Tie Rod/Tie Rod Ends & Pillowball Tension Rods

Okay so you are in 240sx at a stop light about to make a left then suddenly realize you need to make a U turn, but your not sure if you have enough space.  Well if you had TEIN Tie Rods and Ends you wouldn’t be doubting yourself.

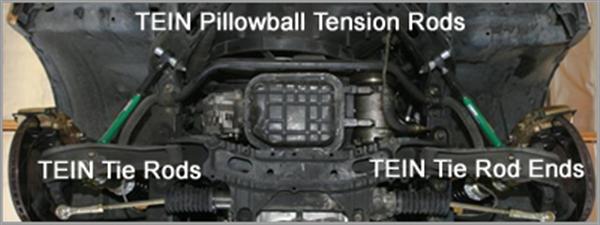
The Tie Rods and Tie Rod Ends (combined) increase your steering angle, improve turning radius and are a huge improvement from  your OE parts.  These Tie rods and Tie rod ends are 10%-55% stronger than your OE parts (numbers vary depending on vehicle) due to the higher quality material and larger diameter of the components.

The kit comes with hardware for either an OE set up or anyone who wants a more aggressive steering angle or just beefier components.

Tie Rod kits start at $88.00

Tie Rod Ends start at $88.00

Click here to see the line up and MSRP.

(Kits are also available for G35 and 350Z)

As for caster adjustment for your 240sx you can upgrade to TEIN’s Pillowball Tension Rods.  The Pillowball type rods improves your acceleration and deceleration. Reason behind this is it controls the movement of the of the lower arms better than the OE bushings. Your steering response will improve, body roll will decrease and wheel alignment will stay more accurate.  The OE rods have huge rubber bushings which deteriorate badly causing unwanted movement and slop.

The tension rod (which are made of carbon steel, S45C) includes an adjustable turnbuckle with rubber encapsulated NMB pillowball bearing, which allows you to adjust the angle of the caster for a more precise alignment and increased strength.

Starting MSRP $290.oo

Click here for the full line up available.

SPECIAL Order products

TEIN is a global company and we offer hundreds of coilover and spring applications for cars all over the world. If you take a look at our US website you might not find your application but you should also check our global website. You can use the Product Search function which shows applications offered throughout the world.

Here are a few examples of cars that are available in the US but not stocked by TEIN USA. These applications are Special Order.

We offer a 4×4 Damper for the FJ Cruiser. This application is popular in the Middle East.

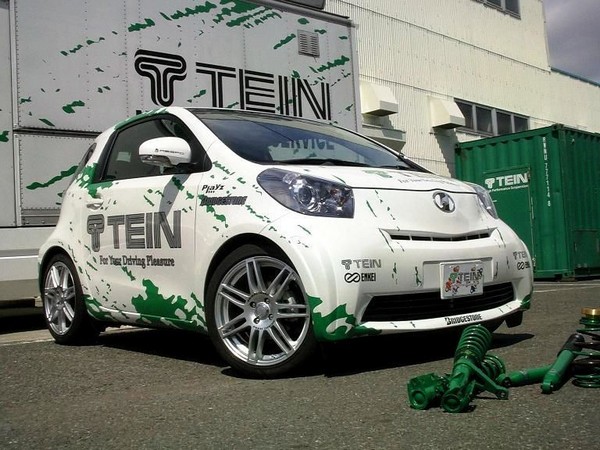
Soon to be released in the US, Scion IQ. TEIN Japan has already released both lowering springs and coilovers.

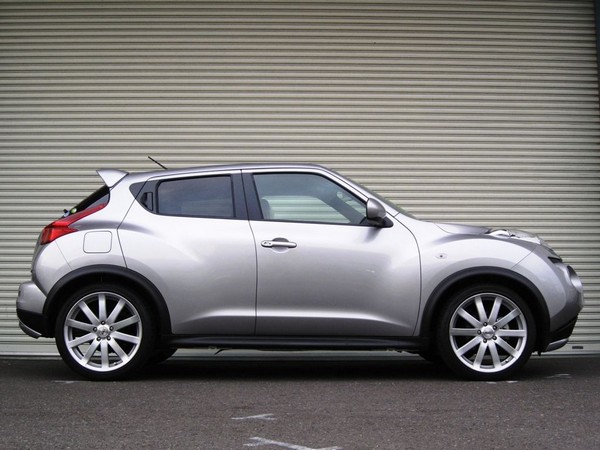
TEIN Japan currently offers lowering springs and coilovers for the Nissan Juke.

The new Street Basis coilover is already under development in Japan for the Lexus CT200H.

The awesome 5-Axis widebody CT200H which is on proto-type TEIN coilovers.

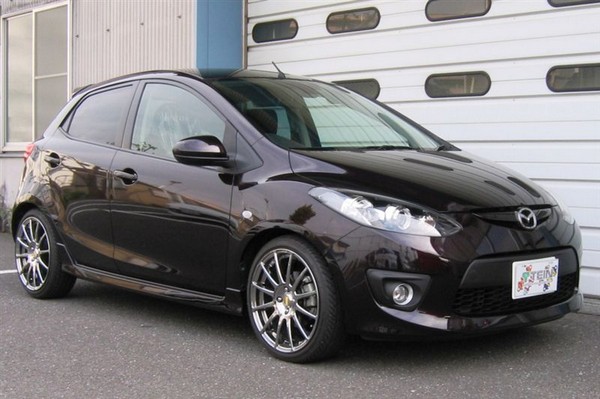
Products for the Mazda 2 can be special ordered.

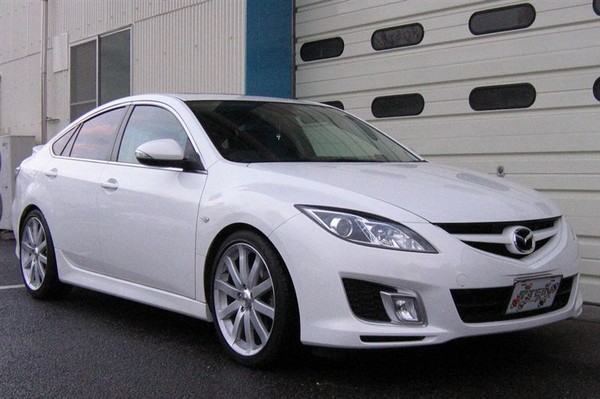
Mazda6 known as the Atenza in Japan. Lowering springs and coilovers are currently available.

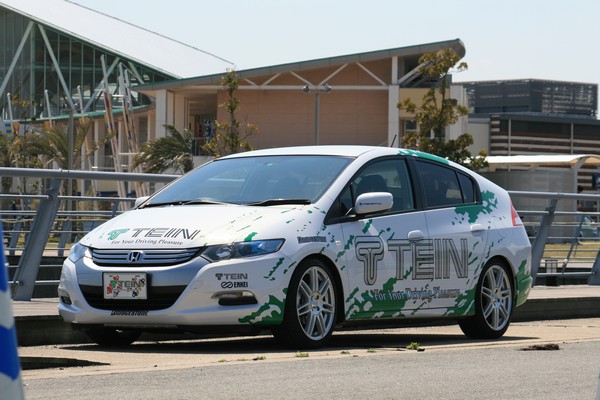
Multiple products available in Japan for the Honda Insight.

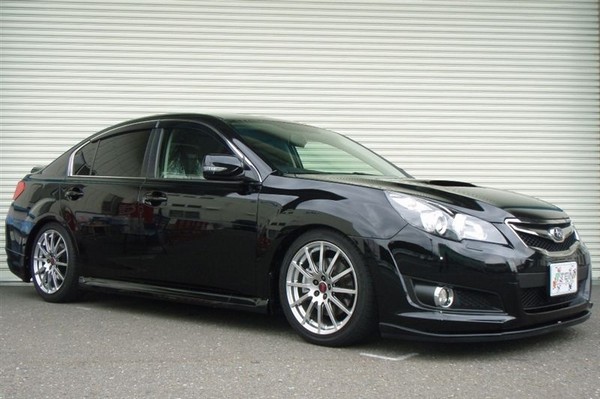
TEIN Japan spec FLEX coilovers for the new generation Subaru Legacy.

IMPORTANT NOTE: most of these applications have not yet been tested on US vehicles so we cannot guarantee fitment or ride height adjustment range. Do your homework before ordering.

Torque Your Dampers Pt. 1

It seems that lately we have been receiving many questions in regards to how to torque our damper components, and what to torque them to.

This time around we’ll be covering the proper method of torquing the Lower Bracket Lock and Seat Locks.

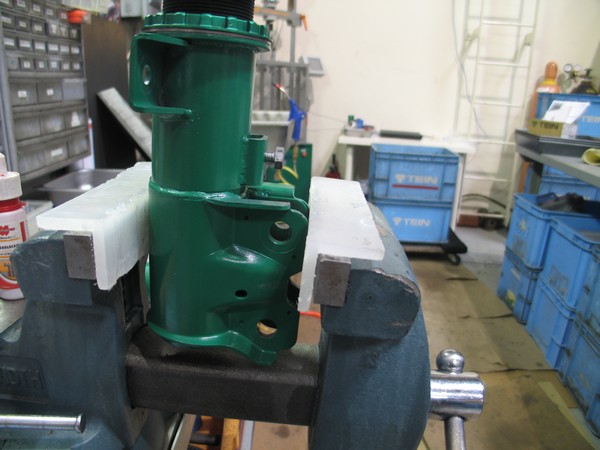
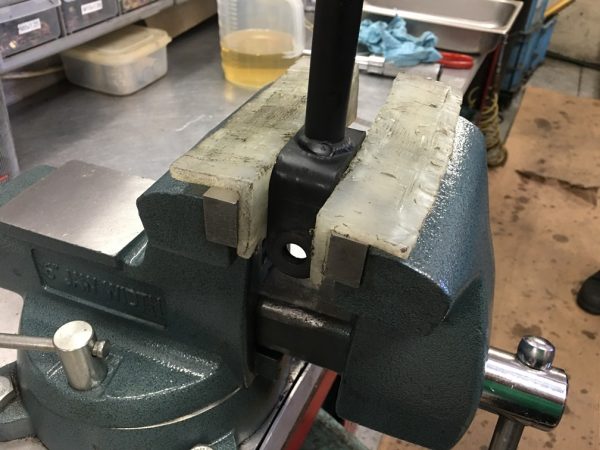
The use of a table mounted vice and plastic soft jaws is highly recommended.

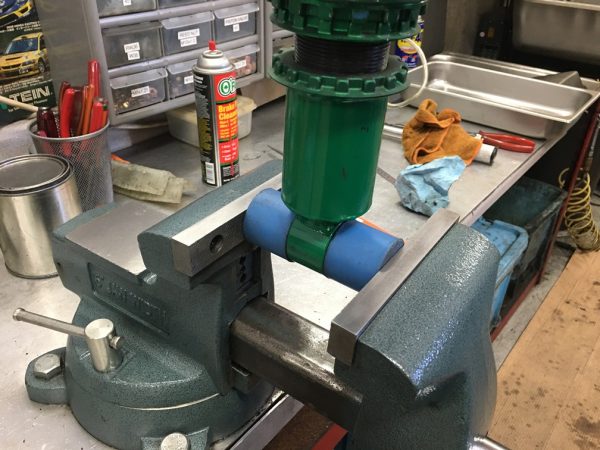
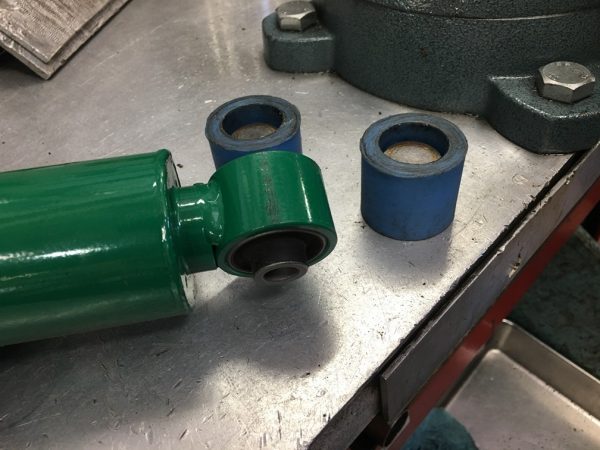
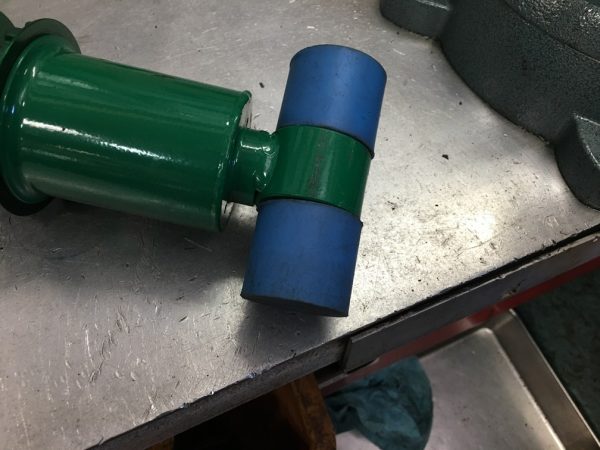
As you can see above, for Eye Ring type bushings, we have special plastic caps with magnets that sit on the inner sleeve of the bushing and protects the outer ring. This allows us to clamp this type of lower bracket to the vise.


We can also secure Fork type lower brackets onto the vise, like below:

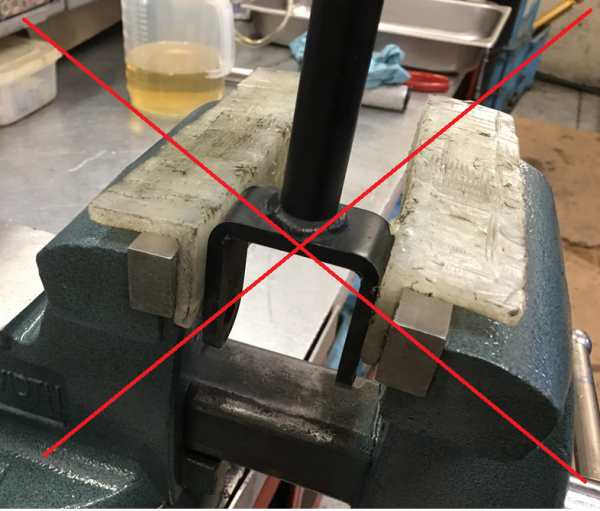
However, DO NOT clamp Fork type lower brackets like below:

This can cause damage to the Fork, if improperly secured in this way.

Remember not to overtighten the vice, otherwise you will end up with some bent and possibly broken parts. The vice only needs to be tightened to the point that the damper will not move around while torquing the parts down.

We will also need the necessary tools to torque the various locks on the damper.
You will need:
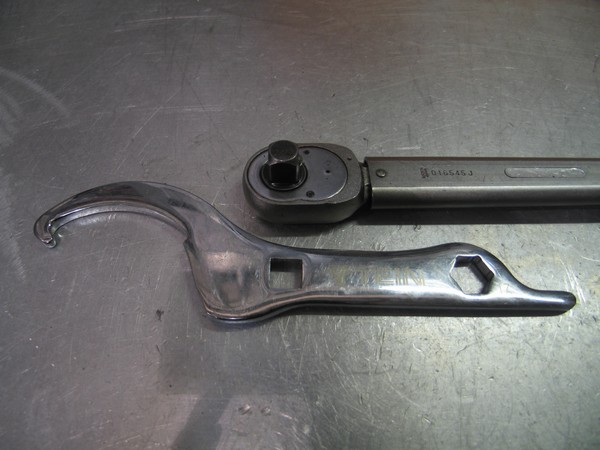
1 Pair of TEIN ADJ Wrenches
&
1 Half-Inch Torque Wrench

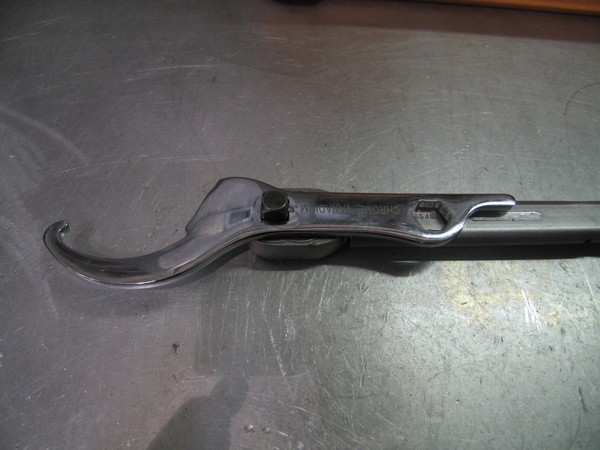
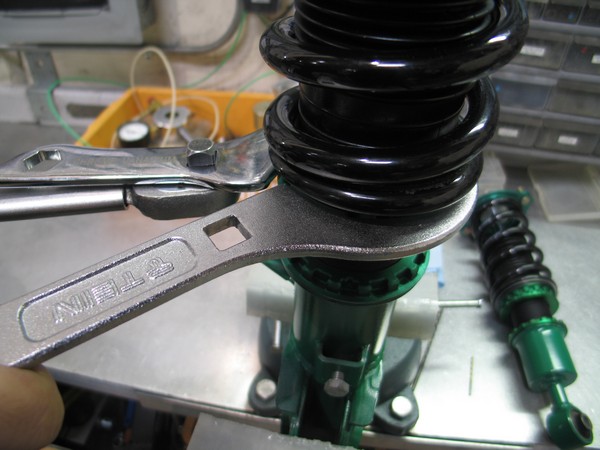
As you can see here our ADJ Wrenches come with a square hole that is made to snap into a Half-Inch Torque Wrench:

Now that we have the damper mounted and the tools for the job setup we can move along to the actual torquing.

We’ll start off with Seat Locks that do the job of holding the spring up.
The torque for the Seat Locks is roughly the same for any and all TEIN Dampers, ranging from Basic Dampers to the Super Racing Dampers, or even the newer STREET BASIS Z/STREET ADVANCE Z and FLEX Z kits.
The torque spec for the Seat Locks is 41.7 +/- 1.8 ft-lb.

(*Please check your included coilover manual for actual torque specifications for your vehicle application)

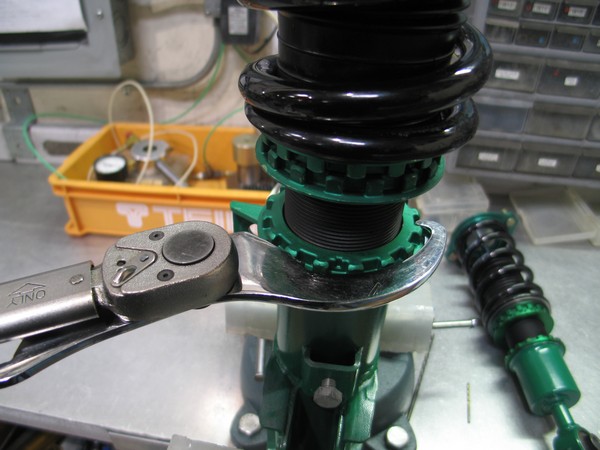
After setting the spring height to where you want it to be, take the spare ADJ Wrench that isn’t hooked up to the Torque Wrench and hold the top Seat Lock, then with the Torque Wrench set to the proper torque setting tighten the bottom Seat Lock until you hear/feel the Torque Wrench click.

Simple enough.

Now, for those with full length adjustable dampers (e.g. FLEX/FLEX Z, MONO FLEX/MONO SPORT, SUPER RACING, etc.) you will also need to torque down the Seat Lock that holds the Lower Bracket in place.

The torque for the Lower Bracket Seat Lock differs between Strut and SA (Non-Strut) Dampers.
The torque spec for Strut Types range is from 101.2 to 115.7 (+/- 3.6) ft-lb.
The torque spec for SA Types is 50.7 +/- 1.8 ft-lb.

(*Please check your included coilover manual for actual torque specifications for your vehicle application)

Using only the ADJ Wrench and Torque Wrench combination is necessary for this Seat Lock.

For those that do not have a vice readily available, the next best way to torque down the Lower Bracket Lock is after the Dampers have been installed onto the vehicle.
Make sure all of the other bolts and nuts (e.g. Knuckle Bolts, Sway Bar Links, etc.) are torqued to manufacturer specs.
Turn the wheel so you have clear access to the Bracket Lock and no obstructions for the proper use of a Torque Wrench, then make sure to lock the steering wheel so that the Damper will not turn while being torqued.

Next time we will talk about the proper method and specs for torquing Top Nuts, Camber Plate Hex Bolts, and HAS (Height Adjustment System) Seat Locks.

When life gives you lemons.. be adventurious & build a drift car

I remember back in the day my family would always be amazed when I would build Legos or my R/C cars exactly how it was shown on the box without looking at the instructions. Let me tell you that was skill (brushed a little dirt off my shoulder), but the drift build that I came across and am about to show you just amazes me.

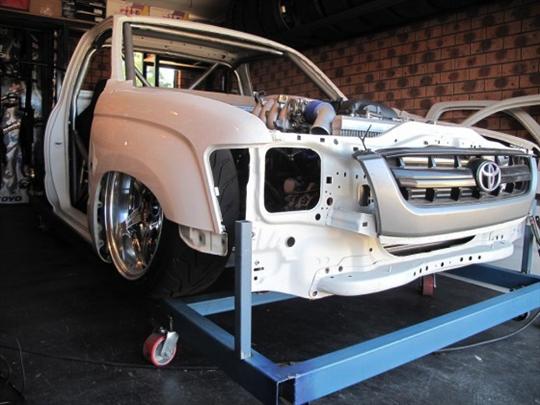
(Note the low ride height in this picture. TWO THUMBS UP & Ryan approved!)
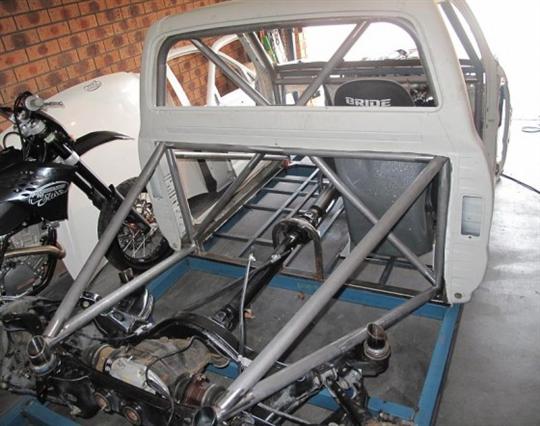
The vehicle being built is not your common drift vehicle, its a Toyota UTE (Toyota Tacoma here in the states). It has been stripped to the bare single cab.

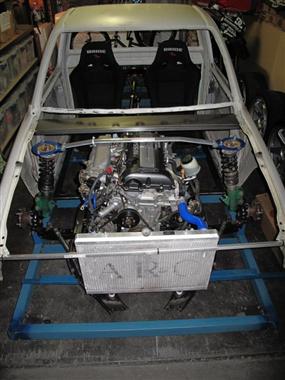
As you can see the modifications have begun. S15 SR20 transplant, ARC radiator, Cusco Strut Tower Bar, Bride seats and TEIN HA coilovers (discontinued model, similar to currently available Super Street coilovers).

The rear end looks to have deleted the shock and leaf spring combination to a solid frame. Now if someone could just teach me to weld this well..

For more updates on this build, visit the following link.

TEIN Mustang GT Up For SALE – SOLD

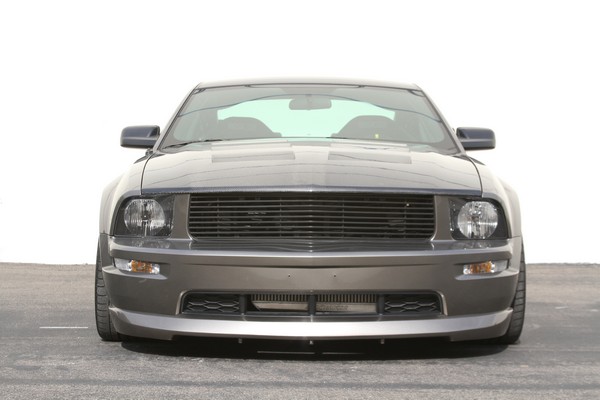
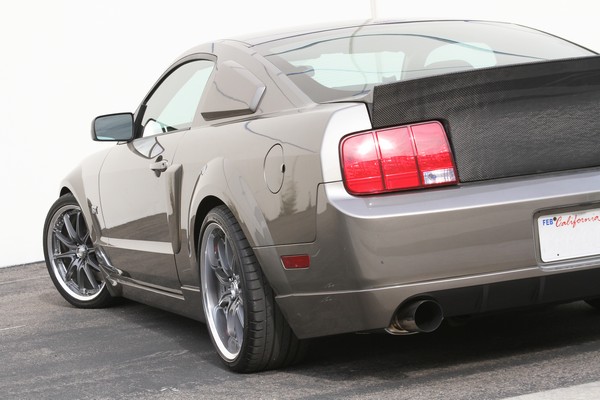
Our 2005 Ford Mustang GT is now up for sale. This Mustang was built with a mixture of Japanese, European and American parts – the best from around the world. And for this reason it does not look or sound like a typical Mustang you might see on the street, at the track or at a show.

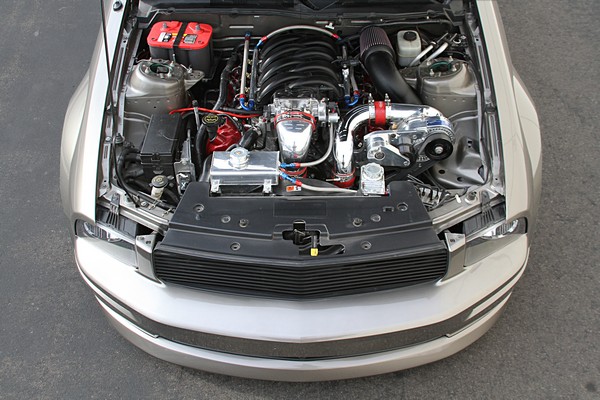
Roush billet grill and ProCharger intercooler peeking through the lower grill.

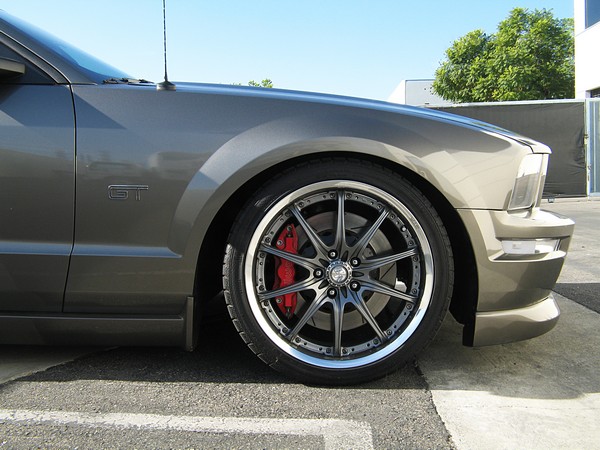
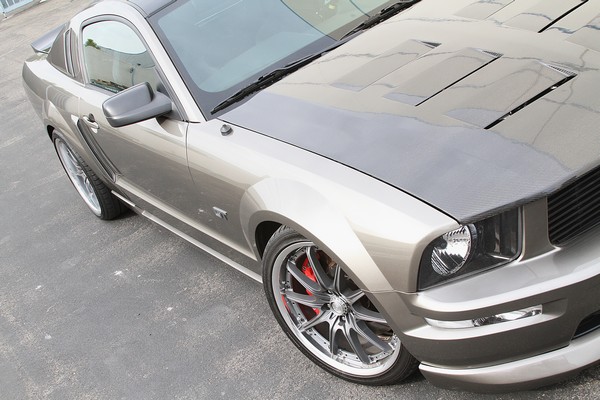
Aggressive stance with FLEX fully adjustable coilovers, Volk GTF with gunmetal center and polished lip wheels, paint matched 3D Carbon Lip Kit and Wilwood BBK 6-piston front and 2-piston rear.

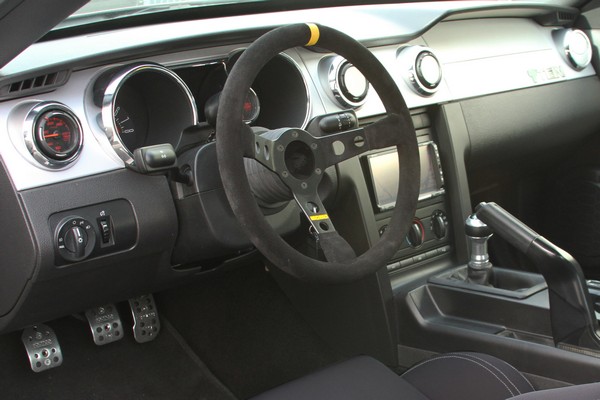
Sparco seats, Momo steering wheel, Clarion DVD/Navigation head unit, DEFI gauges and of course EDFC.

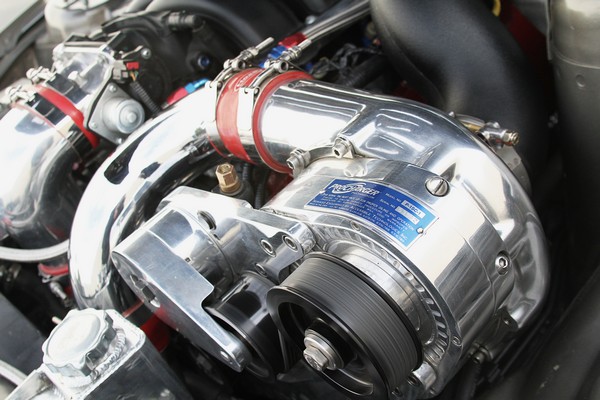
ProCharger supercharger with intercooler, JBA longtube headers, JE pistons, Eagle rods, ARP fasteners, painted valve covers and TONS of polished parts.

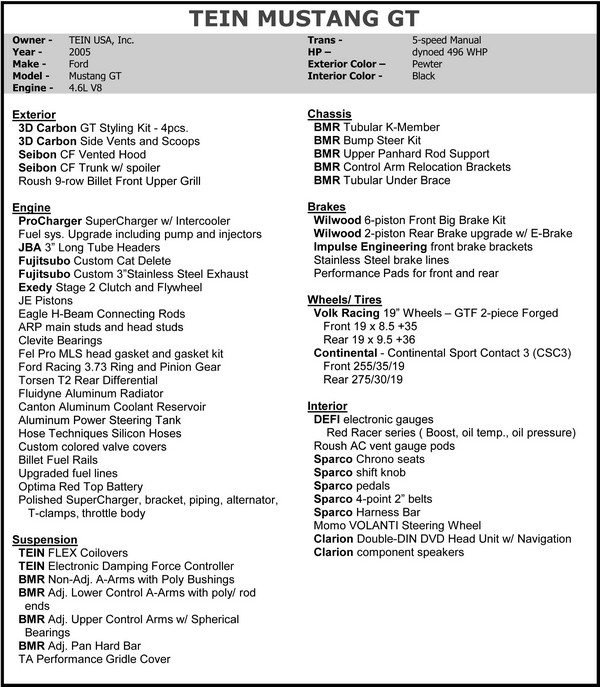
The short block has just been upgraded with a JE pistons, Eagle rods, ARP hardware and a new crankshaft. As of right now the newly built motor has about 10 miles on it. Here is the complete specification sheet:

Volk Racing Forged GTF 2pcs. wheels, light weight and incredibly strong. Wrapped in Continental rubber, 255 up front and 275 in the rear.

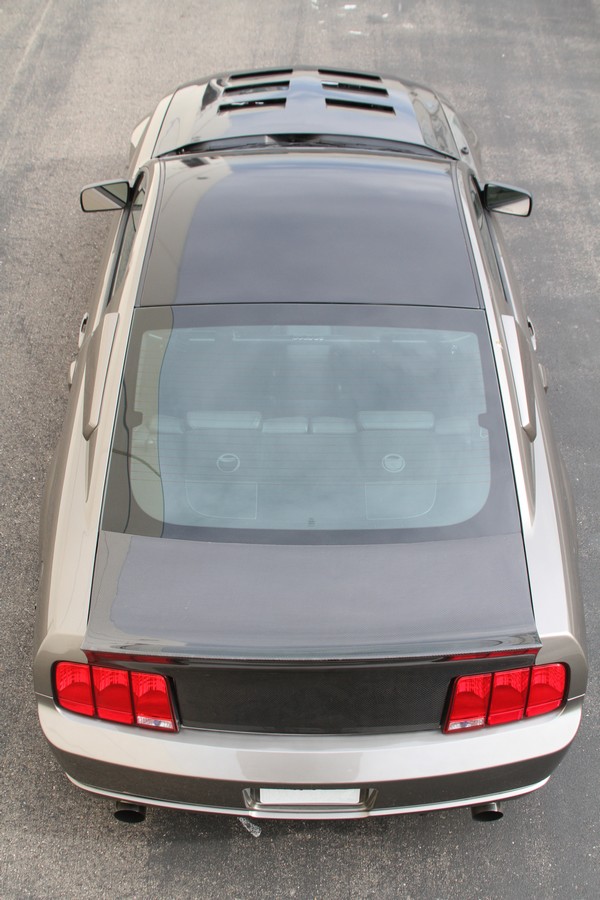
Seibon carbon fiber vented hood and trunk. Black roof done in vinyl decal so it can be easily removed.


If anyone is interested in purchasing this vehicle please contact Philip@tein.com.

SOLD

B(uild).Y(our).O(wn).B(eater)

Normally, I’d make fun of dudes wearing Emo jeans. But in retrospect, they’re probably very effective in preventing the wearer spend money, since they’ll have a hard time accessing money in their pockets because their pants are too tight. So haha on them and on me!

I bring this up because we are faced with yet another recession. Sucks to hear, I’m sure. However, it’s a serious matter for so many of us that have doubts of our job security, or in transition into a new career, or live paycheck to paycheck. You should think thrice before spending your hard-earned money.

But a recession can’t prevent all of us from having fun, right? Well, not so fast there, bud. I may have some cash in my pocket, but that doesn’t mean I can spend money like a mad man. It’s time to be smart with my money, put some cash aside for that rainy day. It’s better to be safe than sorry. And I don’t know about you, but being in debt is no longer for the elitist. It’s a club most American’s are a part of. Bigger than FaceBook. FACEDBook, is more like it.

However, if you are a penny pincher, you can always find ways to have fun on the cheap. Who says you always have to buy new? Who says expensive is always better? There are a lot of great pre-owned cars out there at very affordable prices. Some of you already have a great car to build upon, but you don’t even know it.

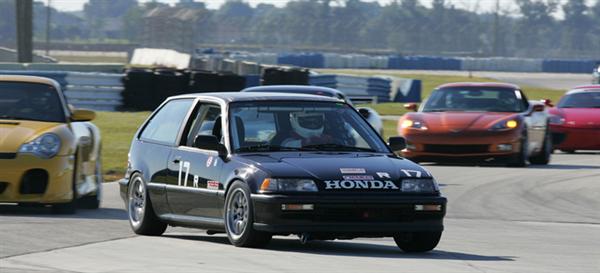
I like breezing through Craigslist for cheap cars that have great performance potential. How about a ’91 Civic Si for $3000? All stock, clean title, clean interior, and 117k miles (LOW for its age, if it’s the original motor), and Red! Ahhhh, takes me back to my high school days. Nice buy if you ask me! Still has A/C, a tape deck and TWO (count ’em) speakers! Wawaweewahhh!! Good deal.

Assuming you buy this car in good condition, and had another 3 grand put aside for mods, you’d have yourself a nice daily driver/beginner’s track tool.

Let’s see what mods are available during my work,,, uh, I mean, research hours.

949 Racing’s durable 15×8 6UL wheels are affordable at $159/ea.
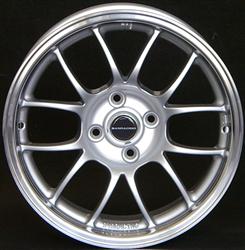
You can get a nice set of 225/45/15’s mounted on them for around $450.

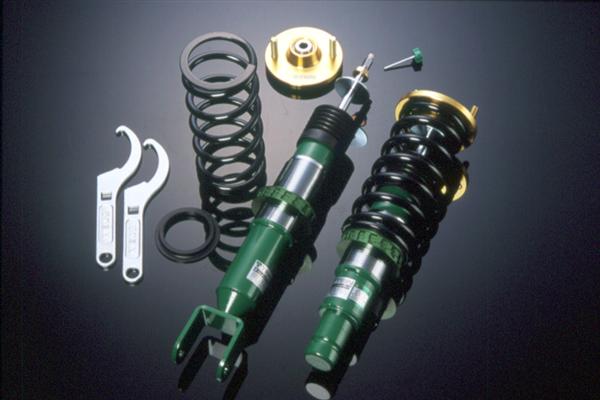
TEIN’s SS-P’s are a nice coilover package for a start in road racing, while still having more than enough compliance for daily commuting.

DSA36-2USS1, msrp $1390
So that’s about $2,476 spent. With another $524, I can change out a few bushings. The rear trailing arm bushing goes out pretty quick. Super Pro makes one, part number SPF0807K for $113.
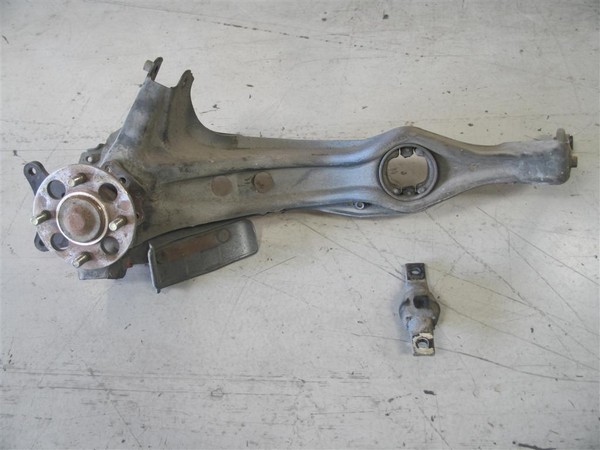
Super Street magazine’s project EF. The car came to us with the bushing already ripped completely out.
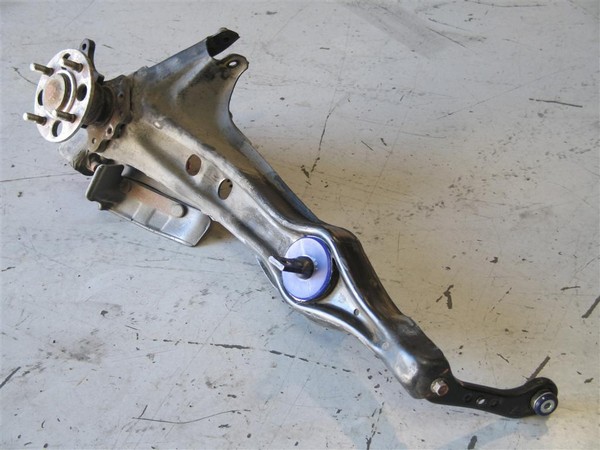
With the new SuperPro bushing installed = no more slop or wandering rear end.

They also have some sway bar mount bushings (front- SPF1528-__*K *different inside diameters available $27, rear-SPF1532-__*K *different inside diameters available $21).  You’d still have enough money to do other bushings, but the aforementioned tend to wear early. I’d probably apply that extra money into a nice set of brake pads, brake fluid, and maybe change rotors, unless resurfacing them is good enough. Then a simple oil change and coolant flush, followed by a basic check up on spark and timing would complete it for me.

Not a bad way to start, if Honda’s are your thing. This car is a great platform to build upon, and with the coilovers, you’ll be able to experiment with different spring rates. You can also get the dampers revalved if you want to try much stiffer springs. Beyond that, engines of similar size or even a B-Series, and now K-Series motor, can be swapped in. But hey, let’s keep it simple for now. With this setup, you’ll be,,,,,,,, well,, you’ll be slow. But with a low power motor, you can improve on other skills, such as learning to maintain your momentum through turns, or establish your vehicle’s limitations, as well as build up your track skills and memory. From there, sky’s the limit. Budget’s the limit, too. You can be the next Stig (look at the above Civic pic for motivation)!

So, not to fear, those of you with limited budgets. Be good with your money, or face some serious financial woes. Be a wise saver and shopper. Research before you buy, and don’t by crap! Some of you may be able to score these parts mentioned as used goods! Dunno about the bushings, though.

Take it easy, guys and girls and happy tuning!

Gr.N with F.R.S. Spec

Hey everyone. You guys might be familiar with our Gr. N dampers but we are now taking those dampers to the next level with our Gr.N with F.R.S.

For those who do not know what F.R.S. is, I will explain the basic features and functions.

F.R.S. is an acronym for Fast Rebound System

This Fast Rebound System operates when the mechanical sensor detects a change in load on the tires. FRS is especially effective when going through large gaps or making jumps.

F.R.S. reduces the possibility of the vehicle bottoming out and keeps the tires on the ground for traction. This will in turn mean faster stage times and better grip on rough surfaces.

Two adjustable points of F.R.S.
1)F.R.S. Start Point
The switch mechanism for the F.R.S. is the belleville washer (disc Spring). As the load on tire gets closer to zero, the F.R.S. operates more actively to give you more traction. Different combination of the Belleville washers allow you to control the amount of load transferred, giving you more possibilities in settings.
2) Opening F.R.S.
When the F.R.S. operates, the by-pass valve is opened to allow rebound damping force to instantly decrease. By altering the amount F.R.S. opens the valve, excess rebound movement of the vehicle or downward load can be adjusted accordingly.

For Further Information and Brochure you can click HERE.

Rally xD at SnoDrift 2011

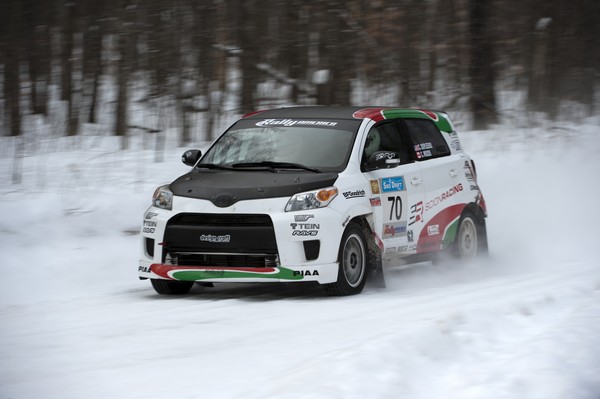
I just got back from the first round of Rally America – Sno*Drift. The event is held about 4 hours North of Detroit in Atlanta, MI. The area is beautiful and the people are friendly BUT the weather is really cold. Coming from sunny and warm Southern California means that I am used to 60 degree Winters with an occasional rain storm. 10-20 degree temps and wind chill put most of the California based team into survival mode.

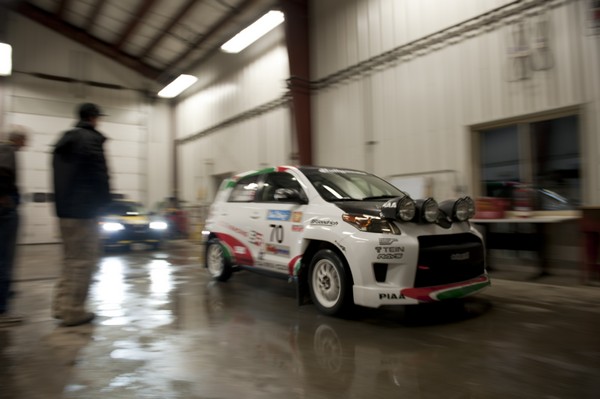
2010 2WD Champions are back in a new Scion xD.

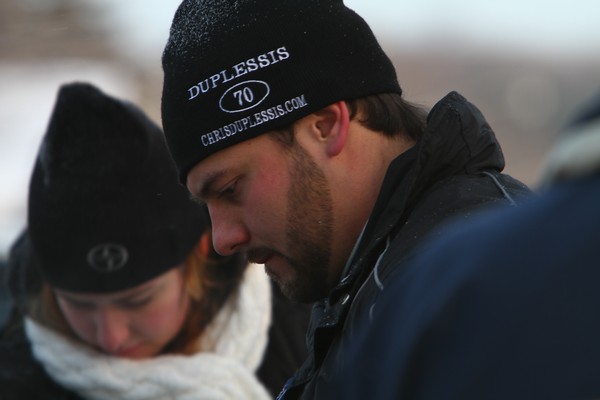
2010 Champion Driver, Chris Duplessis getting ready for battle.

2010 Champion Co-Driver, Catherine Woods who is usually is all smiles is in competition mode.

The xD was already in Detroit when the crew arrived to Michigan as it had been on display at the Detroit Auto Show the week prior. If you cannot tell this xD is not the same as the car that was run last year. This is a brand new xD which was built just before SEMA. It only had 50 miles on the odometer when the Rally started.

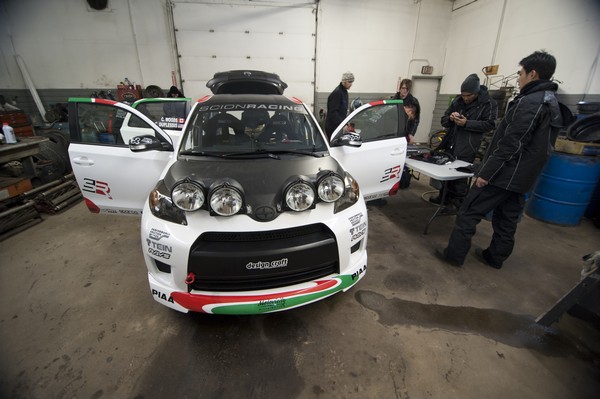
The brand new car needed a thorough tech inspection.

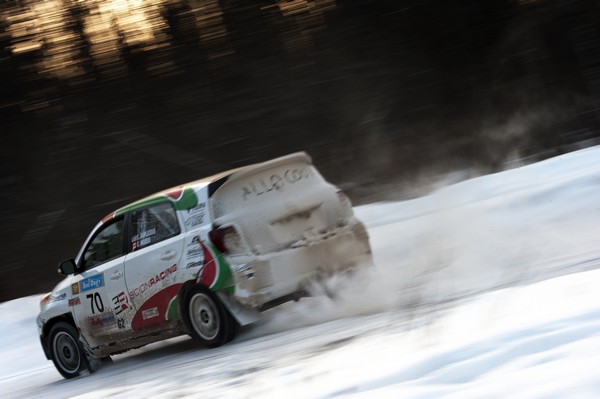
The engine remains almost stock with the only additions being a TRD drop in filter, aftermarket header and Greddy exhaust. The transmission has been upgraded with a Quaife differential which was installed only two days before the event. Coilovers are a custom application HG which have 2-way damping force adjustment. Light weight Volk CE28 wheels and BFG snow tires round out the performance mods. This new car is lighter with various carbon fiber body panels, lexan rear windows and chassis weight reduction. Seats, belts, steering wheel, in-car comm., helmets and driving suits are all Sparco. The guys at Design Craft Fabrication did a great job building the car and getting it ready for the event.

The rally started on Friday in the early afternoon. After the first 6 stages Chris and Catherine pulled out a solid lead in the 2WD class. There was only one service during day one in which the xD came back missing both light pods. Going into the night stages the service crew scrambled to get the recovered pods back onto the car but only 1 made it back on in the limited service time. The lights only lasted about 5mins until the relay blew out forcing Chris to drive with only the OEM lights. A flat tire on stage 7 put Chris and Catherine about 10mins behind the 2WD leader at the end of day one.

After day one the service crew repaired all damage, checked over the car and made preparations for day two. Luckily the folks at a nearby resort allowed the crew to use their heated garage.

On the start of day two Chris and Catherine were determined to make up the lost time and fight for the top podium spot. The next two services went smoothly and the only damage to the car was cosmetic. Chris’s skill on snow and ice served the team well as he was able to make up about 9mins. in 7 stages (truly amazing). There simply were not enough stage miles for the xD to make up all the lost time.

The Rally xD finished in 2nd place in the 2WD class which is a great finish considering this car had ZERO testing.

Great job Gordon Ting and the crew of the Rally xD.

Photos courtesy of Duane and Joey of the Octane Report. See more event coverage at the OctaneReport.com