Coilover Claim That Are Mis-Installations

Many times we receive claims of defective dampers leaking oil which are then requested to be repaired or exchanged under warranty. For the most part the actual cause of the damper failure would be due to mis-installation. Now regardless if its you first time doing a coilover install or have  many years of working in automotive repair, a mis-installation can occur at any time. For the most part the installation instructions included with our coilover systems are straight forward but are usually never read through properly, overlooking the important advisories placed throughout the instructions. Following these advisories will of course lead to a problem free installation.
IMG_2785

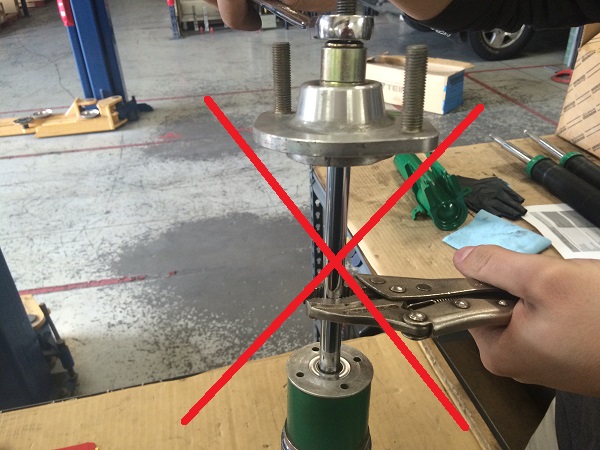
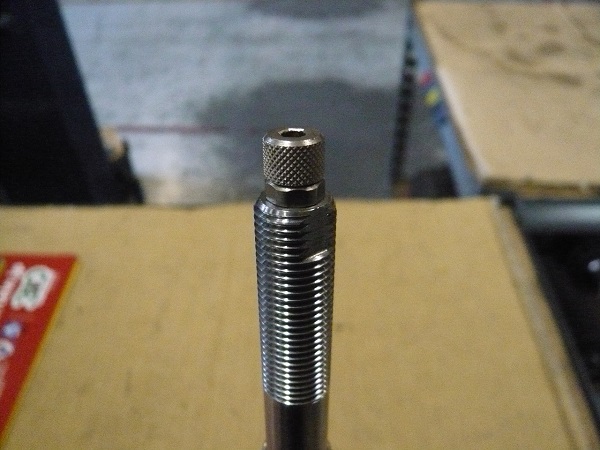
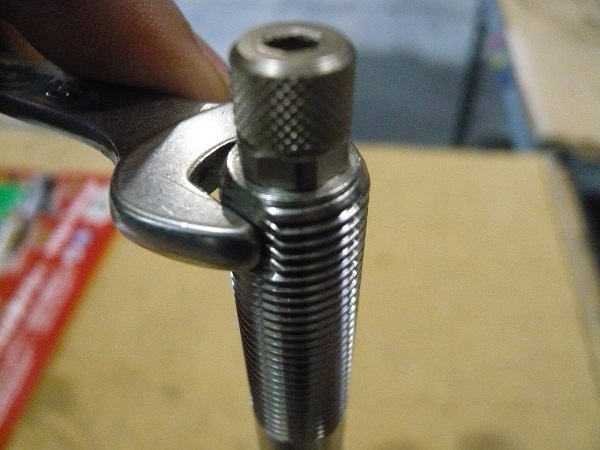
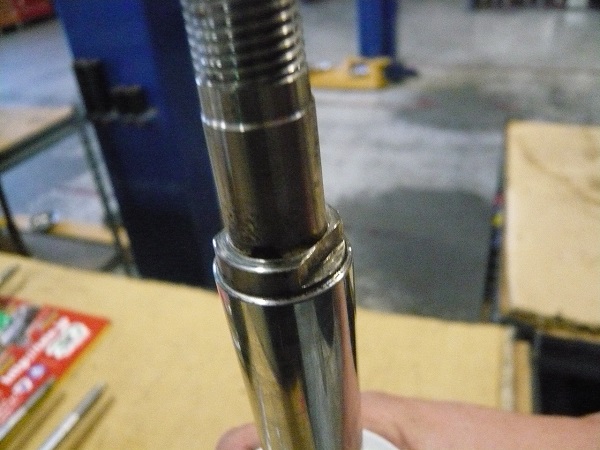
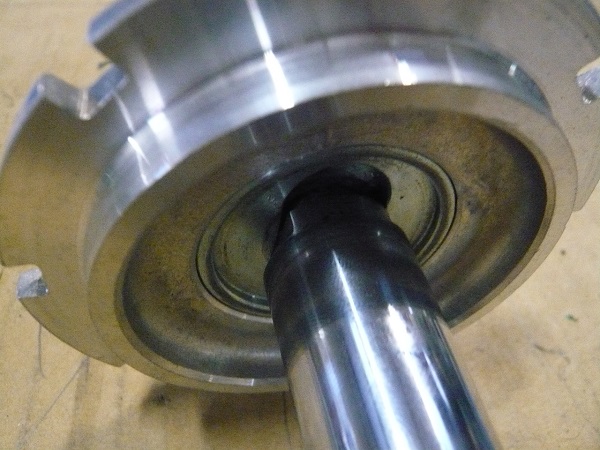
A common disregarded advisory detailing to avoid clamping the piston shaft to tighten the damper top nut. Most consumers and “Mechanics” often are unable to tighten up the top nut claiming that holding the piston shaft body would be the only way to tighten the top nut which would lead up to the coilover to leak. For a better visual understanding what can happen to the piston rod if clamped down, please see the images below of a discarded damper.

P1110132

P1110134


P1110133

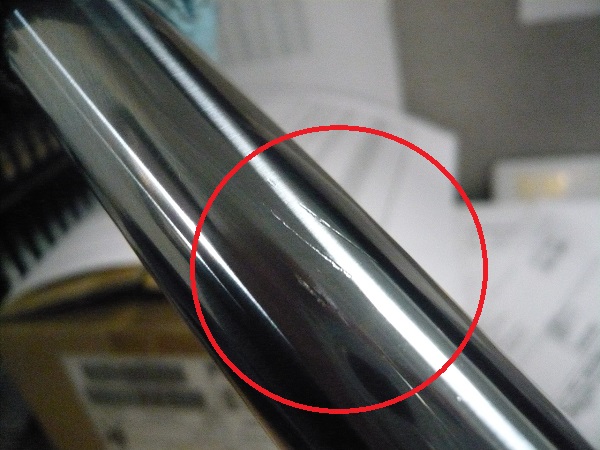
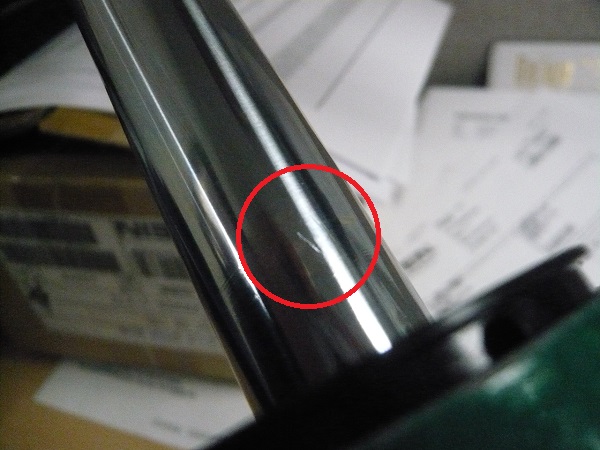
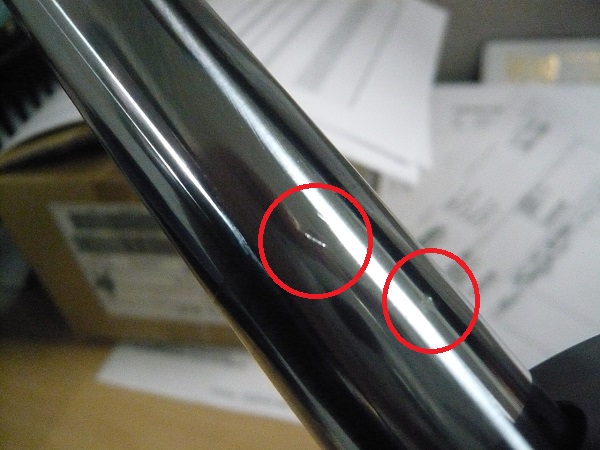
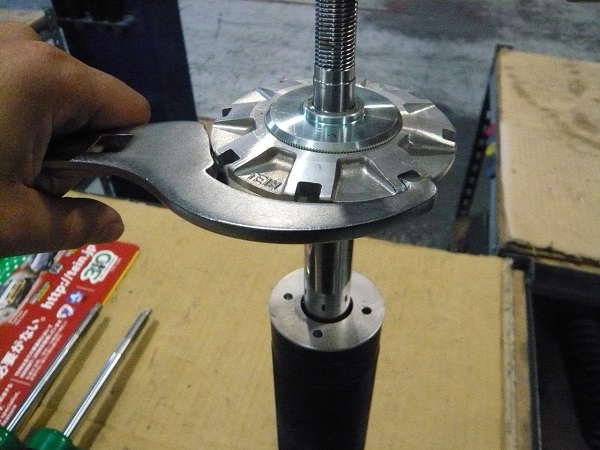
Now to the point of this blog post. This is in no way a manufacturing defect of the coilover. The markings on the piston shaft are what can be referenced as “The Smoking Gun” as it is an obvious tall tale sign that something had been used on the shaft. Do not use anything to clamp down the piston shaft. Our kits would either offer special machined sections of the piston shaft that can be held with a wrench or incorporate the use of the upper spring seat in conjunction with the included adjusting wrenches to hold the piston shaft. If the top nut turns even when tightened but not torqued down, placing the vehicle load on that specific corner then torqueing the top nut will work.

P1110137 P1110138

P1110141P1110146P1110140

When it comes to any product claims, we do our best in repairing those that respectively are a manufacturing defect. If the item is not covered under warranty an explanation is given and detailed for the consumer to further understand the reason for the warranty decline.

EDFC Fitment Check

Back again with some more useful tech info this time for EDFC fitment verification.

We are always receiving calls regarding EDFC fitment on older kits or kits which may not have any details of EDFC compatibility. I was able to obtain some info on some specific areas ,clearances, and measurements that should be focused on when checking for compatibility.


Checking piston shaft compatibility

Inspect the top threaded portion of the of the dampers piston shaft making sure that the shaft is threaded all the way to the top of the shaft. Some shafts may have the flat machined edges, but the threads continue on the other rounded sides. Those can still work. The other type as shown below would have an area around the top of the piston shaft with no threads which not allow the EDFC motor to mount up.


Measuring piston shaft thread amount

Taking a measurement of the same area which protrudes out from the mount, measuring from the edge of the nut to the tip of the shaft. If the measurement is more than 7mm in length, then the EDFC would have enough space to bolt on. Any less and there would not be sufficient space for the motor.


Checking compartment space for EDFC motor

 Taking a measurement from the top of the click assembly a vertical measurement of over 24mm as well as a 50mm horizontal measurement using the center of the piston shaft as the center point. Any clearances less than those detailed would interfere with either the hood or other engine compartment components and/or interior.


Caution! When checking these areas please note that the measurements provided above are the minimum required clearances for the EDFC motor installation. Please keep in mind that depending on the mount type used on the damper kit, the motor might move vertically which may require further clearance. Modifications and/or removal of supportive device around piston shaft top, insulator and/or interior might be required to allow for fitment. EDFC, in conjunction with any tower bars/strut bars may not allow enough clearance across the piston shaft for certain applications. Installation of the EDFC on any vehicles/ dampers on which TEIN had not confirmed fitment compatibility should be done at your own discretion. TEIN assumes no responsibility for any damaged and warranty void for such installations.

 Always exercise caution when trying to install the EDFC units on your application whether the kit has been confirmed for fitment or the guide detailed above is being used to determine fitment. Uncertain of the installation? You can always take a look back at an early post for the EDFC installation for help.

http://teinusa-blog.com/edfc-motor-install/