2022 Subaru BRZ Products

Featured

We’re glad to report that, for the most part, existing coilovers for the Subaru BRZ will in fact work fine with the latest 2022 BRZ body style (ZD8 chassis code).

So, we’re listing our FLEX Z (VSQ54-CUSS4) and FLEX A (VSTD8-D1SS4) as compatible for both first and this second generation BRZ.

2022 Subaru BRZ on TEIN FLEX Z coilover

However, our STREET BASIS Z, STREET ADVANCE Z, and our S.TECH & HIGH TECH lowering springs will have new part numbers.

As to why our existing FLEX Z and FLEX A coilover lines are still compatible- the spring rate and valving work very well on the new platform. But, these coilovers are a bit more aggressive than the STREET BASIS Z & STREET ADVANCE Z lines. Therefore, we’ll have to determine what changes we’ll need to make for these kits. As well, our S.TECH & HIGH TECH springs will be unique for this car due to different lengths and spring rates.

The only issue now, really, is the supply chain, as we’re still experiencing massive delays in imported goods from Japan.

Currently, the FLEX Z and FLEX A coilovers have an eta of late February 2022, while the HIGH TECH springs have an eta of April 2022.

Please visit our Product Stock Page for more information.

FLEX Z (VSQ54-CUSS4) shown

HIGH TECH Lowering Springs (SKAEA-G1B00) shown

TEIN ENDURAPRO/PLUS SPRING KIT

High Performance Premium Shock Absorbers and Lowering Springs

Although we’re well-known mainly for producing coilover kits, the ENDURAPRO and ENDURAPRO PLUS shock absorber line is gaining more momentum stateside. While much more popular overseas, our premium replacement shock absorbers are starting to generate interest in a lot of consumers, especially if you’re on lowering springs and are looking for suitable performance shocks to pair with them, or you simply don’t want to invest in a complete coilover kit.

At the launch of the ENDURAPRO/PLUS line in the U.S., we also launched the ENDURAPRO Spring Kit and ENDURAPRO PLUS Spring Kit, which pairs our S.TECH lowering springs along with either of the shocks, depending on if you want fixed damping setting or 16-click adjustable damping.

Let’s take a look at what’s included with a ENDURAPRO Spring Kit (part # VSQ54-A1SS2) for the FR-S/86/BRZ.

Conveniently packaged, springs are placed over each shock absorber to minimize packing space and package dimensions. Quite honestly, there isn’t much to it. For certain vehicle applications, other components may be included, such as dust boots or bump stops. Although the ENDURAPRO/PLUS shock absorbers utilize our internal Hydraulic Bump Stoppers (H.B.S.), you will still need to retain either a OEM or TEIN bump stop, which is used as a precautionary measure.

Springs packaged over shocks to minimize packaging size.

Hard to tell from the photo, especially when it’s not lined up against an OEM or OEM replacement shock absorber, but our ENDURAPRO/PLUS shock absorbers are much larger in diameter to and OEM/OEM replacement. In fact, it really is just like one of our coilovers, just minus the threaded adjustment for ride height.

Valved to provide far better handling performance, our ENDURAPRO/PLUS shock absorbers are a perfect enhancement for an otherwise stock vehicle. However, paired with one of our lowering springs and you have a much more sporty ride that you can appreciate. We recommend this type of setup for customers who can do without ride height adjustability or pillowball upper mounts (although it may be compatible with some aftermarket pillowball mounts). That just means less maintenance (you are periodically inspecting your suspension, aren’t you!?!?!?!).

Currently our part numbers for ENDURAPRO Spring Kits and ENDURAPRO PLUS Spring kits are rather limited. However, we’re also still working on either developing performance replacement shocks or lowering springs for certain vehicle applications. If you have any questions about these products, please feel free to contact us at 562-861-9161, or reach out to any of our authorized dealers!

A90 Supra S.TECH Rear Bump Stop Modification

Featured

With the newly released S.TECH lowering springs for the A90 Toyota Supra, we wanted to put a notice out to owners about modifications needed to the rear bump stops.

S.TECH Lowering Spring set part number: SKTJ4-S1B00

Our S.TECH spring kit (part number: SKTJ4-S1B00) includes a pair of bump stops and dust boots specifically for the rear shock absorber. However, it is to be used in conjunction with a modified OEM bump stop.

Please follow along as we show you what needs to be done.

First, the rear shock absorber mount needs to be removed. Then, the the OEM bump stop can be pulled out of the mount. Now, the OEM dust boot is simply press fitted around the OEM bump stop. You can just pull the dust boot out, or you can leave it attached. Either way, the OEM bump stop needs to be trimmed significantly, and the portion to be removed also removes the OEM dust boot. Our included TEIN dust boot will replace this piece.

The rear shock absorber mount needs to be removed from the shock absorber assembly.

With the OEM bump stop removed, you need to measure 20mm from the top of the bump stop (widest portion) down and mark this location. This 20mm piece will be reinstalled in the rear shock absorber mount. You can use a razor blade (utility knife will do fine) to cut the bottom portion of the OEM bump stop off.

The OEM bump stop and OEM dust boot are assembled as one piece. The OEM dust boot is easily removed by pulling it off the OEM dust boot.
The top of the OEM bump stop will need to be remained. This should be 20mm thick after trimming.

Now, the included TEIN bump stop also needs to be trimmed. 10mm needs to be trimmed off the bottom (narrow portion) of the TEIN bump stop.

The included TEIN bump stop also needs to be trimmed, too. The bottom portion needs 10mm but from the bottom, which is the narrow portion of the bump stop.
A utility knife makes trimming of the OEM and TEIN bump stop easy work. Just use caution when cutting.

This picture shows how it is to look on the rear shock absorber (without the TEIN dust boot, for example only) along with the trimmed OEM bump stop.

For reinstallation, hand fit the modified TEIN bump stop onto the piston rod. Then, fit the TEIN dust boot onto the piston rod.

Then, reinstall the rear shock absorber mount (with the trimmed OEM bump stop hand pressed in) onto the piston rod. Now you can tighten the rear shock absorber mount with the 16mm flange nut.

Make sure the TEIN dust boot and bump stop are placed up against the trimmed OEM bump stop (basically you are going to sandwich the top of the TEIN dust boot against the trimmed OEM bump stop and trimmed TEIN bump stop).

The final assembly should look like this. The TEIN bump stop is covered by the TEIN dust boot, and both pieces are pushed up against the trimmed OEM bump stop. The TEIN bump stop is a tight fit around the piston rod in order to keep the TEIN dust boot in place and to protect the piston rod from any debris damage while driving.

The rear shock absorber assembly is now ready to be installed back onto the vehicle.

ENDURAPRO PLUS 20K Mile Inspection

I’m lucky enough to be one of the first in the U.S. to put our new ENDURAPRO shock absorbers to use in the U.S. My 2008 Honda Fit was fitted with the ENDURAPRO PLUS (16-click damping adjustable) shocks and struts, which I eventually added our S.TECH lowering springs, around March 2018. I figured it’s time to visually inspect these shocks and see how they’ve held up.

As previously mentioned, this car is typically my daily commuter for work. I average about 14,000 miles in driving a year. While I technically have just over 21,000 miles on these ENDURAPRO PLUS shocks, the other miles I drive for the year has been on my truck. Still, I think over 21k of miles on our ENDURAPRO PLUS shocks is a pretty good age to finally give them a look-see. Mind you, the average shock absorber lifespan is typically 36,000 miles in the U.S. Not too sure how that average came to be. We see shock absorbers last much longer than that. Quite honestly, I should have inspected these shocks a long time ago (a reminder to all to inspect their cars)!

Prior to giving you a run-down of the inspection, I will say that overall the shocks still feel great! Over time, I’ve readjusted the damping click settings simply to find that “sweet spot” in comfort. After all, installing lowering springs will alter the ride quality. Currently I have the fronts and rears set to 8 clicks from stiff (essentially the middle setting). I had previously had it somewhat softer in front and stiffer in back, as I felt it worked well whenever I had the car fully loaded. I may end up softening the front just a little, once everything is reinstalled.

Speaking of fully loaded, that is probably the most awe inspiring experience that showcases how our shock absorbers perform! It really is! As you probably already know, our ENDURAPRO/ENDURAPRO PLUS line includes internal Hydraulic Bump Stoppers, which helps alleviate that ever-so-fun suspension oscillation whenever the car is at maximum capacity.

Again, since it’s my daily commuter, typically there isn’t much extra weight in the car, other than my kids’ seats and some kids junk in the back seats. With lowering springs that are a bit stiffer than stock, it can feel relatively firm over bumps and gaps in the highway. Overall, our S.TECH springs aren’t terribly stiff.

However, after my bi-weekly trip to Costco, which usually consists of purchasing several cases of bottled water, my kids’ diapers and formula, and a bunch of other necessities you have no choice but to purchase in bulk, the trunk gets heavily loaded, and you can both see and feel that added weight. Then add my sons, when i have to pick them up at their Nana’s house. It’s basically like I’m loaded for a long-distance road trip.

This is where our Hydraulic Bump Stopper really comes in to play. Our Southern California highways are anything but smooth, and there are plenty of large gaps, expansion joints, dips, pavement cracks/potholes, ramp-like bumps over overpasses, etc. It’s a great way to put suspension to work, and at highway speeds, this provides us with a horrific ride, and one that puts our vehicles through pure torture. Did I mention that I also have to listen to “Elmo’s Song” on repeat whenever the kids are in the car???

But seriously, over this type of highway terrain, TEIN’s Hydraulic Bump Stopper really does its part in helping absorb these high-speed impacts, preventing the polyurethane bump stop from doing that work and helping the shock absorbers rebound nice and smoothly. Honestly, it has to be one of the more rewarding parts of my commute. Now I can understand what trophy trucks must feel like over big jumps,,,,,, just at a much smaller scale. Hahahaha!

Anyway, on to the inspection:

One thing I noticed was the front strut mounts were making a bit of noise, especially when steering at slow speed. I initially thought it was the bearing making the noise. But, for all I know it could have been a problem with the struts. This just confirms it was indeed the upper mount. However, as mentioned during the initial installation of these ENDURAPRO Plus shock absorbers, the front mounts probably contributed to a slightly lower ride height than target, due to the mostly rubber mount taking a set after 80,000 miles of use. Now at 101,000 miles, it is time to change these components out to fresh new factory style mounts.

Old mount on the left, new on the right. You can see how the mounts have sagged over time. It was starting to make some noise, most notably at low-speed.

For the rears, the only thing I noticed was a hole being worn into one section of the dust boot. Looks to have made contact with the tire. Not a big deal, and replacement dust boots are readily available.

I also checked gas pressure while the shocks were off the car, and all of them seemed fine. By checking I mean I fully compressed each damper by hand and checked the rebound, as well as tried different damping settings during the same procedure. I will say the damping click adjusters were slightly stiff up front. However, that could be due to not using the included ADD Caps to cover them (this keeps dust out of the system). A simple spray of WD-40 or similar type lubricant will displace any dirt or corrosion in between the click knob and its base. Also, any exposed thread on the piston shafts for the front dampers accumulated some surface rust. A wire brush cleaning and some WD-40 helps clean that up. But since I removed the struts from the original upper mounts, the threads got a decent clean up simply from the removal process.

Front strut out. I needed to remove the bearing, as I thought this also contributed to noise I was hearing at low-speed driving.
With the bearing out, I decided to inspect the shock. All components removed help to make a more detailed inspection.

While I’ve had the ENDURAPRO shock absorbers off, I checked bushings in the control arms, ball joints, sway bar end links, and tie rod ends just to make sure of their condition, which fortunately they are. I’m sure at some point I’ll change out the front lower arms (bushings by themselves are not readily available). For the rear twist bar, it’s hard to source just the rear bushing, so I’m going to keep searching for a solution.

I did have the tires changed at around the 3,000 mile mark on these shock absorbers. I wanted to try something a bit more sport oriented, but not very expensive. Also, my “tuning philosophy” (if you will) for starting to modify a car is usually in the order of- decent tires, sport (not race) brake pads/shoes, and some decent suspension (as in shock absorbers and possibly springs), especially if there is a damping adjustable option. This before ever considering more power. With ENDURAPRO Plus shocks and S.TECH lowering springs and some Stoptech Sport pads and plain rotors installed, I needed decent tires. So, I contacted the guys at GT Radial to order a set of their Champiro SX2 Summer tires. I’ve followed the 86 Cup group and saw that these tires offer very decent performance and very good wear resistance, and I wanted to try something other than all-season tires that this car has used over the years. I opted for a size slightly smaller in diameter than stock just to see if there was any gain in performance.

A new set of tires go on the Fit, courtesy of GT Radial
A big thanks to Gonzo, who invited me over to his Chateau. He’s got a full tire changing station in his garage! His son Enzo also came out to help. Good kid!

I will say that these SX2 tires still provided very good comfort. Being a daily commuter, this car only gets an occasional spirited drive. For me, that comes with the excitement of driving through Angeles Crest, since it’s kind of in my “back yard”. Interestingly enough, I found that these tires at 31psi cold, and a 13-click front shock setting (soft) and 6-click rear shock setting (somewhat stiff) had very good and predictable feel. I could very lightly get the back end to rotate with a touch of left-foot braking, and the feeling was pretty consistent throughout my drive through the hwy. The Fit is a very front-heavy car, so it takes a little coaxing to get the car to turn in, since the car understeers easily. One thing I could appreciate from these tires is the wear resistance. Rated as a 200 treadwear, these tires held up better than some 360 treadwear tires I had on previously (which actually only lasted about 13,000 miles before I changed them out to these SX2’s). Dunno what the deal is with that, but those are my figures.

Mind you, these aren’t all-season tires, so I take it a little easier during rainy days. However, wet weather driving is actually quite nice on this setup. Not that I was expecting to hydroplane on a summer tire on wet pavement, it actually handled heavy rain and puddles very well.

While this is sounding like a tire review, what I’m getting at is that these small changes to this daily driven econobox (TEIN S.TECH Springs, ENDURAPRO Plus Shock Absorbers, and GT Radial SX2 tires) have already made this car more enjoyable for my drive. Does it make me miss having a much more sporty car? Absolutely. But, gotta work with what I got. I think most importantly is the value of all these parts as a whole- Not a lot of money spent (granted, I got the shocks for free for testing on my car) to “upgrade” the car. So, for most of you guys looking to make your car a little bit faster and more fun to drive, this should be something to think about.

By the way, the slightly smaller diameter tires I chose actually helped improve a few things such as MPG (when I really take it easy on driving) and acceleration (most notably in higher gears). I was expecting MPG to be a bit worse. However, it has affected actual speedometer readings a tad, but the factory speedometer reads ~1 MPH lower than actual.

All in all, I’d say I’m more than pleased with the car as it currently sits. Not a ton of money invested in getting some performance out of it. Decent suspension, very good tires, and sportier brake pads up front, and I’m a happy camper!

JZA90 Supra Development

Every year a new car release puts us consumers in a tough spot- choosing between a “want” and a “need”. Actually, that’s pretty much the market that TEIN is in. We have a performance product that either a customer simply just wants, or in fact really needs, all depending on what they’re using it for. And for us, just like these new car releases, we have to determine which of our products the customer is going to want, especially for something like the much anticipated new Toyota Supra.

Even on a spec sheet, a stock A90 Supra is a very good package. Of course, as always, the OEM leaves a bit to be desired in many aspects. However, we can see a change in demographic in what they “want” and “need”. Even before the A90 made its way to the consumer, we received inquiries on this platform, mostly with potential owners wanting coilovers. In fact, we got our head start working with Toyota Motorsports as they prepared a couple of A90’s for pace cars to be used at Toyota sponsored events, such as NASCAR races. It was a great opportunity for our in-house engineer to get all the measurements he needs and make a suspension that works well for a pace car, no different than what we’ve done for the Camry pace cars that Toyota Motorsports has worked with us on suspension over the past few years.

Toyota Pace Car

Again, on OEM specs alone, the new A90 Supra is very well equipped. Even though we knew that a “pace car” suspension will never be made as an out-of-the-box setup for our end-users, we had to really think of what, of our products, is the best fit.

A90 Supras have factory electronically controlled suspension. It’s sharing basically all the underpinnings of BMW’s Z4 platform, and BMW technology is found throughout the Supra. So, we know that some consumers are going to want to retain that feature. So first on the list is lowering springs, our S.TECH line specifically.

Next, we knew that coilovers were inevitable. So development on that naturally came next. We’re for sure making a street compliant kit, most likely based around our STREET ADVANCE Z, FLEX Z or FLEX A line. However, the issue is compatibility with the factory electronic solenoids. Much like the FK8 Civic Type R, we’re having to develop our Canceller Units to avoid any issues unplugging these said electronics. This means that the customer can opt for one of our EDFC kits instead of the factory electronics. Yes, that’s an added cost, but our EDFC systems (specifically ACTIVE and ACTIVE PRO) are very advanced and a worthwhile upgrade. Still, we may consider something like our FLEX AVS coilovers which is aimed at Toyotas and Lexus’s using Adaptive Variable Suspension. BUT, this car uses BMW based suspension, and not Toyota’s AVS. So, that will take a bit more time to develop.

On top of making a FLEX type of coilover, we will plan for a more race oriented type setup, most likely around our new MONO RACING coilovers.

Preliminary testing has been completed on production A90’s (the Supra Pace Cars were technically pre-production vehicles, to my understanding). But we’ll still be working on development once other coilover prototypes arrive. So, give us a little time to get these products out!

TEIN Endura Pro Plus Shock Absorbers

This is probably the single most anticipated product from TEIN, for me at least. Why? Probably because I’m reaching a point in my life where I want a simple suspension setup that will work well, and I can do away with a bunch of features I will not really use often. In other words, I’m getting old and lazy.

The TEIN group has been discussing this new line, which is a premium shock absorber, for probably the past five years (to my knowledge). We’ve wanted to get into the replacement shock absorber line for some time now, but we wanted something that had an appreciable difference to the well-known aftermarket shock absorbers already on the market.

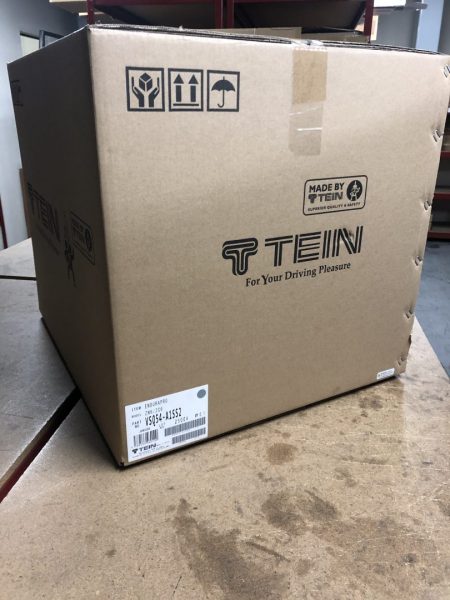
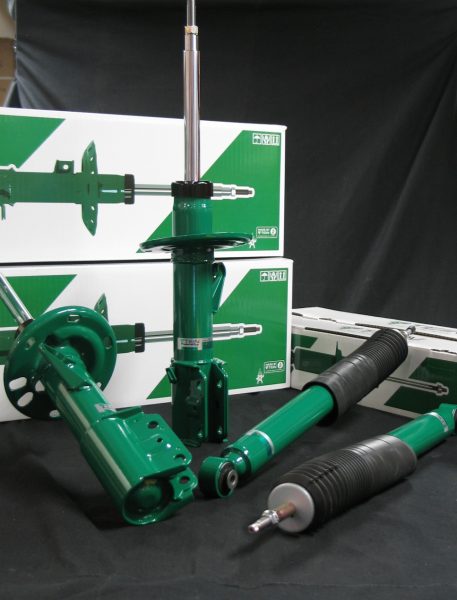
So, after all these years and years of discussion and product development, we now have our Endura Pro and Endura Pro Plus shock absorber line.

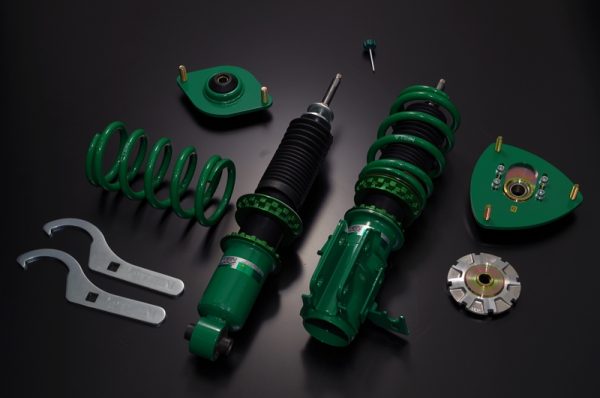
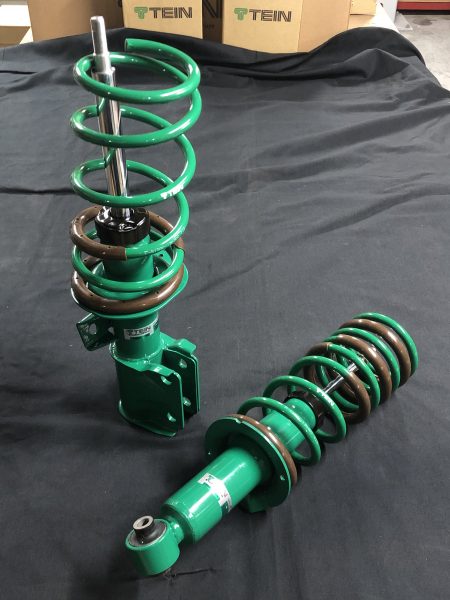
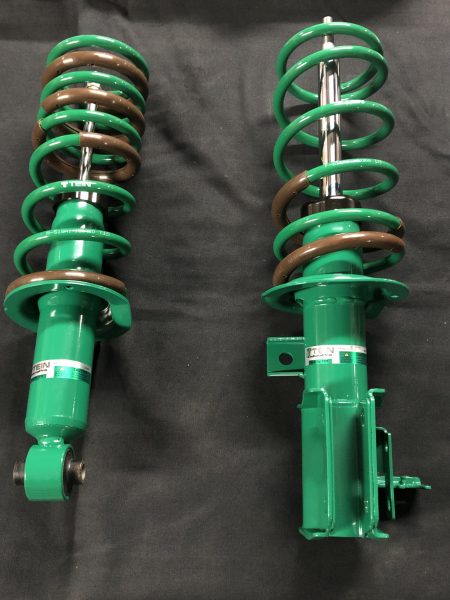
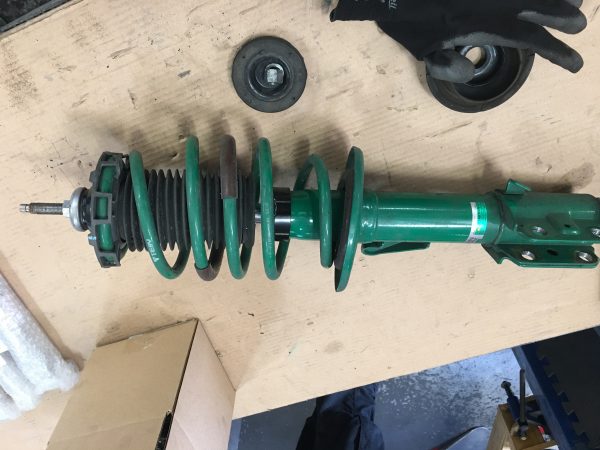
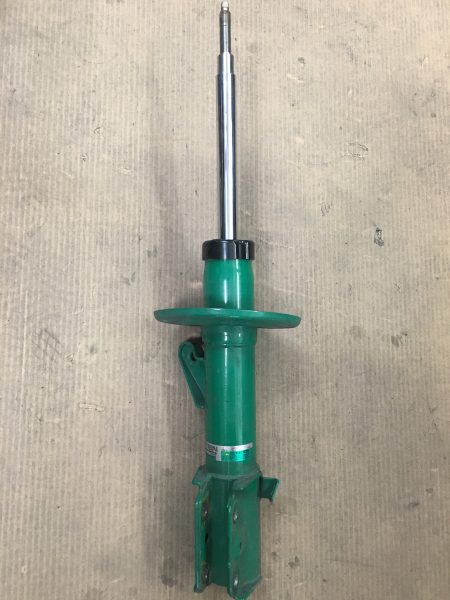
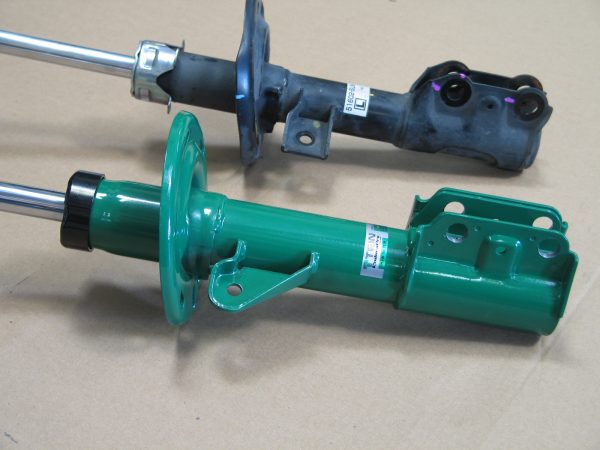
These shock absorbers are completely compatible with OEM vehicles. As stated, it is a replacement shock absorber. HOWEVER, it is far from a simple replacement. We’ve gone an extra step in making them a high performance shock absorber. In saying that, this product is not the same type of suspension as our existing line of coilovers, which in many cases offer a firmer ride and drastically reduced vehicle body motion (sway, squat, dive). The Endura Pro/Endura Pro Plus line does offer a very comfortable ride quality, but internally it is much different than a standard twin-tube shock absorber you’ll find as an OEM shock.

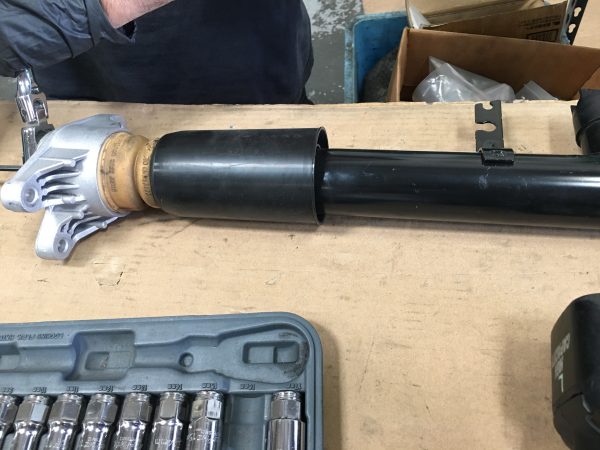
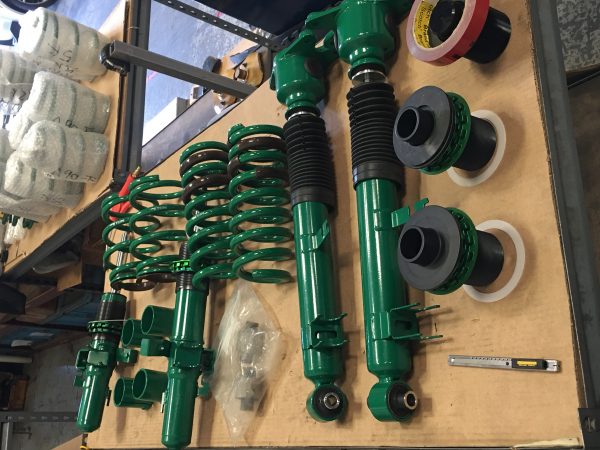
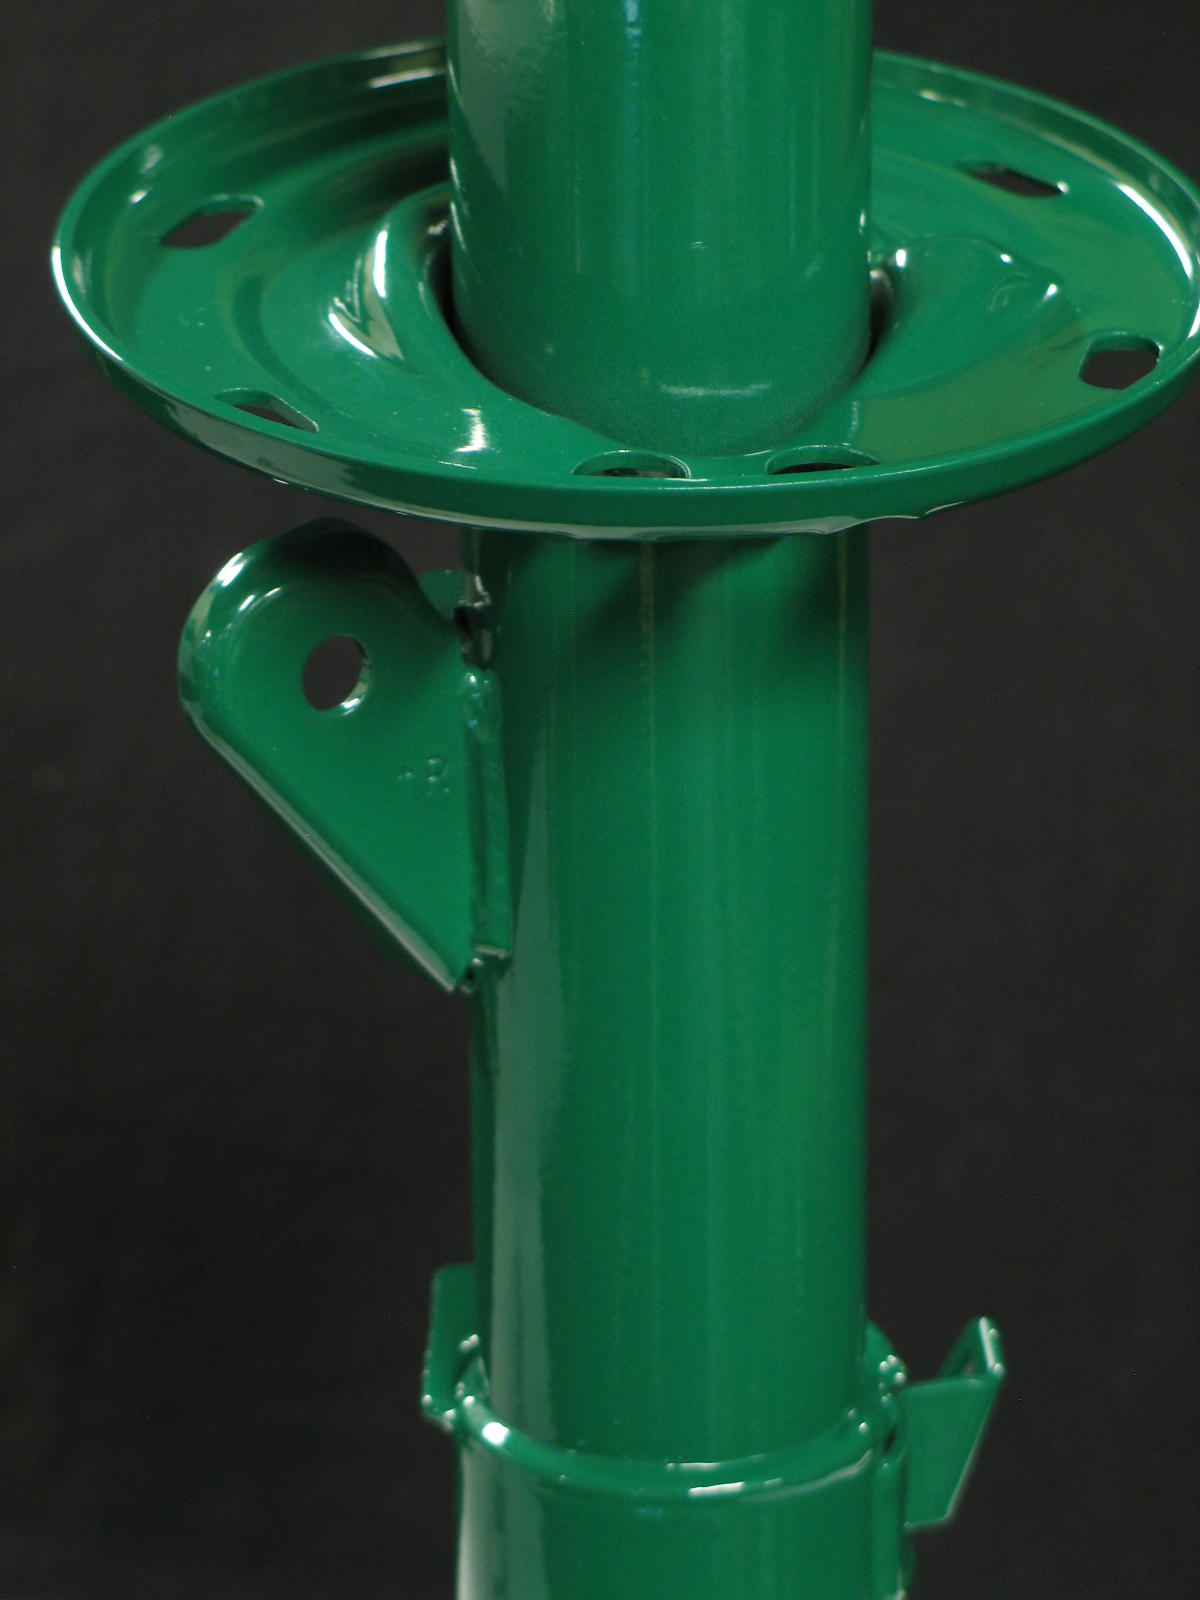
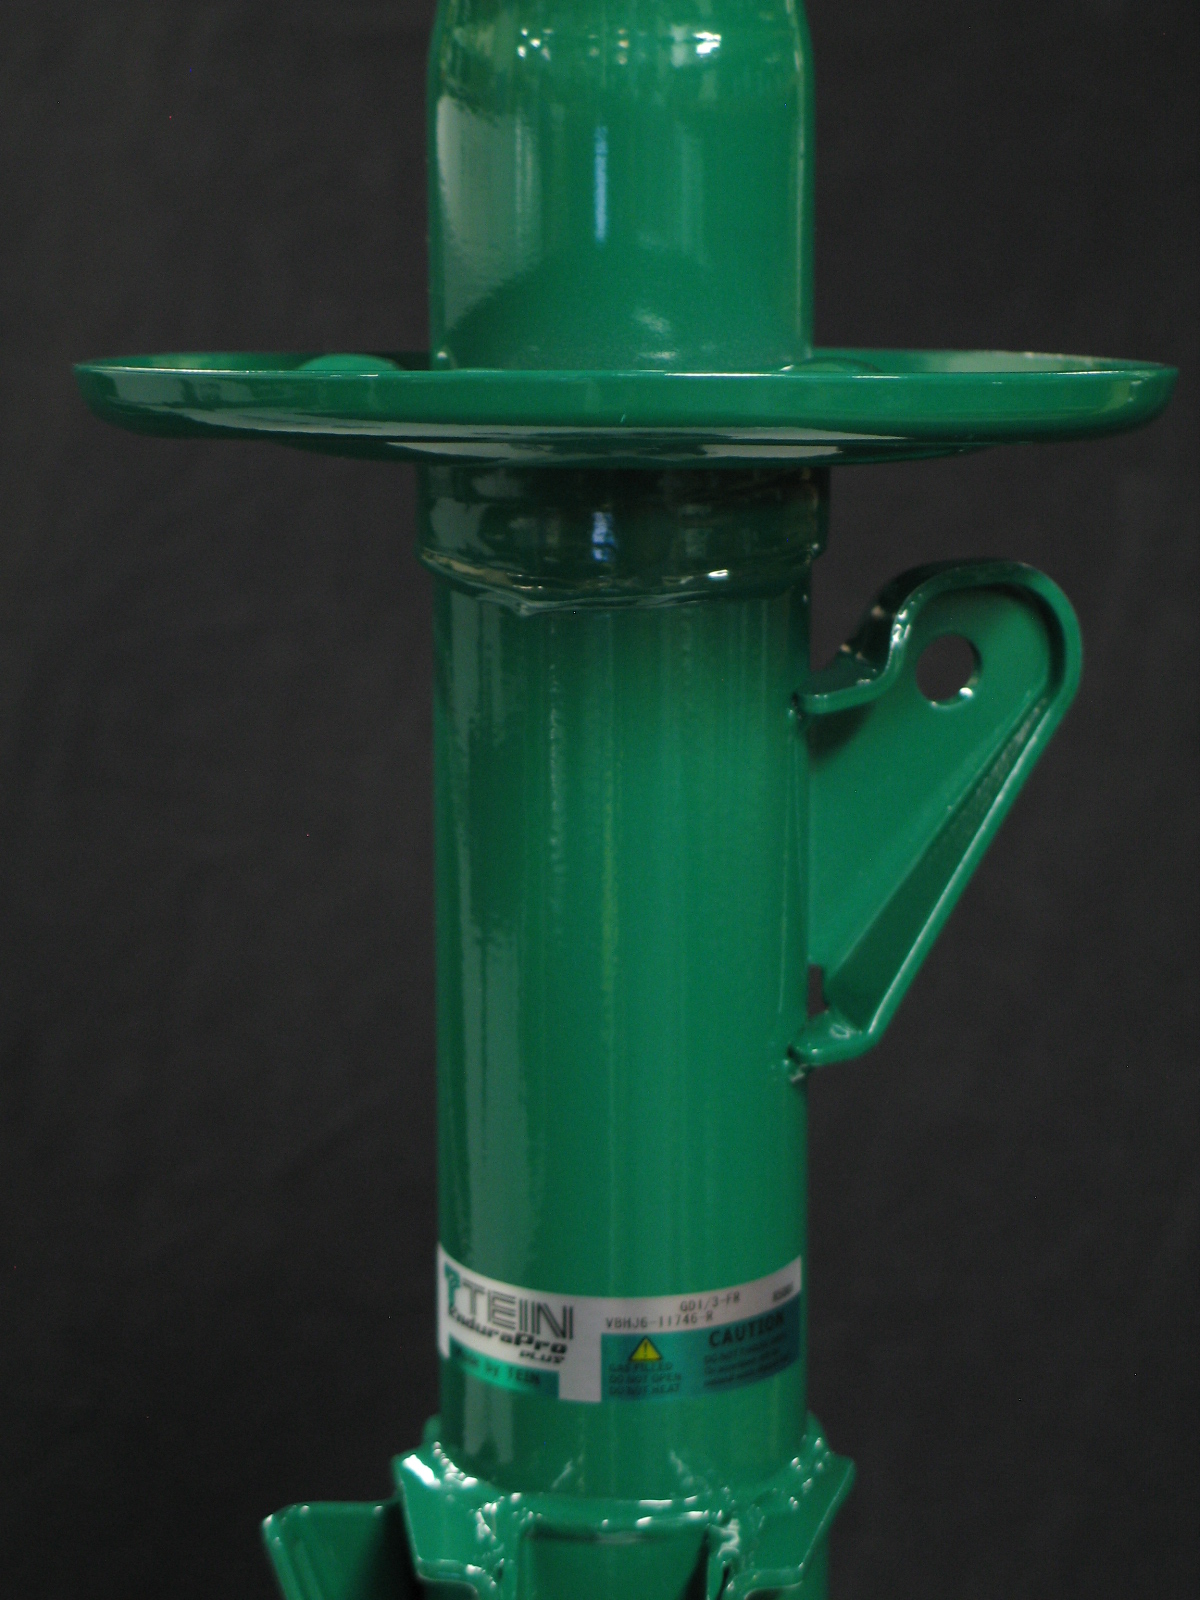
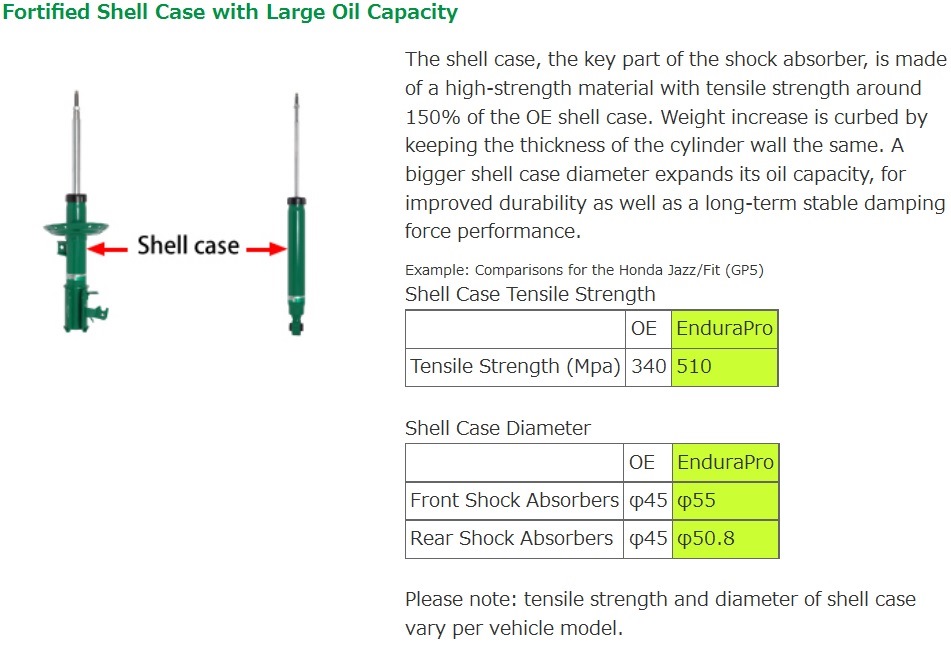
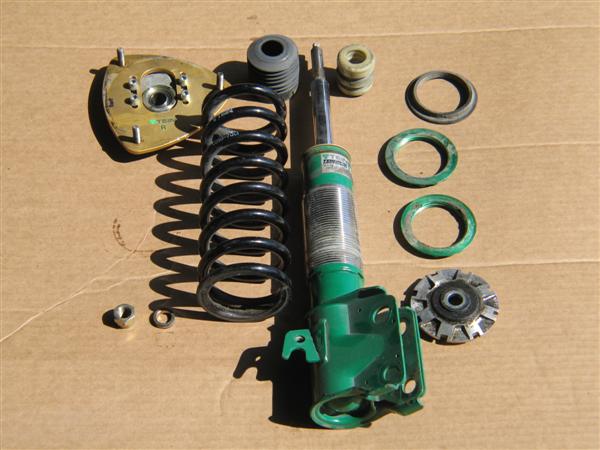
For starters, we actually have increased the internal capacity of the shock absorbers. In most cases, our Endura Pro/Endura Pro Plus shock absorbers are the same length as an OEM shock (a few applications use a slightly shorter damper body), but we also use larger diameter damper bodies, thus the internal volume is greater. In doing so, we’ve increased damper oil capacity over a standard shock absorber for the same vehicle application. That translates to better endurance (long-term driving) and increased longevity. It also allows us to use a larger than OEM piston valve which provides a greater damping force range.

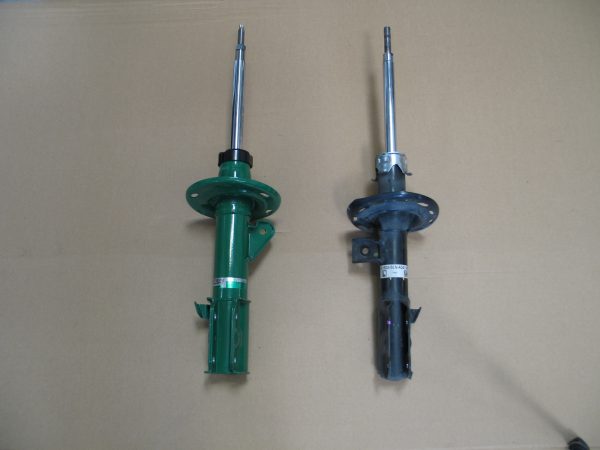
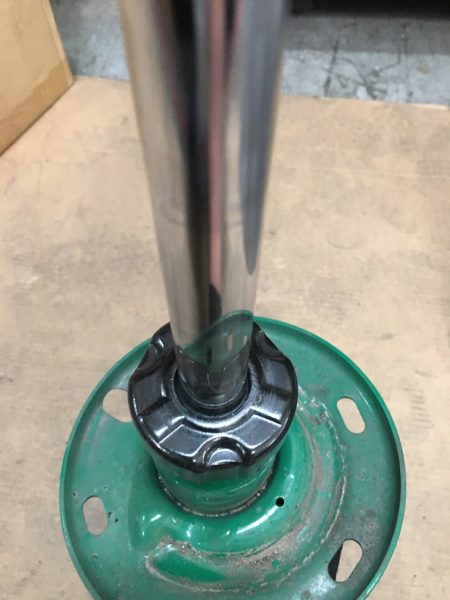
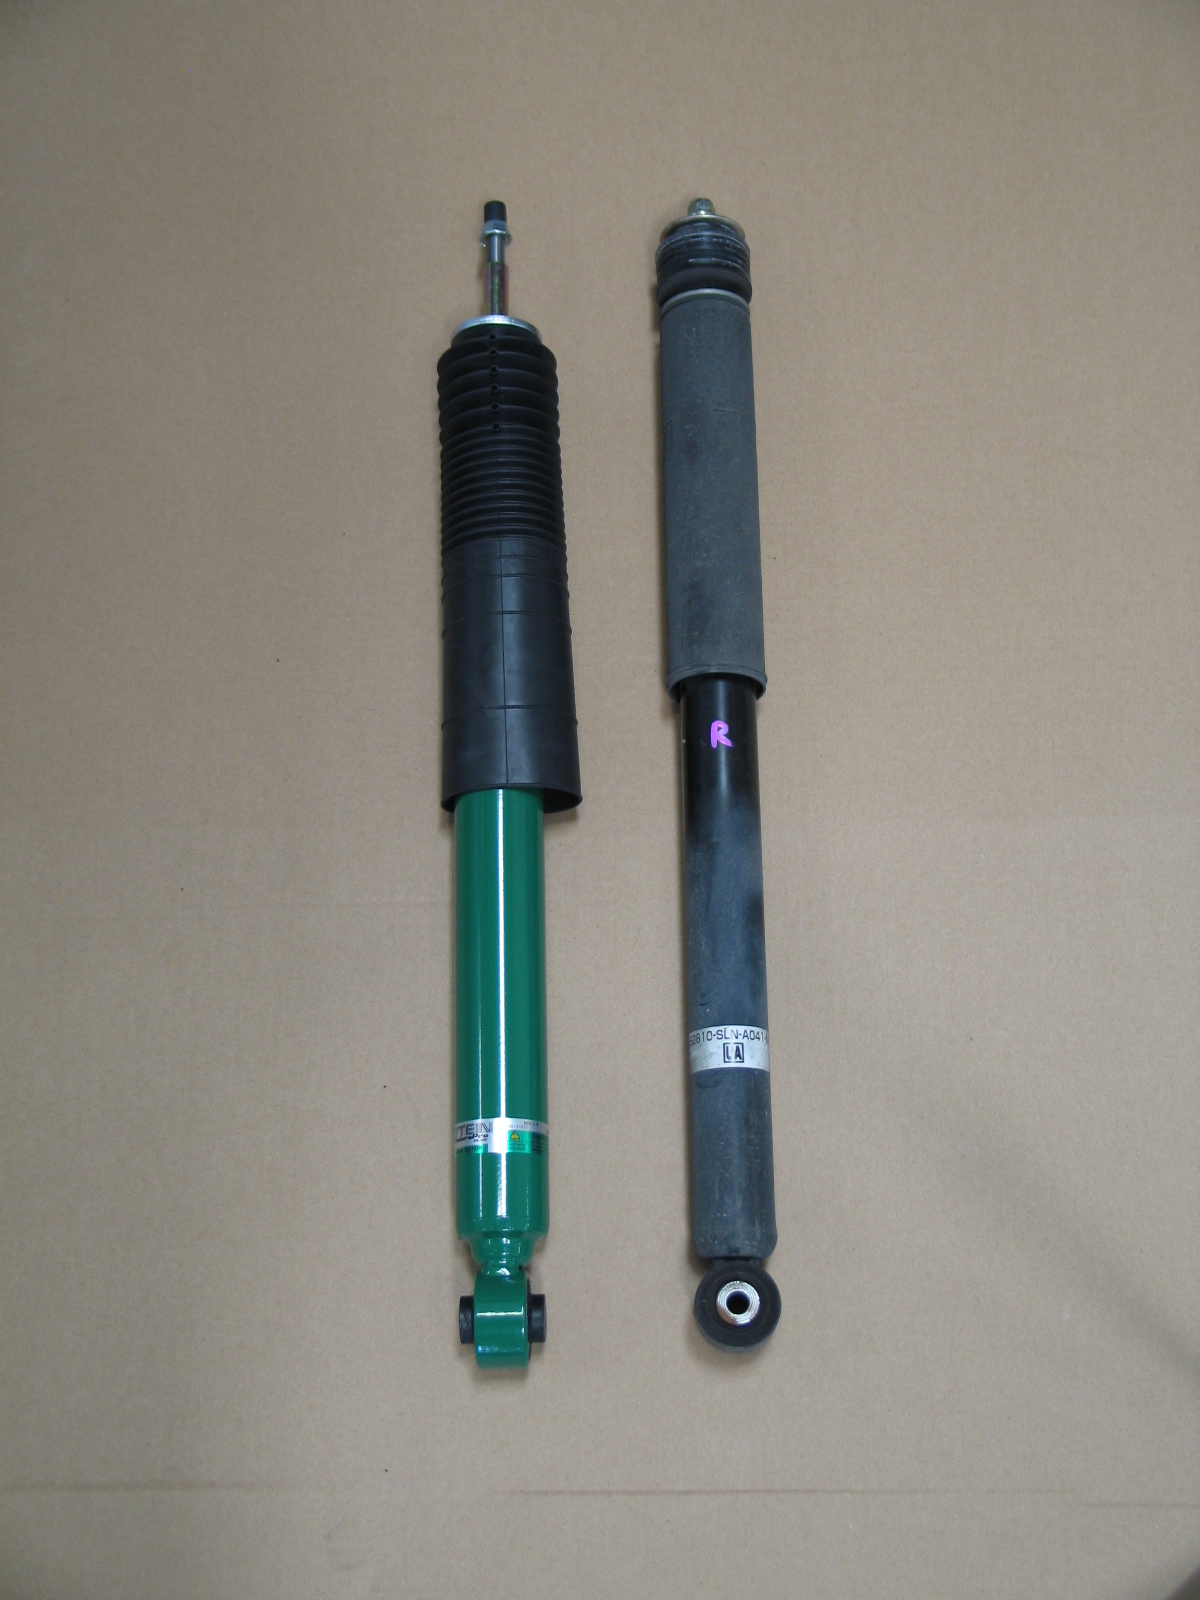
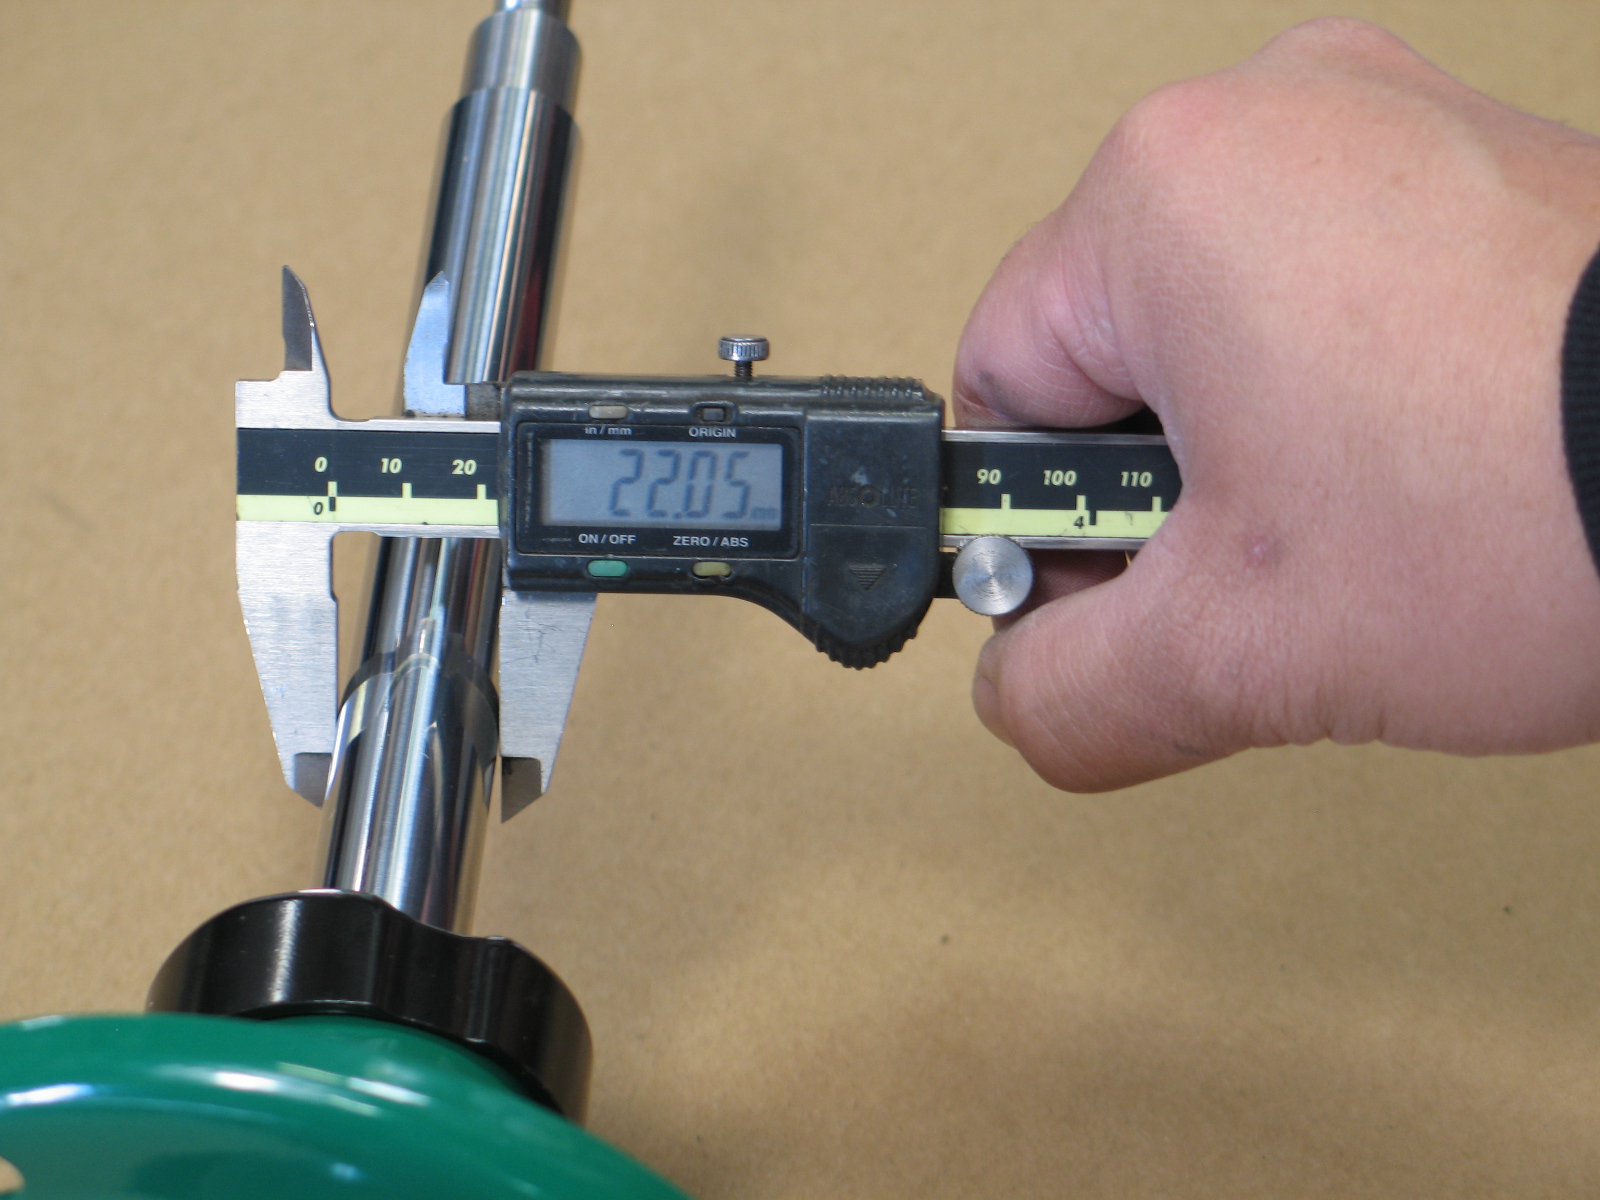
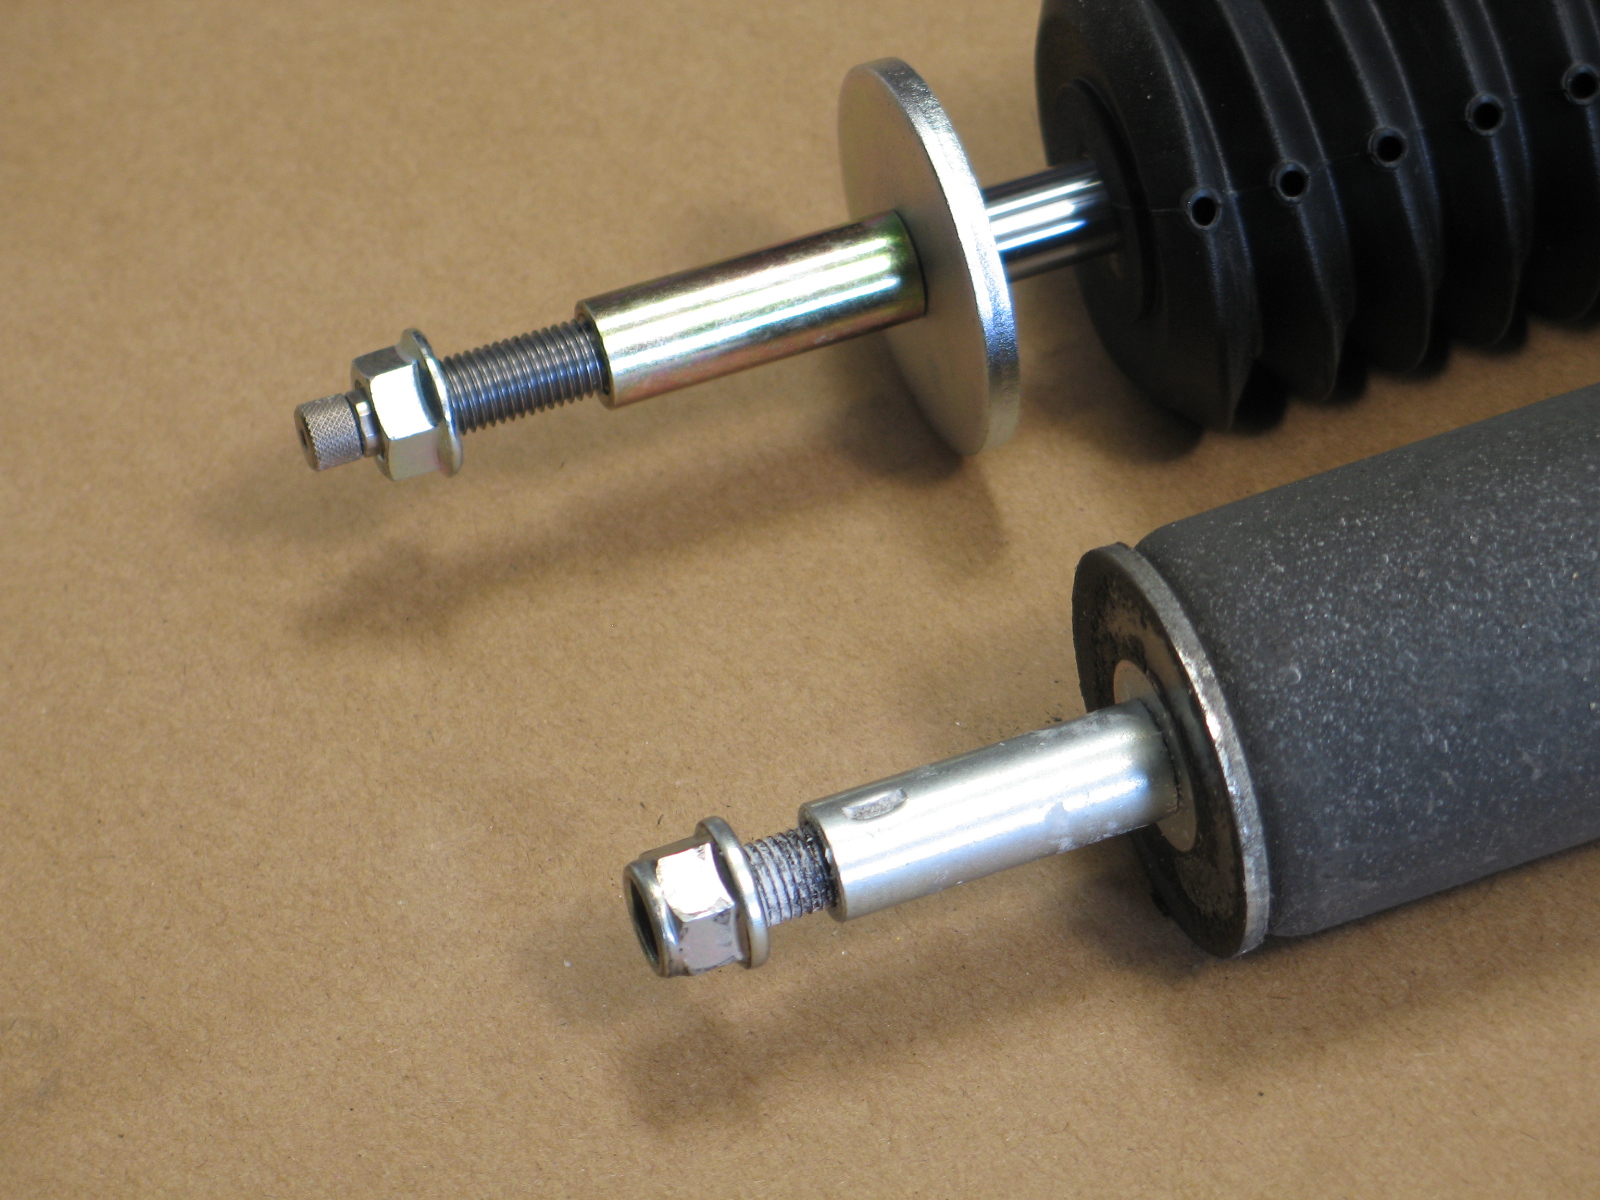
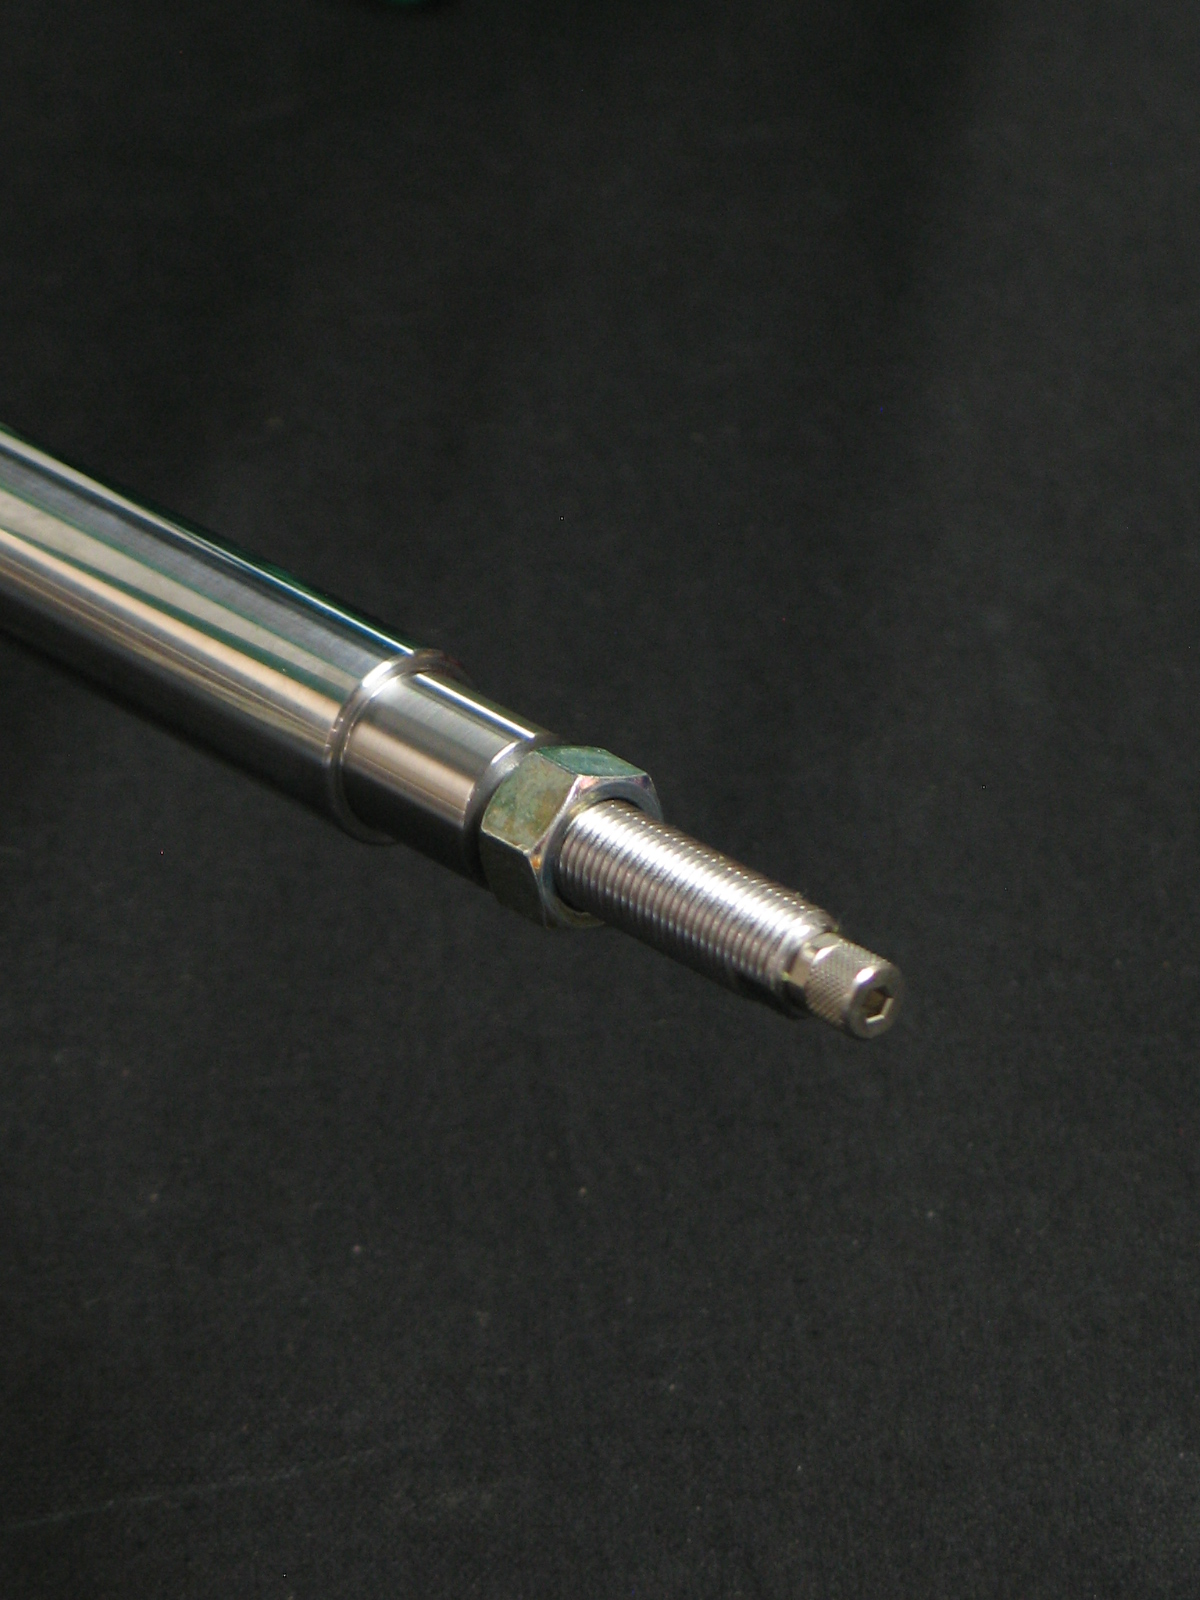
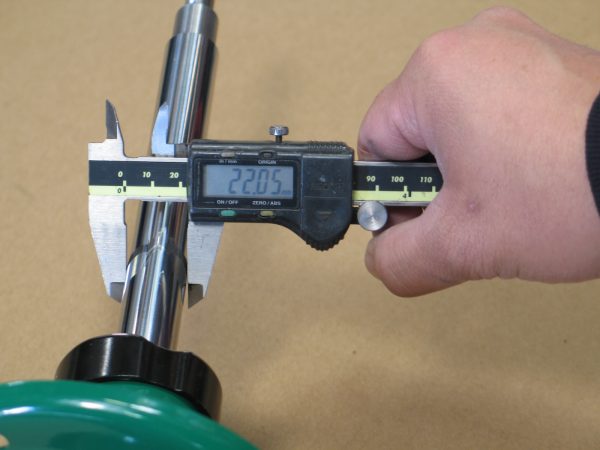
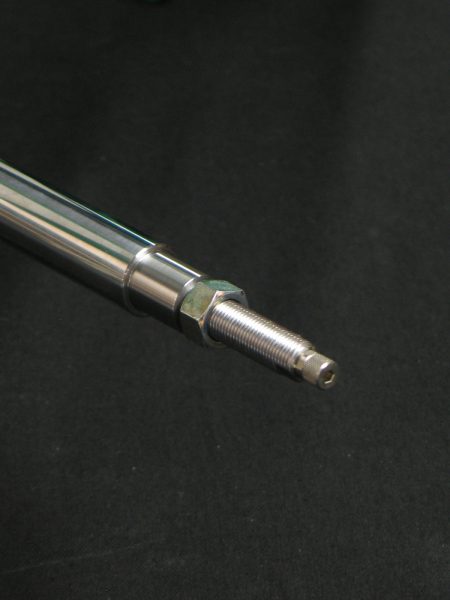
For strut type applications, we use thicker piston rods (22mm dia.) able to withstand greater lateral loading that struts are subjected to.

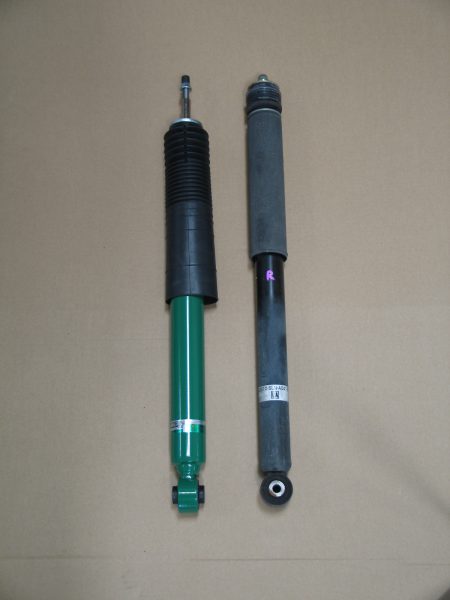
OEM Strut Piston Rod

Endura Pro Strut Piston Rod

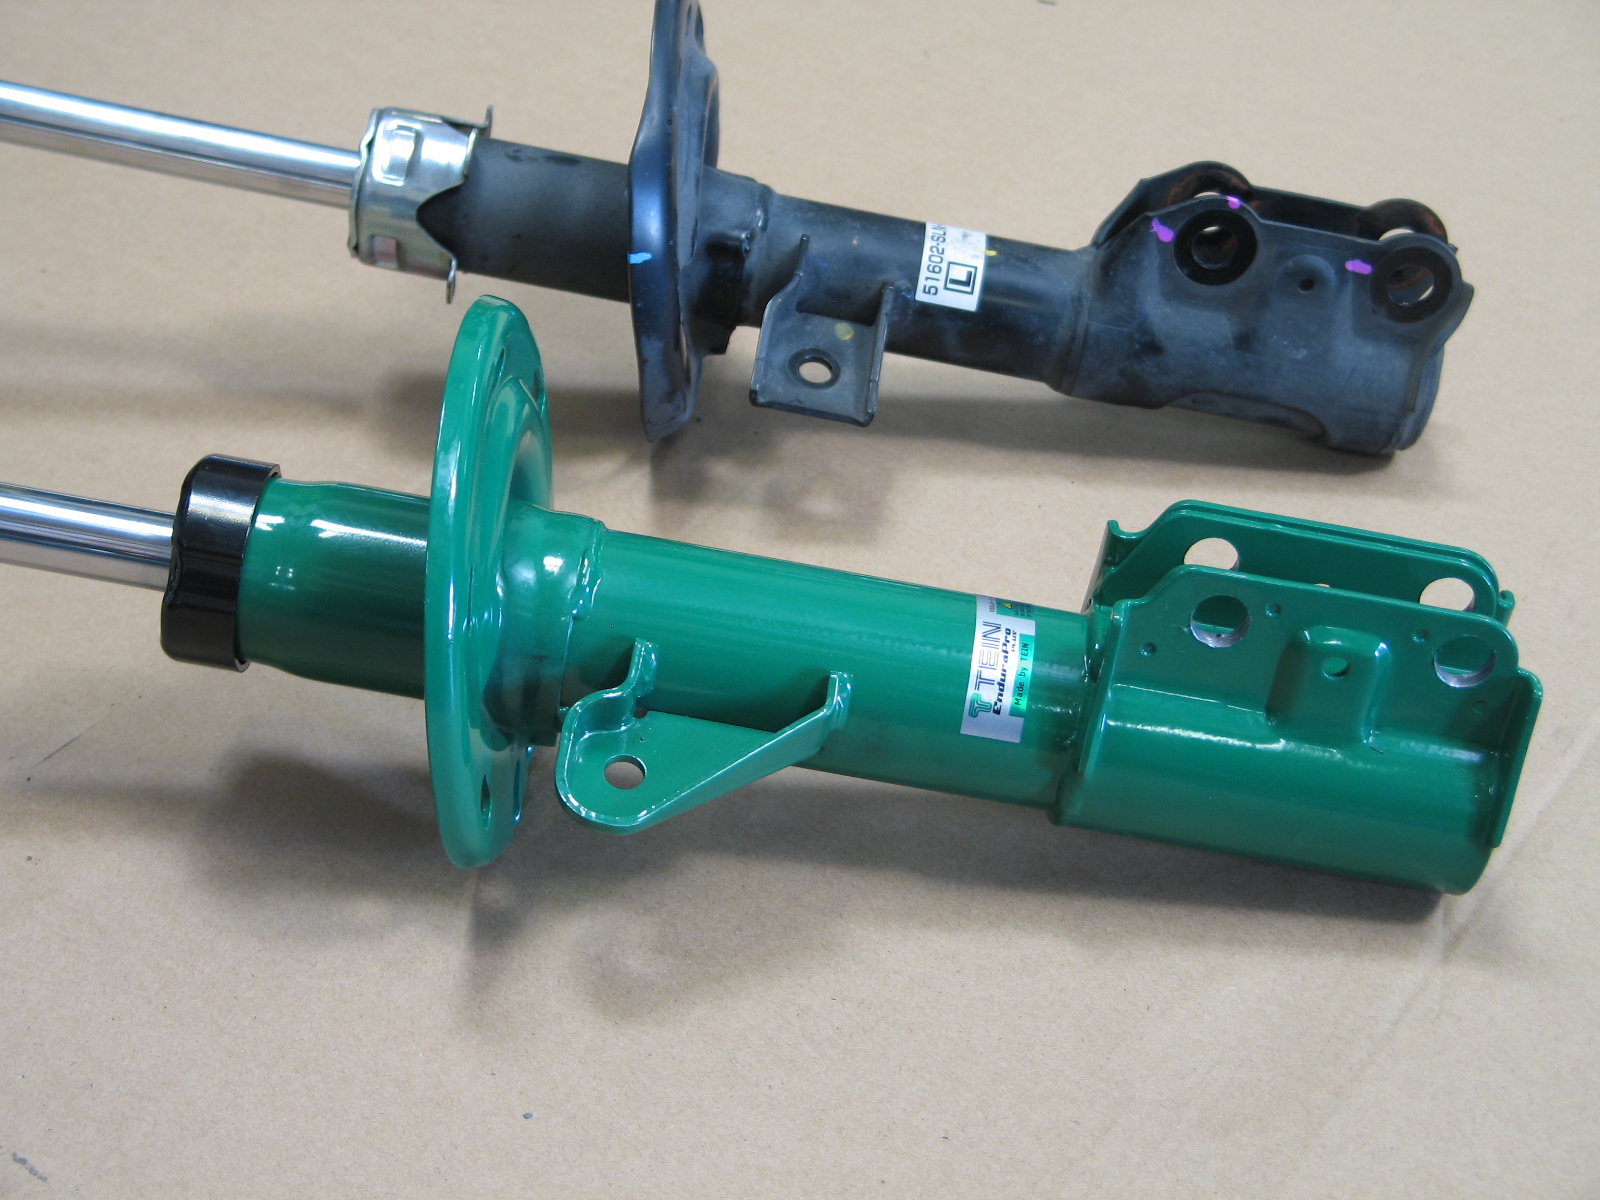
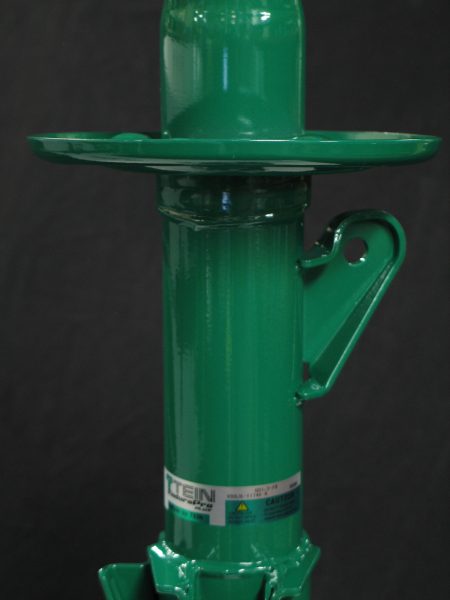
Since we use the same high-strength steel as used in our coilover kits, it allows us to reinforce areas of the damper, like the lower brackets on strut type suspensions, or the spring seat or sway bar bracket, without a large penalty in weight. In fact, for some applications the Endura Pro shock absorber is actually lighter than OEM!

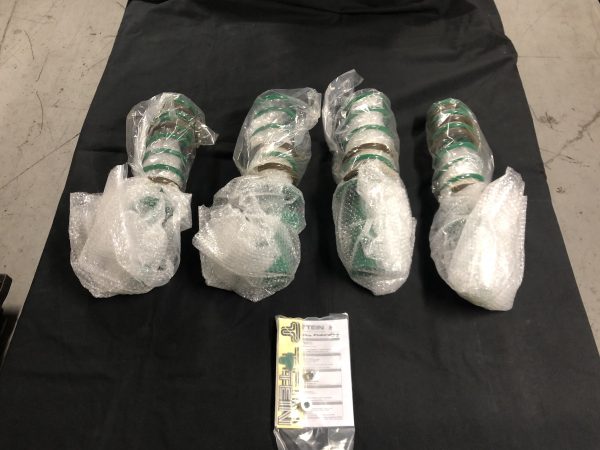
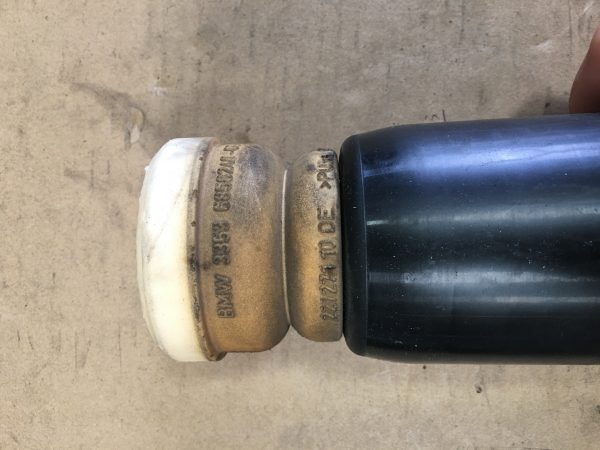
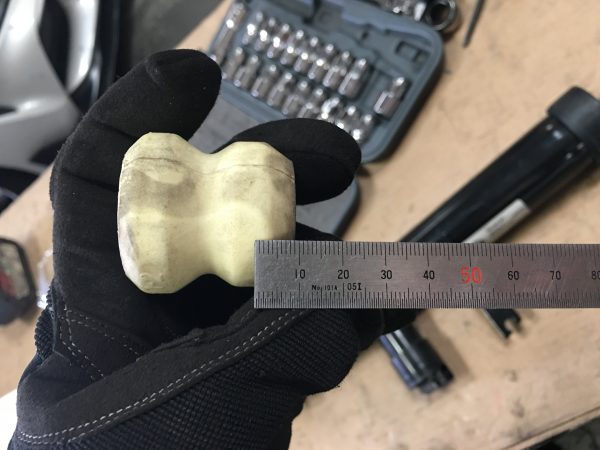
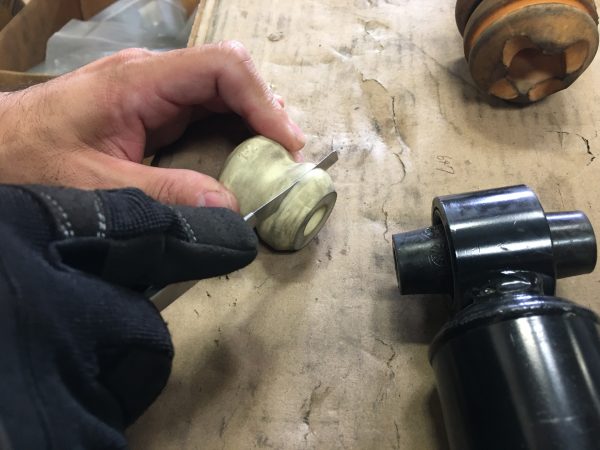
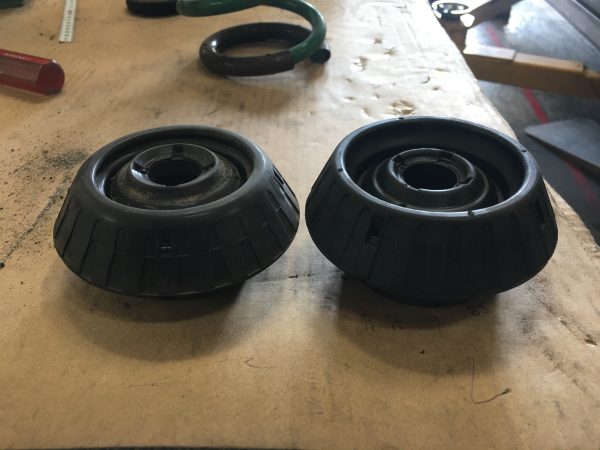
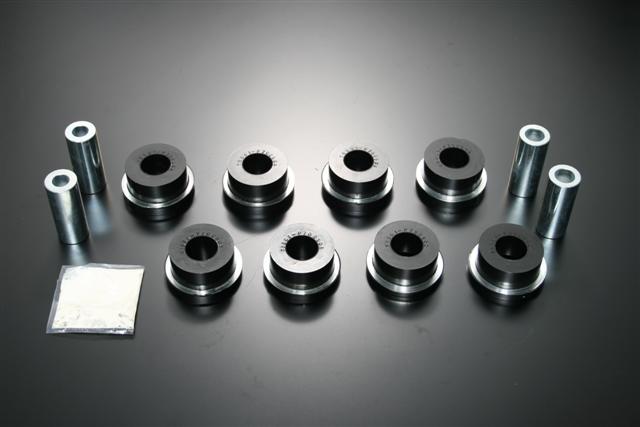
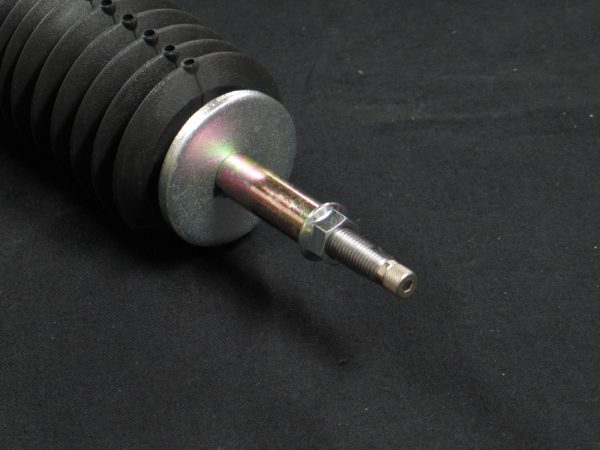
Depending on the vehicle application, we will include necessary hardware to make the installation easier, such as collars, bump stoppers/washers, dust boot, bump stop, etc.

OEM shock (bottom) has a crimped collar, making removal of the dust boot, bump stop, and washer impossible. Endura Pro will include new hardware if necessary.

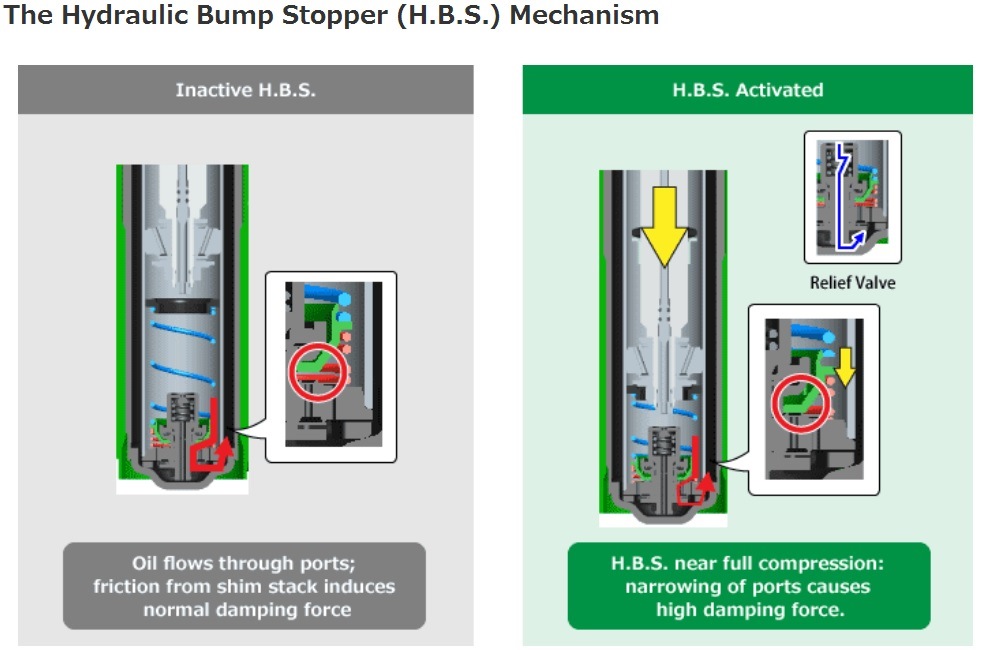
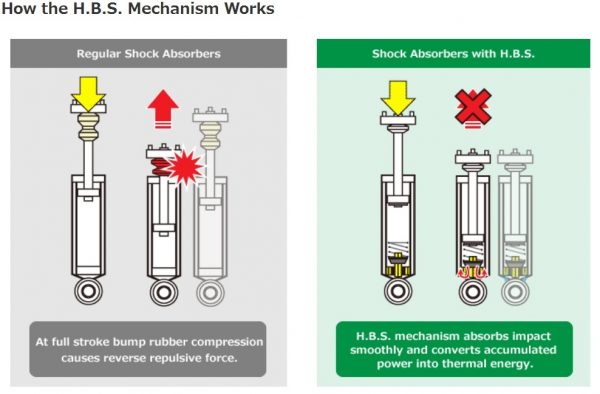
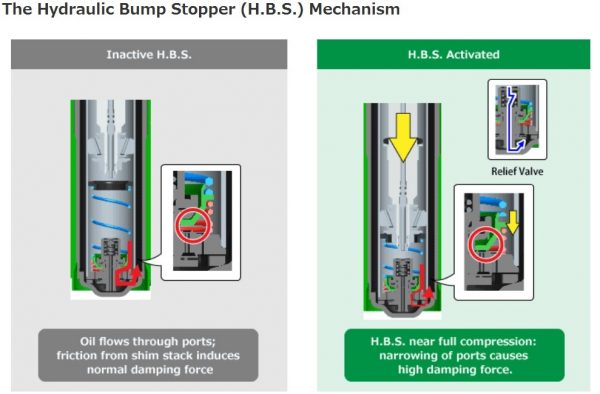
One new feature recently only applied to the TEIN FLEX A coilover kit has now made its way into every Endura Pro/Endura Pro Plus shock absorber- our Hydraulic Bump Stop. With the aforementioned FLEX A line, the only other TEIN product to incorporate a Hydraulic Bump Stop is our Gr.N rally coilovers. The off-road crowd probably knows a fair deal about how a hydraulic bump stop works- it creates higher damping force on compression to prevent the suspension from bottoming out completely, then allows the suspension to settle in a very controlled manner on rebound. What you end up with is a reduction in suspension oscillation (excessive up and down movement, or “porpoising”). Never before has a replacement shock absorber ever had such a feature.

The Endura Pro Plus line, specifically, has 16-way damping adjustment, similar to our other damping force adjustable coilover kits like STREET ADVANCE Z, FLEX Z, MONO SPORT, etc. This gives the end user the ability to set their suspension to their preferences depending on their driving conditions. As an added bonus to having this damping adjustment, this technically makes the Endura Pro Plus shock absorbers EDFC series compatible! With EDFC, now you can control the shock absorber damping settings directly from the driver’s seat. Opt for the EDFC ACTIVE or EDFC ACTIVE PRO series, and you’ll get adaptive damping force control based on speed or g-force loading! EDFC is a universal application for our 16-way adjustable TEIN dampers, so any car can use this setup (some vehicles may require modifications or adapters to make the EDFC Motors fit properly)!

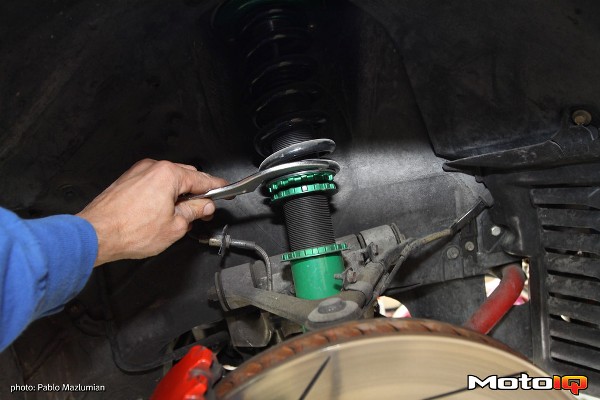
Click knob for damping adjustment on strut type Endura Pro Plus

Click knob for damping adjustment on Endura Pro Plus

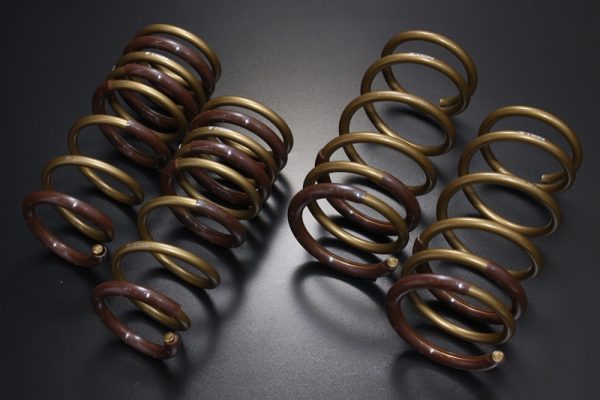
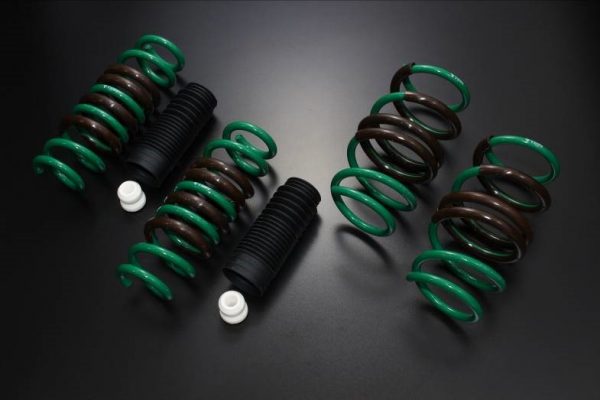
Lastly, the Endura Pro/Endura Pro Plus line adopts our new fully sealed structure in helping keep manufacturing costs (and MSRP) down. These shock absorbers will be available for sale individually, but we’ll also be offering them as a complete set with TEIN S.TECH lowering springs!

So again, this new Endura Pro/Endura Pro Plus line is far from a simple replacement shock absorber, and now I can say I know that personally.

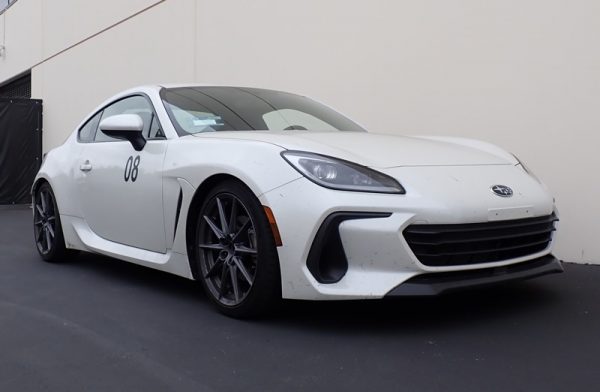
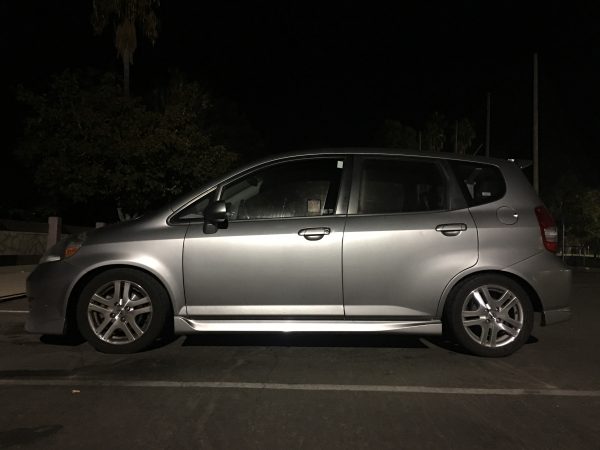
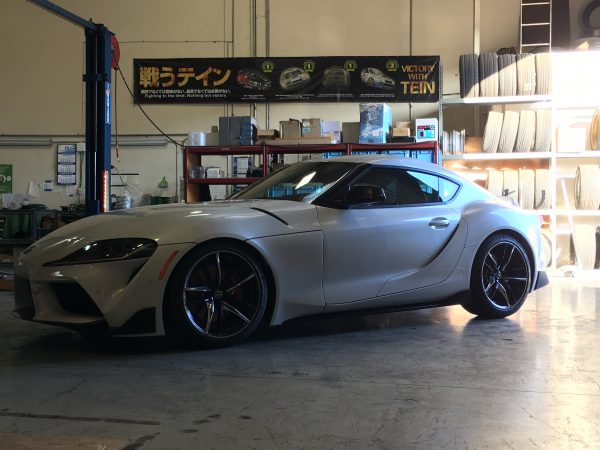
After constant nagging to my boss, I wanted to see if we would be making some for the GD3 Honda Fit (2007-2008). Since I’ve taken ownership of my dad’s Fit, I’ve grown to love driving it. It’s by no means a fast car (quite the opposite, actually. I’ll just call it “brisk”), but it is small, lightweight for its size, and kind of fun to drive in a spirited manner. And it’s a practical car for me now that I have a small family of my own. The Fit also saves me from wasting gas in my truck driving solo to and from work, so it’s now my daily driver.

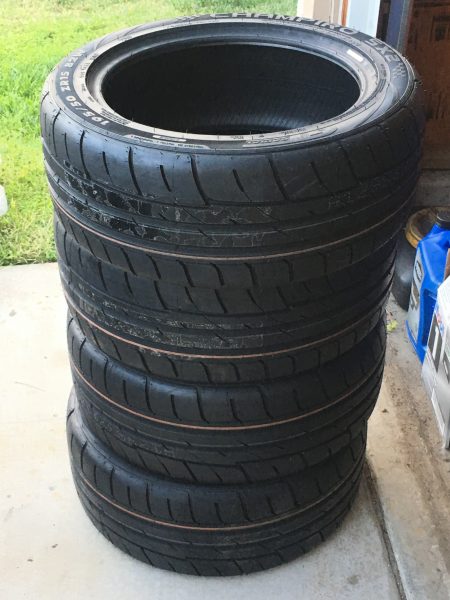
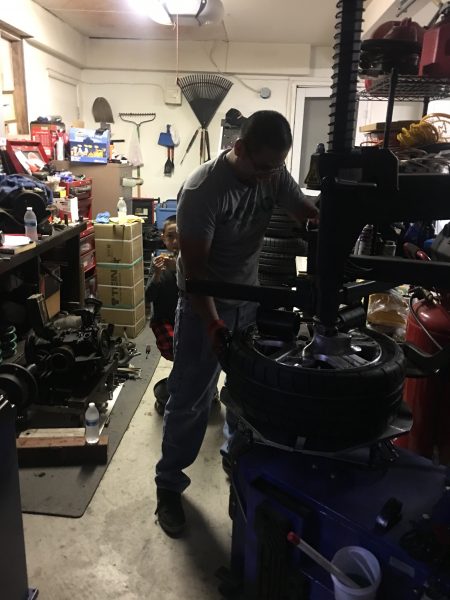
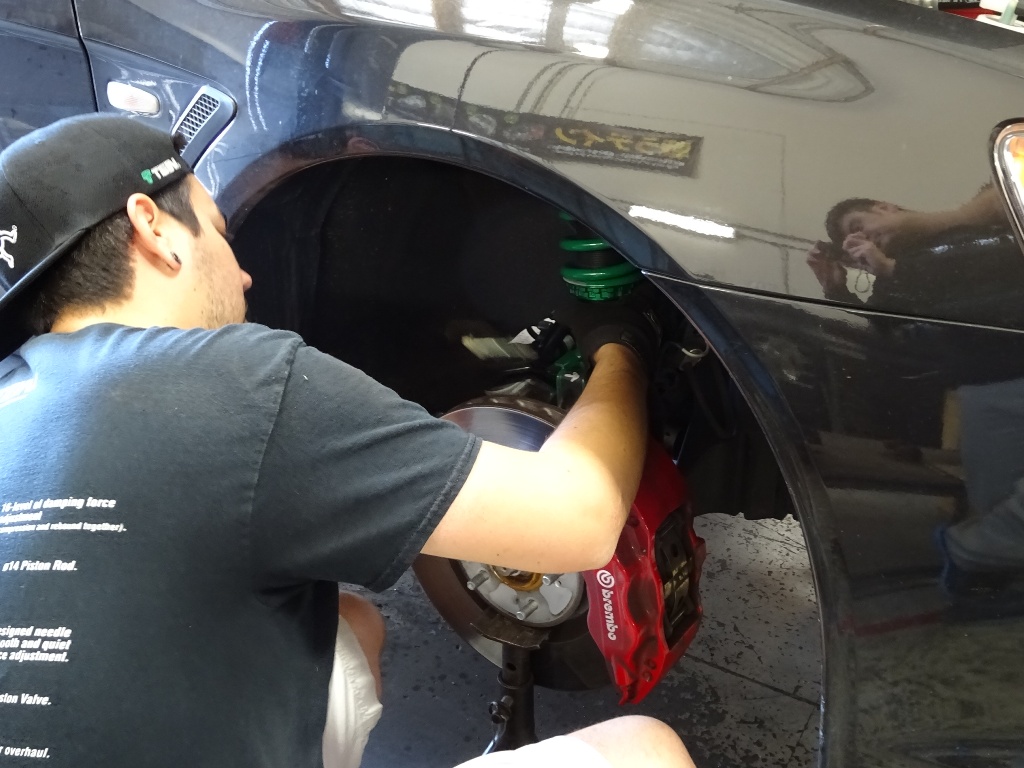
Now, with 80,000 miles, which is relatively low for this year vehicle, I can feel the suspension is not as it was when it was newer. Of course that can be from a number of things, but the shock absorbers are a pretty high wear and tear item in the suspension, so that felt like the cause. After removal of the shocks and compressing them by hand, there was still at least some nitrogen charge in all the shocks, but maybe not enough to really provide good rebound force.

Anyway, to get to the point, I finally got a set of Endura Pro Plus shock absorbers for the Fit!


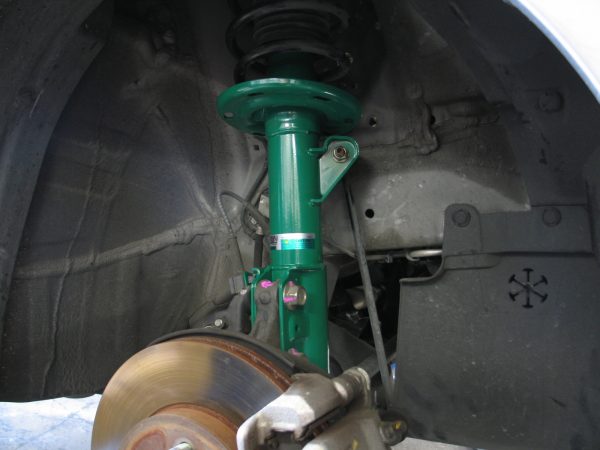
DISCLOSURE– The Endura Pro Plus shock absorbers I’m using are designed for the Japanese market GD3 Honda Fit, which is not a direct fitment for the front.


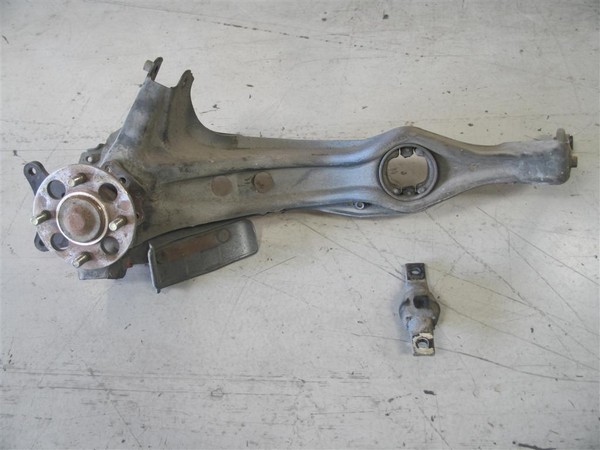
This required some modification to the knuckle brackets by boring out the bolt holes to 14mm. Still, this isn’t a direct fitment even after this modification. The struts are the same length as the US Honda Fit OEM strut, however the spring seat and sway bar bracket are 20mm higher than the OEM strut (fortunately this poses no clearance issues). So, this actually does translate into a slightly higher front ride height. For my Fit, it was approximately 12mm higher than stock ride height in the front.

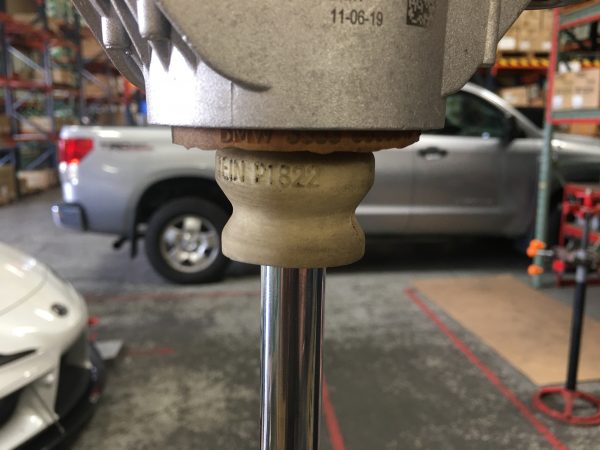
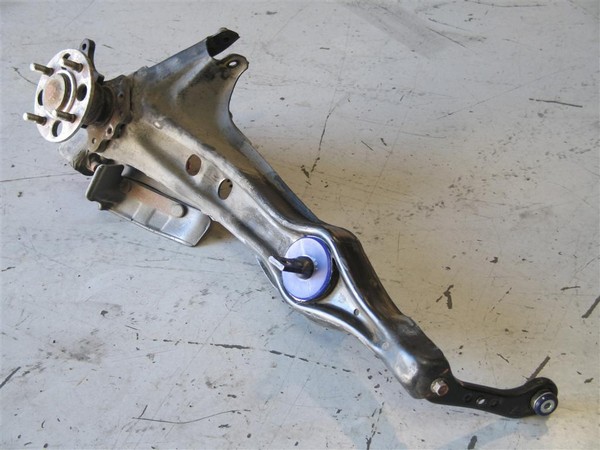
*Endura Pro Plus Strut (bottom) had bolt holes in lower bracket bored to fit USDM GD3 Honda Fit.

The rear dampers are a direct fit, so no problems there.

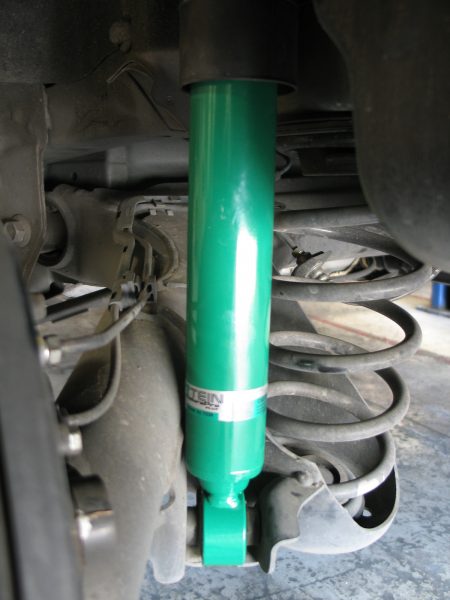
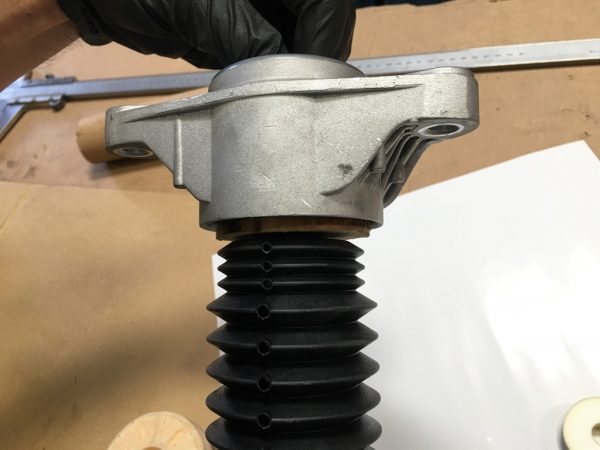
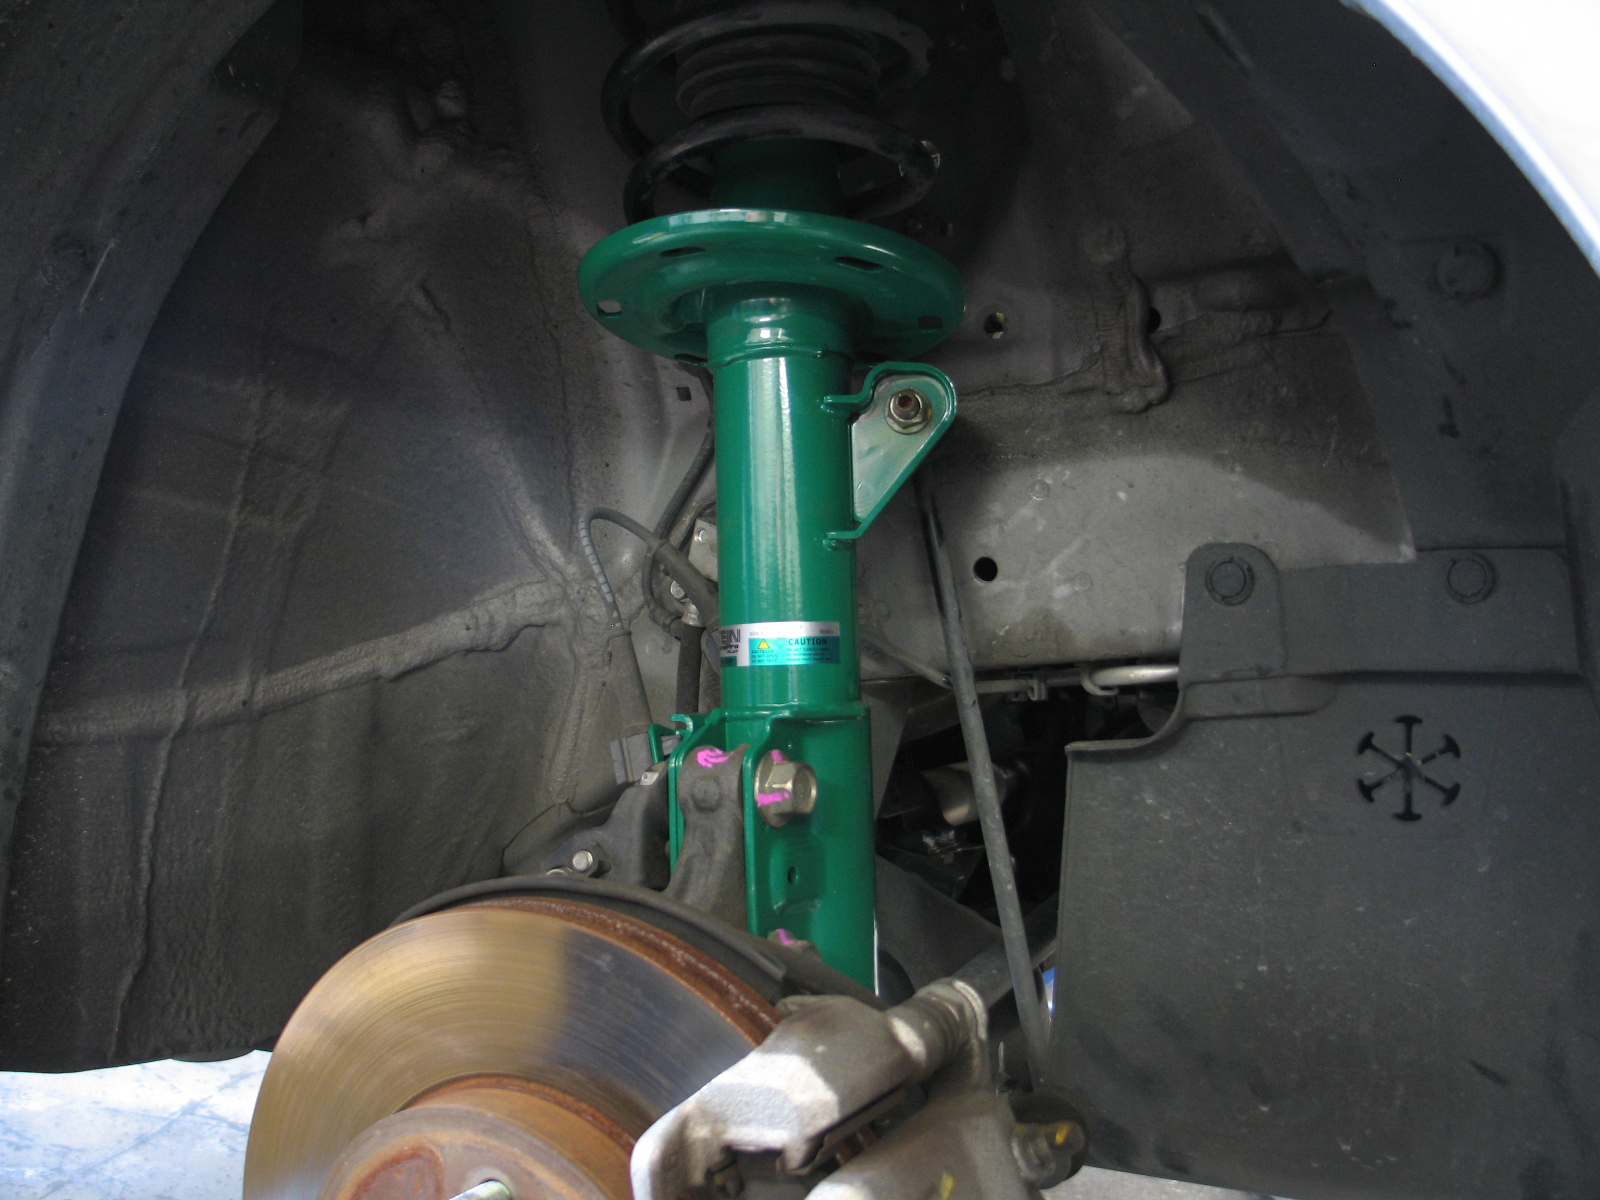
Clearance at the bottom is very close to the axle beam, due to the larger diameter body of Endura Pro/Endura Pro Plus shock absorber. Fortunately no contact with the beam, even at full droop.

With the shock absorbers set at 8 clicks (middle) front and rear, the ride quality felt very much as I remembered the car feeling like when new. That was ten years ago though, so I really only have a memory to go off of. One of my co-workers said that the shocks set to 16 clicks (softest) was actually an improvement over the worn OEM dampers. At 0 clicks (stiffest) it is actually a noticeably firm ride quality, but far from being jarring (the Fit uses soft springs). I found that a 12 click front and 10 click rear was more to my preference. So I drove on that for about a week, until one of the guys here (Gonzo, aka Cpt. Slammo, aka Monster Tuck) kept telling me “it needs to be lower”…. ughhh.

I actually wanted to lower the car a little anyway. Go figure. I mean that’s really what TEIN suspension is known for doing, so it’s only natural to want to use the products I help sell. So, I bought a set of our S.TECH lowering springs for the Fit (part # SKB36-AUB00). Knowing that the front struts are now a bit higher than the OEM strut, I thought the car would look a little funny with a slightly raised front end. But, to my surprise the ride height actually has a relatively even drop front and rear (referring to tire-fender gap)! The front actually dropped a little over 2″ front and 1.2″ rear (we spec S.TECH’s for the GD3 fit at -1.8″ front and -1.2″ rear). So even with the Endura Pro Plus front struts having higher spring seat position than OEM, it’s nearly about the same ride height as our test data. That difference can be due to the strut mounts (being mostly rubber) starting to sag.

As for ride quality, now it feels more in line with how one of our coilover kits feel, like a STREET ADVANCE Z for example. Not incredibly stiff, but nice and sporty with good compliance for my daily commute. The extra flexibility in having damping adjustability is a worthwhile upgrade, especially if you’re considering using lowering springs with new shock absorbers.

All in all, I’d say this is probably the happiest I’ve been with driving the Fit. The lowering springs really helped reduce the body motions (the Fit has a pretty tall roof line). The reduction in body sway is a dramatic improvement! I’ve found a damping setting on the Endura Pro Plus’s that works really well with the S.TECH’s.

In general, as a replacement shock absorber, the Endura Pro line is a great improvement over the factory suspension. Adding the adjustability I get with the Endura Pro Plus shocks gives me a chance to find a ride quality I prefer!

More information on the Endura Pro/Endura Pro Plus shock absorber line can be found on our website


New Suspension Developments at TEIN

Always working to be innovative when it comes to suspension, we’re constantly testing and developing new components in search of greater performance, longevity, and overall quality to our product lines.

We’ve possibly mentioned before that we had always planned to produce our own line of premium shock absorbers, designed to work with OEM springs or our lowering springs. In fact, if you have been to the SEMA show, you’ll know that we displayed a prototype product called “Premier”. We’ve noticed a great demand for such “replacement shocks and struts”.  However, there are already a number of manufacturers making replacement shock absorbers and struts. We don’t simply want to be another addition to all these manufacturers.

So, while considering what type of shocks we’d produce, we started to think about how we can just simply make a premium shock that has longer life span than other replacement shocks. After all, a reliable suspension is something we pride ourselves in creating (along with great value). Fortunately nearly all of our technologies in shock manufacturing high performance suspension can be applied to our premium line of shock absorbers.

Not being enough to set ourselves apart from other companies, we needed innovation. So, after much deliberation, we’re adding our new Hydraulic Bump Stop (H.B.S.) to this premium shock line, and not to just a few applications. H.B.S. will be added to all of our premium shock absorber applications.

Structurally, these new shock absorbers will also benefit from increased rigidity and thicker than O.E. brackets/mounting points on the shock body. This contributes to greater steering feel for strut type applications and safety for the overall design. Internally the damper volume is much greater, allowing for increased damper oil capacity which, in turn, allows for greater long-term performance and reduced fade in damping force over extended usage. And, due to our use of high-strength steel for its construction, we can maintain a product with minimal to no increase in weight compared to O.E.

Since introducing this future new product at SEMA as our “Premier” line, our new premium shock absorber line is now the Endura PRO and Endura PRO Plus. Endura PRO will have a set damping rate per application, while Endura PRO Plus will have 16-way adjustable damping much like our STREET ADVANCE Z, FLEX Z, & MONO SPORT line. One exciting fact about the Endura PRO Plus is that some applications (depending on fitment limitations of our EDFC motor) will be compatible with our EDFC series controllers!

As mentioned, these premium shock absorbers will be designed to work with OE springs (and with TEIN lowering springs, for that matter). While being designed around OEM shock absorber dimensions, valving will be optimized for greater performance. Also, since this line is aimed towards customers needing a better OEM type replacement, this product line will be applicable to a wide variety of vehicles (compact, sport car, full-size sedan, minivans, trucks, & SUV).

As with all TEIN suspension, we will include a 1-year warranty against manufacturer’s defects. But, best of all is our starting price of $105 per shock for Endura PRO and $130 per shock for Endura PRO Plus, making these an affordable upgrade!!

We’re looking forward to this new addition to the TEIN suspension lineup, and we hope you are too!


Basic Suspension Maintenance Time!

Have you been inspecting your suspension periodically? No?? Why not???

Just like most other aspects of your vehicle, an inspection of your suspension should be done. We typically like to inspect all suspension components, not just coilovers, during every oil change (every 5,000 miles). Suspension, and not just the shock absorbers, have quite a bit of components that will wear out over time. In the case of our adjustable suspension, there’s also the factor of more movable components that need to be inspected and tightened to specification.

DSC00364

It’s not uncommon for us to get calls about noise that customers are getting from their suspension, only to find that the noise isn’t related to our coilover, but something like a worn control arm bushing, worn sway bar end link, worn ball joint, or even factory upper mounts with worn rubber components (which, I’m sorry but, we do not sell OEM components).


When it comes to inspecting our coilovers, it is a good idea to inspect items like the spring seats and seat locks. Make sure these are still torqued to specification, following our owner’s manual included with your coilover kit.


****************************************************************************************************************************************
Prior to continuing, we must note that we highly recommend that a technician/mechanic perform such maintenance work. Should you choose to do any installation or maintenance work yourself, please do so at your own discretion. The following is simply information regarding our coilovers and for reference only.

****************************************************************************************************************************************

project supra seat lock

Seat locks that adjust the spring height/preload should be torqued to 42lbs-ft (+/- 2lbs-ft).

Seat locks for MacPherson strut types (that lock the lower bracket to the shock body) should be torqued to 101lbs-ft (+/- 3lbs-ft).

Seat locks for multi-link setups (that lock the lower bracket to the shock body) should be torqued to 51lbs-ft (+/- 2lbs-ft).

Seat locks for H.A.S. designs (height adjust systems, where the spring is separate from the shock) should be torqued to 42lbs-ft (+/- 2lbs-ft).

Other components to inspect on our coilovers are items like the dust boot, bump stop, and (if applicable) rubber spring seats.  Some older models of TEIN suspension use a rubber spring seat between the seat lock and spring. This can start to crack over time. If so, get a replacement, or upgrade to the newer spring seat design that does without this rubber spring seat.

If you have our pillowball mount or upper mount included with your coilovers, also check to make sure all components are tightened down properly.

IMG_0117 (Custom)

Some upper mounts included with our kit have a few components that need to be inspected, especially MacPherson strut type designs that have camber adjustability. The cap screws that allow you to slide the pillowball mount for camber must be tightened down to 14 lbs-ft. The flange nuts that secure the upper mount to the strut tower vary by manufacturer, but those never really require anything more than 20 lbs-ft.

Also, coilovers that include our own upper mount may include our own pillow nut. It’s essentially a collared nut that keeps the piston shaft centered in the pillowball. The collared portion will go into the pillowball itself as you tighten. For front strut type designs, this should be torqued to 45lbs-ft, while rears that are not strut type design (like a multilink setup) require 20lbs-ft.

As to torque values for securing our coilover to the lower control arms, you should reference the factory values of the vehicle manufacturer. These can be sourced online through a quick search, or through automotive forums for your specific vehicle (which should be easy to find).

For front strut type coilover applications that reuse the OEM upper mount assembly, it would also be wise to make sure the strut assembly can rotate freely from left to right. Since the car needs to steer, the OEM upper mount has a bearing that allows the strut assembly to rotate with the knuckle assembly whenever you do steer. In some cases, the bearing can be worn and cause a grinding type sound.

Let’s say you’ve done all this basic maintenance, buttoned everything up, and now going for a drive. Maybe you noticed some squeaking noises. Have you checked your control arm and sway bar bushings?

In many cases, bushings are difficult to inspect. Sometimes their placement makes it very hard to see. You may even need to drop an arm just to be able to get a good look at the bushing. Fortunately, most rubber bushings last pretty long and typically only need to be inspected every 3ok miles or so.


When rubber bushings do go bad, they start to crack and as they pivot, they will squeak. Rubber bushings aren’t like many of the polyurethane, or even Delrin type bushings (highly inadvisable for street use), that are free pivoting. Most rubber bushings have a steel outer shell and a steel inner shell or tube, which are bonded because of the rubber. So that means that as the control arm pivots around its axis, the rubber has to stretch and compress. Eventually, as a rubber bushing dries out, it will start to tear itself apart, and that is what creates noises.

IMG_0847 (Large)revised

Replacing an old, worn rubber trailing arm bushing with a free pivoting polyurethane bushing. As you can see here, the trunnion wasn’t even attached to the bushing anymore. The rubber completely broke off. Fortunately, the trunnion’s placement prevented the arm from completely being loose and dropping out of position. Still, that can cause major damage to the underside of your car, and even cause erratic handling.

IMG_0948 (Large)revised

Freshly inserted trailing arm bushing with the trunnion cleaned of old rubber and reinserted into the new bushing. Because the trunnion is now able to pivot freely, it must be inspected frequently and lubricated to prevent the bushing from drying out. Otherwise, it will start to crack and create creaking or squeaking noises while driving.

Some notes about polyurethane bushings:

Polyurethane bushings, which are very common in aftermarket performance, have some distinctions that make them a likely upgrade for most consumers. Poly bushings, even though offered in various durometers (hardness), have better NVH characteristics than rubber bushings. And, because many of them are much harder than rubber, they don’t deflect as much under load, contributing to better maintained wheel alignment. When they do deflect, they tend to have better memory and can return to shape much more consistently.

00a6e_1s (Small)

TEIN Polyurethane Control Arm Bushings for GRB Subaru. These require a special type of lubricant (included with the kit) to prevent them from drying out.

However, polyurethane can also dry out. And there’s a special grease that’s needed for periodic maintenance, which most aftermarket bushing manufacturers either provide or sell their proprietary grease.

IMG_0892

So, periodically inspect your bushings since they are just as critical for a properly operating suspension.

Having a great handling car is obviously very fun, but it still requires upkeep to maintain that great performance you expect out of it.


Effects of Aerodynamics on Suspension

Enzo Ferrari was once quoted for saying, “Aerodynamics are for people who can’t build engines.” Funny guy, that man. Colin Chapman, however, saw aerodynamics as the future of F1, which reflects heavily on the design direction of the F1 cars you’ve seen for the past four decades. It has been used effectively and with amazing results.

If you follow much on the ever-growing Time Attack racing series, you’ll see or hear about aerodynamics. Other than amazing and tractable power that most engines can be tuned for these days, along with a great suspension and tire package, the only way to tick off several tenths of a second from your lap seems to be crazy aero. Incredibly crazy aero. So much so that the cars on track resemble upside down airplanes. Makes me wonder exactly how much downforce these kitted cars are generating.

Top Fuel S2K

This hammerhead shark looking thing comes from the Top Fuel team in Japan. Currently breaking records at Tsukuba and Fuji Speedway. The front splitter and rear wing are waaaaay too wide for use on the street, which this car will probably never see again anyway. Downforce is what’s keeping these fully prepped unibody cars fast (as well as tons of power).

Aerodynamic tuning seems to be a fairly straightforward approach these days, with many people fabricating their own front splitters, canards, flat bottoms, and rear diffusers. While this post is not necessarily about how aerodynamics work both positively and negatively, it is important to know that it is very effective, and it takes more fine tuning of the rest of your vehicle to make the aero work in harmony with your car.

So how does all this extra downforce from aerodynamic gain affect suspension?

Evasive Blue S2K

This Evasive S2000 had a full aero package. Front splitter, flat bottom under tray, & rear wing work together to generate sufficient downforce. Using street tires (treadwear 180) and Evasive Motorsports’ own Evasive-Spec TEIN Super Racing dampers, this Street RWD class Time Attack car broke records at Buttonwillow in Street RWD class events.

When we set up a suspension kit for a vehicle, we have to factor several items prior to deciding which spring rates will work best, followed by how we will valve the dampers depending on what the driver experiences. After all, it is the driver’s confidence we’re trying to build up, which in turn translates into a high performing car if they can do their part behind the wheel.

Evasive GT-R Braking

Believe it or not, this GT-R from Evasive Motorsports has relatively mild aero components. Still, it’s a matter of finding the right balance for the vehicle at differing speeds. For us as a suspension manufacturer, we’re always concerned with how the stability of the car is affected through body dynamics, whether under turning, accelerating, or braking (as in this picture).

We also have to take into account what type of ride height the customer wants to achieve, which in turn affects the damper length, including droop/extension and bump stroke. Keep in mind that your steering geometry must be set for that specific ride height, as you want minimal effect in bump steer.

Evasive S2K Turn

This S2000 going through a turn looks like it is flat relative to the curve. However, you can see that the asphalt is slightly cambered, and the inside wheels/tires need to droop down and maintain contact for greater traction, which it is doing. Otherwise if the wheels were to have lost contact, traction suffers and the balance is thrown off. This car also has relatively mild aero additions.

In its heyday, aero tuning wasn’t understood as it was today. Early reports in F1 stated that the vehicle would oscillate, or “porpoise”, at varying speeds. If the suspension setup was too soft, this problem could be exacerbated by this porpoising phenomenon. This effect disrupts airflow and causes instability as speed increases.

F1 typically has the best examples of the effect of downforce on suspension. For one, F1 cars of today have incredibly stiff suspension. Some control arms actually don’t even have any pivoting point and rely on flexing to provide suspension movement. If you’ve seen an F1 car in action, you’ll know that, for the most part, the circuits they drive on are very smooth. Nevertheless, suspension is still necessary as the car still has to pass through gaps, curbing, etc. However, F1 regulations allow a tire with a really huge sidewall. So this in turn acts as suspension (just without proper damping; also helps create a fairly large contact patch for the tire). If it were tires with a very low aspect ratio (small sidewalls) the car would have to rely on softer suspension, which is what they want to avoid doing.

Still, when you watch an F1 car, you can notice how little body roll there is (it’s noticeable, but not as severe as a street car). The suspension does move, so it is functional. It seems though that the tires, as they deflect and deform through turns, adds to body motion.

sahara f1 kerb

Obviously this Sahara Force India car is going past a curb, which makes the car look like there is some body roll. Of course there is some roll, just very minimal.


massa ferrari

This older spec Ferrari shows just a bit more body roll at turn-in.

But, on straightaways, it is clear that F1 car suspension is working. Thankfully this has been made clear in the 2015 regulations as all cars must use a titanium skid plate. And when this skid plate makes contact with the ground, it makes an amazing shower of sparks seen coming out the car’s back end. Why is this helpful? because clearly the car is making enough downforce to cause the skid plate to scrape along the ground.

lotus f1 sparks

We kinda dig the show current F1 cars put on, especially with their titanium skid plates.

This is a factor that is still important with street cars set up for racing. You may find a need for super stiff suspension, but for the most part we don’t have, or get, to drive on super smooth circuits like F1 cars do. That means we need a suspension that can track the road surface better and help maintain good traction. Super stiff suspension with very little droop travel with literally be skipping off the curbs and bumps. It wouldn’t take a whole lot to make the car feel unsettling. So, therein lies the problem. Then, once you add aero parts like a front splitter, flat bottom, rear diffuser, & rear wing, you’re compounding the problem. It’s a balancing act.

For the most part, our Super Racing dampers are designed and valved with some specific spring rates in mind for each application. In fact, some of our sponsored teams, like SportCar Motion and Evasive Motorsports here in the U.S., have pretty aggressive aero on their Time Attack vehicles, yet they still use our recommended spring rates. Really aggressive aero, and even a change in stickier tires, may require a small change in spring rate, maybe something slightly stiffer (+2kg/mm), and that is more than enough.

Ultimately, it is best to try a suspension kit as-is at our recommendations, do your testing, work on any other additional modifications you make to the vehicle, continue testing, then you can assess what changes you need to make to your suspension. It can be as simple as damping force changes, ride height changes, or spring rate change. Starting with an out-of-the-box setup is at least a good baseline. Just as with any other modification you make to your car, modifications to suspension can also be made. We’ve already spent the time to engineer the the suspension kit for your specific application (albeit a relatively stock vehicle), so that gives you a great baseline to start with.

Since I brought up what Enzo Ferrari said- “Aerodynamics are for people who can’t build engines”, how about this new engine for the 488 GTB:

ferrari-488-gtb-engine-image

Damn, that looks sexy.


One extra thought- while it’s nice to try and pioneer your own aero setup for your car, sometimes it’s best to go with a tested/developed setup for your car. Piecing together components from different manufacturers, although looking very similar and wanting to create similar effects, may not net the results you are looking for. Aerodynamic tuning can be very tricky to get right, depending on what you want to achieve.

CFD-ANSYS-BMW-SauberF1

Beware of Poor Quality Springs!

We’ve put a great video out on YouTube showcasing the effects of a poor quality spring compared to our own springs:


Goes to show that not all products are created equal. We spend a lot of resources for our research and development departments,  and for good reason. We’ve built a great reputation of offering high quality performance parts at pretty reasonable prices. We have to uphold that reputation, and to do so means constant product development.

It’s sad to know that there are “high performance” suspension manufacturers that are mass producing components without ever testing them. We put each and every one of our designs through rigorous testing to ensure their reliability and performance. Everything we design must pass our extensive tests before it ever reaches you, our customer.

I’d rather spare you the whole “you get what you pay for” speech because, in some cases, the consequences of not knowing the first time around could mean your safety, and potentially your life. So, take it from us- if you really want something, don’t choose what you think is the second or third best option just because it will save you some money. Purchase from a reputable manufacturer. Purchase with confidence. Most of all, purchase wisely. If you don’t have the money now, you should save up for what you really want. Or, just shop around and find a great price from one of any of our authorized TEIN dealers.

For a list of our authorized TEIN dealers, please visit the following link:

http://www.tein.com/dealer_list/index.html