
In continuation of covering the proper methods of torquing our dampers we will be covering how to torque the Top Lock Nut.
Torque Specs will not be covered this time around, only the proper methods for torquing. To find the correct Torque Specs for you vehicle’s dampers consult the Installation Manual that came with your kit. For those who have dampers that require use of the stock upper mounts, consult the factory torque specs.
If your dampers use TEIN upper mounts but you don’t have the original Installation manual, contact us at 562-861-9161 or email at tus_sales@tein.com. We can send .pdf copies of our installation manuals to you.
Once again, the use of a table mounted vice to keep the dampers from moving (covered HERE) is recommended.
These are the tools needed to properly torque the Top Lock Nut:
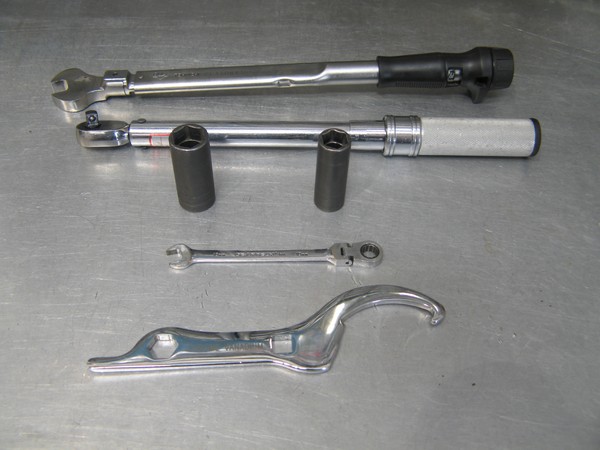
1 Torque Wrench with Spanner Wrench Adapter (17mm and/or 14mm depending on your vehicle application)
1 3/8 Inch Torque Wrench (A 1/2 Inch Torque Wrench may not provide low enough torque settings)
1 21mm Socket
1 17mm Socket
1 14mm Socket
[Sockets needed depend on your vehicle application]
1 Open Ended 10mm Spanner Wrench
1 Open Ended 8mm Spanner Wrench
[Spanner Wrenches needed depend on your vehicle application]
1 Tein ADJ Wrench
Strut Type Dampers
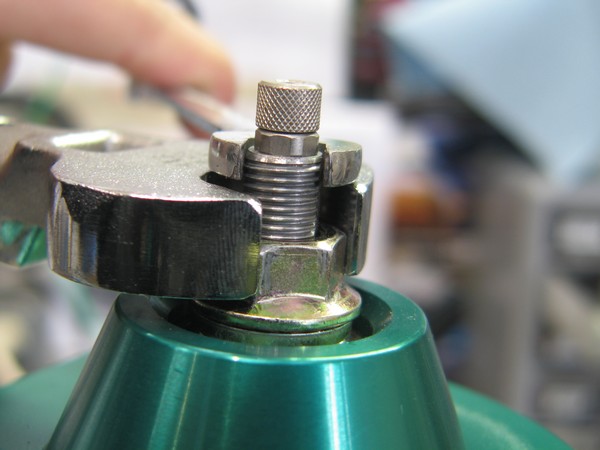
Some Strut Type Dampers’ Piston Rods have notches machined into the top section [Pictured Below],
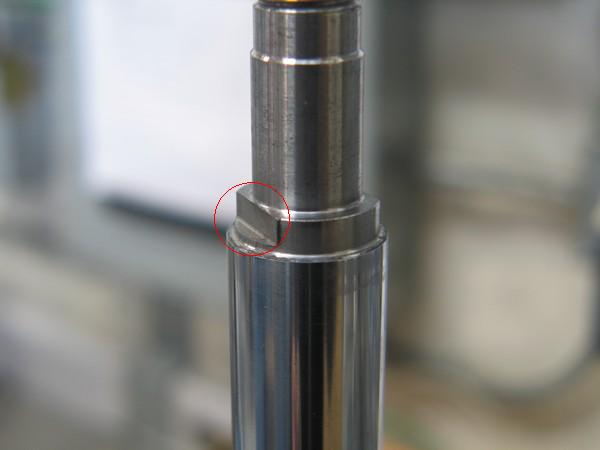
that correspond and line up with notches in the Upper Spring Seat [Pictured Below].
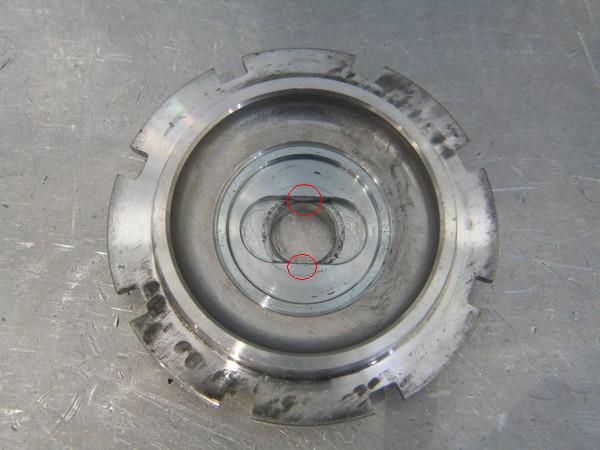
When assembling the damper make sure these notches line up. If they are not lined up while tightening the Top Lock Nut, the Piston Rod and/or the Upper Spring Seat will become damaged.
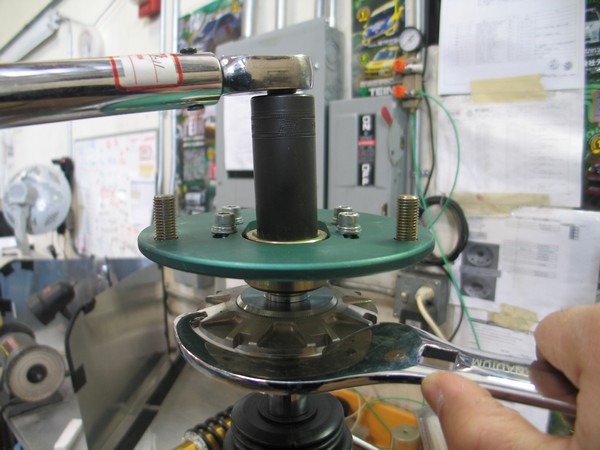
With everything assembled and lined up correctly; using the TEIN ADJ Wrench to hold the Upper Spring Seat and the 3/8 Inch Torque Wrench with the correct socket on the Top Lock Nut, turn until you hear the click.
Some Strut Type Dampers do not utilize a TEIN Upper Spring Seat. As the above method will not work for those dampers refer to the method used on SA Type Dampers below.
SA Type Dampers
SA Type Dampers’ Piston Rods have machined notches that accommodate a 8mm or 10mm Spanner Wrench.
[Pictured Below]
[Spanner Wrench size will vary depending on your vehicle application]
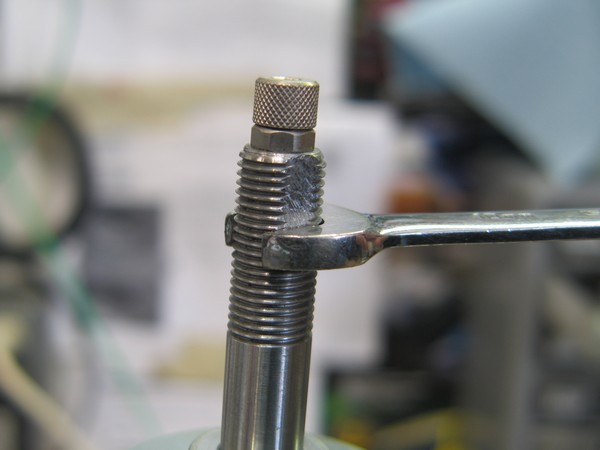
With everything assembled correctly; using the 8mm or 10mm Spanner Wrench to hold the Piston Rod and the Torque Wrench with Spanner Wrench Adapter to turn the Top Lock Nut, turn until you hear the click.
Caution: Over-torquing the Top Lock Nut can cause the Spanner Wrench to slip, damaging the Piston Rod Threads in the process.
If all else fails and an Impact Gun MUST be used, in accordance with our Instruction Manual, set the Impact Gun at the lowest torque possible. A 3/8 Inch Impact Gun is recommended as a 1/2 Inch Impact Gun may be too powerful and can break the Piston Rod. Also, make sure to use short bursts instead of a long continuous burst with the Impact Gun.
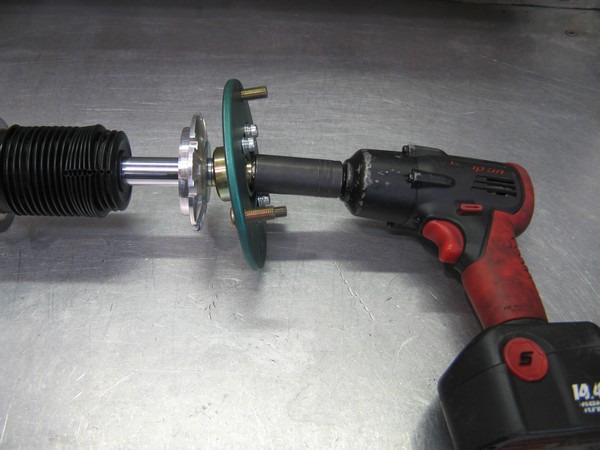
When tightening with an Impact Gun the Piston Rod must not be allowed to spin. The impact and high rate of spinning the Piston Rod can achieve when using an Impact Gun will loosen the internal nut and damage the damper.
For Strut Dampers, use a TEIN ADJ Wrench to hold the Upper Spring Seat while tightening the Top Lock Nut.
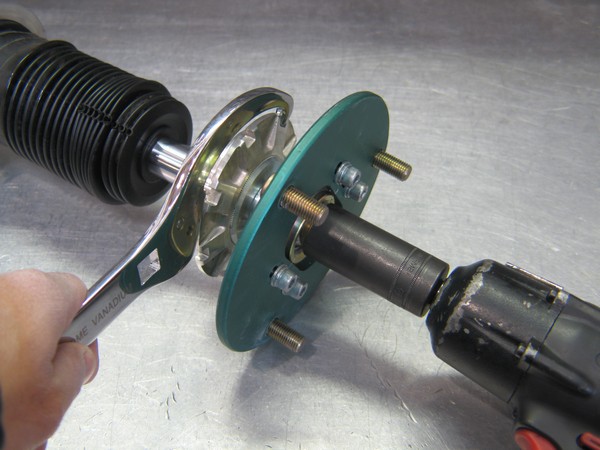
If your Strut Damper does not utilize an Upper Spring Seat that can be grabbed with a TEIN ADJ Wrench then follow the same instructions as the SA Damper below.
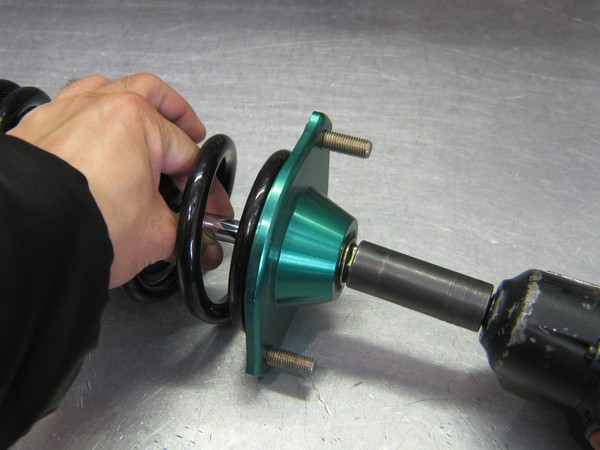
For SA Dampers, grab onto the Piston Rod with your fingers as such to prevent the Piston Rod from spinning. Do NOT grab the piston rod with pliers or any other tools as they may scratch the Piston Rod that will damage the Oil Seal and cause an oil leak.
Note: The use of an Impact Gun must be the absolute last resort. TEIN assumes no responsibility for broken or damaged dampers due to incorrect assembly and installation.