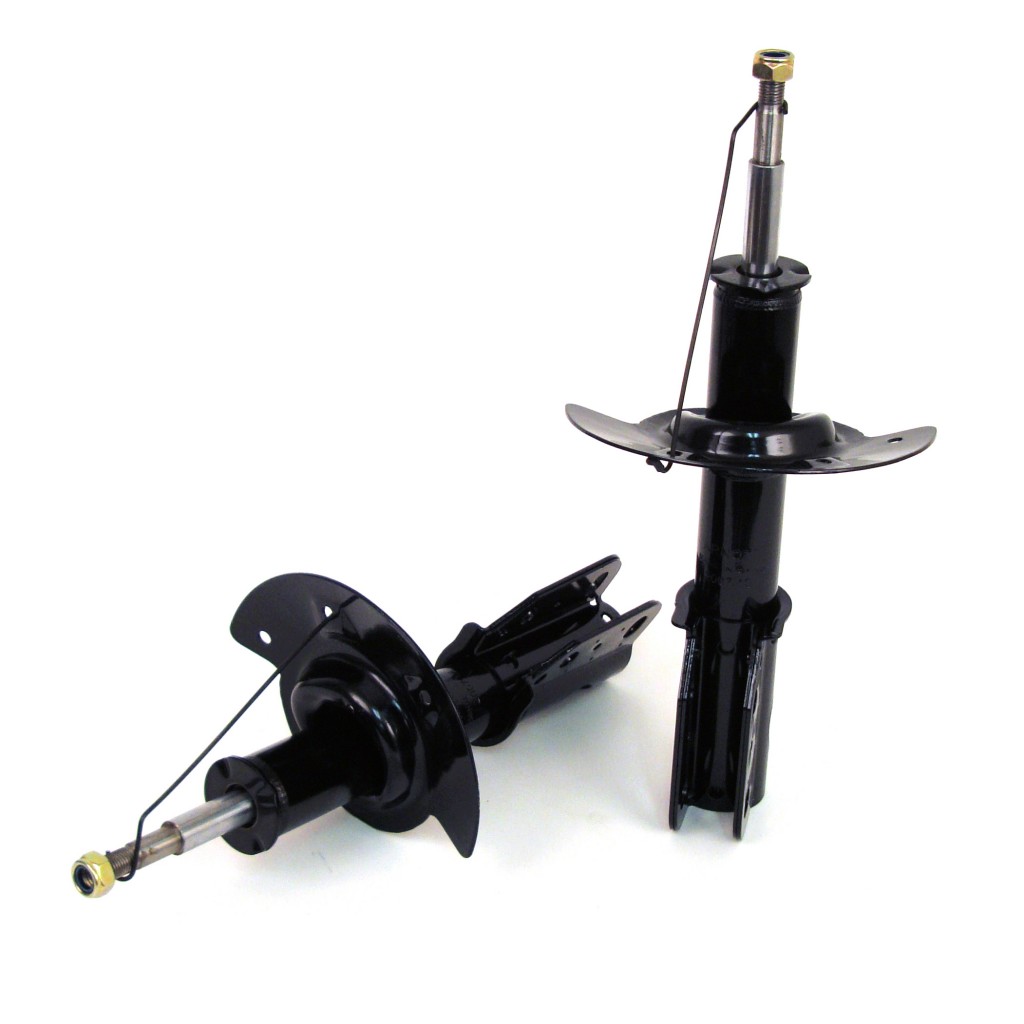
2017+ Honda Civic EDFC Install

With the release of the current body style Civic FLEX Z Coilovers, we have been receiving more and more inquiries of how the EDFC Motors would mount, specifically the rears due to its limited accessibility. Luckily a close friend of ours was interested in the EDFC Active for his vehicle so I went ahead and did the install for him.
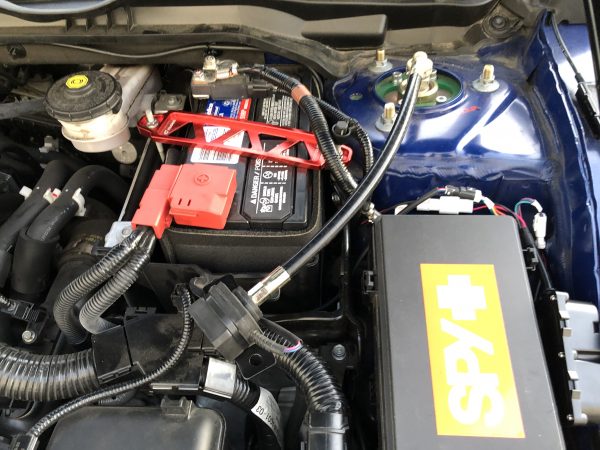
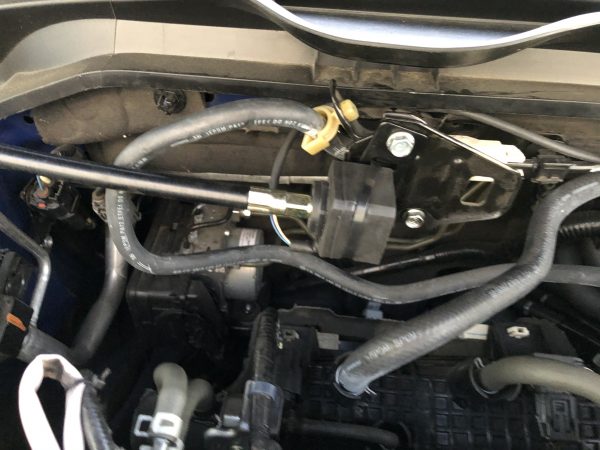
Since I had never really had a chance to look over the vehicle you can say I went into this blindly. Initially accessing power for the EDFC Active controller and driver units seemed to be impossible (at least in the engine compartment area) without requiring modifictions. I basically just wired up all three to the main fuse box under the dash. Also for reference, the Driver Unit power cables are be able to reach the main fuse box under the dash, the rear being longer and front slightly shorter in length. I was under the impression that they were the same length. The front Driver Unit was installed next to the Engine Compartment Fuse Box and the rear was placed on the backside rear bulkhead. Both were in decent areas for placement. However it’s eventually up to you on the placement for the driver units. Just make sure the heat sink portion of the driver unit has enough space to dissipate heat. Power source was setup first as I wanted to avoid staining any of the interior, since the rears required the shocks to be removed.
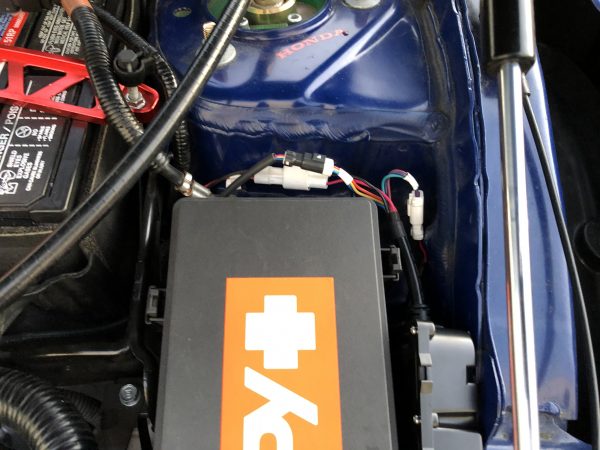
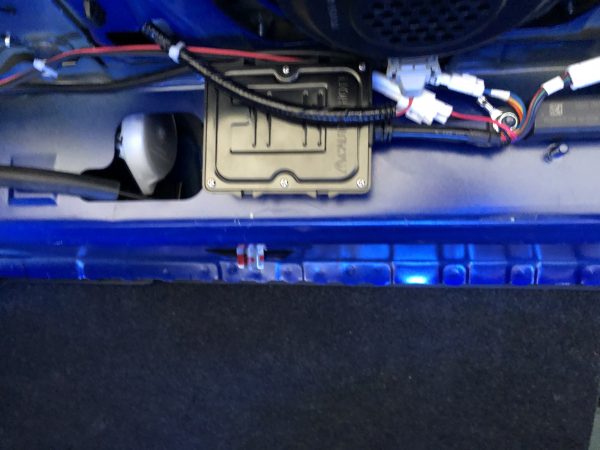
Engine Compartment Driver Mount
Rear Bulkhead Driver Unit Mount

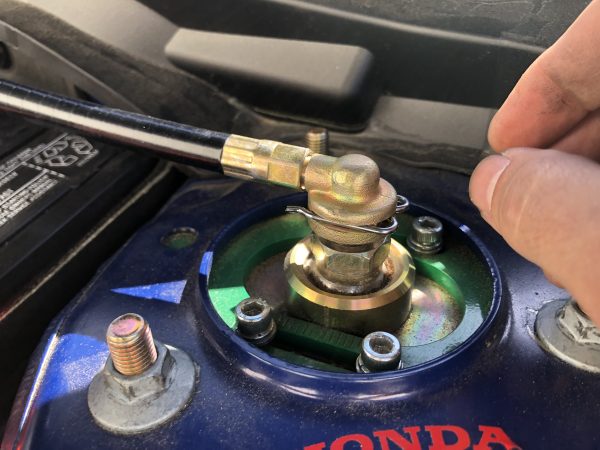
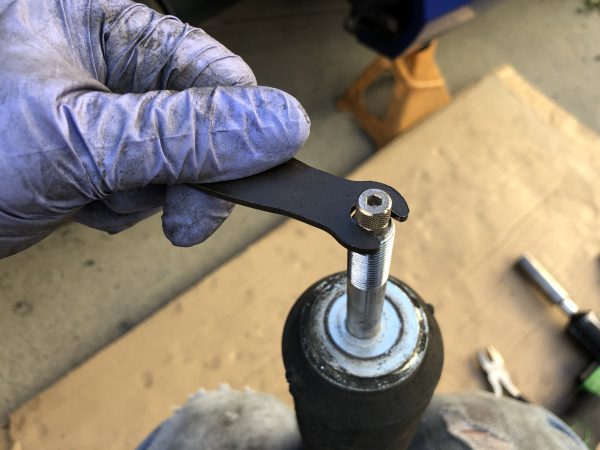
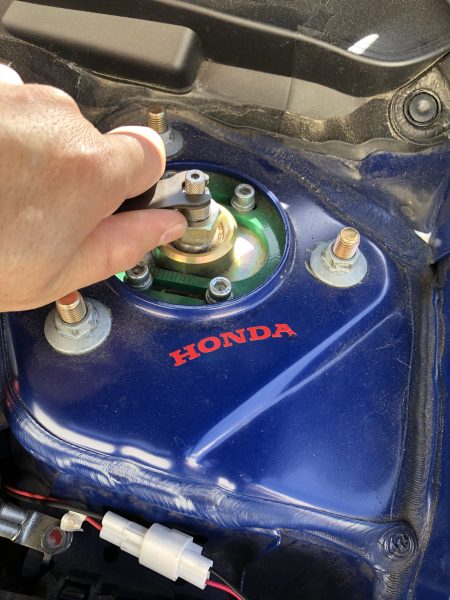
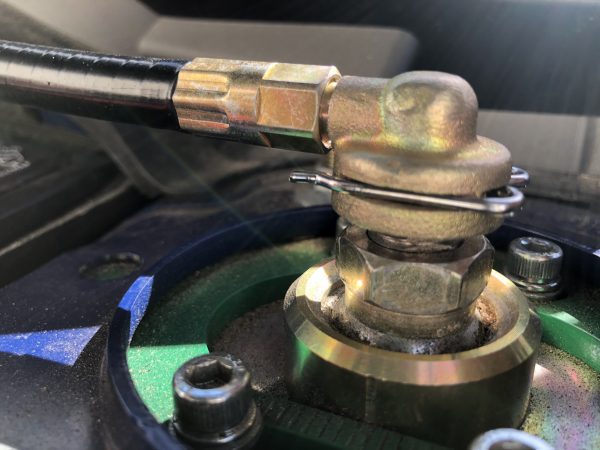
Installation of the front for this Civic required the use of the EDFC Motor Extension Kit to relocate the motors. Although it looks like the EDFC Motor will clear the hood, it in fact does not. The Click Assembly is first removed with the Hex Bolt. Once removed I applied the supplied grease to the hex bolt hole, wiping any excess grease from the piston shaft.
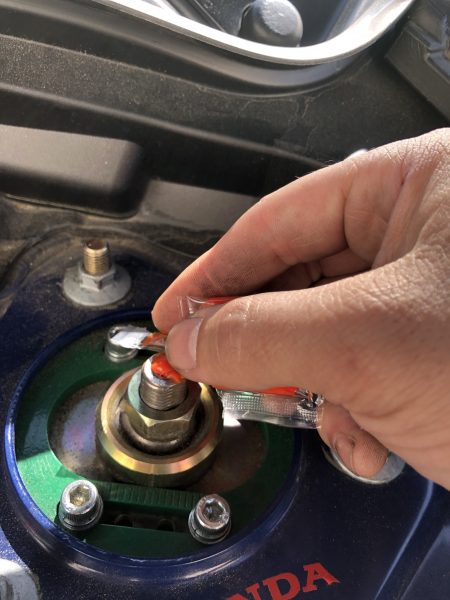
Next a small amount of Thread Locker (also included with the EDFC Motor Kit) is lightly applied to the piston shaft outer thread on both sides (where the Extension Kit’s Top Adapter screws on to).
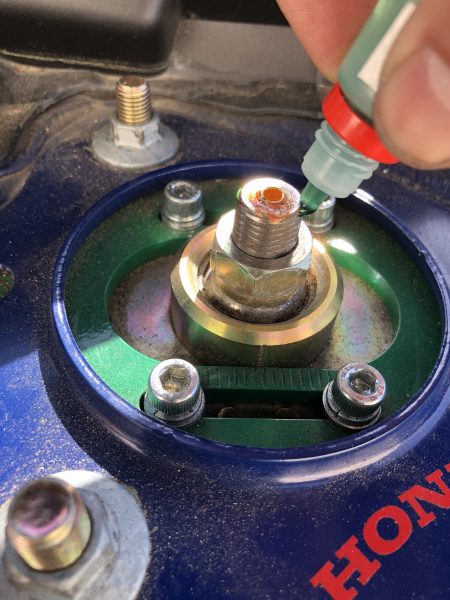
Then the Top Adapter base is tightened onto the shaft using a 19mm wrench. Please note that a very minimal amount of force was exerted to the Top Adapter and should not be overtightened as it can break. Next the gold adjusting rod (Conversion Rod) is installed in the Top Adapter hole.
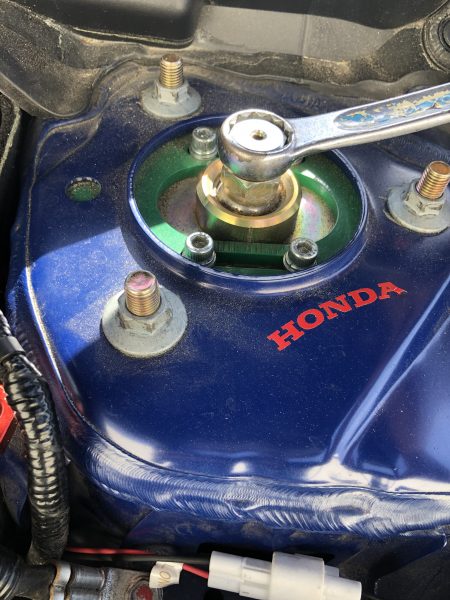
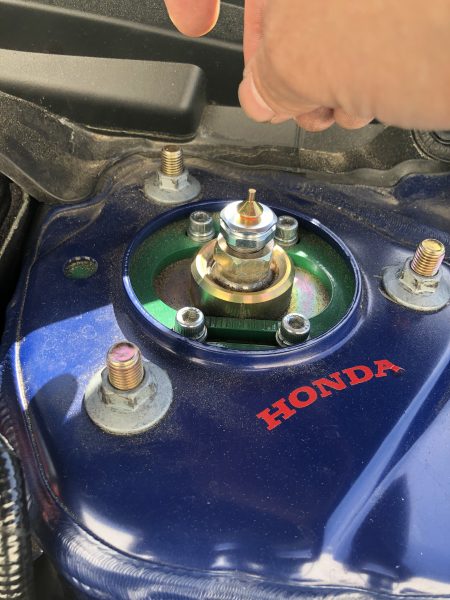
Prior to installing the 90 degree angle (Cover) and clip to the Top Adapter, I installed the Extension adding threadlocker on it and hand tightened it. Make sure that the Inner Shaft is turned out as to avoid any hangups with it against the gold Conversion Rod when installing.
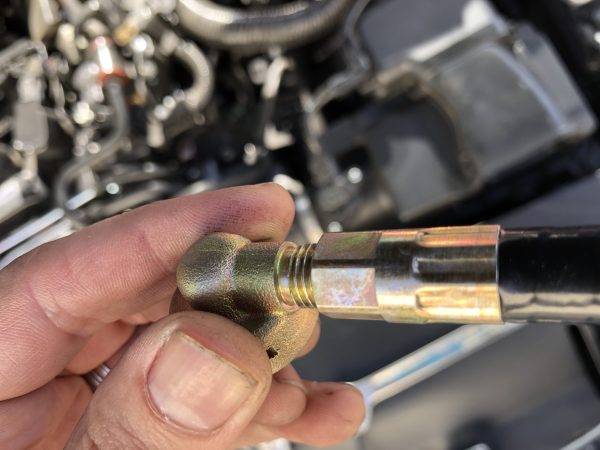
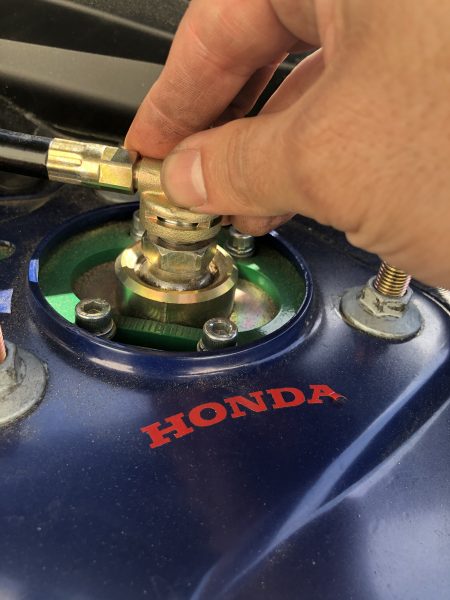
Then proceed to install them on to the Top Adapter pressing down firmly to also press down the gold Conversion Rod and allow you to insert the locking clip to lock against the base. Afterwards add threadlocker to the other end of the Extension and proceed to install the EDFC Motor and also hand tightened it. Motor mounting location is up to you as some may have different locations preferred then the ones I had chosen. Also, do not bend the Extension (no U bends). It only allows a minimal amount of bending.
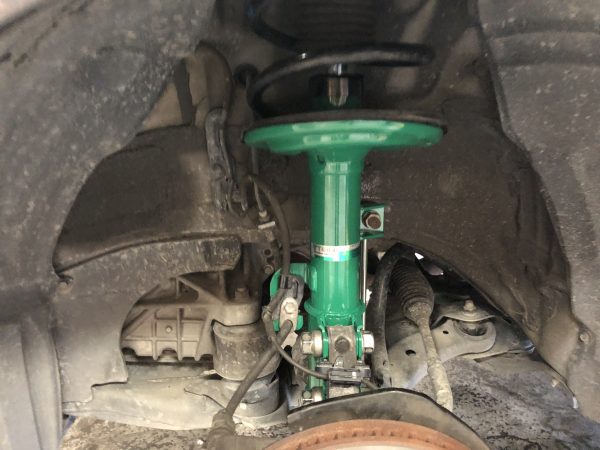
The fronts were not too bad to install. However, the rears were another story. Since only TEIN Japan had a chance to do an EDFC installation noting down key areas in the rear shock’s mounting tower where the EDFC motor cable is to exit, this gave us an opportunity to see if this would be the same for U.S. market applications. The wheelwell liner should be removed before uninstalling anything as it allows for a clear view of the shock mount tower area.

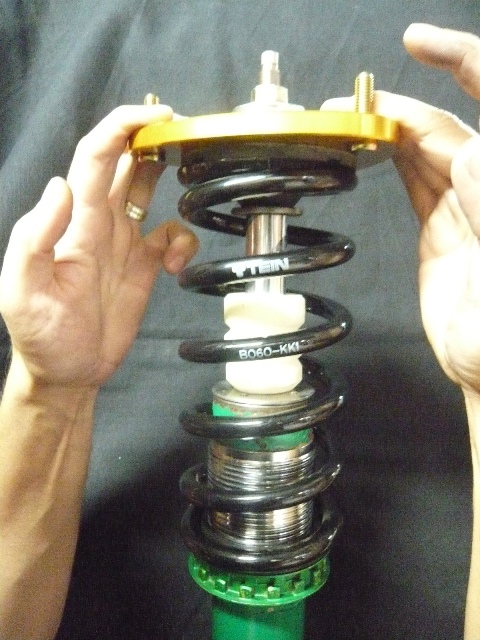
Due to limited accessibilty of the lower shock bolt, the rear spring should also be removed. Once the shock is removed the upper mount also needed to be disassembled to allow removal of the click assembly.
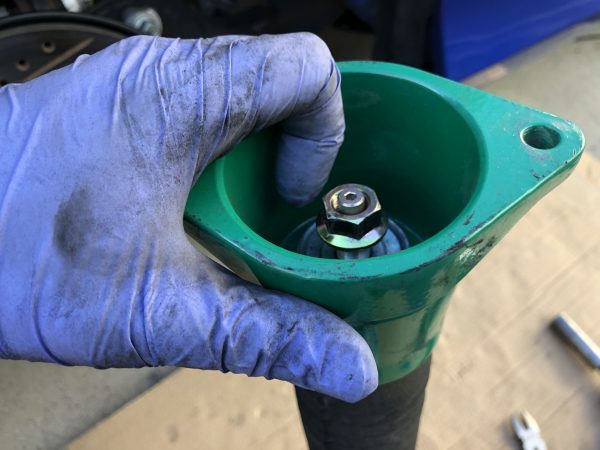
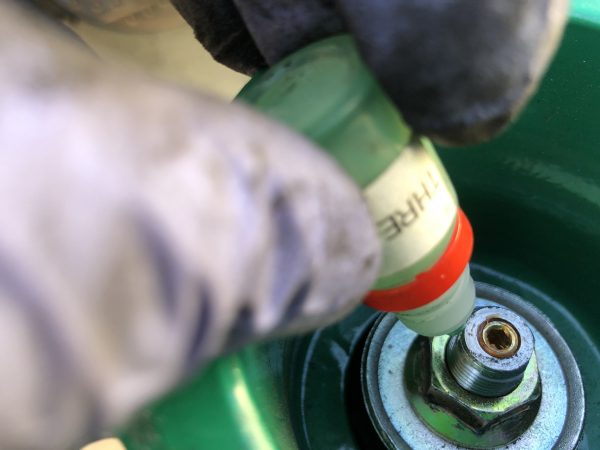
Once the click is removed apply the grease into the hex bolt hole then (applicable to EDFC ACTIVE and ACTIVE PRO models) install the supplied gold color hex bolt flush with the top of the piston rod. Reinstall the mount back on the damper. Apply grease to the hex bolt, then apply threadlocker to the piston shaft threads.
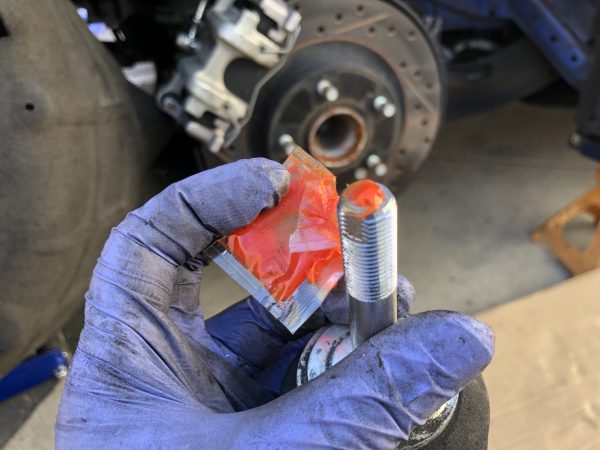
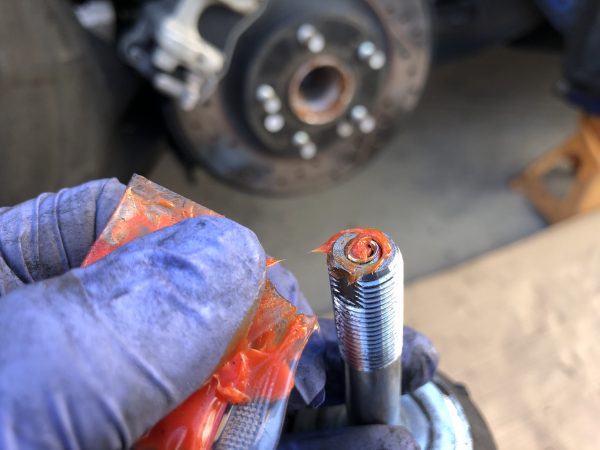
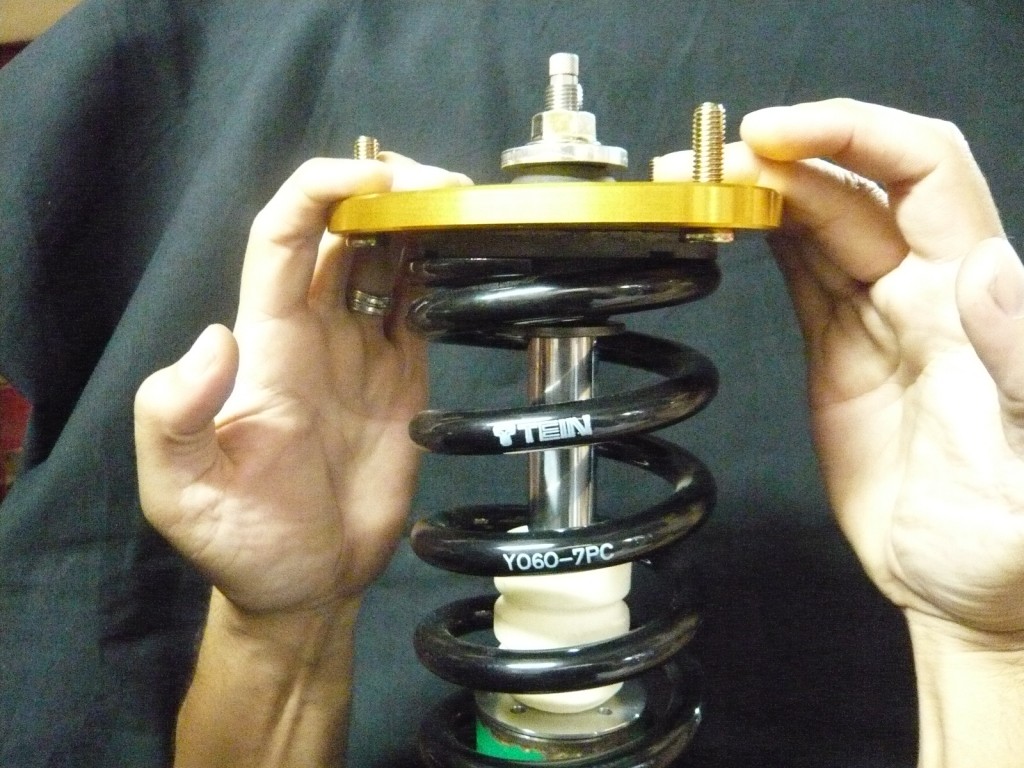
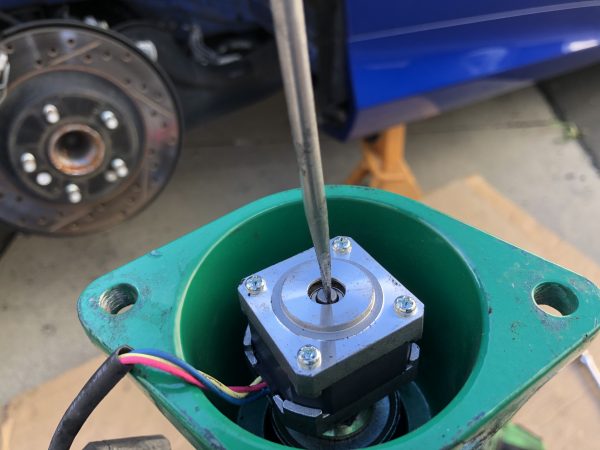
Proceed to install the EDFC motor hand tight to the threaded piston rod. Now, check that the EDFC Motor’s shaft turns freely by using a flathead screwdriver to turn the shaft- you should be able to complete several turns in either direction (it should eventually stop in either direction). The EDFC Motor cover was a slight pain to install since accessibility of the motor inside the cup-shaped upper mount was extremely limited. On a side note, I have seen where the Motor cover was preinstalled and a slit cut on the top of the EDFC Motor allowing for screwdriver access to the Motor’s shaft. Then once you check for free movement of the shaft, the slit can be resealed with silicon. Either method of EDFC Motor install works.
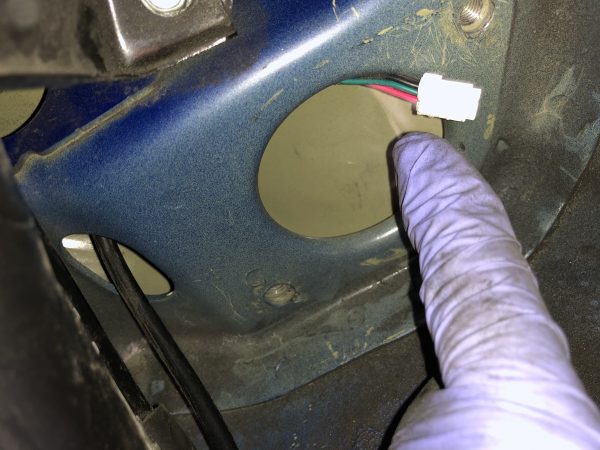
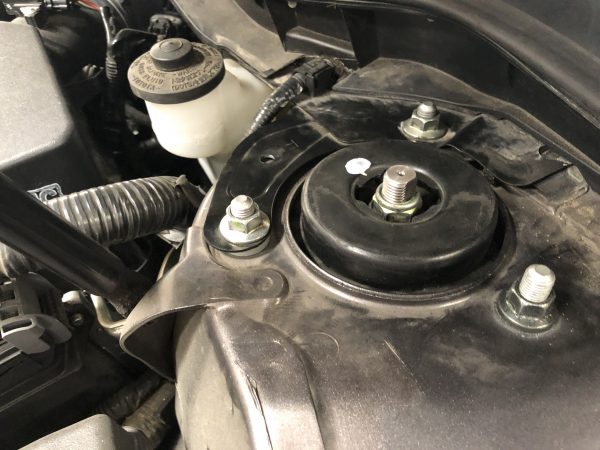
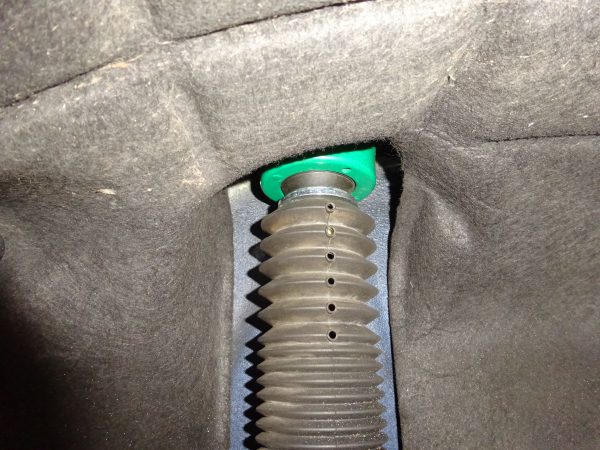
Prior to reinstalling shock, the EDFC Mid-Cable would need to be installed. As you can see in the images, there is a small access hole next to the main tower hole where the shock would mount.
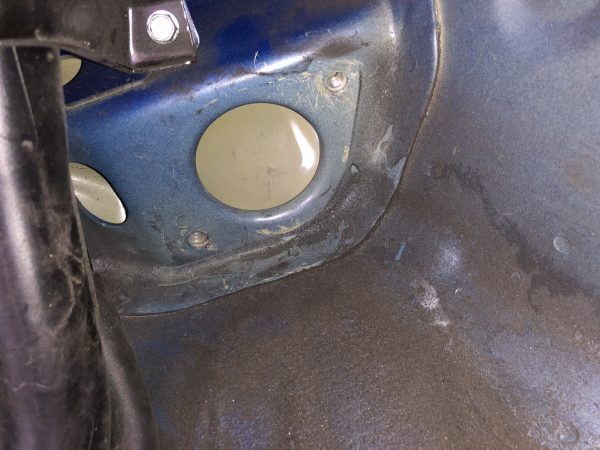
The male connector of the mid cable needs to be fed through the smaller access hole over to the shock hole. Please take note that the cable connector also needs to be pushed through a small clearance on the top upper corner of the smaller access hole (as shown in the noted image).
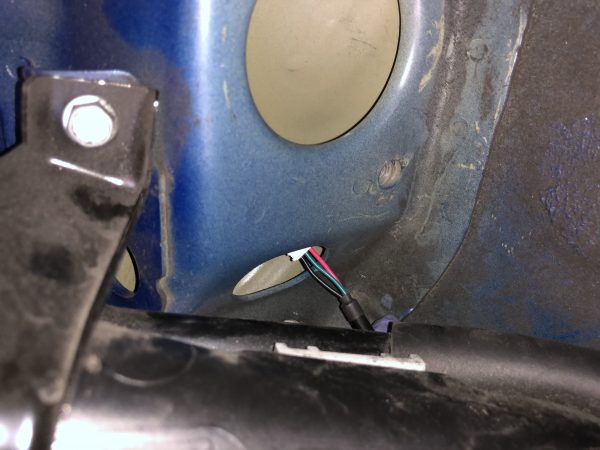
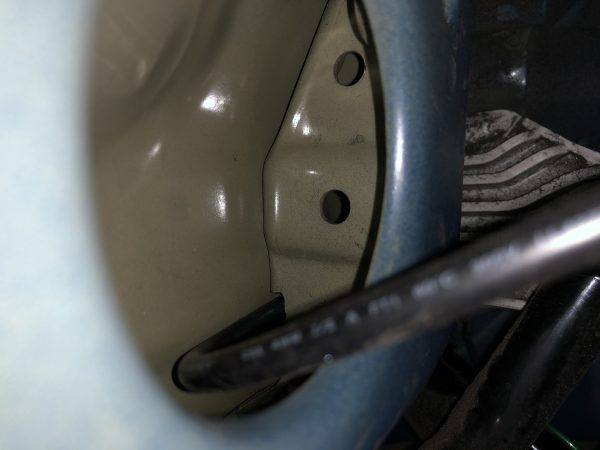
Once pushed through, position the shock on its mount (I recommend to install the bolt through the lower shock eye ring bushing for support.) then connect the two cables together and gently pull the mid cable and EDFC motor cable through. During this time you would also need to move the shock’s upper mount closer to the tower to avoid tearing the cable wire. Once the shock mount is close enough, a bolt can be threaded on to hold the upper mount in place allowing for the cable slack to be removed then the mount to be completely reinstalled. Afterwards you can reinstall the shock bolt and spring, applying suspension preload when tightening up the loosened bolts.The EDFC Mid Cables were ran through existing grommets into the trunk area to the driver unit.
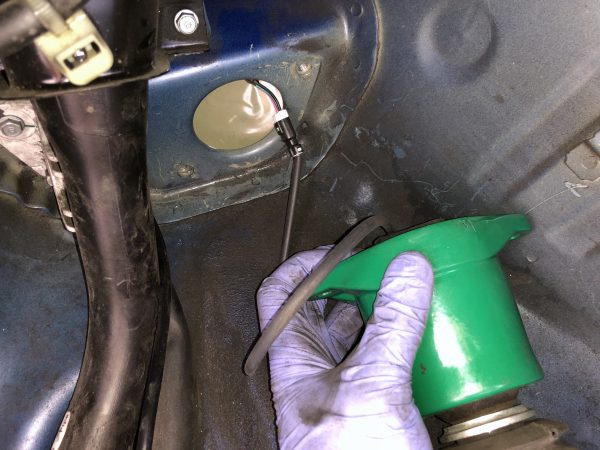
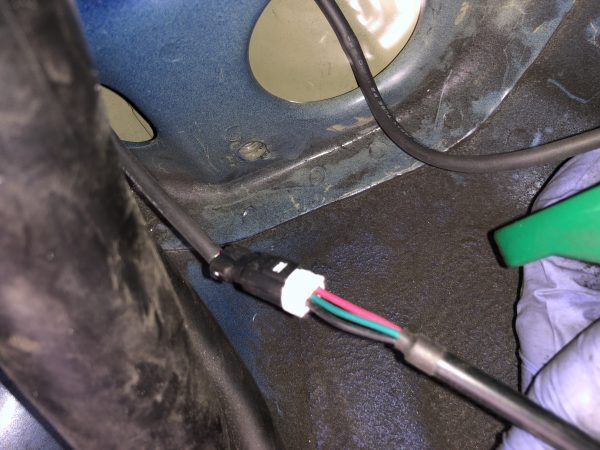
Though this install took a little longer than anticipated, we have a better understanding for installing EDFC ACTIVE (and EDFC ACTIVE PRO) on 2017+ Honda Civic models. Hope this helps out for any out there looking to install our EDFC systems on similar applications. As per usual you can alway contact us direct should you have any technical questions.

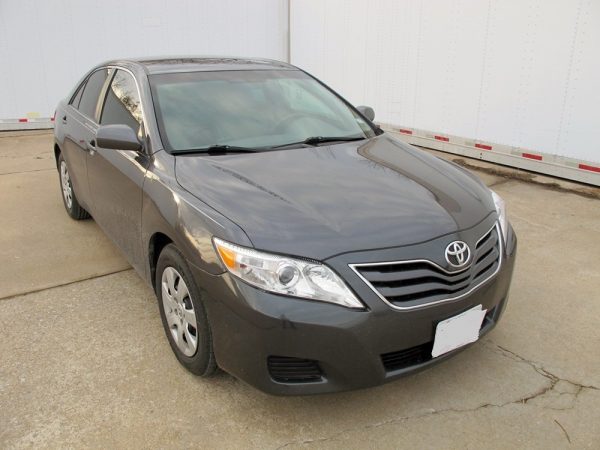
ENDURA PRO Install

With the Endura Pro line still relatively new to Premium OEM replacement market, we would like to continue the promotion with another Endura Pro install. This installation of our Endura Pro dampers was done on a 2011 Toyota Carmy base model. Being that the vehicle was in for some other product testing, we said “why not” and see how the install goes.

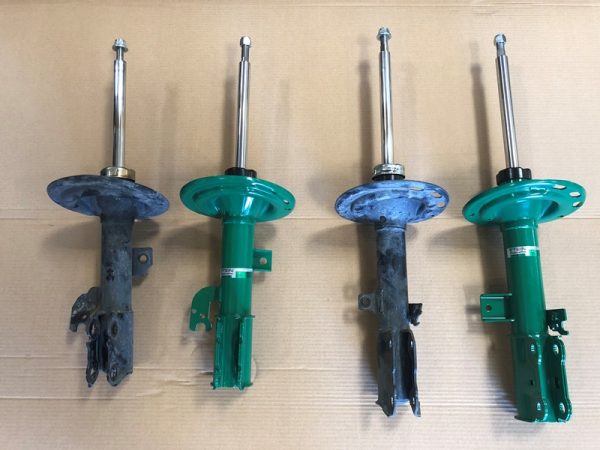
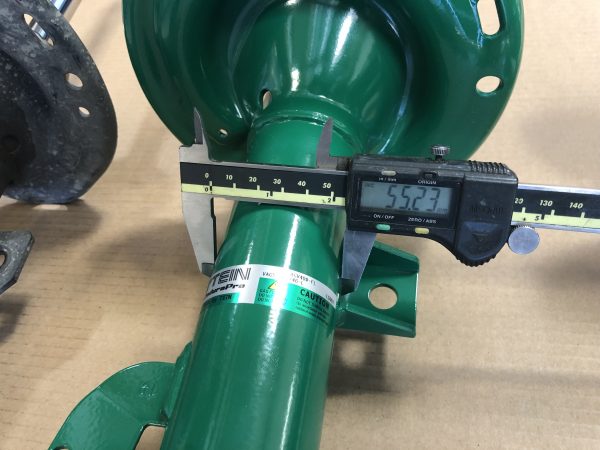
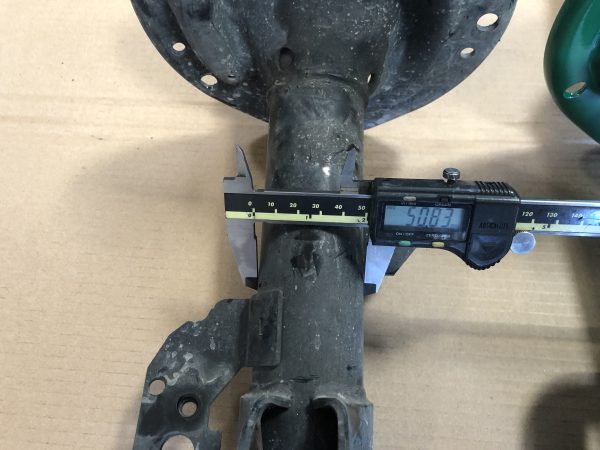
Upon initial side by side comparison between the factory and the Endura Pro, they are overall similar with the exception of the strut body being thicker larger on the Endura Pro for added oil capacity which improves the durability and increases damping force performance long-term.

When we design our Endura Pro line replacement struts and shocks, we try our best to mimic the OEM strut or shock design as to allow worry free component and coil spring installation.

With the Endura Pro Plus offering the damping force adjustability, some top strut mount covers may not pop on as before and would need to be removed. However the struts and shocks will include our add caps to protect the click adjuster from any debris.

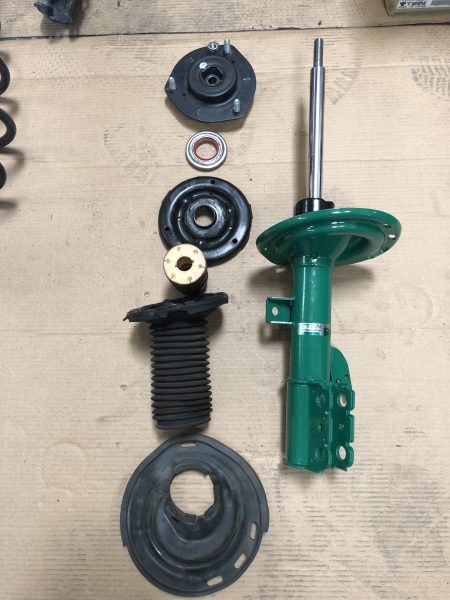
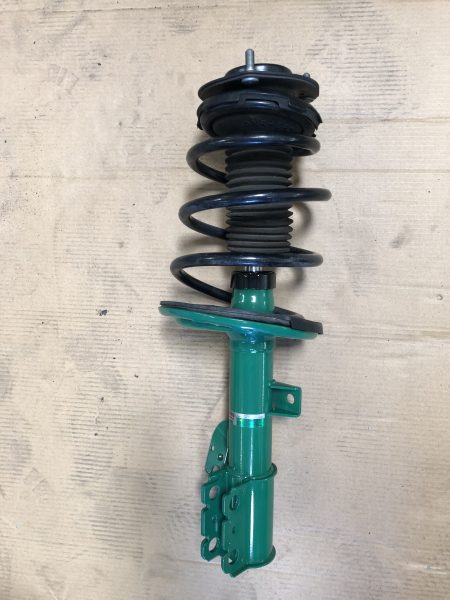
Since all of the OE strut components were in decent shape, we proceeded to just clean them up the install them on the Endura Pro as seen in the image below.


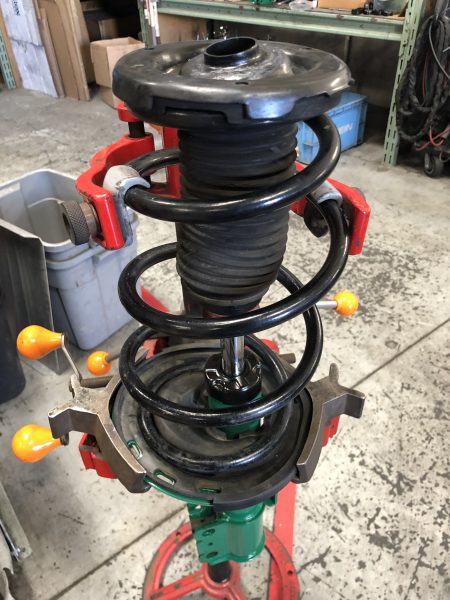
With all components installed including the upper mount being tightened down, everything lined up just as it would on the factory struts. Even the install onto the vehicle, all components lined up and mounted as they should.

Initial test drive impressions left me very surprised. Now obviously most folks would feel that this is biased being that I work for TEIN USA INC. However this was based on how the factory felt as well as other vehicle experiences with the auto parts Monroe and/or cheaper replacements. I feel that the vehicle rode as though it were brand new from the dealership even though with around 70K on the chassis. This would put the factory shocks slightly over the manufacturers recommended  replacement interval of 50K for shocks and struts which can attribute to the original struts being worn but not completely blown. Now another contributor to this ride would be from the Hydraulic Bump Stop system offered on both ENDURA PRO lines.

I can honestly say I am impressed with the ENDURA PRO and look forward to getting a set for my daily driver civic as I am interested in ride comfort of the Hydraulic Bump Stop and the damping force adjustment offered on the ENDURA PRO PLUS. I will definitely be making a post on the install one the time comes.


Coilover Claim That Are Mis-Installations

Many times we receive claims of defective dampers leaking oil which are then requested to be repaired or exchanged under warranty. For the most part the actual cause of the damper failure would be due to mis-installation. Now regardless if its you first time doing a coilover install or have  many years of working in automotive repair, a mis-installation can occur at any time. For the most part the installation instructions included with our coilover systems are straight forward but are usually never read through properly, overlooking the important advisories placed throughout the instructions. Following these advisories will of course lead to a problem free installation.
IMG_2785

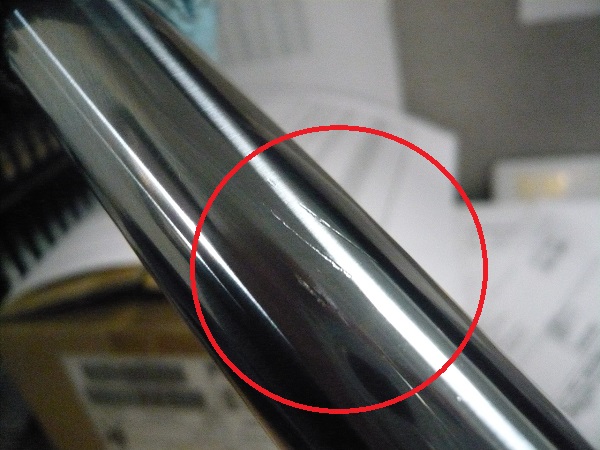
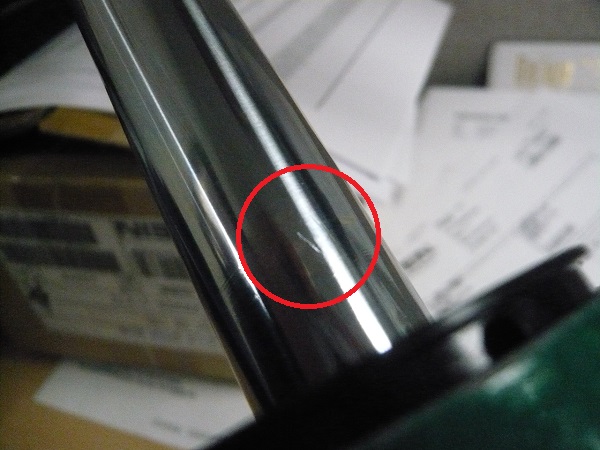
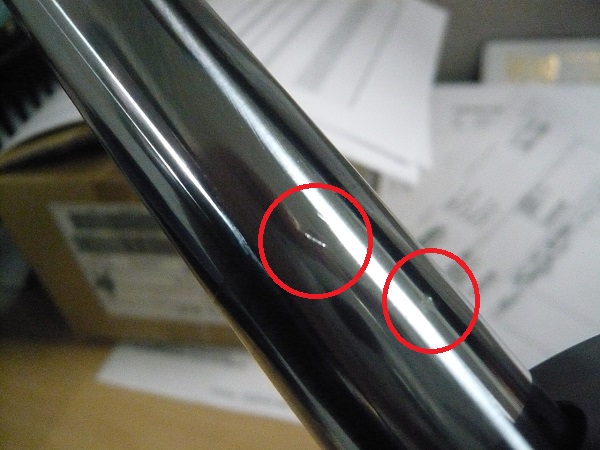
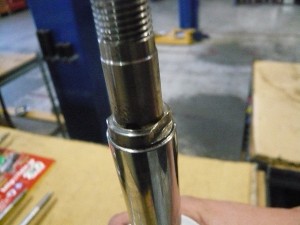
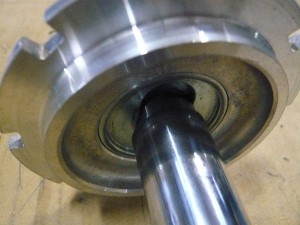
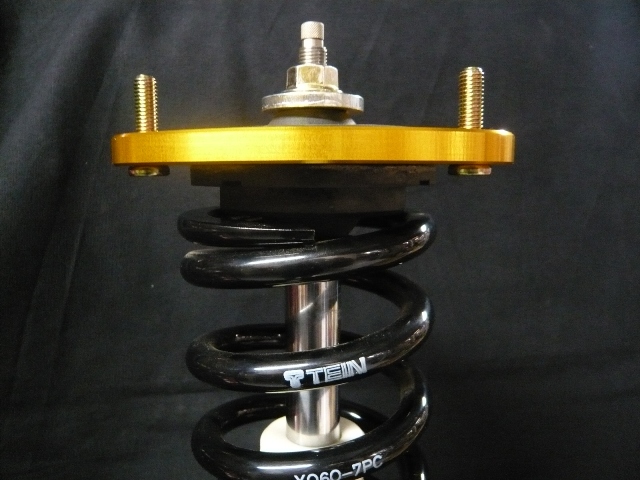
A common disregarded advisory detailing to avoid clamping the piston shaft to tighten the damper top nut. Most consumers and “Mechanics” often are unable to tighten up the top nut claiming that holding the piston shaft body would be the only way to tighten the top nut which would lead up to the coilover to leak. For a better visual understanding what can happen to the piston rod if clamped down, please see the images below of a discarded damper.

P1110132

P1110134


P1110133

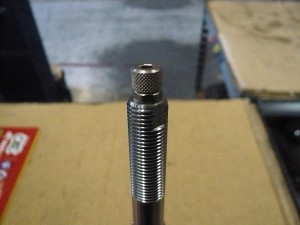
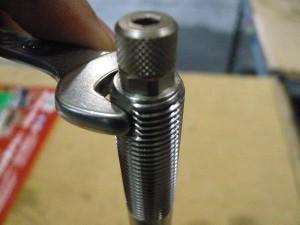
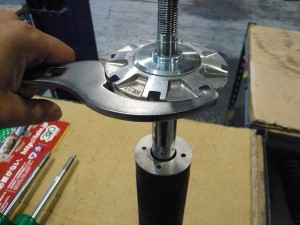
Now to the point of this blog post. This is in no way a manufacturing defect of the coilover. The markings on the piston shaft are what can be referenced as “The Smoking Gun” as it is an obvious tall tale sign that something had been used on the shaft. Do not use anything to clamp down the piston shaft. Our kits would either offer special machined sections of the piston shaft that can be held with a wrench or incorporate the use of the upper spring seat in conjunction with the included adjusting wrenches to hold the piston shaft. If the top nut turns even when tightened but not torqued down, placing the vehicle load on that specific corner then torqueing the top nut will work.

P1110137 P1110138

P1110141P1110146P1110140

When it comes to any product claims, we do our best in repairing those that respectively are a manufacturing defect. If the item is not covered under warranty an explanation is given and detailed for the consumer to further understand the reason for the warranty decline.

Toyota Sienna STREET FLEX Dampers

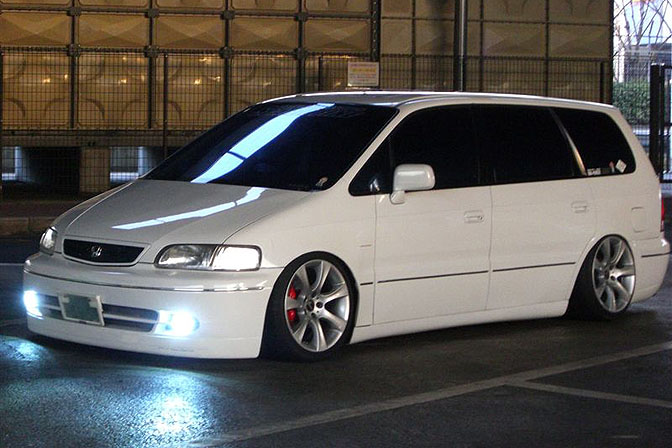
Little interest in the past had come for damper kits on minivans in the U.S. If any inquiries, most were for the Honda Odyssey 95-98 RA1 and Toyota Previa (Estima) TCR20/21 90-97.

honda-odyssey-ssu1-22

Previa

Many years later and minivan interest has gone up. Why? Utility. Small families need a vehicle with ample room, easy access, and convertibility. However, they need something more economical than the typical Chevy Suburban. The minivan provides that. And these days, minivans are equipped with more than just power windows and am/fm radio. Now, you can find full entertainment systems, passenger HVAC controls, and even individual seats (compared to bench seats). Minivans are starting to look way better than the Conversion Vans of the past (WAY BETTER). So many vehicle manufacturers have learned to grow with the trend, and now there are many minivan offerings.

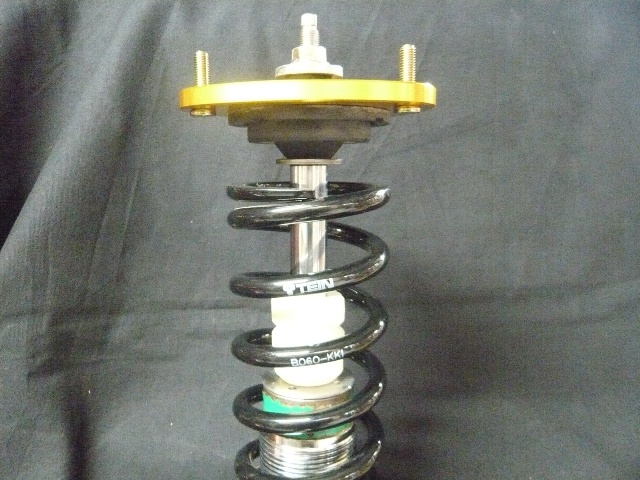
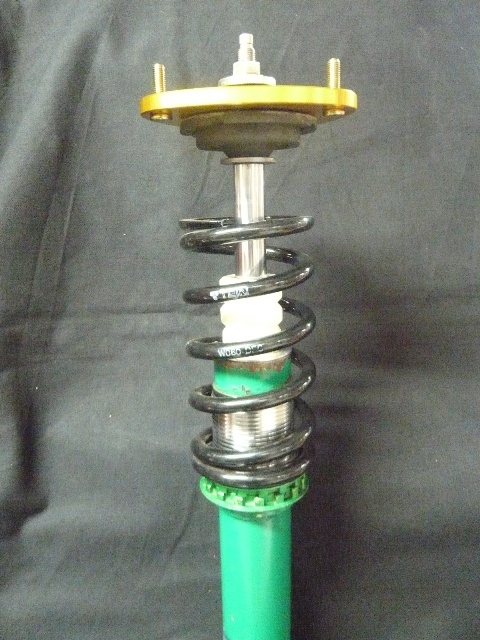
In Japan, and some other countries in Asia, minivans make a lot of sense, especially for the aforementioned reasons. If you only have room for one vehicle, why not make it a true utility vehicle? As we have been told, minivans are even popular with the younger generation. So, this eventually led to an aftermarket for the minivan crowd. TEIN has been manufacturing damper kits for minivans for years. One of our most popular, but now discontinued, was our HYBRID DAMPER kit, which looked similar to a SUPER STREET/STREET ADVANCE setup but had a hydraulically controlled lower bracket to adjust ride height ~40mm up/down. This gave lowered minivan owners extra ground clearance, especially important for owners who had minivans with body kits (true story; you can see some kitted vans in these pics).
The minivan may not necessarily be badged as the “Soccer Mom” vehicle of choice, with SUV’s, and even crossover SUV’s, having continued to grow in popularity in the U.S., but they’ve been catching on in the U.S. One common inquiry we receive is for the Toyota Sienna. Consumers asked for damper kit availability for this application. Previously, another JDM vehicle model (Toyota Alphard) damper kit had been confirmed to work with the Sienna. However it did have some slight complications with the rear damper mounting assembly angle causing noise issues.

Wald-Toyota_Alphard_2009_800x600_wallpaper_03

Finally it looks like we may have hit the nail on the head, as damper kits are now being produced for the 2011+ Sienna’s. The product was designed and tested in our TEIN Hong Kong branch. The vehicle was actually an imported U.S. model Sienna, and the current Sienna is also being imported to other countries, including Japan, which gave them a chance to also confirm testing. With these considerations in its favor, we have decided to release a STREET FLEX damper kit.

STFA.Sienna

The STREET FLEX offers a full-length adjustable body, damping force adjustable with EDFC compatibility, and Hardened Rubber Style Uppermount assembly for the front allowing for an increase in steering response and handling compared to the OE mounts, as well as noise dampening for added comfort when compared to coilover systems with the Pillowball Style Uppermount assemblies.  As the “STREET FLEX” name implies it was designed for the streets which means a comfortable yet sporty ride for a daily driven minivan.

offsetkings-fdlb-14

So now it would be a fight between moms and dads as to who gets to drive low down spec minivan to soccer practice or the grocery store. For further details on this kit please use the weblink below, or contact us direct to 562-861-9161.

http://tein.co.jp/srch/pricelist_e_fromtekigo.php?maker=TOYOTA&carmodel=SIENNA&chassis=GSL30L&skg=TA8&gno=1


Wheel Fitment Complaint

It seems as though lately we’ve been having a high increase in complaints from consumers about tire rubbing.
Now this rubbing encountered is not necessarily coming from the original OE wheel and tires but rather aftermarket wheel and tire set ups.

Wheel Fitment 6

Wheel Fitment 4


With this in mind a common sense factor should be taken into consideration but is always thrown out the window as the car must look sweet with an aggressive offset. Bear in mind that not just any wheel and tire set up can be used on any vehicles.

Wheel Fitment 2

Many consumers that do achieve the desired fitment would also require further modifications to the wheel well and other suspension components. The rubbing has nothing to do with the lowering spring or coilover set up as it never was any type of issue upon the initial testing of the vehicle with the OE wheels. Now the lowering spring or coilover set up may not be to the consumers expectations, either allowing for too much travel when weight is placed on a particular corner of the vehicle causing the rubbing, or not enough to bring the wheel and fender clearance to the desired place.

Wheel Fitment 3

I, too, have ran across this dilemma thinking that the wheel and tire set up would be sufficient enough for the drop I was looking to maintain. With the same issue encountered, rather than blame others for my error, I decided to make further modifications as to allow for the fitment. Let’s just say that it still encountered rubbing at full suspension compression but worked well enough for me.

So, before you decide to lower your vehicle and get new wheels, consider certain factors such as wheel size (diameter, width, and offset) as well as tire size (width and outside diameter). These factors can affect overall wheel fitment and can cause problems with rubbing if not taken into consideration.

***Images shown above were those found on google search and I do not take any type of claim to them being images of my own.***

The 2014 SEMA Show

The 2014 SEMA Show is in full swing. Many exhibitors displaying this years must have products. Just as great as the years past.

10422547_856654131041096_7654534052986804351_n


Check out these other pictures taken of a few TEIN Sponsored cars which are looking sweet seating on TEIN suspension.

10425509_857630457610130_7045192160546505349_n  

   1966859_857154790991030_2372465118017879576_n

10468058_857152157657960_875133915533753052_n

 For new photos of the show, check out the TEIN USA facebook and Instagram pages. Thanks to those who have had the chance to stop by our booth this year. If you havent and would like to their still is time to stop on by and see whats gonna be new for 2015. We’ll be in the South Upper Hall in booth #34291. Hope to see you there!


Short Spring Dilemmas Part 1

I will be going over the details of some issues encountered with the use of shorter springs. Part 1 of a 2 part post would explain the use of shorter length springs with a ride height adjustable coilover. Many consumers think that the use of a shorter length spring on a ride height adjustable coilover such as the Street Basis, Street Advance, Super Street, Basic’s, and Comfort Sport dampers would allow for the coilover to drop even further than the kits current maximum lowest setting. Essentially this is correct if the damper assembly has sufficient amount of range left on its body threads and/or overall damper length. Any consumer kits which have this type of set up will initially encounter the issue of the upper mount assembly riding against the bump rubber. This will eventually cause the bump rubber to break down causing either the damper to prematurely wear the seal and, in worst cases, cause internal damage of the damper. Other issues also experienced are spring slop (the spring moving out of its seat positions during operation due to the shortened length) damaging the damper body and threads, noises due to excessive damper component movement, and damper component failure (upper, lower spring seats, bushings, and bearings) from the loose fitting spring.


P1100311

P1100312

P1100318


The images above shows a Super Street damper assembly from a 2004 Subaru Impreza WRX utilizing the standard 6KG spring rate with a 225mm length offered with the kit but set to a significantly low ride height.  The second image above shows a load on mount assembly placed against the spring. This is not what the springs normal position would be with the vehicle weight added to it. For this application, the calculations of the spring rate (6KG) with the vehicles sprung weight (the weight above the spring  excludes suspension components below the spring) (sprung weight is 235)  which would compress the spring another 39mm placing  the upper mount assembly closer to the bump stop.

Now, if  a consumer looking to utilize a 1 inch shorter length spring in the same spring rate, the images below shows (the same ride height setting is maintained) the increase in gap between the upper mount assembly as well as the amount of piston shaft stroke exposed. The second image below would show the dampers shaft compressed to the point at which the mount sit against the spring. With the previously mentioned sprung weight compressing the spring the additional 39mm’s the spring would compress further placing the upper mount assembly even closer to the bump stop eliminating stroke from the damper. At this point it would begin to hit the bump stop over slightly larger bumps on the road and slowly break down the bump stop.


P1100333

P1100336


Now, should the consumer consider an even shorter length spring (in this case 2 inches shorter with the same spring rate; again, if the lowest ride height position is maintained), the images below show how the size in gap between the upper mount assembly and spring has immensely increased. The second image would again show the damper assembly compressed to the point at which the upper mount and spring meet. With the details previously mentioned of the sprung weight added to the spring, the upper mount would sit up against the bump stop with no type of  real movement on the dampers stroke. The end result if utilized in this manner would be horrible ride quality, as their would be no stroke available, the upper mount assembly would immediately begin to damage the bump stop which in turn would either break the bump stop wedging the pieces into the seal portion and tearing at the seal or worst case splitting the bump stop apart allowing for the piston shaft to fully compress and hit the base of the damper damaging the unit internally.


P1100338

P1100339


The use of a stiffer spring in conjunction with a shorter length spring would be advisable as it would further support the vehicle weight minimizing the amount of  contact between the upper mount assembly and bumper. This of course would also need to follow the spring rate change recommended range depending on the damper model. For any spring rate changes beyond our recommended range, we highly advise for the dampers to be sent in for a revalve service. Oversprung dampers can prematurely wear out as the dampers are not be able to keep up with the stiffer springs need for more rebound force.

For part 2 of the Short Spring Dilemmas, I will be going in depth to discuss full length adjustable coilover utilizing shorter lengths.

USDM Red Racer Gauges (White Needle)

W_off

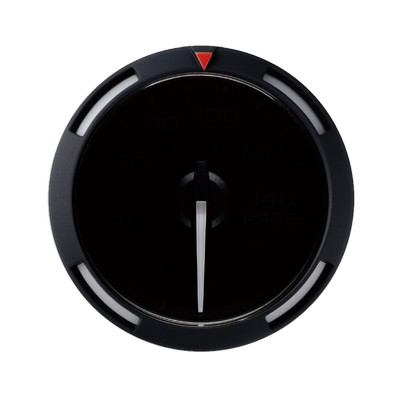
52MM RACER GAUGE WITH WHITE NEEDLE (POWER OFF)

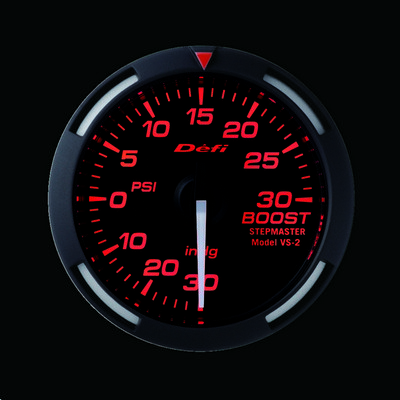
New Red Racer Gauges have now arrived.


New Features Radouts:

  • PSI
  • Fahrenheit
  • Bright White Needle for greater visibility for day and night

rgwhite


W_BOOST_B

TURBO 52MM GAUGE (DF06507)

W_PRESS_B

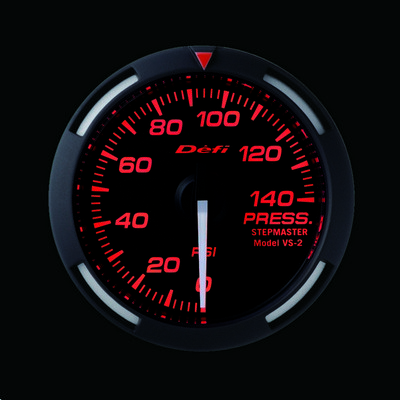
PRESSURE 52MM GAUGE (DF06607)

W_TEMP_B

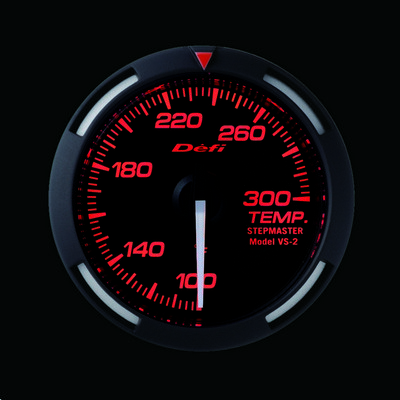
TEMPERATURE 52MM GAUGE (DF06707)

W_EGT_B

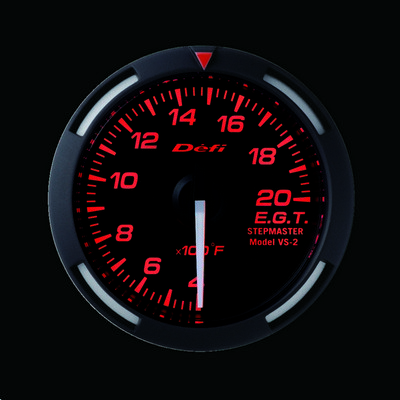
EXHAUST TEMP. 52MM GAUGE (DF06807)

Mono Sports for the Nissan Skyline R35

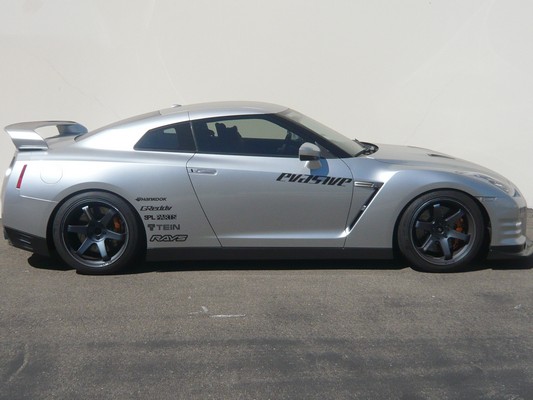
To all the R35 Skyline owners that would like to upgrade the suspension set up, there is a new product you might want to consider. We have just finished testing.

P1100205


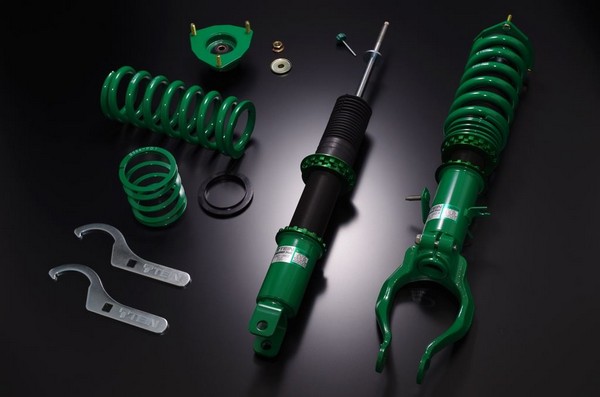
The all new Mono Sport coil overs.

monosportr35

Full-Length Ride Height Adjustment Feature
Ride Height Adjustment with Little or No Change in Ride Quality

Mono-Tube Structure
Mono-Tube System to Robustly Convey the Information from Road Surface

Damping Force Adjustment System
16-level Linear Damping Force Adjustment System

Complete Kit with Upper Mount
Exclusively Designed Upper Mounts are Included (Except Some Models)

1-Full-Car-Kit
Complete Suspension Kit of 4 Shock Absorbers & 4 Springs

Currently the coil over kit is  Special Order from Japan.

Part number: GSK00-71SS3 MSRP $1980

P1100203

Another Overhaul Packaging Advisory

Hello Everyone. This post is a friendly reminder of the best methods for proper overhaul packaging. Poor damper packaging is unfortunately still happening to this day. Consumers are still reminded over the phone to pack up the damper/s well being sent in for the service as to avoid any missing, or in worst cases, damaged components.


P1100071

P1100067


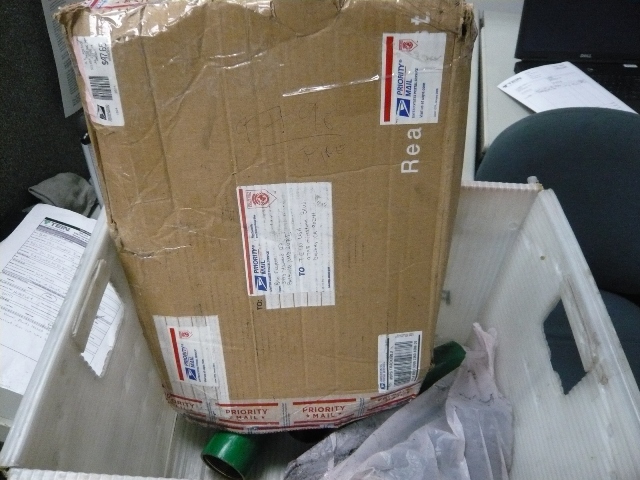
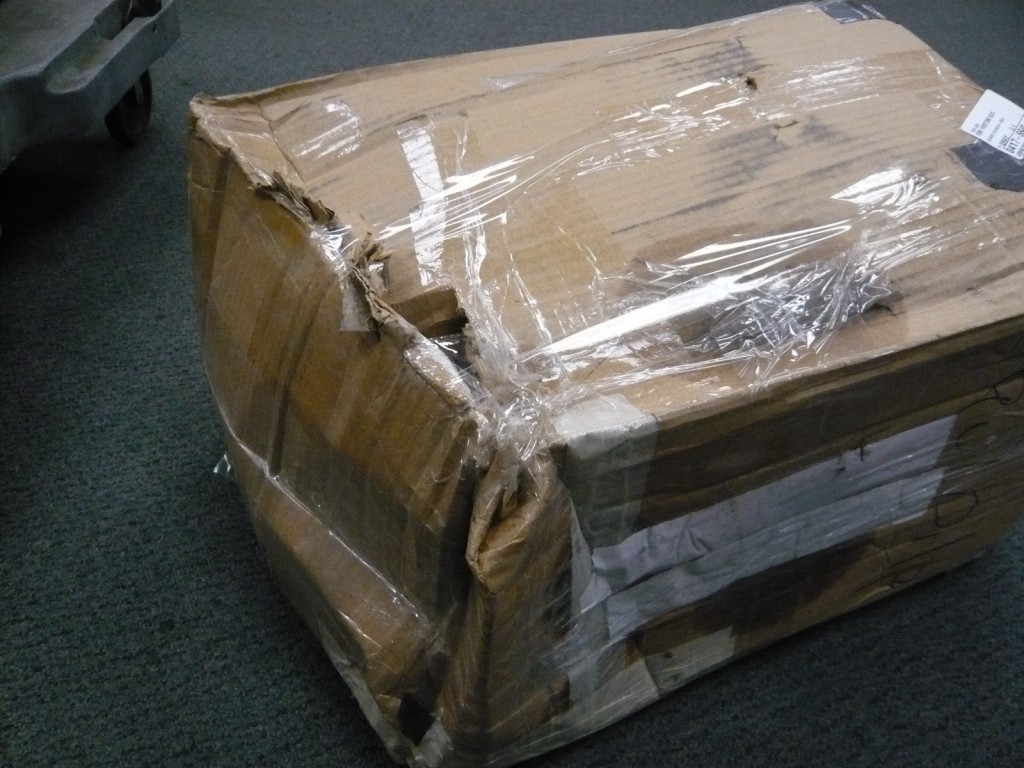
Both images shown above were not sufficiently packed, allowing for the damper/s to move about during freight, more so seen on the top image as the box completely broke open and was just placed in a box by the USPS delivery driver.
Although not all consumers can be completely reached regarding this, we still try our best to inform them all. The best suggestion I can give to anyone sending in their damper/s for a service would be as follows:

If the damper/s packed have some amount of movement inside, the damper will more than likely tear through the box. Packing peanuts and bubble wrap are your friends. Pack it to the point that the damper/s do not move around in the packaging. This would prevent the weight shifting back and forth as well as side to side which, with the weight of the dampers, can break through.

packing.peanuts.package


Packing peanuts are always a good way to fill in empty gaps in boxes.

Sharp points on the damper/s should be padded to avoid bends or breaks and/or tearing through the box.

Only send what is needed for service or inspection. Any unnecessary components such as springs, seat locks, spring seats, and/or upper mounts (unless you are looking to have them repaired or inspected) should be removed from the damper and/or packed along side the damper/s.

IMG_0196


Seat locks and spring seats can be sent along with the damper for service but can also be removed.

Compressing and tethering down the piston shaft can also be done to save package size as well as allowing for more dampers/ components to be added to the shipment. Keep in mind though when doing this to avoid at all cost scratching the piston shaft surface as it may get damaged requiring a replacement then be required.

SK-2189_v1_20090425

OEM replacement struts and shocks commonly come packaged like the image above to both help with packaging in a smaller box as well as help in protecting the piston shaft as it would be compressed into the body.

Package insurance is recommended. Should any product happen to be damaged during freight, the insurance would cover at least the declared cost. Please contact us if you need to determine the declared cost/value of an item. That way, should the damage be covered by the freight forwarder, you will have sufficient value to get a replacement.

Following these suggestions should at least give you the peace of mind that the damper/s being sent in for service will not incur any damage on its way to our facility. Unfortunately I cannot guarantee that the package and contents will be received in undamaged condition. There are times that the freight courier may not have the best consideration for care of packages being shipped. Avoid any of these headaches and take further consideration when packaging and sending in your damper/s for service.