Autosport Dynamics Inc.

To those of you who follow the drifting scene, particularly the Formula D series that has been receiving nationwide and international coverage, many of you may already be familiar with the Falken and Monster Energy Falken Tire livery. We are very fortunate to be the suspension suppliers for quite a few of their vehicles, such as their Saturn Sky driven Darren Macnamara, Nissan 350z driven by Tyler Mcquarrie, and the Ford Mustang’s of Justin Pawlak and Vaughn Gittin Jr.

Ever since Falken’s entry into Formula D, they’ve been placing themselves quite high among most contenders in this series, claiming many 1st place victories, as well as a championship title. But their full-fledged attack came about with the enlistment of Autosport Dynamics, Inc. (ASD) who handle all the vehicle builds for the aforementioned cars, as well as all vehicle maintenance.

Mind you, Autosport Dynamics expertise goes well beyond their experience with Formula D. They’ve also had their hands in NASCAR, SCORE, F1, SCCA, NASA, and British F3.  That’s quite a resume for a company that started in the 1980’s. And, these services aren’t limited to teams, either. Yes, they offer their services to the public!

Check them out on their site

http://www.autosportdynamics.com/about.html

They also keep a great up-to-date blog on the Formula D series, filled with pictures and videos from both races and test sessions. Pretty cool.

http://www.thejackstand.com/

Vaughn Gittin Jr. in the Monster Energy Falken Tire Mustang

Darren Macnamara in the Saturn Sky

Falken Team Video

2011 Falken Formula Drift Test from Falken Tire on Vimeo.

And, as if that wasn’t enough to keep their hands full, they operate a retail site, www.asdmotorsports.com

Geez. All work and no play makes Autosport Dynamics a,,,,, wait, their work is THEIR play! Forget it.

Disaster Relief Donations

We would like to give our greatest condolences to those who have lost love ones and family members in the horrible accident in Japan. It has been almost a month since the earth quake/tsunami, and would like to thank everyone that has donated or helped the people of Japan. It will not be an easy task for many people in Japan to get back to there normal lives but I’m sure that they will be thankful for all the help and support from around the world.

TEIN Inc has donated a total of 3,000,000 yen to the Red Cross Association

TEIN Employees and overseas fund-raising netted a donation of 874,785 yen

TEIN’s Domestic and Overseas Customers have donated 2,305,362 yen

Giving a Grand Total donation of 6,180,147 yen (approx. $74,000 USD)

If possible please continue your support and donations to the disaster relief efforts.

S. Verdier Podium Finish with Video

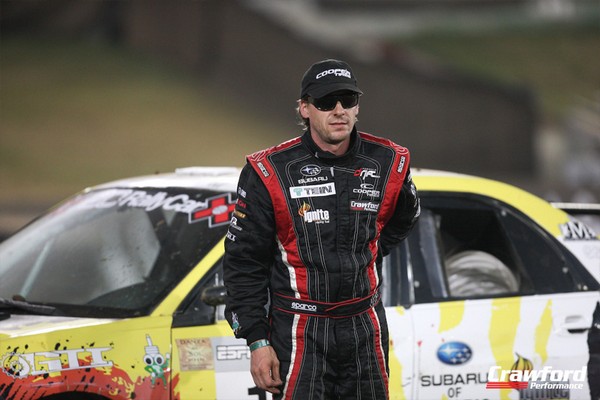
A big congratulations goes to Stephan Verdier and his crew for the 3rd place podium finish at Rd.1 of the Global RallyCross Championship.

Stephan finished behind Marcus Gronholm and Tanner Foust in the Saturday final which is outstanding considering many of the other competitors have HUGE budgets and some are factory backed.

From watching the in-car videos it looks like Stephan had a lot of fun on the Irwindale Speedway course which featured a 70′ gap jump and 50/50 tarmac to gravel road surface.

Our own engineer, Mr. Katsuma Nakai, was on hand for suspension support. A few minor tweaks were made to the Gr.N dampers which performed flawlessly.

Check out the in-car video from MotoIQ and Saturday’s final.

Images taken from MotoIQ, Urban Racer and Subie-Life.com. Video taken from MotoIQ and XGames.

NFS SoCal Meet

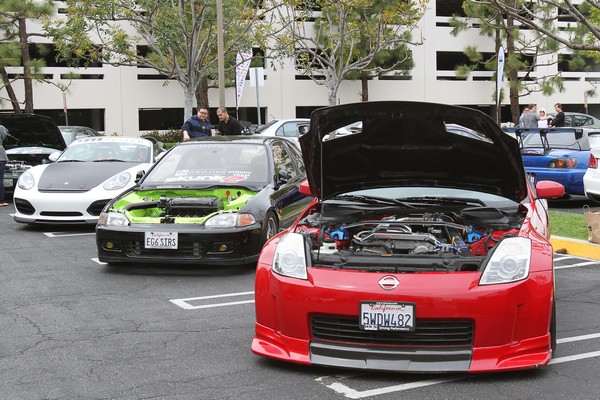
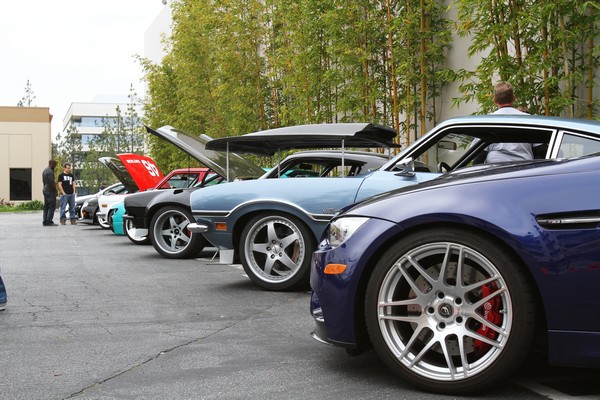
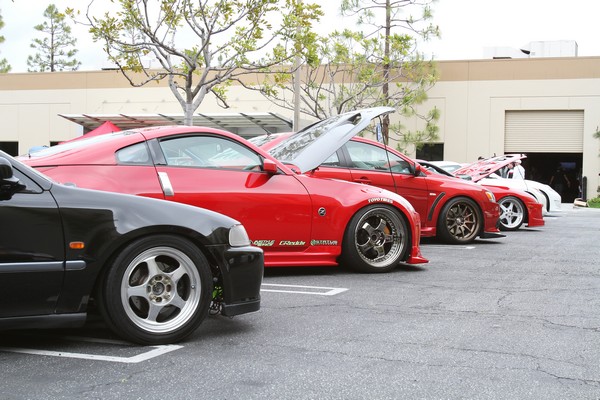
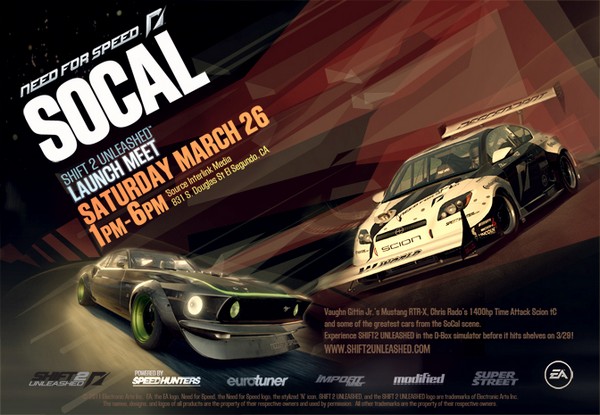
The Need For Speed SoCal meet held at the Source Interlink Media offices in El Segundo, CA was a quality event. There were nice cars, free raffles, delicious taco plates and plenty of game stations to try out NFS Shift2 Unleashed.

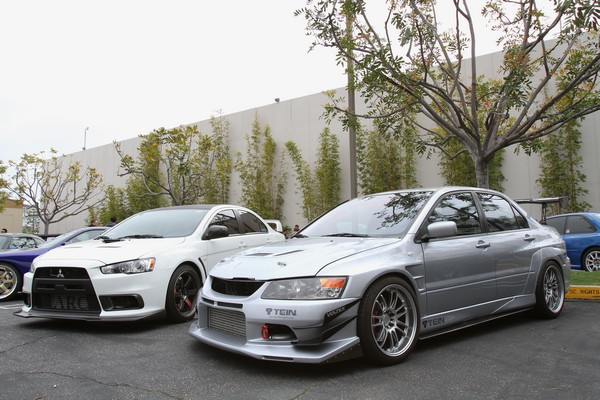
Source Interlink opened up their garage and photo studio area for the public. They had some awesome cars parked throughout the building including Rado’s Time Attack tC, Evasive Motorsports EVO 9,  Twin Turbo built Viper, JR’s NFS Mustang and a bunch of other projects.

Source Interlink’s Garage area which has multiple car and motorcycle lifts, Snap-On tools and full bar. Yes, a full bar with LCD screens, and lounge area.

Evasive Motorsport EVO 9 Time Attack car parked near the photo studio. NFS Shift 2 gaming consoles were placed throughout the building for people to try.

Inside the photo studio area.

EA ran a contest for the fastest driver on the DBox setup. Winner got a Logitech prize pack.

In the morning the sky was gloomy but it cleared up later in the day. There was a wide variety of quality cars on display.

Loi from SportCar Motion brought up their monster DC2. Going to Arizona later this week for Modified Tuner Shootout.

My EVO 9 parked next to Brian’s (Mackin Industries) EVO 10.

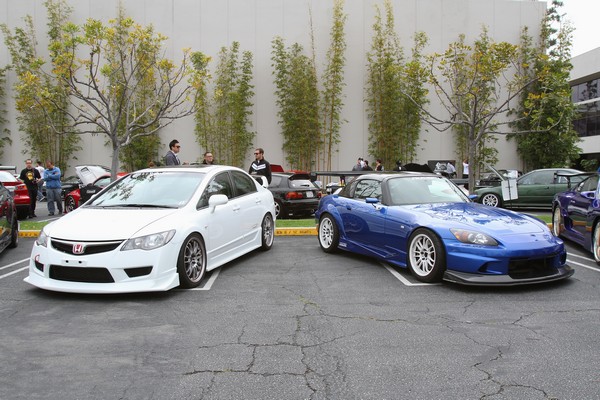
Two more Evasive cars. Mike’s Civic Si with Type R conversion and Ken’s Voltex kited S2000.

Big Thanks to EA and Source Interlink Media for throwing the event. Check out Speedhunters.com for more coverage.

RallyCross or NFS SoCal Meet

Living in Southern California has its perks. This weekend locals have two events they can attend

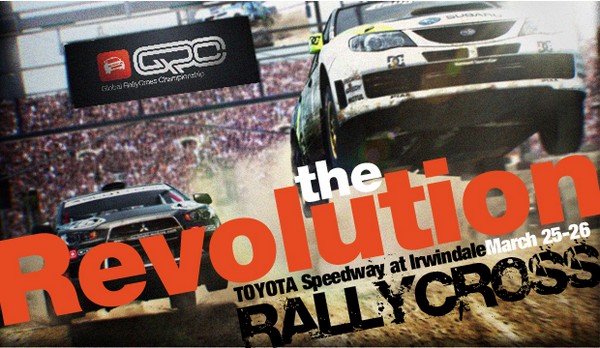
Global RallyCross Championship at Irwindale Speedway

or

Need for Speed SoCal Meet at the Source Interlink offices in El Segundo

Preparing for GRCC Rd.1

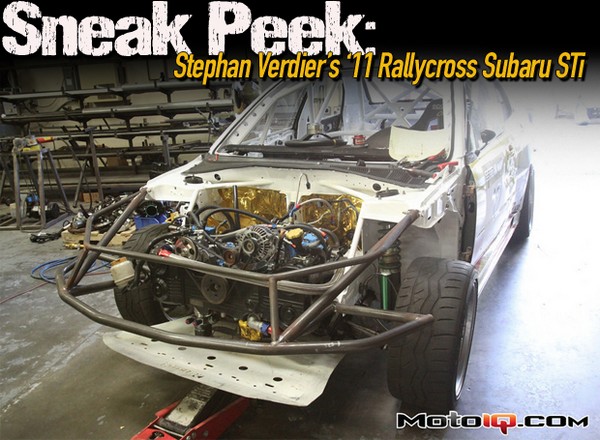
Stephan Verdier is putting the finishing touches on his STi for RallyCross competition. Stephan and his crew have been hard at work preparing his car and it is looking GOOD.

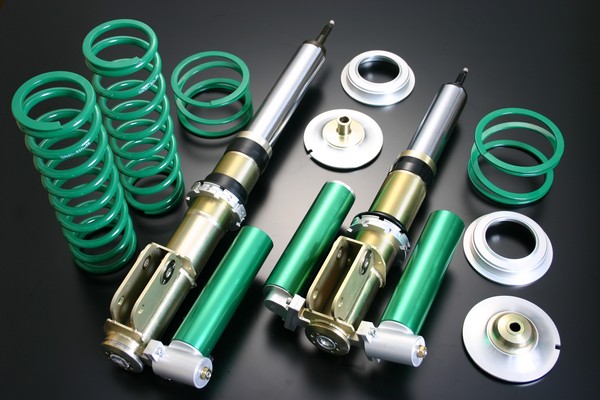
We loaned Stephan a set of our Gr.N dampers which have been proven in Rally competition.

To see more of Stephan’s car visit MotoIQ which has a great writeup by Mike Kojima. Click HERE

Preparing for NFS SoCal Meet

On the other end of the spectrum I am preparing my EVO 9 for display at NFS SoCal meet. My car is in no way a show car but I do like the occasional meet with the relaxed atmosphere. Plus the Source Interlink offices are pimp, fully loaded garage with full bar. If you did not know Source Interlink is the publisher for Super Street, Import Tuner, Modified, Euro Tuner and a bunch of other automotive related magazines.

I have not started my car in over 3 months so a little work needed to be done. Oiled the valvetrain/ head, replaced the spark plugs, had my RC injectors tested and cleaned and installed a C-West hood.

Updated pics of the car coming soon.

Check back here next week for some event coverage.

Torque Your Dampers Pt. 2

In continuation of covering the proper methods of torquing our dampers we will be covering how to torque the Top Lock Nut.

Torque Specs will not be covered this time around, only the proper methods for torquing. To find the correct Torque Specs for you vehicle’s dampers consult the Installation Manual that came with your kit. For those who have dampers that require use of the stock upper mounts, consult the factory torque specs.

If your dampers use TEIN  upper mounts but you don’t have the original Installation manual, contact us at 562-861-9161 or email at tus_sales@tein.com. We can send .pdf copies of our installation manuals to you.

Once again, the use of a table mounted vice to keep the dampers from moving (covered HERE) is recommended.

These are the tools needed to properly torque the Top Lock Nut:
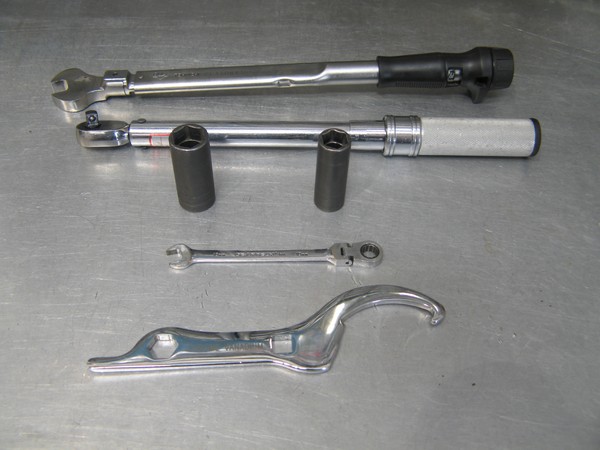
1   Torque Wrench with Spanner Wrench Adapter (17mm and/or 14mm depending on your vehicle application)
1   3/8 Inch Torque Wrench (A 1/2 Inch Torque Wrench may not provide low enough torque settings)
1   21mm Socket
1   17mm Socket
1   14mm Socket
[Sockets needed depend on your vehicle application]
1   Open Ended 10mm Spanner Wrench
1   Open Ended 8mm Spanner Wrench
[Spanner Wrenches needed depend on your vehicle application]
1   Tein ADJ Wrench

Strut Type Dampers

Some Strut Type Dampers’  Piston Rods have notches machined into the top section [Pictured Below],
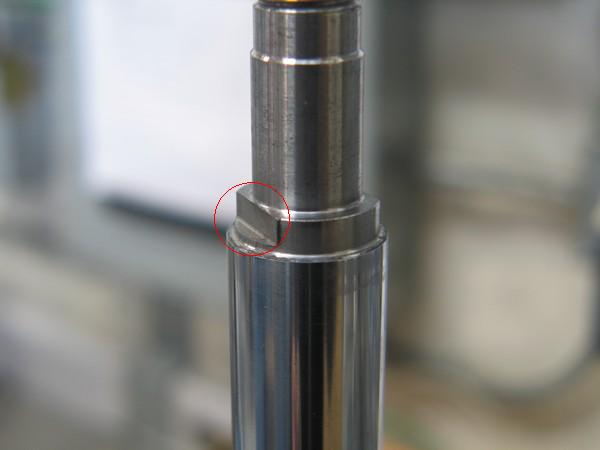
that correspond and line up with notches in the Upper Spring Seat [Pictured Below].
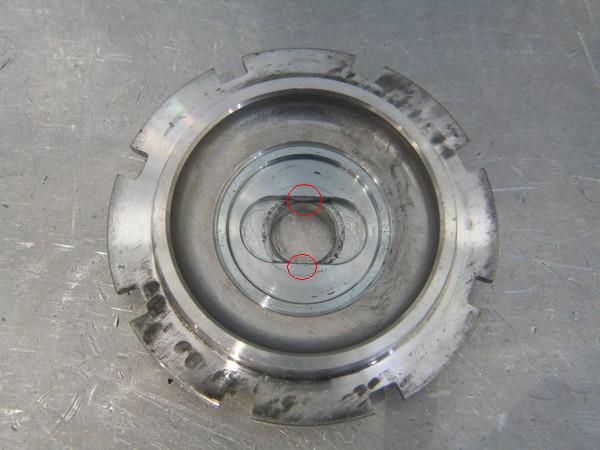
When assembling the damper make sure these notches line up. If they are not lined up while tightening the Top Lock Nut, the Piston Rod and/or the Upper Spring Seat will become damaged.

With everything assembled and lined up correctly; using the TEIN ADJ Wrench to hold the Upper Spring Seat and the 3/8 Inch Torque Wrench with the correct socket on the Top Lock Nut, turn until you hear the click.
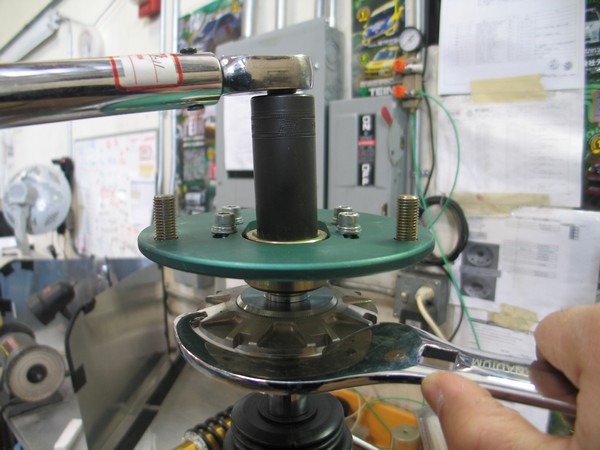
Some Strut Type Dampers do not utilize a TEIN Upper Spring Seat. As the above method will not work for those dampers refer to the method used on SA Type Dampers below.

SA Type Dampers

SA Type Dampers’ Piston Rods have machined notches that accommodate a 8mm or 10mm Spanner Wrench.
[Pictured Below]
[Spanner Wrench size will vary depending on your vehicle application]
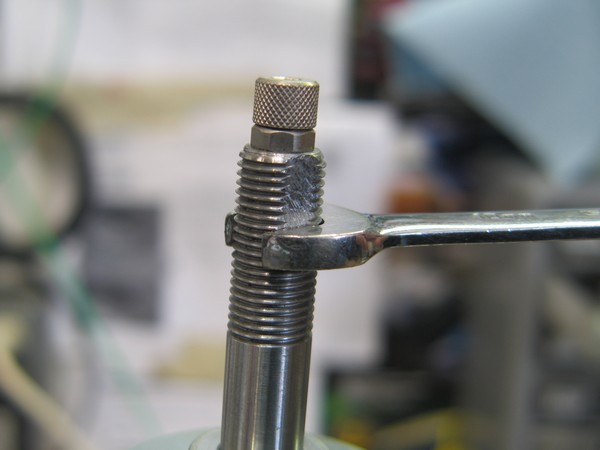
With everything assembled correctly; using the 8mm or 10mm Spanner Wrench to hold the Piston Rod and the Torque Wrench with Spanner Wrench Adapter to turn the Top Lock Nut, turn until you hear the click.
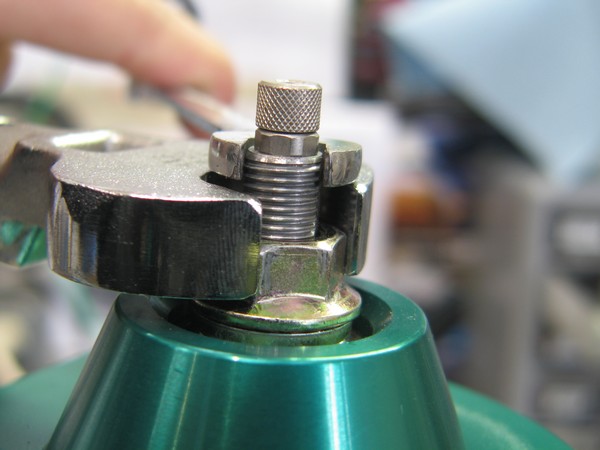
Caution: Over-torquing the Top Lock Nut can cause the Spanner Wrench to slip, damaging the Piston Rod Threads in the process.

If all else fails and an Impact Gun MUST be used, in accordance with our Instruction Manual, set the Impact Gun at the lowest torque possible. A 3/8 Inch Impact Gun is recommended as a 1/2 Inch Impact Gun may be too powerful and can break the Piston Rod. Also, make sure to use short bursts instead of a long continuous burst with the Impact Gun.
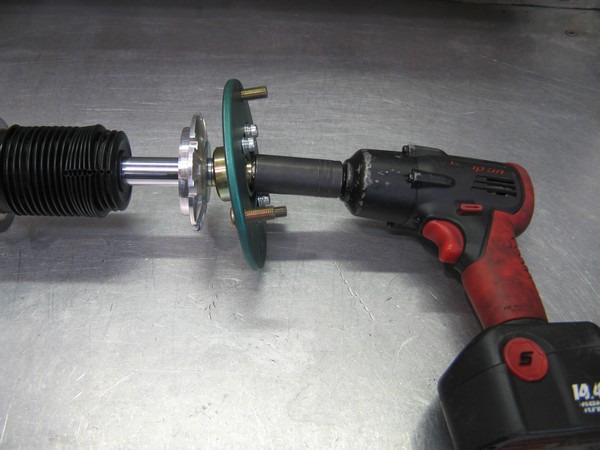
When tightening with an Impact Gun the Piston Rod must not be allowed to spin. The impact and high rate of spinning the Piston Rod can achieve when using an Impact Gun will loosen the internal nut and damage the damper.

For Strut Dampers, use a TEIN ADJ Wrench to hold the Upper Spring Seat while tightening the Top Lock Nut.
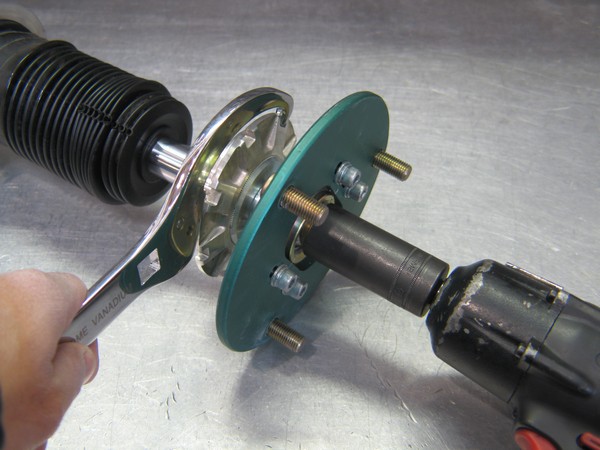
If your Strut Damper does not utilize an Upper Spring Seat that can be grabbed with a TEIN ADJ Wrench then follow the same instructions as the SA Damper below.

For SA Dampers, grab onto the Piston Rod with your fingers as such to prevent the Piston Rod from spinning. Do NOT grab the piston rod with pliers or any other tools as they may scratch the Piston Rod that will damage the Oil Seal and cause an oil leak.
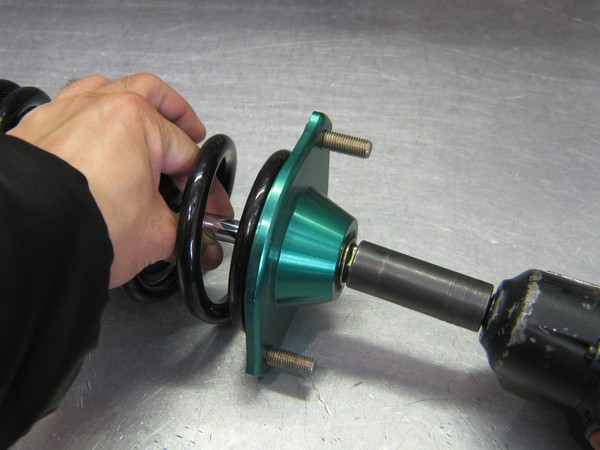
Note: The use of an Impact Gun must be the absolute last resort. TEIN assumes no responsibility for broken or damaged dampers due to incorrect assembly and installation.

How low can you go?

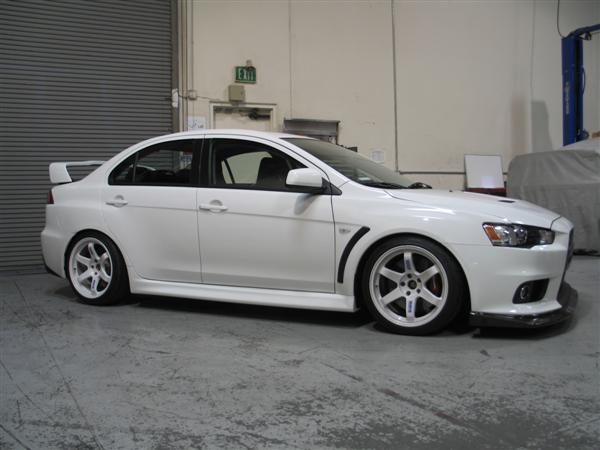
We get a lot questions about what is the lowest a vehicle can go. It has been a tough question to answer since at one time the cops would actually measure from the center of your headlight to the floor. We were unable find out any information to back this up. This last weekend I had a fun 8 hour traffic school class that was able to shed some light on the California State law regarding the legal ride height.

The law states (Cut & pasted from the California DMV website):

V C Section 24008 Modification of Vehicles

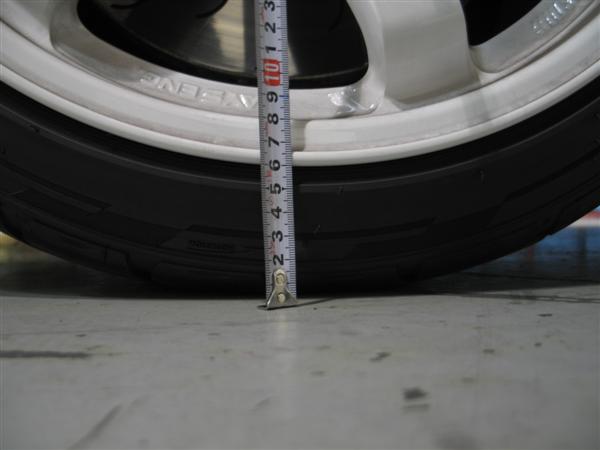
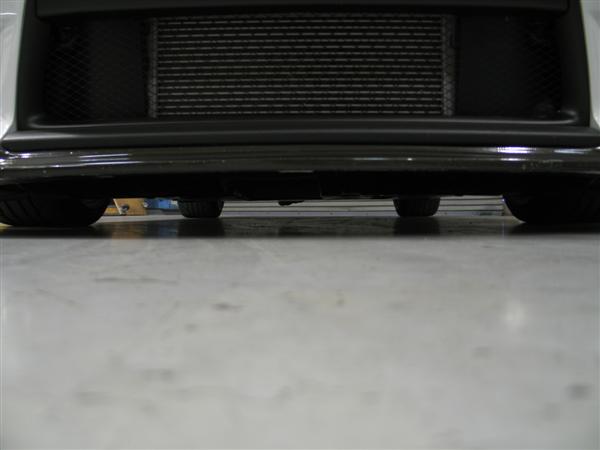
It is unlawful to operate any passenger vehicle, or commercial vehicle under 6,000 pounds, which has been modified from the original design so that any portion of the vehicle, other than the wheels, has less clearance from the surface of a level roadway than the clearance between the roadway and the lowermost portion of any rim of any wheel in contact with the roadway.

Basically not any part of your vehicle can be lower than the measurement of the lowest part of your rim to the ground. Makes sense right? Just in case if a tire blows out, your not Fred Flintstone-ing with a Fast and Furious floor board on the road.

This law is only confirmed for the State of California. Please check with your state for the current law regarding minimum ride height.

Exhaust Design

Now, I’m not about to bore you with technical information on exhaust designs since there is already a plethora of information and opinions on the benefits and downsides of each type of design. But exhausts play an important role in power production for our cars. I cannot say outright that it is an area most people tend to overlook. However, it is a factor that is often overlooked when it comes to the expectations we have. There are so many exhaust brands out there, and all of them follow their own tuning style.

For most of us, our cars are our daily drivers. And maintaining drivability is a very important aspect. I don’t know about you, but I like keeping the powerband nice and smooth, as well as accessible from the 2500 to 4000 rpm range. I definitely don’t spend a bunch of time motoring at redline. No thanks.

But really, it seems that we are all convinced by advertisements and forum posts (if you follow those) that show that bigger piping size is better. Is it, though?

When we had an engineer from Fujitsubo stay with us in the U.S. to develop exhausts specifically for the North American market, we learned a bit more into exhaust design and what makes Fujitsubo exhausts unique. Of course a main factor would be to make more power. Second was material selection for their Stainless Steel and Titanium exhausts. Third was reduced weight over factory exhausts. And lastly, a combination of great sounds and great looks.

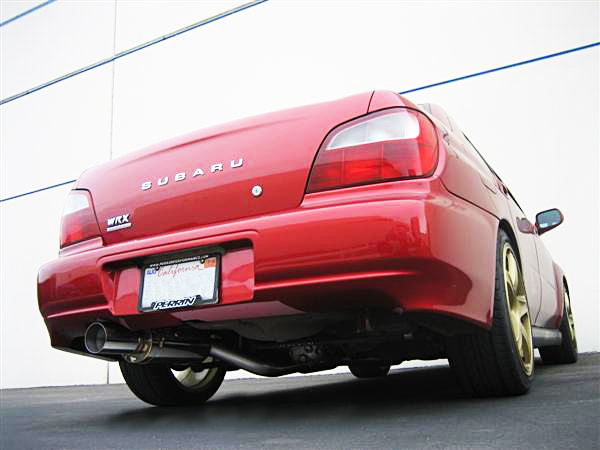
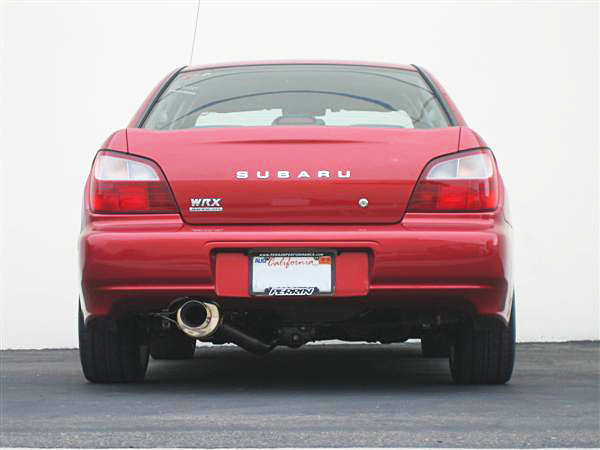
Taking a look at the RM-01A I have on my car (part number FJ 190-63055), I never knew how much attention to detail Fujitsubo had put into it. They really do stand by their quality.

Inside diameter is 76.3mm, but it retains the donut-type flange from the downpipe, which matches my aftermarket downpipe (as well as stock) perfectly. Even though this means there is a slight step in piping diameter at the flange (63.5mm), it also means less stress at the flange where the two pipes meet. The rear canister also has a reducer of the same size. This helps to reduce decibel levels to a very low 86dB. Fujitsubo does sound tests using SAE J1169 standards.

Weight reduction comes in the form of 1.0mm thick SUS304 for the piping, resonators, and cansiter. Also, hollow hangers are used, as well as stamped 1.5mm thick gusset flanges (Fujitsubo’s SuperEX exhaust manifolds use Lost Wax formed flanges).

Minimal bends in piping also help to reduce restriction, and the rear canister is slighly canted. Fujitsubo even paid attention to ground clearance, and create an exhaust package that fits factory mounting points as precisely in the stock location as possible.

Overall, I am quite happy with the performance and sound. As I had mentioned, I like a very drivable range of power at relatively low to mid rpm range. I kinda threw that out the window with my turbo selection (a bit laggy for a 2 liter). But with this exhaust, I have regained good midrange power. Torque is nice and flat from 2800-6000 rpm and the motor pulls nicely up until 6500 rpm, at which point my injectors begin to max out. But again, I keep it low rpm on the street. Afterall, that’s where it spends most of its time. The RM-01A is aimed towards users that want good mid to high end power gains, which more or less suits my needs. Since I asked my tuner for a conservative tune, I feel like I was able to achieve what I was looking for, even with the extra lag my turbo gives.

So, while I won’t be needing max power right now, this setup seems to be a great match. As a consumer, you have a lot of resources to find what will suit you best. So do your research.

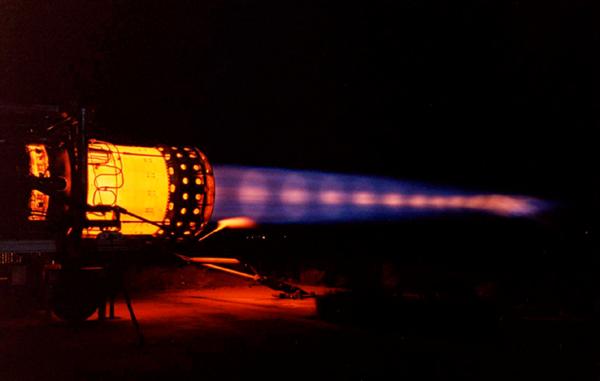
I suppose there will be a day when I’ll want a crazy high horsepower, flame-spitter of a car. When that day comes, I’ll be doing this

Imagine being able to spit out shock diamonds like this!!! I’m a nerd.

Bye bye

A lil FUN @ the office

Thanks to Troy from Five Axis everyone at the office gets to have a little fun.

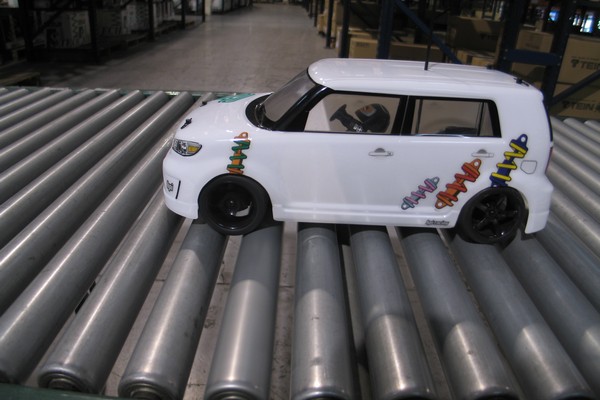
One of our Authorized Dealers, Five Axis, just happened to drop by to pick up some TEIN Product and had a little surprise. It seems that HPI Racing manufactures a RC car copy of the Scion xB with Five Axis lip kit and wheels. The original vehicle that Five Axis produced had our Basic Coilovers.

Everyone wanted to play with it the first day and I had opened it and unpack it. It felt like Christmas morning all over again. I was excited to actually take it out for a spin but unfortunately the AA batteries for the controller were not included and I could not find any in the office. 🙁 eeeerrr I had to wait one more day to have a little fun.

Thanks to our Marketing Manager we got batteries the next day (thanks Phil). Everyone got a chance to have a few laughs and enjoy the RC car.

I unfortunately did not have great control of the car and was accidentally crashing the poor car into poles and pallets in the warehouse, thankfully no damage was done to the vehicle. I will practice to get better handling the RC car. I think we are planning to make a time attack course in the warehouse or parking lot.

We had a good time with the car we even put it on a Dyno….lol, sort of.