TEIN ERROR CANCELLER KITS

For anyone with factory equipped Adaptive or Electronically Controlled Suspension will know, changing to an aftermarket suspension kit (i.e. coilovers) isn’t typically a straightforward, or plug & play affair. Now, some suspension manufacturers will at least include some method of resolving any warnings or errors that may pop up on the instrument panel whenever disconnecting the OEM Adaptive/Electronic suspension. In some cases, it’s not a problem at all.

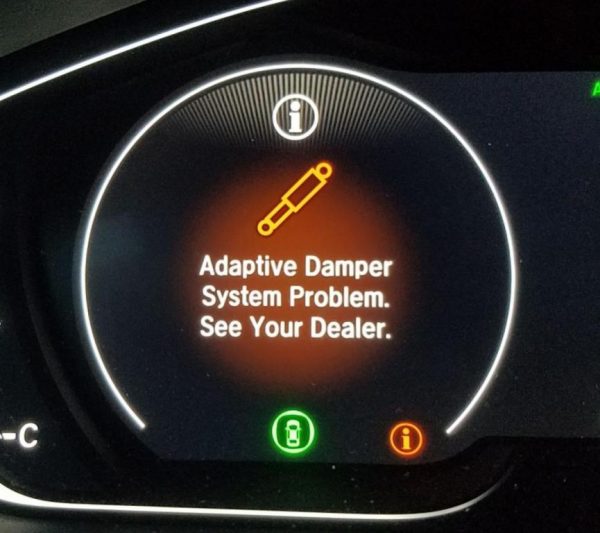
This is the error notification you’ll get on the late-model Honda Accord Touring models with Adaptive Suspension.

Over a two years ago, we decided that we had to do something similar, as factory Adaptive/Electronic suspension is becoming standard on entry-level priced cars. No longer is this type of suspension exclusive to luxury marques. This led to the development of our Error Canceller Kits.

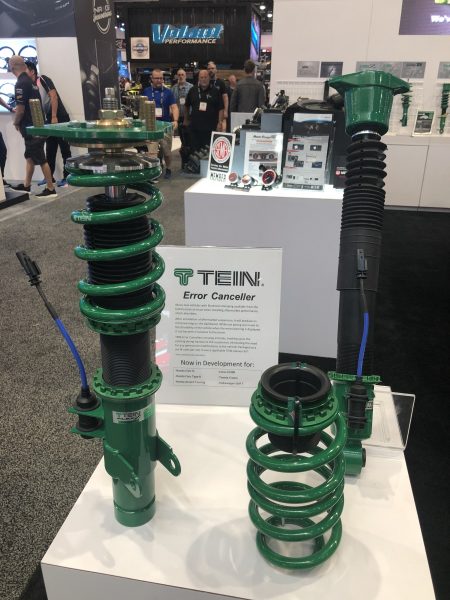
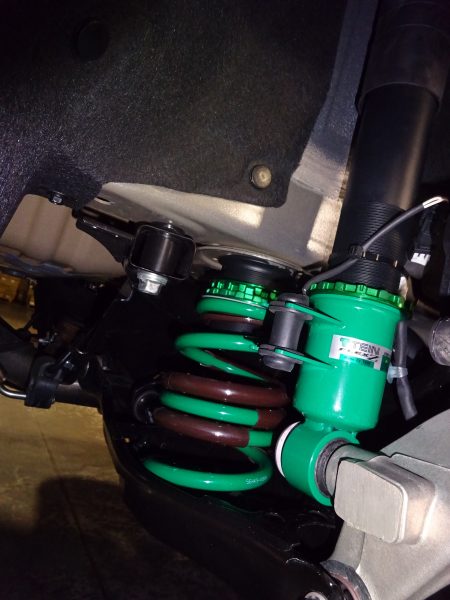
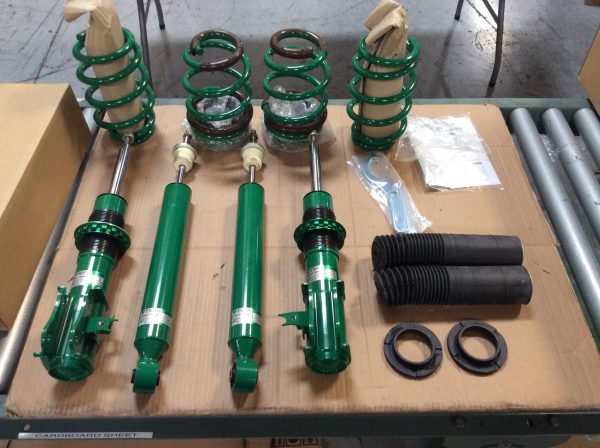
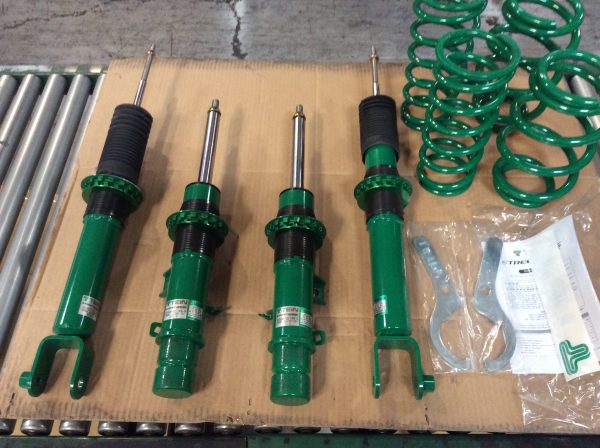
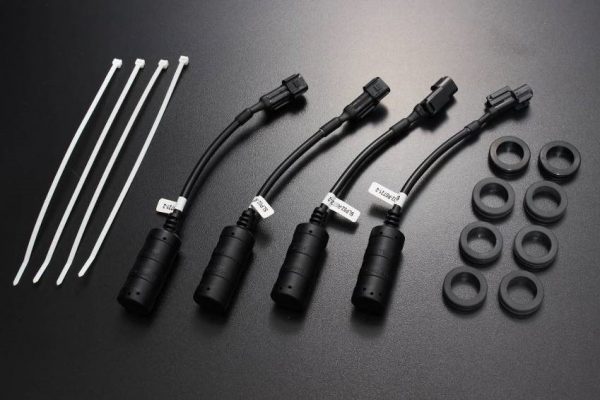
Error Canceller Kit show with some accessories, but actual accessories may vary by vehicle application.

Again, with entry-level cars now having either standard or optional (trim level dependant) Adaptive/Electronic suspension, there’s always a need for better handling performance. So, we had to come up with some type of resolution to the aforementioned warning or error on the dash.

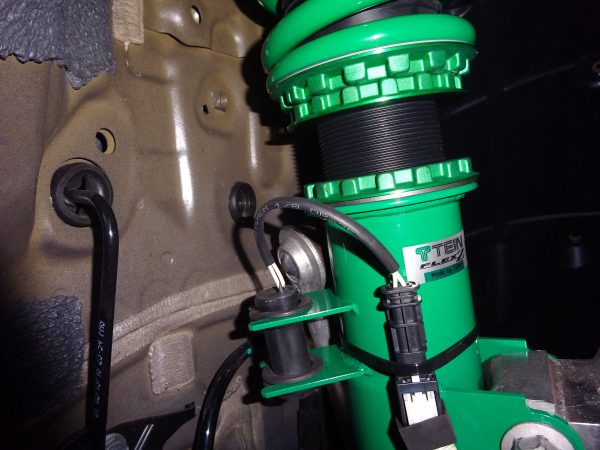
Our solution is literally plug & play. Each Error Canceller unit uses a OEM style plug that connects to the factory wiring harness for the suspension. All that’s left is to mount the canceller securely to the damper, and you’ll be good to go!

To date, we’re still limited on which vehicles we make our Error Cancellers for, mainly because there aren’t too many Japanese entry-level priced vehicles with Adaptive/Electronic Suspension. However, as we’re getting into product development for European vehicles, it’s only natural that our Error Canceller Kits will continue to grow in vehicle application.

Currently available and upcoming Error Canceller Kits:

2017+ Honda Civic EDFC Install

With the release of the current body style Civic FLEX Z Coilovers, we have been receiving more and more inquiries of how the EDFC Motors would mount, specifically the rears due to its limited accessibility. Luckily a close friend of ours was interested in the EDFC Active for his vehicle so I went ahead and did the install for him.

Since I had never really had a chance to look over the vehicle you can say I went into this blindly. Initially accessing power for the EDFC Active controller and driver units seemed to be impossible (at least in the engine compartment area) without requiring modifictions. I basically just wired up all three to the main fuse box under the dash. Also for reference, the Driver Unit power cables are be able to reach the main fuse box under the dash, the rear being longer and front slightly shorter in length. I was under the impression that they were the same length. The front Driver Unit was installed next to the Engine Compartment Fuse Box and the rear was placed on the backside rear bulkhead. Both were in decent areas for placement. However it’s eventually up to you on the placement for the driver units. Just make sure the heat sink portion of the driver unit has enough space to dissipate heat. Power source was setup first as I wanted to avoid staining any of the interior, since the rears required the shocks to be removed.

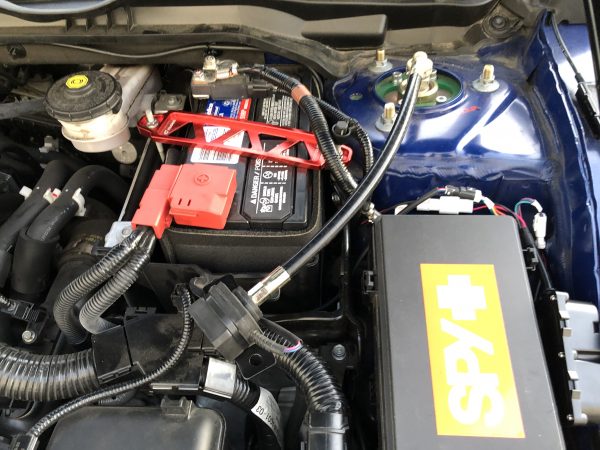
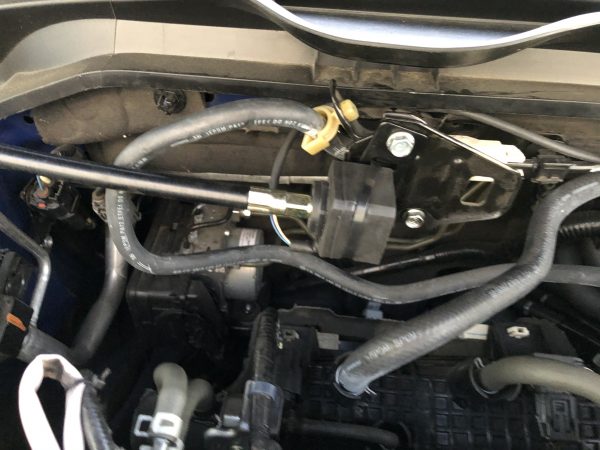
Engine Compartment Driver Mount
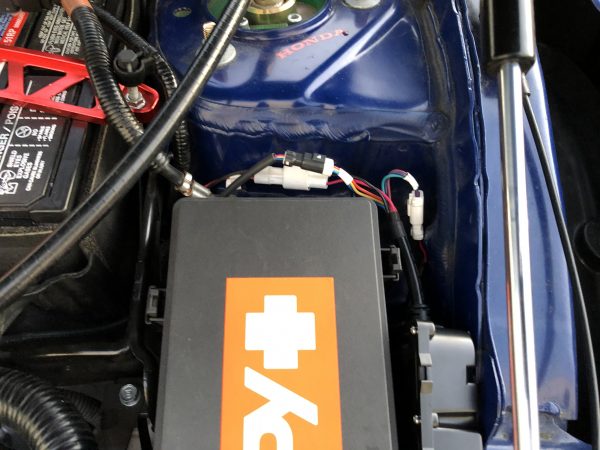
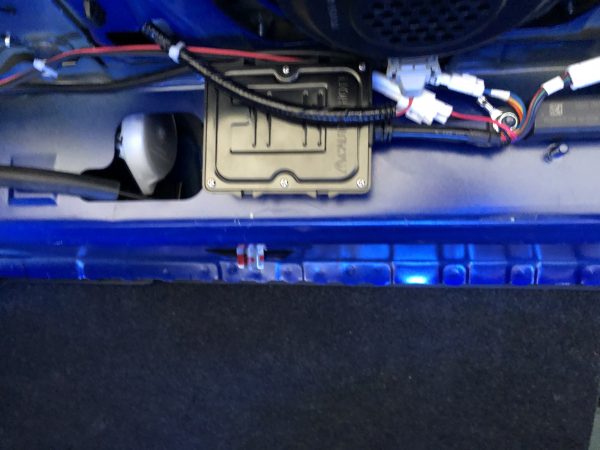
Rear Bulkhead Driver Unit Mount

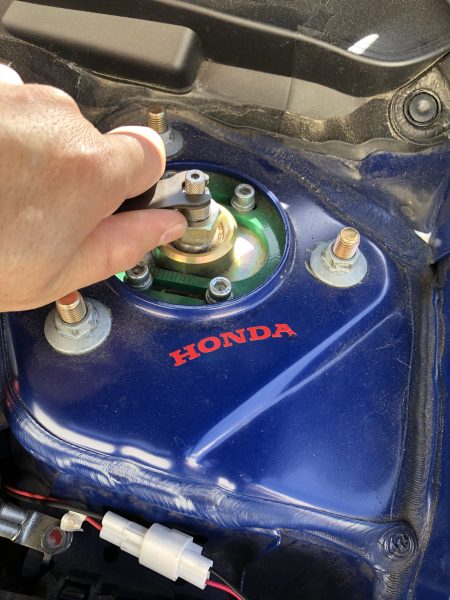
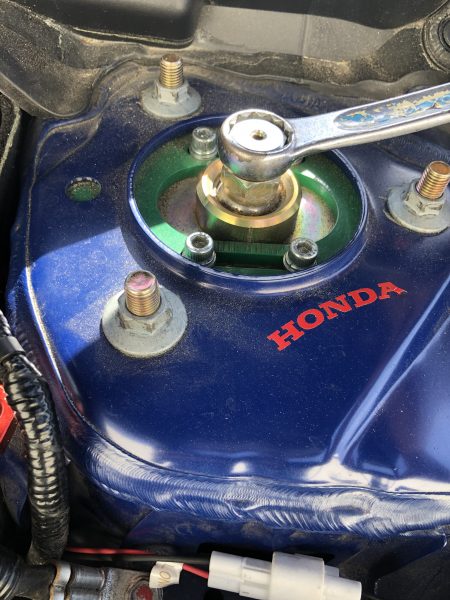
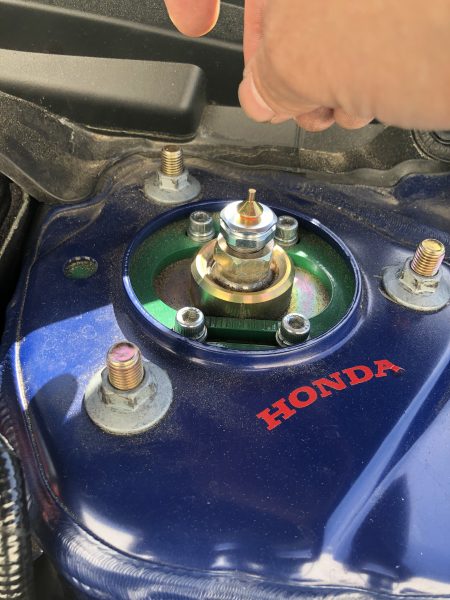
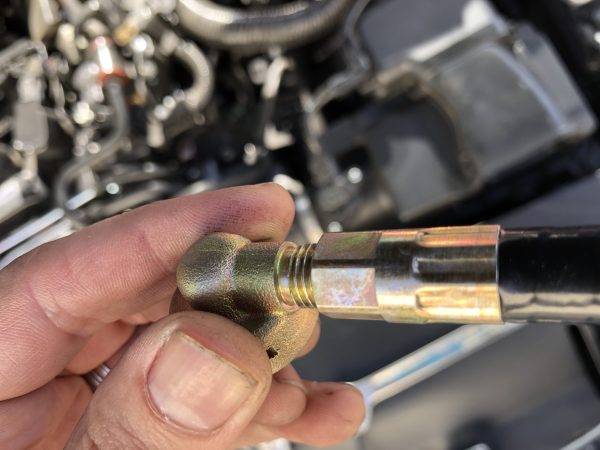
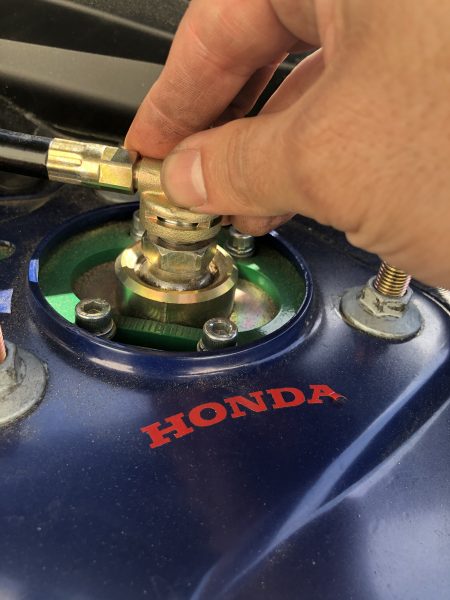
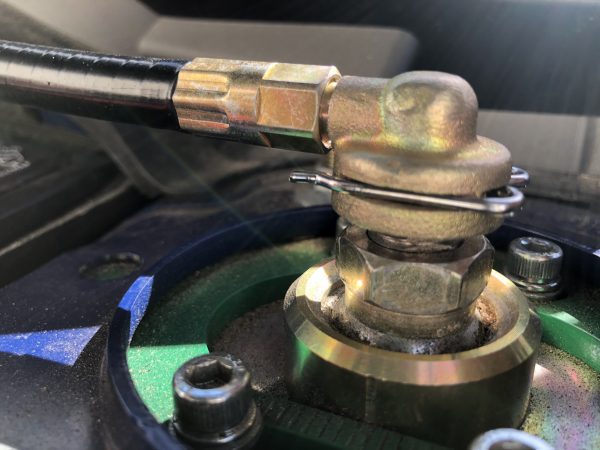
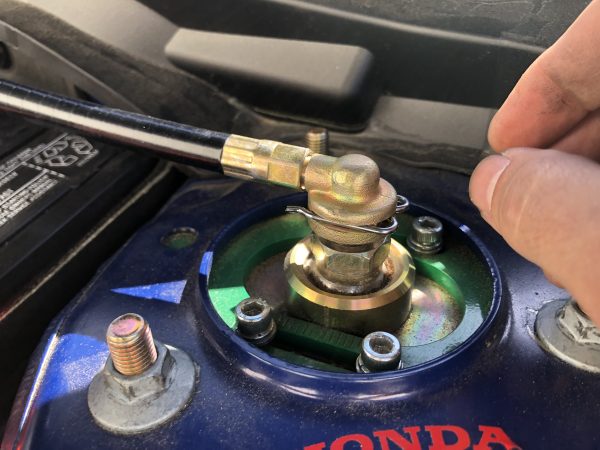
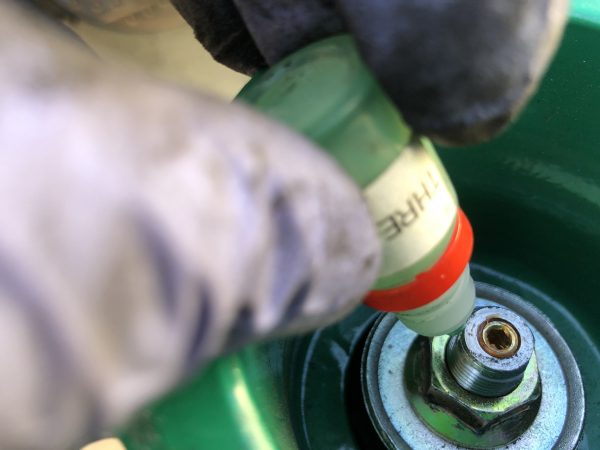
Installation of the front for this Civic required the use of the EDFC Motor Extension Kit to relocate the motors. Although it looks like the EDFC Motor will clear the hood, it in fact does not. The Click Assembly is first removed with the Hex Bolt. Once removed I applied the supplied grease to the hex bolt hole, wiping any excess grease from the piston shaft.

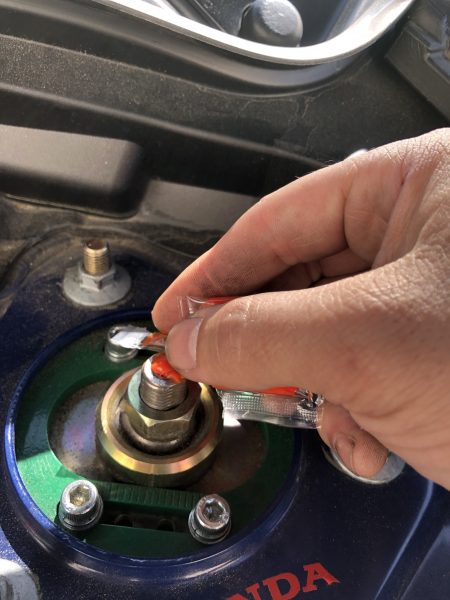
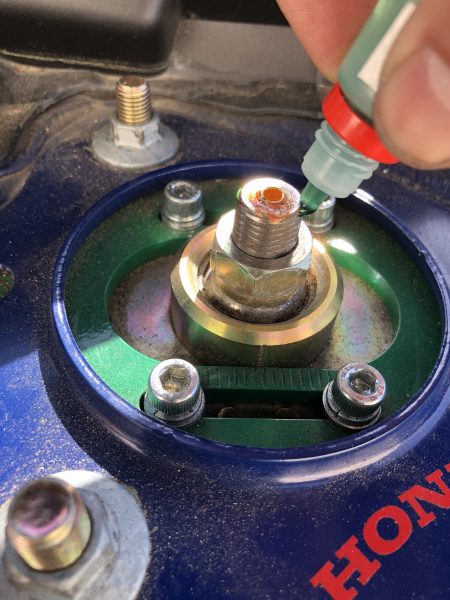
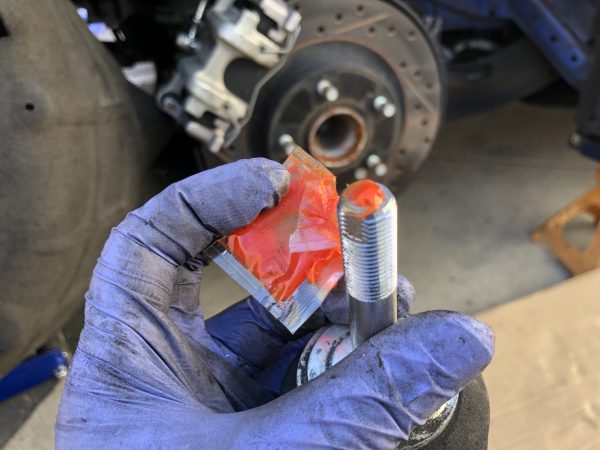
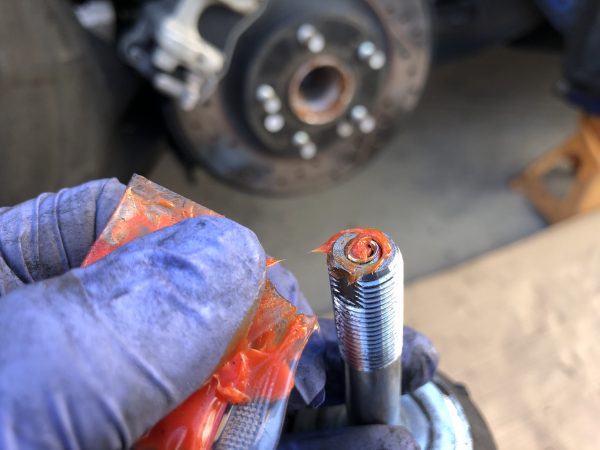
Next a small amount of Thread Locker (also included with the EDFC Motor Kit) is lightly applied to the piston shaft outer thread on both sides (where the Extension Kit’s Top Adapter screws on to).

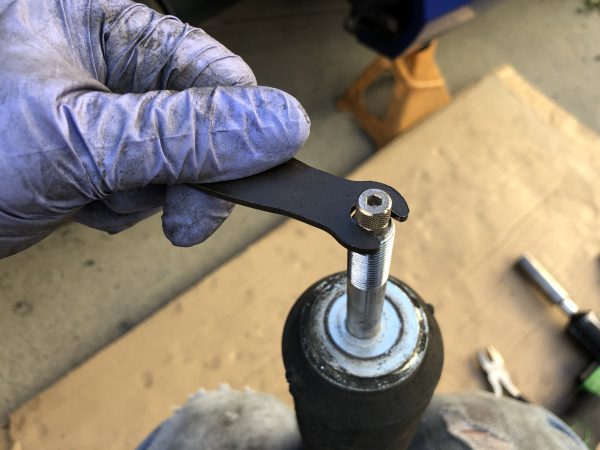
Then the Top Adapter base is tightened onto the shaft using a 19mm wrench. Please note that a very minimal amount of force was exerted to the Top Adapter and should not be overtightened as it can break. Next the gold adjusting rod (Conversion Rod) is installed in the Top Adapter hole.

Prior to installing the 90 degree angle (Cover) and clip to the Top Adapter, I installed the Extension adding threadlocker on it and hand tightened it. Make sure that the Inner Shaft is turned out as to avoid any hangups with it against the gold Conversion Rod when installing.

Then proceed to install them on to the Top Adapter pressing down firmly to also press down the gold Conversion Rod and allow you to insert the locking clip to lock against the base. Afterwards add threadlocker to the other end of the Extension and proceed to install the EDFC Motor and also hand tightened it. Motor mounting location is up to you as some may have different locations preferred then the ones I had chosen. Also, do not bend the Extension (no U bends). It only allows a minimal amount of bending.

The fronts were not too bad to install. However, the rears were another story. Since only TEIN Japan had a chance to do an EDFC installation noting down key areas in the rear shock’s mounting tower where the EDFC motor cable is to exit, this gave us an opportunity to see if this would be the same for U.S. market applications. The wheelwell liner should be removed before uninstalling anything as it allows for a clear view of the shock mount tower area.

Due to limited accessibilty of the lower shock bolt, the rear spring should also be removed. Once the shock is removed the upper mount also needed to be disassembled to allow removal of the click assembly.

Once the click is removed apply the grease into the hex bolt hole then (applicable to EDFC ACTIVE and ACTIVE PRO models) install the supplied gold color hex bolt flush with the top of the piston rod. Reinstall the mount back on the damper. Apply grease to the hex bolt, then apply threadlocker to the piston shaft threads.

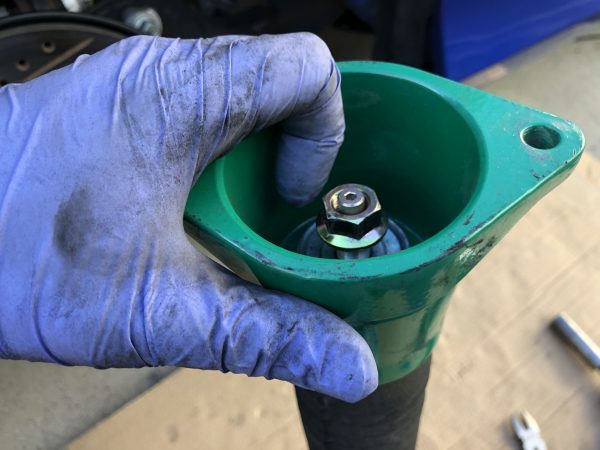
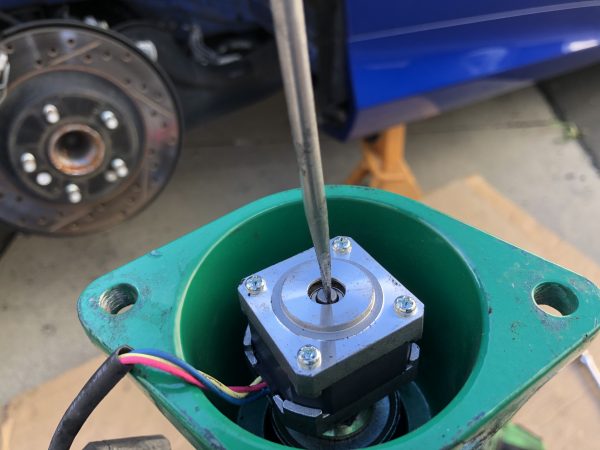
Proceed to install the EDFC motor hand tight to the threaded piston rod. Now, check that the EDFC Motor’s shaft turns freely by using a flathead screwdriver to turn the shaft- you should be able to complete several turns in either direction (it should eventually stop in either direction). The EDFC Motor cover was a slight pain to install since accessibility of the motor inside the cup-shaped upper mount was extremely limited. On a side note, I have seen where the Motor cover was preinstalled and a slit cut on the top of the EDFC Motor allowing for screwdriver access to the Motor’s shaft. Then once you check for free movement of the shaft, the slit can be resealed with silicon. Either method of EDFC Motor install works.

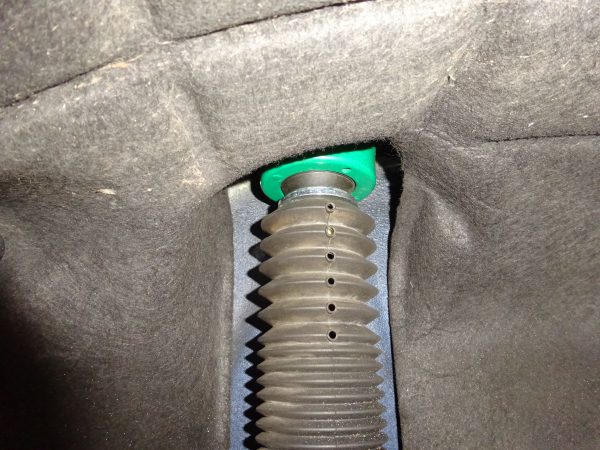
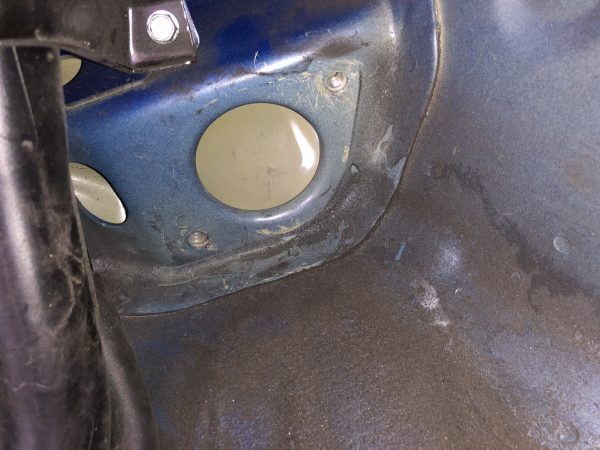
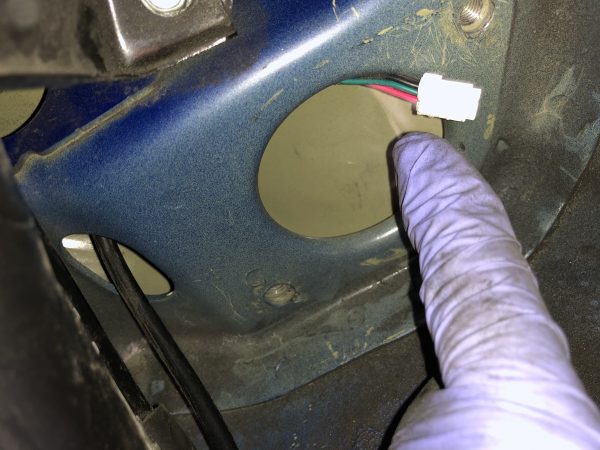
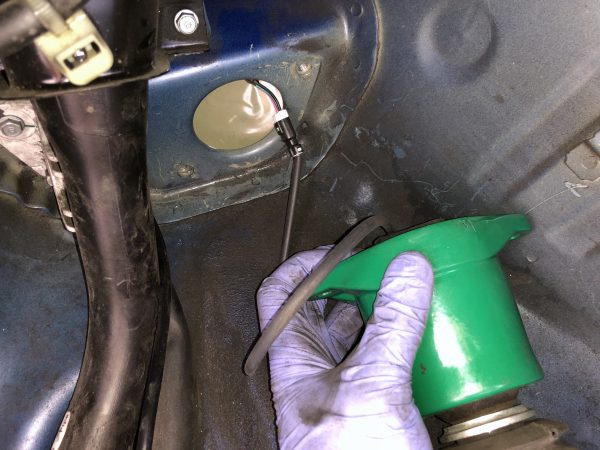
Prior to reinstalling shock, the EDFC Mid-Cable would need to be installed. As you can see in the images, there is a small access hole next to the main tower hole where the shock would mount.

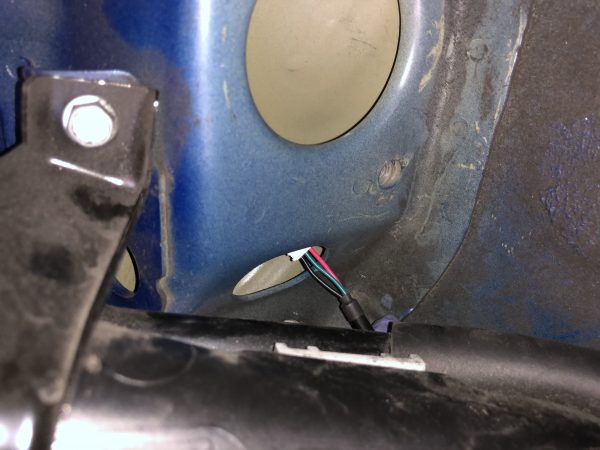
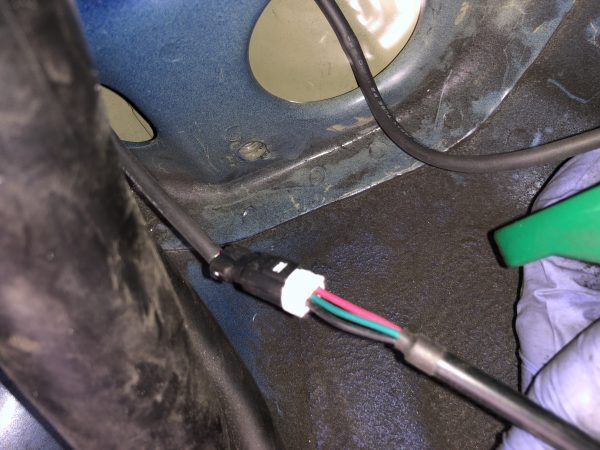
The male connector of the mid cable needs to be fed through the smaller access hole over to the shock hole. Please take note that the cable connector also needs to be pushed through a small clearance on the top upper corner of the smaller access hole (as shown in the noted image).

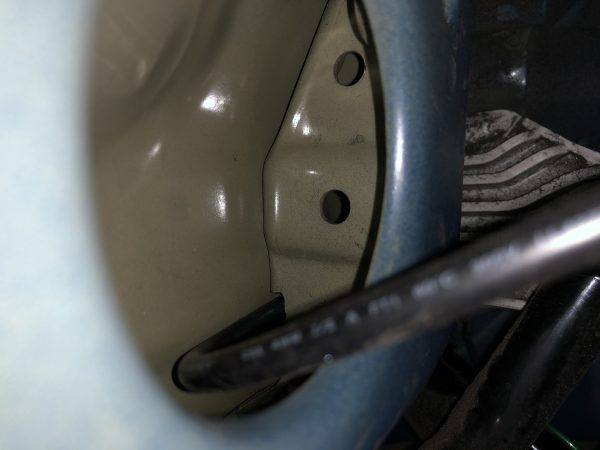
Once pushed through, position the shock on its mount (I recommend to install the bolt through the lower shock eye ring bushing for support.) then connect the two cables together and gently pull the mid cable and EDFC motor cable through. During this time you would also need to move the shock’s upper mount closer to the tower to avoid tearing the cable wire. Once the shock mount is close enough, a bolt can be threaded on to hold the upper mount in place allowing for the cable slack to be removed then the mount to be completely reinstalled. Afterwards you can reinstall the shock bolt and spring, applying suspension preload when tightening up the loosened bolts.The EDFC Mid Cables were ran through existing grommets into the trunk area to the driver unit.

Though this install took a little longer than anticipated, we have a better understanding for installing EDFC ACTIVE (and EDFC ACTIVE PRO) on 2017+ Honda Civic models. Hope this helps out for any out there looking to install our EDFC systems on similar applications. As per usual you can alway contact us direct should you have any technical questions.

ENDURAPRO PLUS 20K Mile Inspection

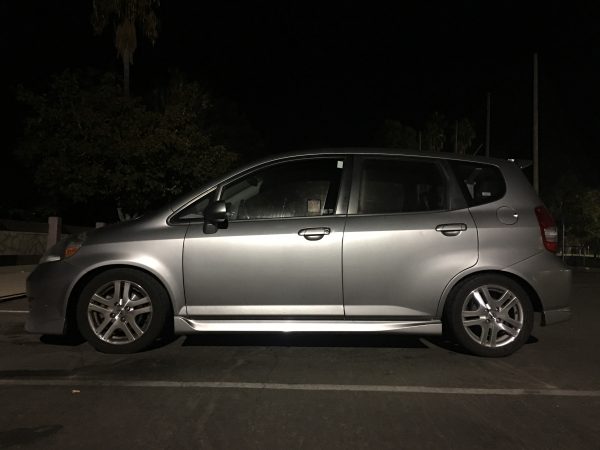
I’m lucky enough to be one of the first in the U.S. to put our new ENDURAPRO shock absorbers to use in the U.S. My 2008 Honda Fit was fitted with the ENDURAPRO PLUS (16-click damping adjustable) shocks and struts, which I eventually added our S.TECH lowering springs, around March 2018. I figured it’s time to visually inspect these shocks and see how they’ve held up.

As previously mentioned, this car is typically my daily commuter for work. I average about 14,000 miles in driving a year. While I technically have just over 21,000 miles on these ENDURAPRO PLUS shocks, the other miles I drive for the year has been on my truck. Still, I think over 21k of miles on our ENDURAPRO PLUS shocks is a pretty good age to finally give them a look-see. Mind you, the average shock absorber lifespan is typically 36,000 miles in the U.S. Not too sure how that average came to be. We see shock absorbers last much longer than that. Quite honestly, I should have inspected these shocks a long time ago (a reminder to all to inspect their cars)!

Prior to giving you a run-down of the inspection, I will say that overall the shocks still feel great! Over time, I’ve readjusted the damping click settings simply to find that “sweet spot” in comfort. After all, installing lowering springs will alter the ride quality. Currently I have the fronts and rears set to 8 clicks from stiff (essentially the middle setting). I had previously had it somewhat softer in front and stiffer in back, as I felt it worked well whenever I had the car fully loaded. I may end up softening the front just a little, once everything is reinstalled.

Speaking of fully loaded, that is probably the most awe inspiring experience that showcases how our shock absorbers perform! It really is! As you probably already know, our ENDURAPRO/ENDURAPRO PLUS line includes internal Hydraulic Bump Stoppers, which helps alleviate that ever-so-fun suspension oscillation whenever the car is at maximum capacity.

Again, since it’s my daily commuter, typically there isn’t much extra weight in the car, other than my kids’ seats and some kids junk in the back seats. With lowering springs that are a bit stiffer than stock, it can feel relatively firm over bumps and gaps in the highway. Overall, our S.TECH springs aren’t terribly stiff.

However, after my bi-weekly trip to Costco, which usually consists of purchasing several cases of bottled water, my kids’ diapers and formula, and a bunch of other necessities you have no choice but to purchase in bulk, the trunk gets heavily loaded, and you can both see and feel that added weight. Then add my sons, when i have to pick them up at their Nana’s house. It’s basically like I’m loaded for a long-distance road trip.

This is where our Hydraulic Bump Stopper really comes in to play. Our Southern California highways are anything but smooth, and there are plenty of large gaps, expansion joints, dips, pavement cracks/potholes, ramp-like bumps over overpasses, etc. It’s a great way to put suspension to work, and at highway speeds, this provides us with a horrific ride, and one that puts our vehicles through pure torture. Did I mention that I also have to listen to “Elmo’s Song” on repeat whenever the kids are in the car???

But seriously, over this type of highway terrain, TEIN’s Hydraulic Bump Stopper really does its part in helping absorb these high-speed impacts, preventing the polyurethane bump stop from doing that work and helping the shock absorbers rebound nice and smoothly. Honestly, it has to be one of the more rewarding parts of my commute. Now I can understand what trophy trucks must feel like over big jumps,,,,,, just at a much smaller scale. Hahahaha!

Anyway, on to the inspection:

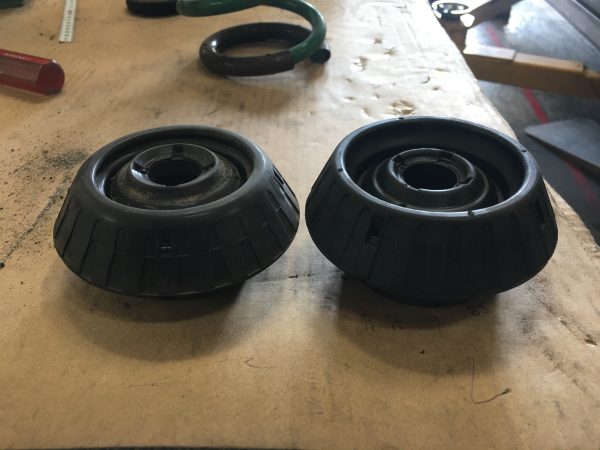
One thing I noticed was the front strut mounts were making a bit of noise, especially when steering at slow speed. I initially thought it was the bearing making the noise. But, for all I know it could have been a problem with the struts. This just confirms it was indeed the upper mount. However, as mentioned during the initial installation of these ENDURAPRO Plus shock absorbers, the front mounts probably contributed to a slightly lower ride height than target, due to the mostly rubber mount taking a set after 80,000 miles of use. Now at 101,000 miles, it is time to change these components out to fresh new factory style mounts.

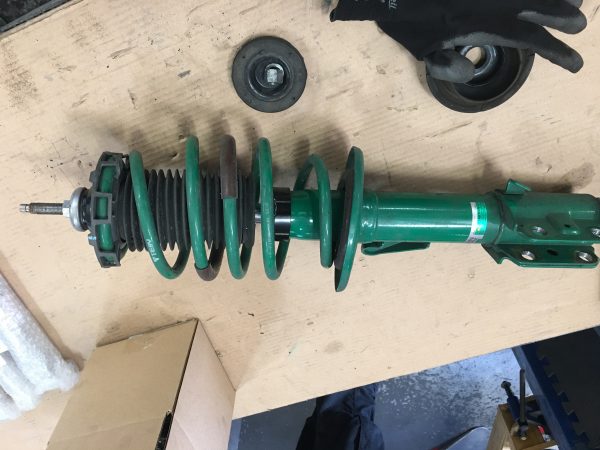
Old mount on the left, new on the right. You can see how the mounts have sagged over time. It was starting to make some noise, most notably at low-speed.

For the rears, the only thing I noticed was a hole being worn into one section of the dust boot. Looks to have made contact with the tire. Not a big deal, and replacement dust boots are readily available.

I also checked gas pressure while the shocks were off the car, and all of them seemed fine. By checking I mean I fully compressed each damper by hand and checked the rebound, as well as tried different damping settings during the same procedure. I will say the damping click adjusters were slightly stiff up front. However, that could be due to not using the included ADD Caps to cover them (this keeps dust out of the system). A simple spray of WD-40 or similar type lubricant will displace any dirt or corrosion in between the click knob and its base. Also, any exposed thread on the piston shafts for the front dampers accumulated some surface rust. A wire brush cleaning and some WD-40 helps clean that up. But since I removed the struts from the original upper mounts, the threads got a decent clean up simply from the removal process.

Front strut out. I needed to remove the bearing, as I thought this also contributed to noise I was hearing at low-speed driving.
With the bearing out, I decided to inspect the shock. All components removed help to make a more detailed inspection.

While I’ve had the ENDURAPRO shock absorbers off, I checked bushings in the control arms, ball joints, sway bar end links, and tie rod ends just to make sure of their condition, which fortunately they are. I’m sure at some point I’ll change out the front lower arms (bushings by themselves are not readily available). For the rear twist bar, it’s hard to source just the rear bushing, so I’m going to keep searching for a solution.

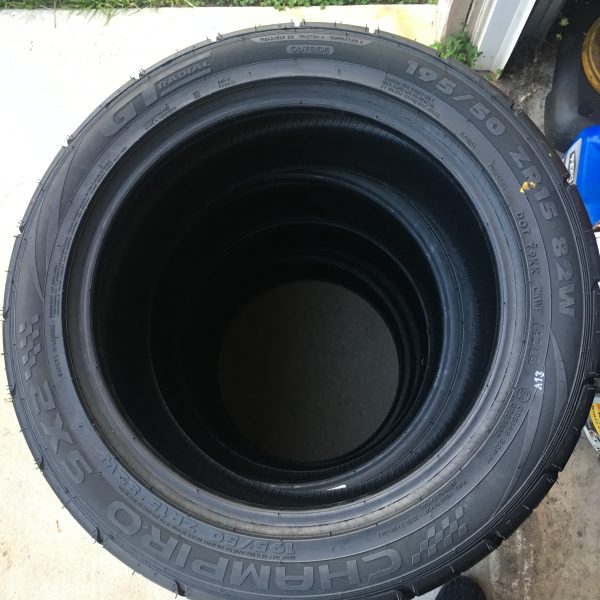
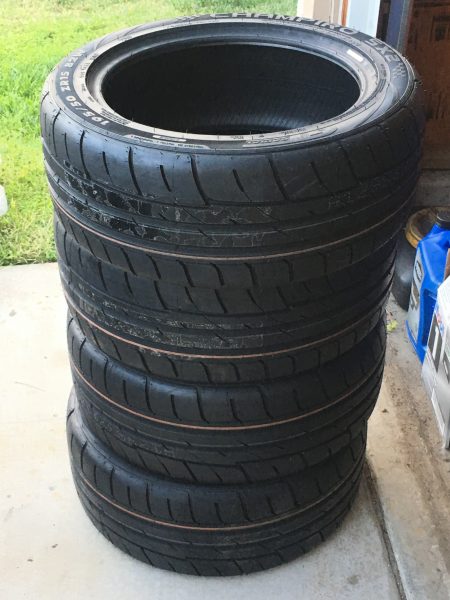
I did have the tires changed at around the 3,000 mile mark on these shock absorbers. I wanted to try something a bit more sport oriented, but not very expensive. Also, my “tuning philosophy” (if you will) for starting to modify a car is usually in the order of- decent tires, sport (not race) brake pads/shoes, and some decent suspension (as in shock absorbers and possibly springs), especially if there is a damping adjustable option. This before ever considering more power. With ENDURAPRO Plus shocks and S.TECH lowering springs and some Stoptech Sport pads and plain rotors installed, I needed decent tires. So, I contacted the guys at GT Radial to order a set of their Champiro SX2 Summer tires. I’ve followed the 86 Cup group and saw that these tires offer very decent performance and very good wear resistance, and I wanted to try something other than all-season tires that this car has used over the years. I opted for a size slightly smaller in diameter than stock just to see if there was any gain in performance.

A new set of tires go on the Fit, courtesy of GT Radial
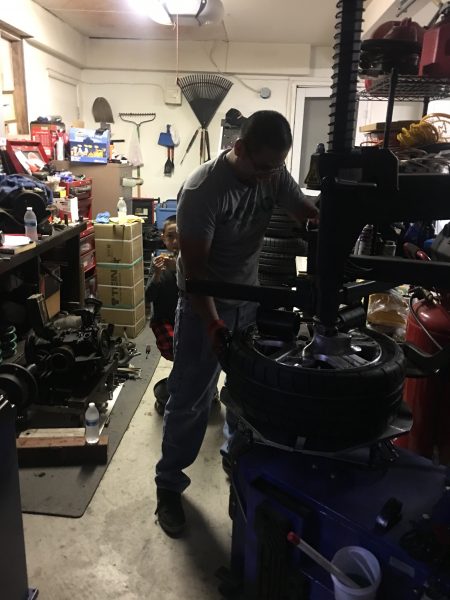
A big thanks to Gonzo, who invited me over to his Chateau. He’s got a full tire changing station in his garage! His son Enzo also came out to help. Good kid!

I will say that these SX2 tires still provided very good comfort. Being a daily commuter, this car only gets an occasional spirited drive. For me, that comes with the excitement of driving through Angeles Crest, since it’s kind of in my “back yard”. Interestingly enough, I found that these tires at 31psi cold, and a 13-click front shock setting (soft) and 6-click rear shock setting (somewhat stiff) had very good and predictable feel. I could very lightly get the back end to rotate with a touch of left-foot braking, and the feeling was pretty consistent throughout my drive through the hwy. The Fit is a very front-heavy car, so it takes a little coaxing to get the car to turn in, since the car understeers easily. One thing I could appreciate from these tires is the wear resistance. Rated as a 200 treadwear, these tires held up better than some 360 treadwear tires I had on previously (which actually only lasted about 13,000 miles before I changed them out to these SX2’s). Dunno what the deal is with that, but those are my figures.

Mind you, these aren’t all-season tires, so I take it a little easier during rainy days. However, wet weather driving is actually quite nice on this setup. Not that I was expecting to hydroplane on a summer tire on wet pavement, it actually handled heavy rain and puddles very well.

While this is sounding like a tire review, what I’m getting at is that these small changes to this daily driven econobox (TEIN S.TECH Springs, ENDURAPRO Plus Shock Absorbers, and GT Radial SX2 tires) have already made this car more enjoyable for my drive. Does it make me miss having a much more sporty car? Absolutely. But, gotta work with what I got. I think most importantly is the value of all these parts as a whole- Not a lot of money spent (granted, I got the shocks for free for testing on my car) to “upgrade” the car. So, for most of you guys looking to make your car a little bit faster and more fun to drive, this should be something to think about.

By the way, the slightly smaller diameter tires I chose actually helped improve a few things such as MPG (when I really take it easy on driving) and acceleration (most notably in higher gears). I was expecting MPG to be a bit worse. However, it has affected actual speedometer readings a tad, but the factory speedometer reads ~1 MPH lower than actual.

All in all, I’d say I’m more than pleased with the car as it currently sits. Not a ton of money invested in getting some performance out of it. Decent suspension, very good tires, and sportier brake pads up front, and I’m a happy camper!

FK8 Civic Type R Suspension Development

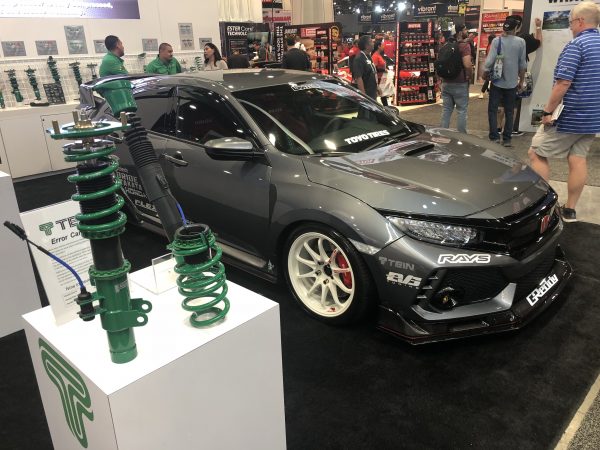
We’ve already showcased our FLEX Z prototype suspension for the FK8 Honda Civic Type R at the SEMA show last year, but we’re now making more headway into production of this kit, as well as lowering springs and the upcoming MONO RACING suspension kit for this platform.


FK8 Civic Type R Suspension Soon Available

Development took longer than expected, mainly due to the availability of this platform in Japan. Why that was troublesome for us is that TEIN Japan usually gets a head-start on product development whenever a global vehicle platform is available. That saves TEIN USA the development time on designing the suspension (altogether possible for us to do, but it still comes with its own development delays).

Prior to the SEMA show, we knew that TEIN Japan finally had an FK8 to do testing on and had prototypes they could send to us. So, as soon as that opportunity came around, we contacted a local partner in having his Type R brought in and tested, and eventually asked ever so kindly to use the car for our booth display at SEMA 😉

As many of you consumers already know, the FK8 front suspension is a far cry from the design for the standard Civic’s that platform shares. It has a very unique strut suspension, much like the Super Strut design of the Toyota Celica.

In fact, the design was so unique that it posed another issue for us in both disassembly and reassembly of the suspension. Of course, we try to offer a suspension kit that is a bolt-on affair for the consumer, so it took a bit of self-education to figure this out ourselves.

Also, newer cars like the Type R have factory electronically controlled suspension. This was a problem because once the factory suspension is removed, a fancy warning came on the dash display. This led us to develop our new Canceller Units that will be included on applicable vehicle applications we make suspension kits for. With the Canceller Unit, no more warnings on the dash, and that means a customer can opt for one of our EDFC controller units, like EDFC ACTIVE PRO.

Production Canceller Unit for FK8 on display at SEMA 2018.

***Canceller Units are vehicle specific unfortunately. Again, we will include them for suspension applications that require them.
Canceller Unit (*prototype used for testing only) installed on FK8 front strut
Canceller Unit (*prototype used for testing) installed on the FK8 rear shock absorber

EDFC would actually be a blessing for this car, since Honda decided to make the shock absorber upper mounting position in an inaccessible design (since our damping adjustment is at the top of the piston rod).

Soon we hope to have these kits available! Please keep posted with us for more info, or keep checking our website for new product releases!


TEIN Endura Pro Plus Shock Absorbers

This is probably the single most anticipated product from TEIN, for me at least. Why? Probably because I’m reaching a point in my life where I want a simple suspension setup that will work well, and I can do away with a bunch of features I will not really use often. In other words, I’m getting old and lazy.

The TEIN group has been discussing this new line, which is a premium shock absorber, for probably the past five years (to my knowledge). We’ve wanted to get into the replacement shock absorber line for some time now, but we wanted something that had an appreciable difference to the well-known aftermarket shock absorbers already on the market.

So, after all these years and years of discussion and product development, we now have our Endura Pro and Endura Pro Plus shock absorber line.
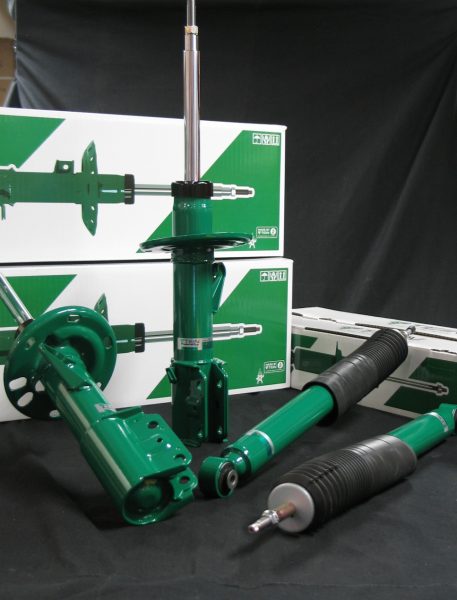
These shock absorbers are completely compatible with OEM vehicles. As stated, it is a replacement shock absorber. HOWEVER, it is far from a simple replacement. We’ve gone an extra step in making them a high performance shock absorber. In saying that, this product is not the same type of suspension as our existing line of coilovers, which in many cases offer a firmer ride and drastically reduced vehicle body motion (sway, squat, dive). The Endura Pro/Endura Pro Plus line does offer a very comfortable ride quality, but internally it is much different than a standard twin-tube shock absorber you’ll find as an OEM shock.

For starters, we actually have increased the internal capacity of the shock absorbers. In most cases, our Endura Pro/Endura Pro Plus shock absorbers are the same length as an OEM shock (a few applications use a slightly shorter damper body), but we also use larger diameter damper bodies, thus the internal volume is greater. In doing so, we’ve increased damper oil capacity over a standard shock absorber for the same vehicle application. That translates to better endurance (long-term driving) and increased longevity. It also allows us to use a larger than OEM piston valve which provides a greater damping force range.
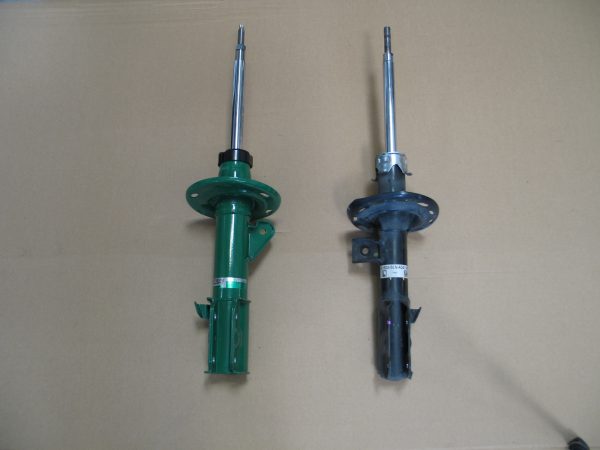
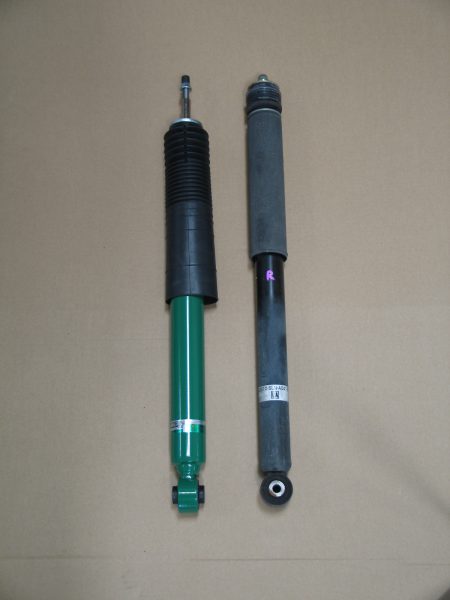
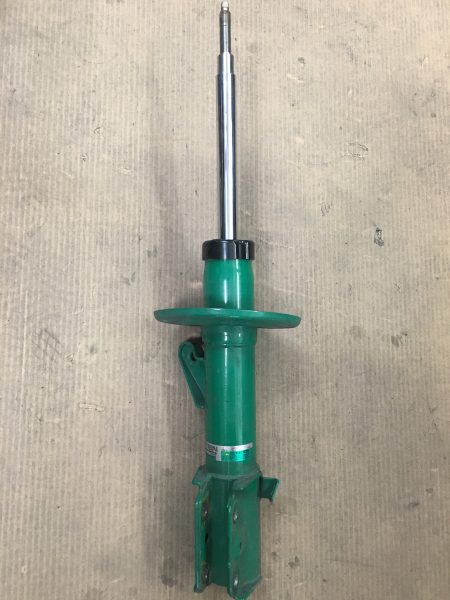
For strut type applications, we use thicker piston rods (22mm dia.) able to withstand greater lateral loading that struts are subjected to.
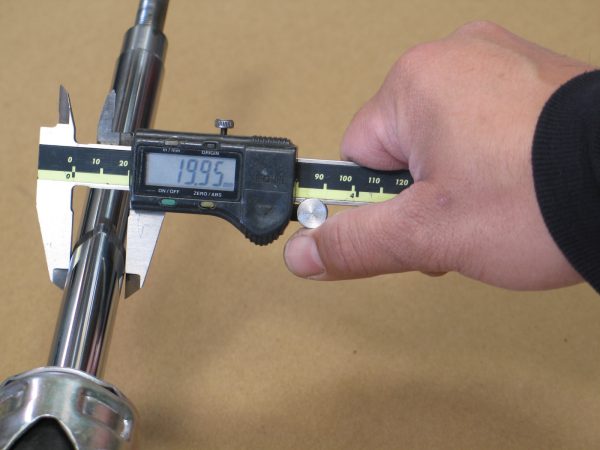
OEM Strut Piston Rod
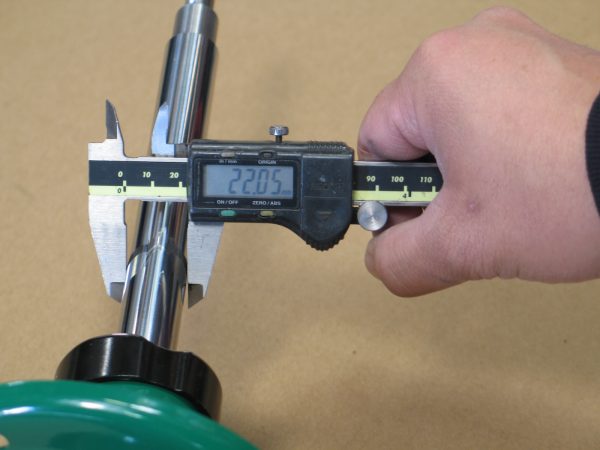
Endura Pro Strut Piston Rod

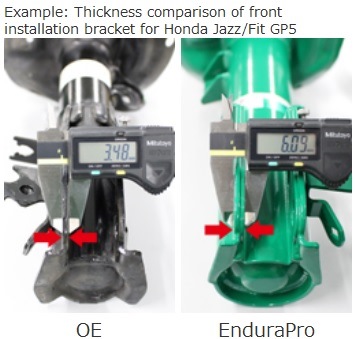
Since we use the same high-strength steel as used in our coilover kits, it allows us to reinforce areas of the damper, like the lower brackets on strut type suspensions, or the spring seat or sway bar bracket, without a large penalty in weight. In fact, for some applications the Endura Pro shock absorber is actually lighter than OEM!
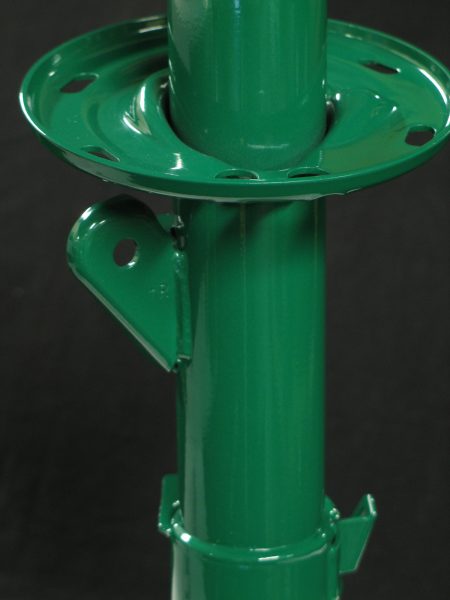
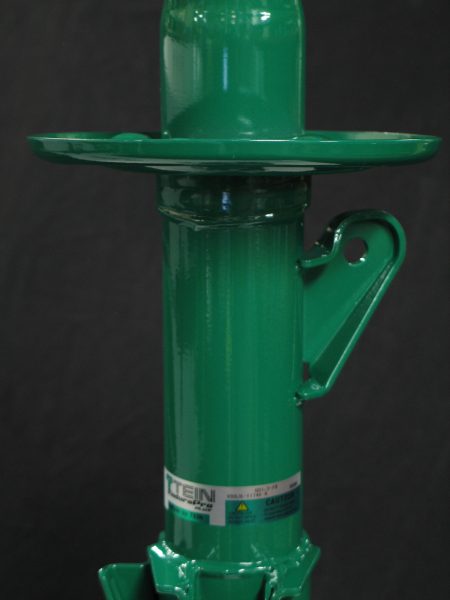
Depending on the vehicle application, we will include necessary hardware to make the installation easier, such as collars, bump stoppers/washers, dust boot, bump stop, etc.
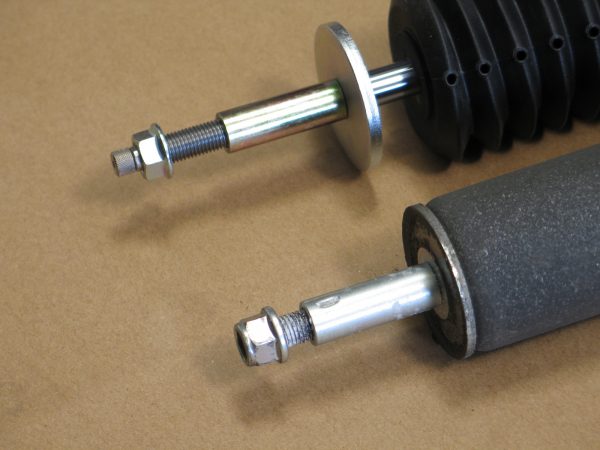
OEM shock (bottom) has a crimped collar, making removal of the dust boot, bump stop, and washer impossible. Endura Pro will include new hardware if necessary.

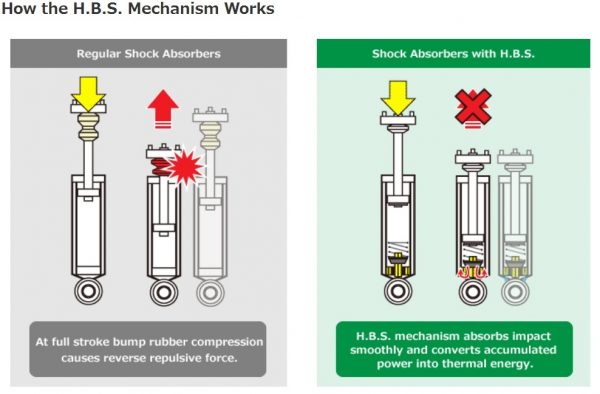
One new feature recently only applied to the TEIN FLEX A coilover kit has now made its way into every Endura Pro/Endura Pro Plus shock absorber- our Hydraulic Bump Stop. With the aforementioned FLEX A line, the only other TEIN product to incorporate a Hydraulic Bump Stop is our Gr.N rally coilovers. The off-road crowd probably knows a fair deal about how a hydraulic bump stop works- it creates higher damping force on compression to prevent the suspension from bottoming out completely, then allows the suspension to settle in a very controlled manner on rebound. What you end up with is a reduction in suspension oscillation (excessive up and down movement, or “porpoising”). Never before has a replacement shock absorber ever had such a feature.
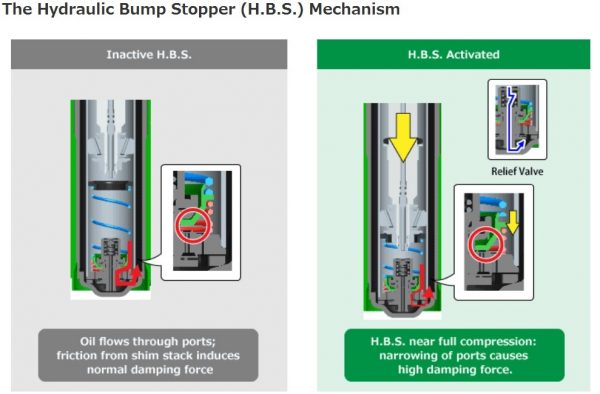
The Endura Pro Plus line, specifically, has 16-way damping adjustment, similar to our other damping force adjustable coilover kits like STREET ADVANCE Z, FLEX Z, MONO SPORT, etc. This gives the end user the ability to set their suspension to their preferences depending on their driving conditions. As an added bonus to having this damping adjustment, this technically makes the Endura Pro Plus shock absorbers EDFC series compatible! With EDFC, now you can control the shock absorber damping settings directly from the driver’s seat. Opt for the EDFC ACTIVE or EDFC ACTIVE PRO series, and you’ll get adaptive damping force control based on speed or g-force loading! EDFC is a universal application for our 16-way adjustable TEIN dampers, so any car can use this setup (some vehicles may require modifications or adapters to make the EDFC Motors fit properly)!
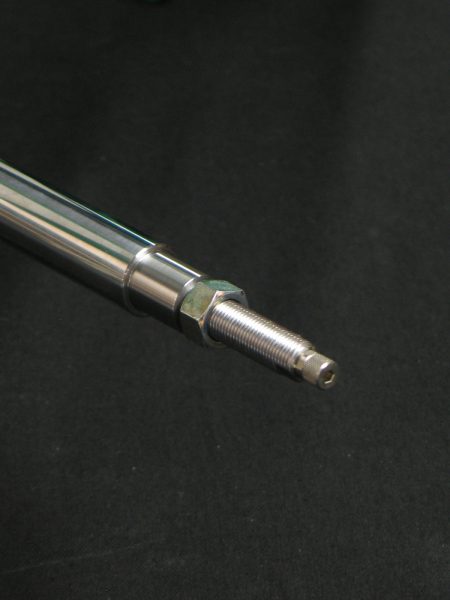
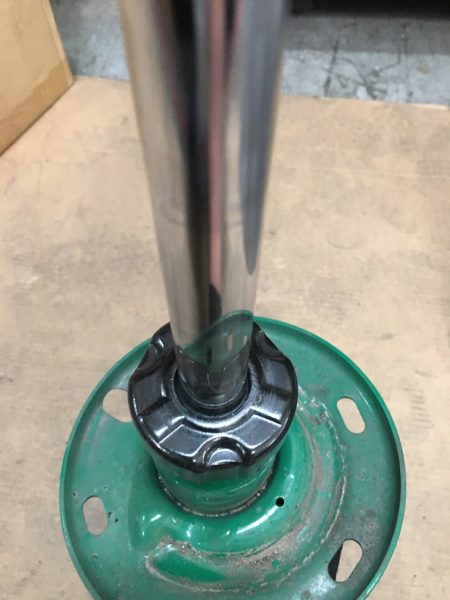
Click knob for damping adjustment on strut type Endura Pro Plus
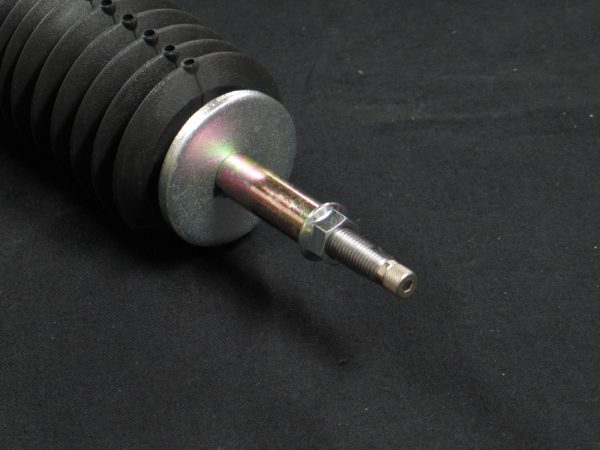
Click knob for damping adjustment on Endura Pro Plus

Lastly, the Endura Pro/Endura Pro Plus line adopts our new fully sealed structure in helping keep manufacturing costs (and MSRP) down. These shock absorbers will be available for sale individually, but we’ll also be offering them as a complete set with TEIN S.TECH lowering springs!

So again, this new Endura Pro/Endura Pro Plus line is far from a simple replacement shock absorber, and now I can say I know that personally.

After constant nagging to my boss, I wanted to see if we would be making some for the GD3 Honda Fit (2007-2008). Since I’ve taken ownership of my dad’s Fit, I’ve grown to love driving it. It’s by no means a fast car (quite the opposite, actually. I’ll just call it “brisk”), but it is small, lightweight for its size, and kind of fun to drive in a spirited manner. And it’s a practical car for me now that I have a small family of my own. The Fit also saves me from wasting gas in my truck driving solo to and from work, so it’s now my daily driver.

Now, with 80,000 miles, which is relatively low for this year vehicle, I can feel the suspension is not as it was when it was newer. Of course that can be from a number of things, but the shock absorbers are a pretty high wear and tear item in the suspension, so that felt like the cause. After removal of the shocks and compressing them by hand, there was still at least some nitrogen charge in all the shocks, but maybe not enough to really provide good rebound force.

Anyway, to get to the point, I finally got a set of Endura Pro Plus shock absorbers for the Fit!


DISCLOSURE– The Endura Pro Plus shock absorbers I’m using are designed for the Japanese market GD3 Honda Fit, which is not a direct fitment for the front.


This required some modification to the knuckle brackets by boring out the bolt holes to 14mm. Still, this isn’t a direct fitment even after this modification. The struts are the same length as the US Honda Fit OEM strut, however the spring seat and sway bar bracket are 20mm higher than the OEM strut (fortunately this poses no clearance issues). So, this actually does translate into a slightly higher front ride height. For my Fit, it was approximately 12mm higher than stock ride height in the front.

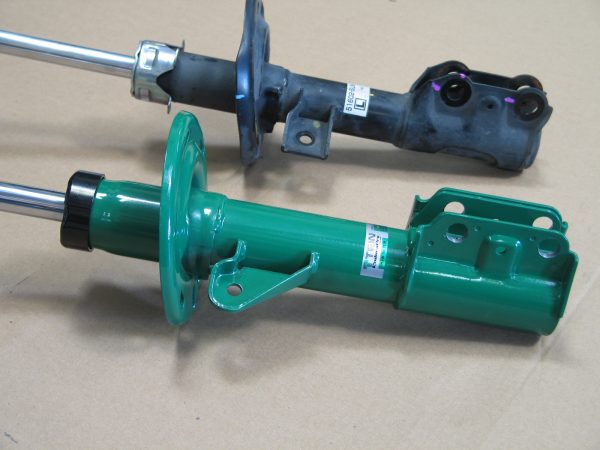
*Endura Pro Plus Strut (bottom) had bolt holes in lower bracket bored to fit USDM GD3 Honda Fit.
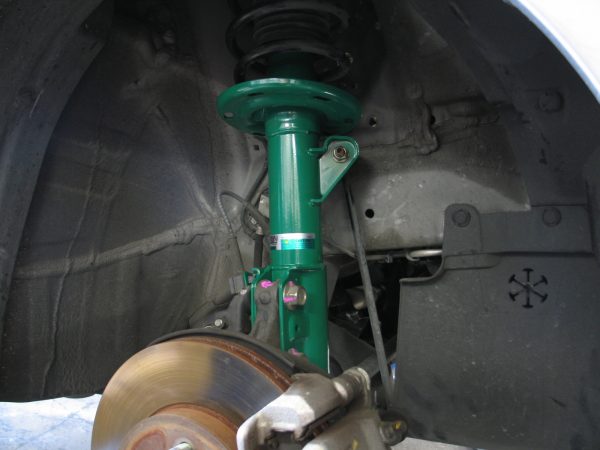
The rear dampers are a direct fit, so no problems there.
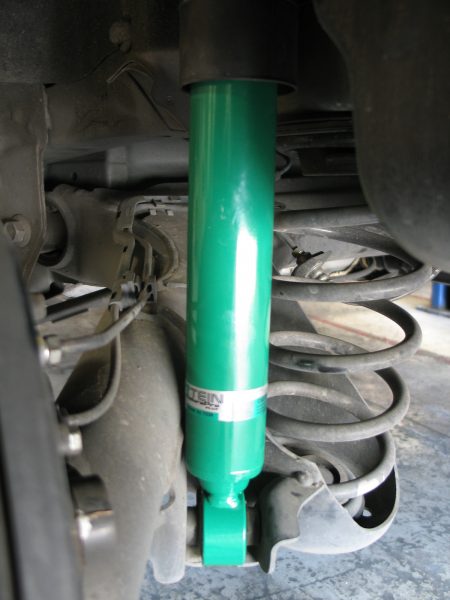
Clearance at the bottom is very close to the axle beam, due to the larger diameter body of Endura Pro/Endura Pro Plus shock absorber. Fortunately no contact with the beam, even at full droop.

With the shock absorbers set at 8 clicks (middle) front and rear, the ride quality felt very much as I remembered the car feeling like when new. That was ten years ago though, so I really only have a memory to go off of. One of my co-workers said that the shocks set to 16 clicks (softest) was actually an improvement over the worn OEM dampers. At 0 clicks (stiffest) it is actually a noticeably firm ride quality, but far from being jarring (the Fit uses soft springs). I found that a 12 click front and 10 click rear was more to my preference. So I drove on that for about a week, until one of the guys here (Gonzo, aka Cpt. Slammo, aka Monster Tuck) kept telling me “it needs to be lower”…. ughhh.

I actually wanted to lower the car a little anyway. Go figure. I mean that’s really what TEIN suspension is known for doing, so it’s only natural to want to use the products I help sell. So, I bought a set of our S.TECH lowering springs for the Fit (part # SKB36-AUB00). Knowing that the front struts are now a bit higher than the OEM strut, I thought the car would look a little funny with a slightly raised front end. But, to my surprise the ride height actually has a relatively even drop front and rear (referring to tire-fender gap)! The front actually dropped a little over 2″ front and 1.2″ rear (we spec S.TECH’s for the GD3 fit at -1.8″ front and -1.2″ rear). So even with the Endura Pro Plus front struts having higher spring seat position than OEM, it’s nearly about the same ride height as our test data. That difference can be due to the strut mounts (being mostly rubber) starting to sag.

As for ride quality, now it feels more in line with how one of our coilover kits feel, like a STREET ADVANCE Z for example. Not incredibly stiff, but nice and sporty with good compliance for my daily commute. The extra flexibility in having damping adjustability is a worthwhile upgrade, especially if you’re considering using lowering springs with new shock absorbers.

All in all, I’d say this is probably the happiest I’ve been with driving the Fit. The lowering springs really helped reduce the body motions (the Fit has a pretty tall roof line). The reduction in body sway is a dramatic improvement! I’ve found a damping setting on the Endura Pro Plus’s that works really well with the S.TECH’s.

In general, as a replacement shock absorber, the Endura Pro line is a great improvement over the factory suspension. Adding the adjustability I get with the Endura Pro Plus shocks gives me a chance to find a ride quality I prefer!

More information on the Endura Pro/Endura Pro Plus shock absorber line can be found on our website
 

Discounted Coilovers for Formula Drift Irwindale

We’ll be attending this year’s Formula Drift event at Irwindale Speedway on October 13-14, 2017.

Rumors abound that this will be the last Formula D event at this specific track (which has been the same rumor for the past five years or so; seems to be a legitimate claim this time).
As always, we’ll have our merchandise for sale, as well as some products on display.
We’ll also be bringing some discounted coilovers that we brought to JCCS (which was kind of a last-minute notice).

*These are technically used coilover kits (test & evaluation). In actuality, they were mostly used for fitment testing and for obtaining ride height adjustment range data and were not really driven on. These kits will be sold as-is and without warranty.

GSB14-1UAS2

GSK10-1UAS2

GSP26-1UAS2

GSHD6-1USS2

VSM40-C1SS1

DSE20-LUSS2

GSB90-51SS3


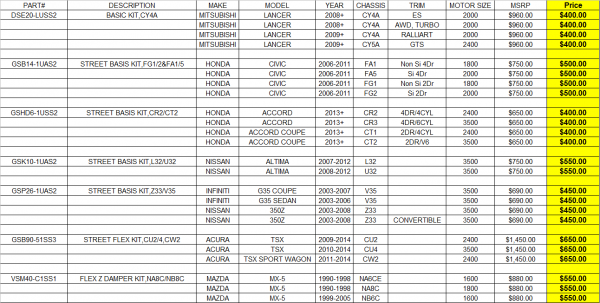
See special pricing below:

*Prices are for cash payment (we will not be able to process credit card transactions during Formula D)


***We will only be bringing qty 1 of  each part number listed. The list below is solely to show applicable vehicle models by part number***

Japanese Classic Car Show (September 23, 2017)

This weekend is the Japanese Classic Car Show in Long Beach, by the Queen Mary! We’ve been attending for the past 5 years, and while it may not seem like our kind of customer base, we do get our fair share of product inquiries for suspension for older Japanese vehicles.

We’re not necessarily posting about our past experiences at JCCS, or what new products we’re making. In fact, our SPECIALIZED DAMPER PROGRAM still exists and is what we refer these types of customers to, since it’s applicable to nearly all vehicle makes and models.

Instead, I wanted to mention that once again we’ll be there, and of course we’ll have our TEIN merchandise on sale, as well as some of our products on display (and a pair of S30’s on our SPECIALIZED DAMPERS!). We’ll also have some TEIN suspensions that we’re clearing out and at a special price!!! While there aren’t many of these kits that we’re bringing, we’re sure there are some customers with these vehicle applications that might be interested.

These kits were used for test fitment and ride height measurement testing by our Research & Development department. So they are practically brand new with some installation scratches.


BASIC/DSE20-LUSS2 (for 2008+ Mitsubishi Lancer)

STREET BASIS/GSB14-1UAS2 (for 2006-2011 Honda Civic, Incl. Si models)

STREET BASIS/GSHD6-1USS2 (for 2013+ Honda Accord)

STREET BASIS/GSK10-1UAS2 (for 2007-2012 Nissan Altima)

STREET BASIS/GSP26-1UAS2 (for 03-08 Nissan 350Z/03-08 Infiniti G35 Coupe & Sedan)

STREET FLEX/GSB90-51SS3 (for 08-12 Honda Accord/09-14 Acura TSX)

FLEX Z/VSM40-C1SS1 (for 90-05 Mazda MX-5 Miata)

Special pricing on the right side column (in bold):

****CASH ONLY. ALL PRICES ARE FINAL. NO REFUNDS****

****First come, first served-NO RESERVATIONS/HOLDS****

*****Kits sold in as-is condition; no warranty*****

PART# DESCRIPTION MSRP Price
DSE20-LUSS2 BASIC KIT,CY4A $960.00 $400.00
GSB14-1UAS2 STREET BASIS KIT,FG1/2&FA1/5 $750.00 $500.00
GSHD6-1USS2 STREET BASIS KIT,CR2/CT2 $650.00 $400.00
GSK10-1UAS2 STREET BASIS KIT,L32/U32 $750.00 $550.00
GSP26-1UAS2 STREET BASIS KIT,Z33/V35 $690.00 $450.00
GSB90-51SS3 STREET FLEX KIT,CU2/4,CW2 $1,450.00 $650.00
VSM40-C1SS1 FLEX Z DAMPER KIT,NA8C/NB8C $880.00 $550.00

1992-1995 Honda Civic Suspension Testing

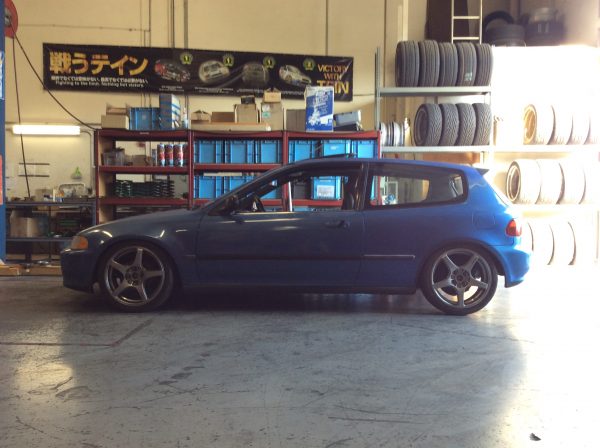
While this car has been out of production for well over 20 years now, we still find that the 1992-1995 Honda Civic is still a good seller in terms of our suspension products. Many older vehicles don’t really fare so well when it comes to aftermarket parts. Many parts being discontinued due to little demand. However, Civics of this generation are still very popular platforms to modify, and there are still plenty of them on the road, whether in sedan, coupe, or hatchback form.

Many of our customers should be well aware that TEIN is adamant of technological innovation in suspension. In fact that is a huge part of the name “TEIN” (TEchnological INnovation). Year after year we always look into ways to improve our suspensions and we try, as much as possible, to offer various kits to make it easier for the customer to choose the correct kit for their needs.

With that said, we’re still working on developing suspension for the ’92-’95 Civic. Currently, we’re working on the specifications for our upcoming STREET BASIS Z & STREET ADVANCE Z applications. While this line has been out for a few years now, we had yet to release it for these model years of Civic.

Why bother with testing, especially if we already have existing STREET BASIS and STREET ADVANCE coilovers? Why not just carry over the same specs of that kit to the newer Z line? That would be the easy way of doing it. However, we rely very heavily on customer feedback when deciding what spring rates and what type of valving we will designate for each application. Over the years, our customers’ mindsets have changed. In the past, we were making suspension kits that were very aggressive in terms of springs and valving, mainly because the customers were expecting a very sporty ride feel. While great for track driving, they proved to be very harsh for the street, especially if it was for a daily driver.

Over the years, we’ve taken the time to revise our tuning philosophy for suspension. Making dedicated street suspensions such as the STREET BASIS and STREET ADVANCE lines, we wanted good performance with uncompromising comfort to be the emphasis.

That, along with other updated suspension components like our Advance Needle (for damping adjustable suspension), and piston valve designs, different shim designs, etc. , means that we must retest certain vehicle platforms to make sure there is no degradation in either performance or comfort. Simply trying to carry over an old specification into a new suspension doesn’t always work out so well.

So, back to testing the ’92-’95 Civic and finding that good balance we’re looking for! Actually, since we’re on the topic of this car, we’re planning to revise the spring rates for the front (from 7kg/mm to 9kg/mm). That may not sound logical, since we’re trying to set up a good street kit with ample comfort. But, with the prototype valving we’re testing on it, it is working perfectly!!

Oh, and I forgot to mention- look for the new STREET BASIS Z to start around $450 and STREET ADVANCE Z at $550 for this platform Civic when it’s released later this year!

2016 Continental Tire Show Car Shootout

Typically following the SEMA Show in Las Vegas is a few race events that we look forward to. One of them is Global Time Attack’s Super Lap Battle at Buttonwillow Raceway Park. The second one, one which we weren’t too familiar with, was the Continental Tires Show Car Shootout, which was run by Super Street Magazine. All we did know was that our friends at Sportcar Motion were bringing their K24 powered Honda S2000 to the event.

2016-continental-tire-show-car-shootout-sportcar-motion-s2000-3

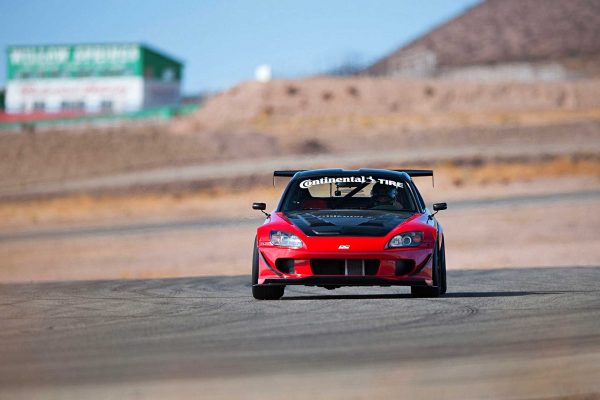
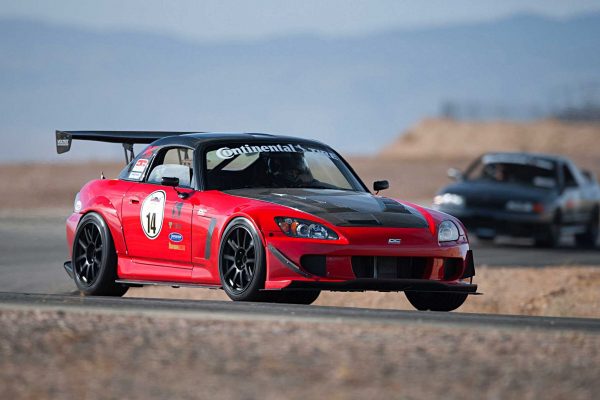
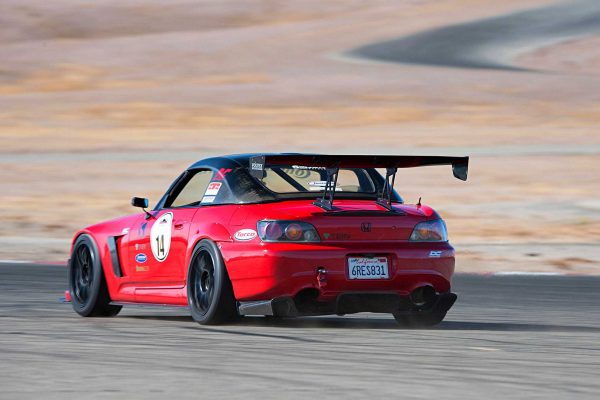
This S2000 is one of Loi Song’s, owner of Sportcar Motion, personal vehicles. When he picked up a set of our MONO SPORT coilovers for this car, we thought it was basically just one of his street cars, something to drive to and from work. Eventually, this ended up becoming yet another track car to the many in his stable, with a built K24 motor replacing the F22 usually sitting in the engine bay. Other than that change, the car looks like many tuned S2000’s you’ll find on the street or at the occassional track day.

2016-continental-tire-show-car-shootout-sportcar-motion-s2000

Super Street finally published the results of this event, which included a dyno session then a track day at Streets of Willow at Willowsprings Raceway. End result- last in power on the dyno (235hp/193lb-ft), third (among 10 competitors) around the track with a 1:24.619 lap. Hmmmm. Interesting result considering field this car was competing against. The fastest car of the day was a BMW 135i with a v8 swap (unspecified engine, unspecified power). That car did a 1:23.327. Second place was an Acura NSX which was also near the bottom in power (321hp/238lb-ft) and stopping the timer at 1:23.786. Other cars in the field included an R32 Skyline, another AP2 S2000, 370Z, Hyundai Genesis Coupe, GRF Sti, and a pair of CZ4A Evo’s. Not a bad field.

2016-continental-tire-show-car-shootout-sportcar-motion-s2000-2

Goes to show that power isn’t the only part of the race car equation to consider. It’s a balance of well-tuned suspension (which I might add is an out-of-the-box setup), mild aero front and rear, good tires (Continental UHP ExtremeContact Sport tires were used on all cars for this event) and brakes. This all has to work together well. So, for a “show car”, nice job, Sportcar Motion!!!!

2016-continental-tire-show-car-shootout-drivers


Read more about the Super Street hosted event here.

Global Time Attack’s Super Lap Battle 2016

This week is the Super Lap Battle Time Attack event at Buttonwillow Raceway Park, hosted by Global Time Attack.

Damn, that’s a mouthful to say…

Anyhow, we’ve continued to attend the event for the past 6 consecutive years now. Our main purpose is to check out how the event goes, see how it has grown, and also to assist any teams/drivers that are using TEIN suspension.

For the most part, most teams/drivers are pretty experienced with their setup. So it’s not like we’re trying to rearrange everything they’ve setup and working for them. We just want to see how we can extract a bit more performance with a little bit of tuning. We bring one of our in-house engineers to speak with the driver and get feedback on how the car feels. From that, we are able to make an assessment on whether any changes to the suspension should be made, or if some other aspect should be altered. Funny enough, tire pressures tend to be overlooked.

The past few years has really just left us looking like spectators, however. Again, most of the teams have their race cars sorted out. So there isn’t much for us to do except check out the progress of each session.

For this year, we really only know of two teams on TEIN-equipped cars competing. Evasive Motorsports is bringing their R35 GT-R to run in the Unlimited AWD class, and Sport Car Motion (SCM) has their DC2 Type R Integra in the Limited FWD class. Both teams using our Super Racing damper kits.

scm-itr

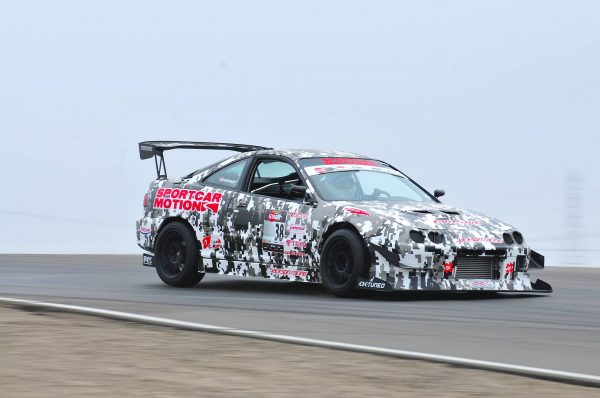
The SCM Type R has proven to be plenty fast, mainly because they know how to extract the most out of their Rotrex-charged K24 engine setup. [Not] oddly enough, their Super Racing dampers are completely off-the-shelf. No changes in valving, and spring rates are per our recommendation. We did a refresh on the dampers last year, but unfortunately the car couldn’t make the event. Considering this specific Super Racing kit was on the team’s previous EG Civic race car, and that it has just over 6 years of use, the dampers were due for a rebuild anyway. We look forward to seeing the Type R run again this week!


evs-gtr

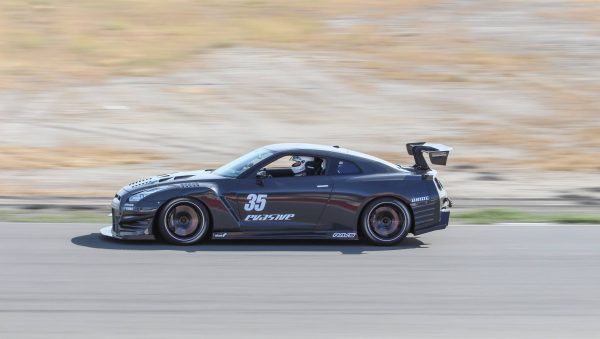
Evasive Motorsports has only taken their GT-R, in its current iteration, to a couple of track days. Back when the car had the very basics (our Super Racing dampers, racing brake pads, upgraded wheels & tires), they were using our recommended setup. Now, with a slightly wider body and more aero additions, we’ve uprated their springs. Other than that, the Super Racing dampers have our 3-way units installed, but valving has been kept as out-of-the-box. Wheels are a bit larger now, and they’re using a much more sticky tire. On its maiden voyage in this setup at Buttonwillow, the car did something in the neighborhood of a 1:47.00 lap time. No time spent trying to fine tune anything, and that’s what they run……… Damn. We weren’t expecting something that quick for what is essentially a still very street-bound car with full interior, full amenities. While we would love to attribute this shockingly fast time to our dampers, the fact is that Evasive Motorsports aren’t any slouches when it comes to building a proper car for the track. We’ll see what else the team does to knock down a couple more seconds from the timer.

Other than those two cars, which would keep our engineer busy enough, we’ve yet to hear of anyone else that may need our assistance. But, as I mentioned, they probably don’t need our help……


……….. You know what,,,,, this is just starting to sound like an excuse for us to just go and watch some racing! Don’t tell my boss…