Cleaning and Maintaining Your Suspension

Alright, so plenty of you may still have a lot of time on your hands due to being stuck at home due to COVID-19, even though our country seems to be opening up to business as usual. But still, it is forcing many “non-essential” (man, that really doesn’t sound nice) businesses to remain closed, and many of you without much to do.

This really has led to a lot of our customers taking the time to do some vehicle maintenance, which is great since we highly recommend you check your suspension.
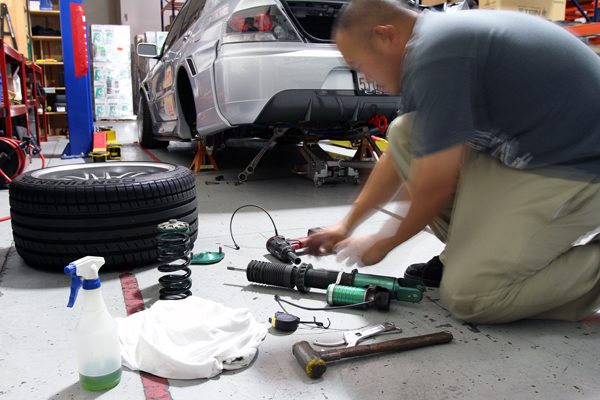
As we have mentioned in the past, we recommend periodic inspections of your coilovers. For customers in drier climates, typically twice a year is good. While areas in cold or very wet areas should inspect at least 4 times out of the year, or at least after the wet season.

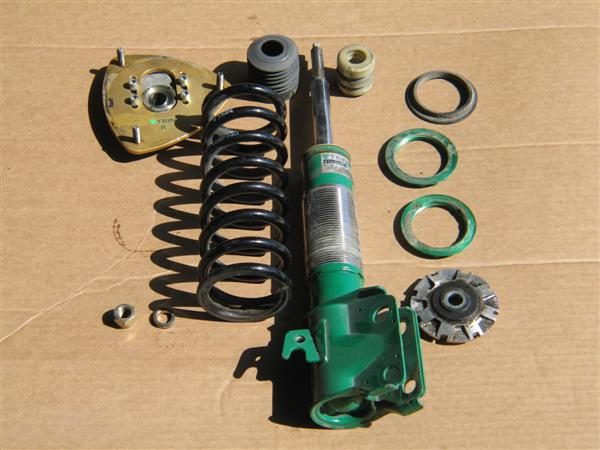
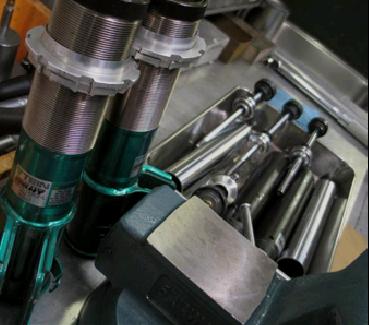
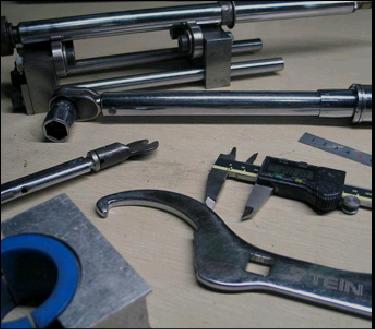
Getting chance to fully disassemble your suspension would be great. This lets you get to all the individual components- bare shock absorber, spring seats/seat locks, springs, upper mount, dust boots, bump stops, eye ring bushings, pillowball mounts, etc. and give them a good cleaning, or replacement if necessary. Sounds like a lot of work, which it is. But for some of us, this can be a rewarding task and help keep your vehicle road-worthy.

With an adjustable suspension kit, so many movable/removable parts should be checked, like spring seats and seat locks- making sure they’re able to move freely on the threads and also finally torqued to specification. Making sure the threads on the damper bodies are clear of debris prevents the spring seats/seat locks from seizing in place. Some consumers believe that because we use aluminum spring seats/seat locks on a steel threaded body will lead to them seizing because they’re two dissimilar materials (galvanic corrosion). However, that is not the case. Our aluminum spring seats and seat locks are hard anodized (forming aluminum oxide on the surface), and our threaded damper bodies are either chrome plated (older models) or coated with our ZT coating (and based coated with zinc). This will prevent potential issues with galvanic corrosion. So, please check to make sure the threads of the damper body, as well as the spring seat/seat locks are clean. Lastly, a little bit of lubricant on the threads is actually important, not just to prevent seizing, but to allow proper torque application when tightening. Anything from a light distillate (WD-40 is very common and readily available), or even a little bit of oil, will work just fine.

Even with that said, wet/coastal areas, or areas with snowfall will require a bit more maintenance, and actual cleaning of threaded components, as salts can eat away at aluminum and steel, and even cause the metal surfaces to expand slightly causing seized seat locks. You can use car wash detergents to clean these threads, and dampers in general. Again, even WD-40, which will displace water and lightly lubricate components, works well (we’d just apply this after any type of cleaning you do).

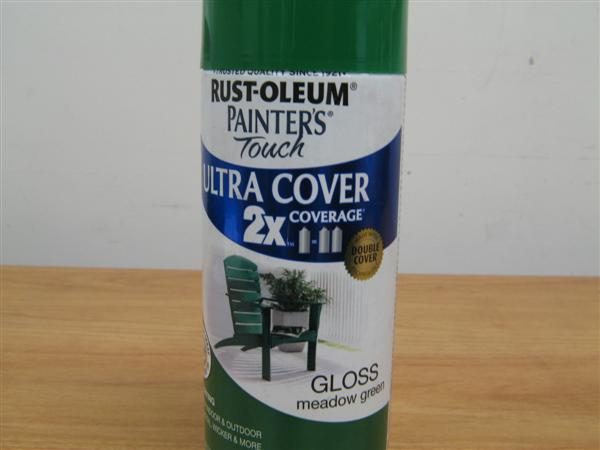
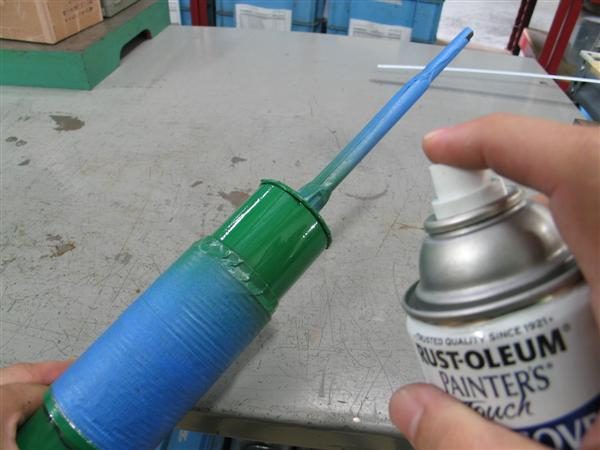
Also, it’s a good time to check the overall condition of your coilovers coated (painted) surfaces and making sure there is no peeling, scratched off surfaces, etc. For our green powder paint, customers can touch up surface blemishes with spray paints that are commercially available (Krylon or Rustoleum enamel; Meadow Green paint color).
A full disassembly lets you assess the condition of all individual components for your coilover and check if any part needs replacement. Also lets you give it a good detailed cleaning.

Lastly, and as a note for you TEIN suspension owners, if you need any assistance with your suspension or need replacement parts, or need the torque specifications for coilover kit, give us a call at 562-861-9161 Monday-Friday (9a-6p PST), or email us at tus_sales@tein.com. We’re open during this time, and we’ll do our best to help you out!

Coilover Claim That Are Mis-Installations

Many times we receive claims of defective dampers leaking oil which are then requested to be repaired or exchanged under warranty. For the most part the actual cause of the damper failure would be due to mis-installation. Now regardless if its you first time doing a coilover install or have  many years of working in automotive repair, a mis-installation can occur at any time. For the most part the installation instructions included with our coilover systems are straight forward but are usually never read through properly, overlooking the important advisories placed throughout the instructions. Following these advisories will of course lead to a problem free installation.
IMG_2785

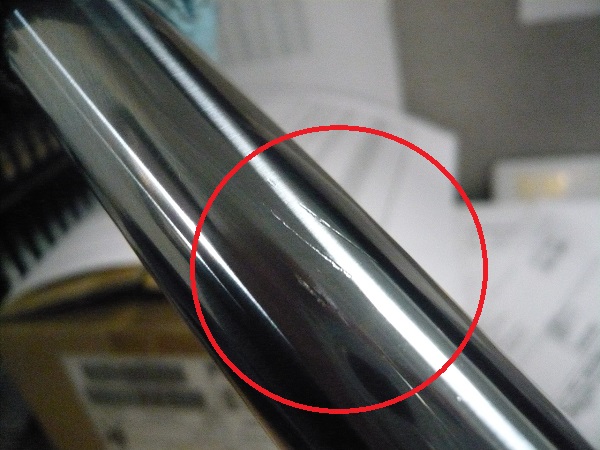
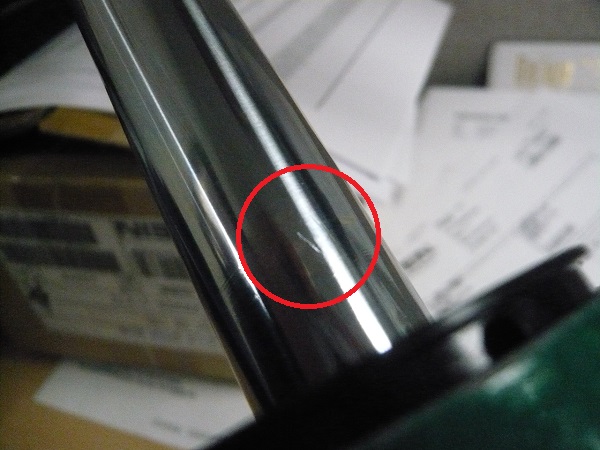
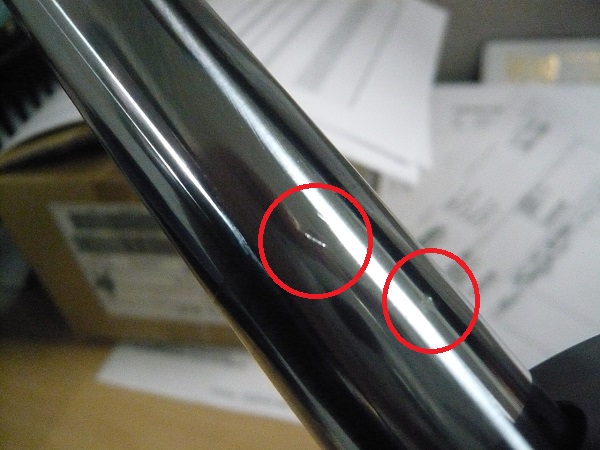
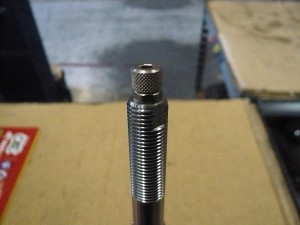
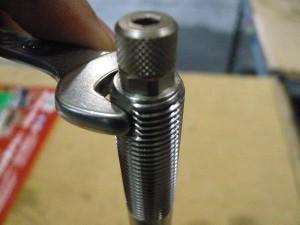
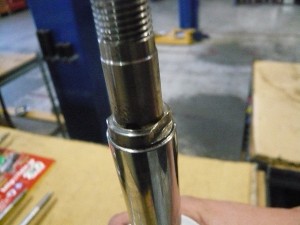
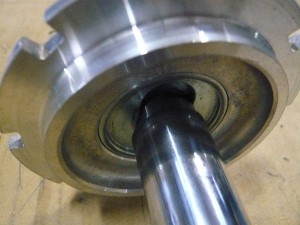
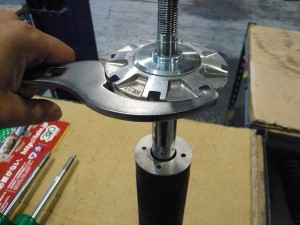
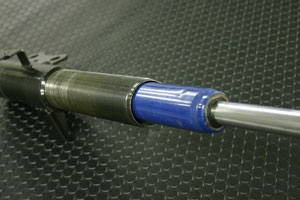
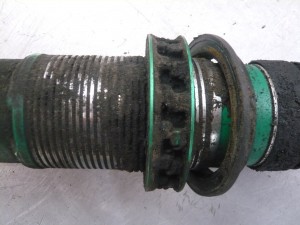
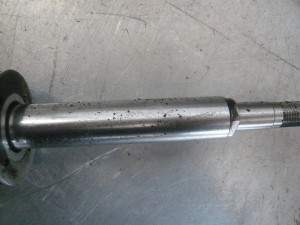
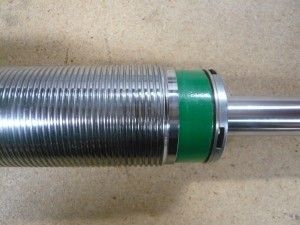
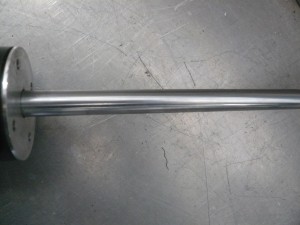
A common disregarded advisory detailing to avoid clamping the piston shaft to tighten the damper top nut. Most consumers and “Mechanics” often are unable to tighten up the top nut claiming that holding the piston shaft body would be the only way to tighten the top nut which would lead up to the coilover to leak. For a better visual understanding what can happen to the piston rod if clamped down, please see the images below of a discarded damper.

P1110132

P1110134


P1110133

Now to the point of this blog post. This is in no way a manufacturing defect of the coilover. The markings on the piston shaft are what can be referenced as “The Smoking Gun” as it is an obvious tall tale sign that something had been used on the shaft. Do not use anything to clamp down the piston shaft. Our kits would either offer special machined sections of the piston shaft that can be held with a wrench or incorporate the use of the upper spring seat in conjunction with the included adjusting wrenches to hold the piston shaft. If the top nut turns even when tightened but not torqued down, placing the vehicle load on that specific corner then torqueing the top nut will work.

P1110137 P1110138

P1110141P1110146P1110140

When it comes to any product claims, we do our best in repairing those that respectively are a manufacturing defect. If the item is not covered under warranty an explanation is given and detailed for the consumer to further understand the reason for the warranty decline.

Identifying FLEX Z Coilovers

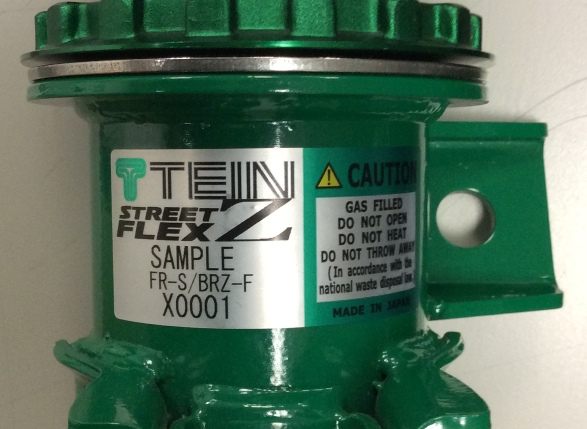
Honestly, there really isn’t much of a difference from FLEX Z to STREET FLEX dampers physically. Really, the only thing, other than verifying the part number on the bottom bracket (silver Caution sticker), is to check the damper itself.

As we have mentioned, the FLEX Z dampers are fully sealed units, which mean it cannot be rebuilt. However, identifying what a fully sealed damper looks like may not be so easy for some. So, here are a couple things to check for:

Silver (Caution) Sticker-

FLEX Z Diff 002

This sticker not only shows the product by name, but also the part number (where “SAMPLE” is listed), listed as a 10 digit alphanumeric (ex. “VCQ54-U2531”). If, for any reason, you can only see a part number and not the product name, give us a call and we can verify what kit it really is.  As you can see, we also list the vehicle application (typically by chassis code), and the lot number (bottom 5 digits, alphanumeric).

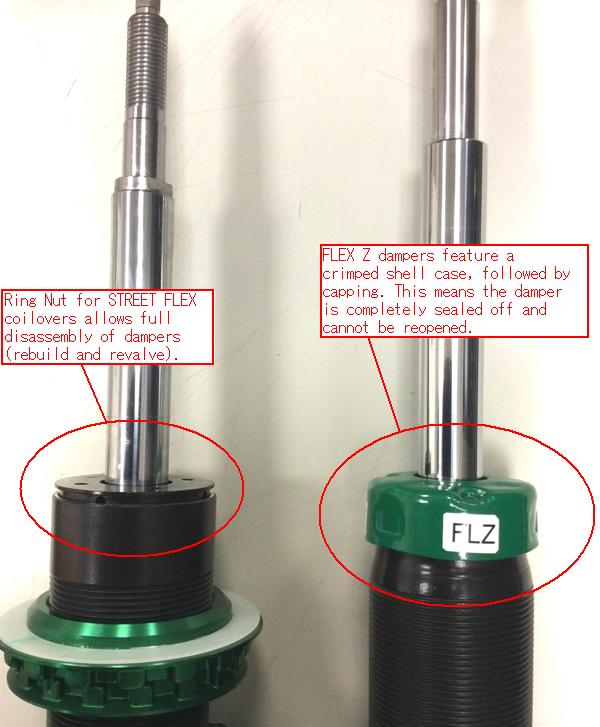
But, if you have a chance to inspect the dampers yourself, you can check out the top of the damper body shell case-

FLEX Z Diff 001

As you can see in the picture above, the STREET FLEX coilovers (and current models of STREET BASIS & STREET ADVANCE coilovers) use a Ring Nut to seal off the damper. This allows us to fully disassemble the damper and service the unit. This also lets us revalve dampers by giving us access to the piston and base valve assembly.

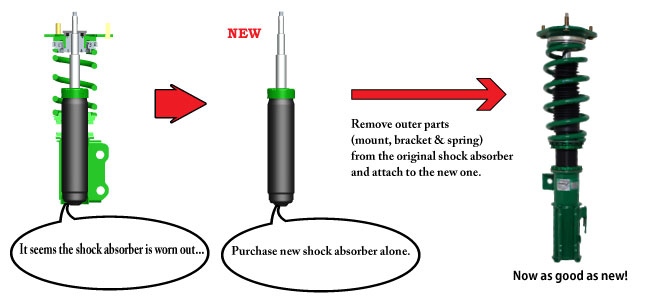
The FLEX Z, on the other hand, has been fully crimped and capped. This means we cannot reopen the dampers at all. In the event the customer has a worn out FLEX Z damper, they can simply purchase a replacement damper body only (no need to purchase the bottom bracket, seat locks & spring seat, spring, or upper mount). Then all that is needed is to swap some of the original components back on to the new damper body.

We certainly hope this helps you find any major differences between the two FLEX line of coilovers, especially down the road when people may resell their FLEX Z coilovers and list them as STREET FLEX. We believe it’s worthwhile knowing how to spot any major differences.

As always, if you are not sure of how to identify our products, give us a ring! We’ll be glad to help!!!

TEIN Replacement Single Dampers

As many of our customers are already aware, we’re able to sell single dampers as replacements. While not as cost-effective as rebuilding your dampers, it is a better time-saving method of getting your vehicle back on the road.  We know that some customers have heard from auto parts stores (probably non-authorized TEIN dealers) that TEIN will only sell complete kits. That isn’t true.

We’ve heard from customers wanting their dampers serviced by us, but concerned about the 2-2.5 week turnaround time. We know that for some customers, they only have one car to use. Being without a car for a 2.5 week minimum can cause havoc to their daily routine. This is why we are able to sell single dampers.

This same service will apply to the upcoming “Z” line of dampers, such as our STREET FLEX Z, STREET ADVANCE Z, & STREET BASIS Z coilover kits. Since they are all fully sealed, non-rebuildable units, it will be much easier to just replace the bare damper (pictured below, middle).

flz_image3_en

Mind you, these are not merely damper inserts/cartridges like some other suspension manufacturers use. We mean the actual bare damper- no spring, no upper mount (FLEX Z), no lower bracket (FLEX Z). What’s the difference between an actual damper and a damper insert?

Our dampers are application-specific, meaning that each damper is made specifically for one vehicle model. Of course, there are some vehicles that share similar platforms where we can sell a single coilover kit part number (ex. 1999-2003 Acura TL = 1998-2002 Honda Accord).  In other words, we’re not simply using one design of shock absorber insert and placing them into damper bodies of various lengths just so we can say “Application-Specific”. Each coilover kit has carefully selected spring rates and dampers are valved to match (yes, we actually test each vehicle application before deciding spring rates and damper valving). That means that the internal components of the dampers, such as piston shaft, inner tube (for twin-tube dampers), and a few other components, have to be of a specific length for a given design. It is a timely and costly process, but it makes more sense to do it right. To be honest, we’re not too sure how well damper inserts work, especially if different vehicles require different damper valving and stroke length. It really doesn’t make a lot of sense.

damper and insert

You can see how a damper insert is put into an existing shell case.

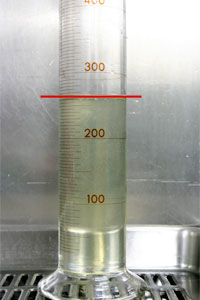
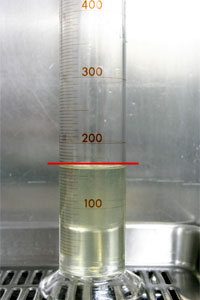
Another problem with damper inserts/cartridges is their limited capacity. Because their overall dimensions are smaller than the shell case they’re being put into, that means less volume for damper oil.

oil capacity in a TEIN damper

oil capacity in a TEIN damper

oil in a damper insert/cartridge

oil in a damper insert/cartridge


For a performance damper, this limited oil capacity means susceptibility to damper fade and decreased damping force under extended use. That is why we make every coilover application to exacting dimensions for their intended vehicle. Unless it is an absolutely practical application, TEIN dampers will never use cartridges, ever!

Back on topic, this single damper replacement service is available for each and every one of our products, including the upcoming “Z” line, but will be much more affordable compared to the current rebuildable dampers.

For discontinued TEIN items or dampers we no longer have inventory of, we can remanufacture single dampers through TEIN Japan. The only problem is that customers may have to face extended downtime since the remanufactured dampers are made to order.

Our goal is to decrease a customer’s downtime on vehicle repairs. For us, this makes a lot of sense to be able to provide such service.

If you are having problems ordering a single replacement damper, please give us a call at 562-861-9161. We’re glad to assist you in getting your car back on the road!

MotoIQ Visits TEIN USA, Inc.!

Our friends at MotoIQ decided to stop in and have their Type FLEX coilovers for their Project Supra rebuilt! While they were here, we gave them an inside view of our overhaul process. Not necessarily something we allow the public to see first-hand. But, we are talking about MotoIQ here, guys that like to nerd the hell out on car stuff. We couldn’t easily keep the door closed on them! Lol!!!

This Project Supra of theirs is pretty nuts to begin with. So we were glad to see that they wanted to continue the use of their older Type FLEX coilovers. However, we thought it would be a great idea to update the internals to the newer STREET FLEX setup. So, we had our in-house engineers work closely with the MotoIQ staff to get their dampers to the lastest specifications from TEIN!!

MIQ TEIN 6

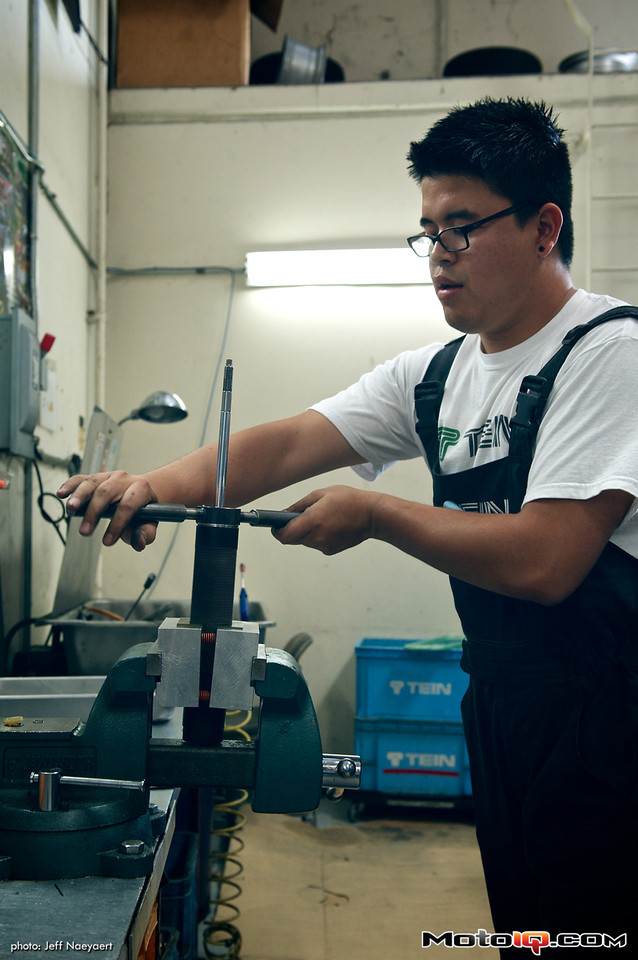
We had our R&D staff take them through our overhaul process and show, from start to finish, what goes into our rebuilds.

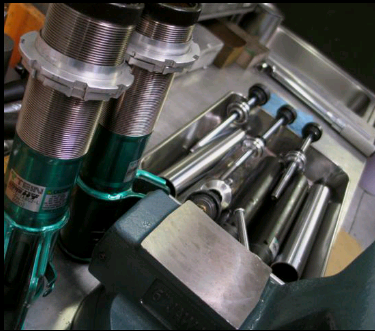
After a disassemble of external components (lower brackets, seat locks, upper mounts, springs, dust boots, & bump stops), we can start complete teardown of the damper itself. Our dampers require some unique tools for some parts of disassembly, which is why we do not offer rebuild kits to the public. We ask that all customers send their dampers to us for servicing.

MIQ TEIN 2

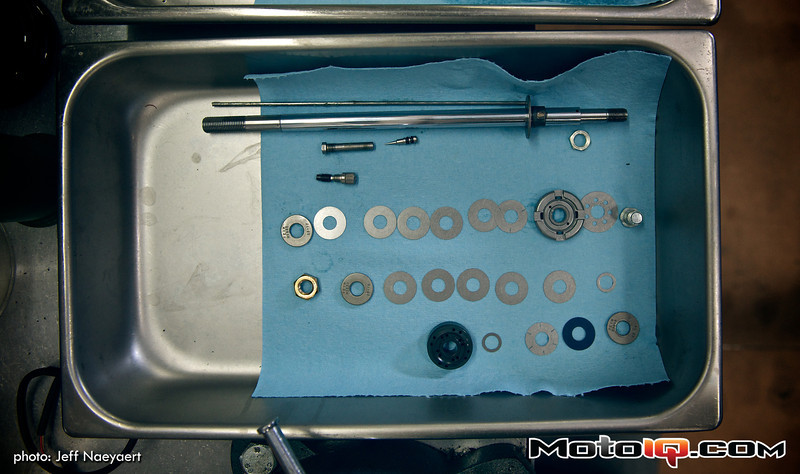
Once completely torn down, we can get to work on the internals. The piston shaft is broken down into several components. Once we can loosen the lower nut on the piston shaft, the piston valve assembly, including all shims and washers, can be removed. These components will be replaced with new ones. Whenever possible, we want to keep rebuild costs as low as possible for our customers, so we will try to reuse components that are still in excellent condition.

Once we can completely assess the condition of all components, we can then get to work on rebuilding. In MotoIQ’s case, we had to make some modifications to make the newest STREET FLEX setup work with their coilovers.

MIQ TEIN 3

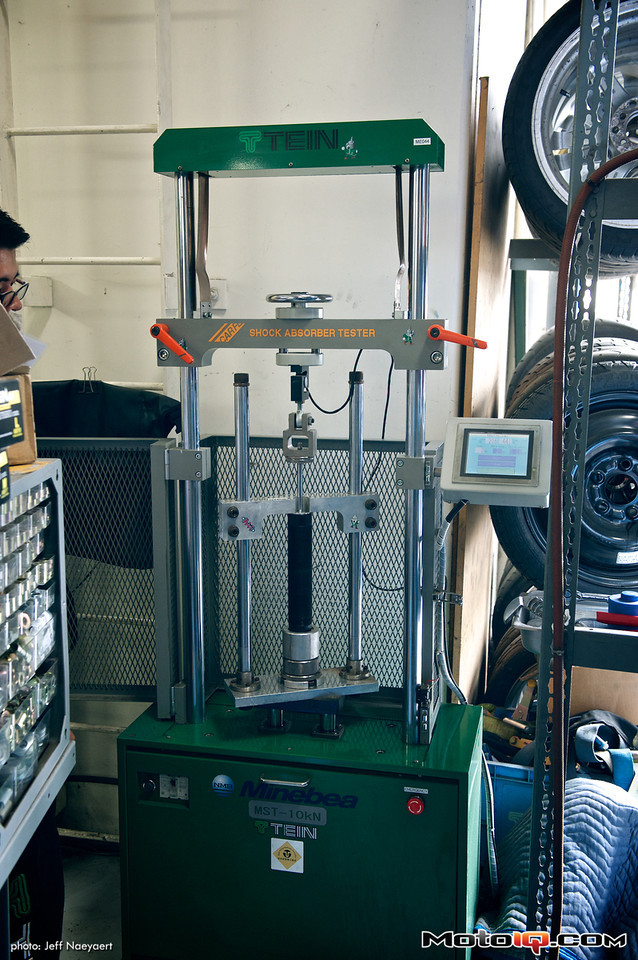
After all the necessary modifications are completed, we completely assemble the dampers, fill with nitrogen,  then run them on our damper dyno and make sure they meet performance specification.


MIQ TEIN 5

All other external components can then be reinstalled and the completed dampers sent back to the customer! All that’s left is to install, check/fix alignment, and enjoy!

We look forward to the next installment from MotoIQ on their Project Supra! They also have our EDFC Active to test out, so we’re sure they’re busy nerding away with that!

Please note that our overhaul and revalve service is available to the public. So, if you have any questions on our overhaul services, please give us a call at 562-861-9161 for more info! We’re glad to help!!!

In the meantime, please visit MotoIQ for some great technical information and follow along on their Project Supra build!

Project Supra Hits 800 WHP!:

http://www.motoiq.com/MagazineArticles/ID/3766/Project-MKIV-Supra-Part-10–Dyno-testing–we-hit-800-WHP.aspx

Industry Insider: TEIN’s Shock Service:

http://www.motoiq.com/MagazineArticles/ID/3743/Industry-Insider-Tiens-shock-service.aspx

OVERHAUL PISTON ROD CHANGE

We have received many overhauls over the years, a lot of the times we Highly suggest to change the piston rod out due to scratches, dents, pinhole damage. Below you will find the images of why we highly recommend to have them changed.

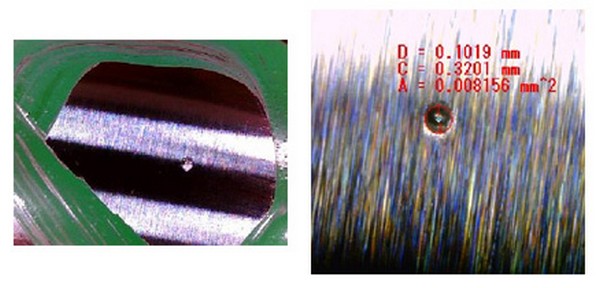
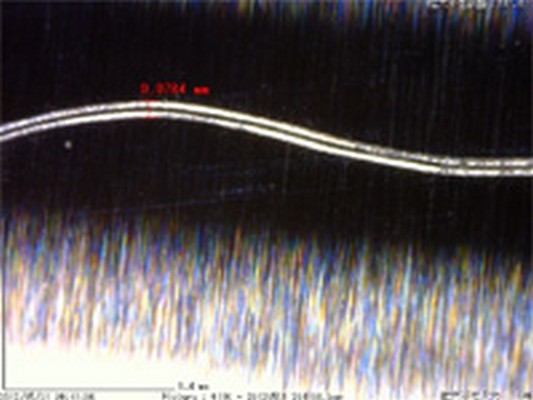
inspec_0708_2Above is the Microscopic view of a Pinhole damaged Piston Rod. As you can see if the piston rod is reused like that, that pinhole can rip or damage the new seal, and gas can leak from where the pinhole contacts a portion of this seal due to improper sealing.

See on the image below how it can have multiple damages that would require to highly change the piston rod for a new one.
inspec_10

The image below is of a Microscopic image of a Linear Scar on the piston rods. This would need to be changed due to that deep liner scar. Same problems can happen where the dust seal may be damaged from contact with this scar, and gas leaking past the seal since the scar creates a gap (improper seal).


inspec_30

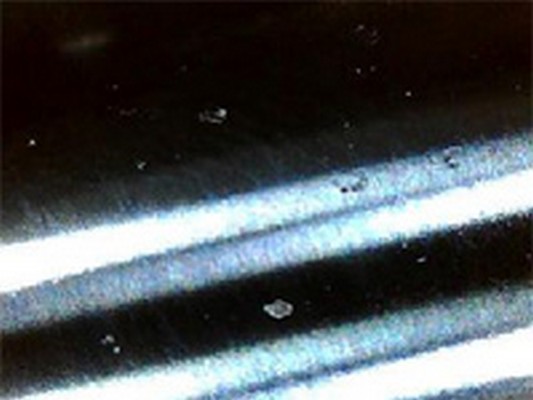
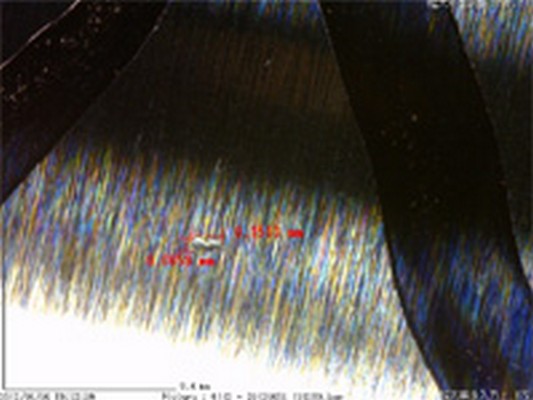
Scratches on the piston rod are one of the most common. Below you will find the Microscopic image of the scratched area will give you a better understanding as to why we would need to change the piston rod for the rebuilt.

inspec_12

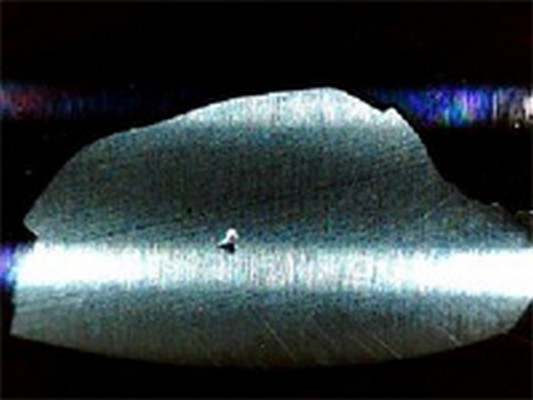
Last but not least would be the Microscopic Image of the Dents, these dents can be done to the piston rods from any rocks or debris on the road.

inspec_14

This is how it would normally look on the piston rod without the microscopic image.

inspec_15

As you can see why we would highly recommend to have these type of piston rods changed. All of these could have been one of the major problems that might have blown your dampers initially.

If you have any questions regarding our overhaul services and/or pricing, please feel free to contact us.


Overhaul Season

What’s up, all?!! Just a friendly reminder that the winter season is the ideal season to submit your dampers to us for an overhaul.  To those who don’t know what an overhaul means, basically we freshen up the dampers to a like new condition.

The standard turnaround time is between three to five weeks. The repair time frame depends on the condition of the dampers.  Dampers with less damage are typically overhauled under two weeks. However,  repairs to severely damaged dampers can be prolonged up to five weeks.  Unfortunately, we cannot confirm a repair time frame, nor exact overhaul total until the dampers are inspected.

OH

Before you submit your dampers to us, make sure fill out our overhaul agreement form. Please visit the link provided below to obtain this form.

OVERHAUL PAGE

Feel free to contact us should you have any other questions.

Overhaul Repair Cost Confusions

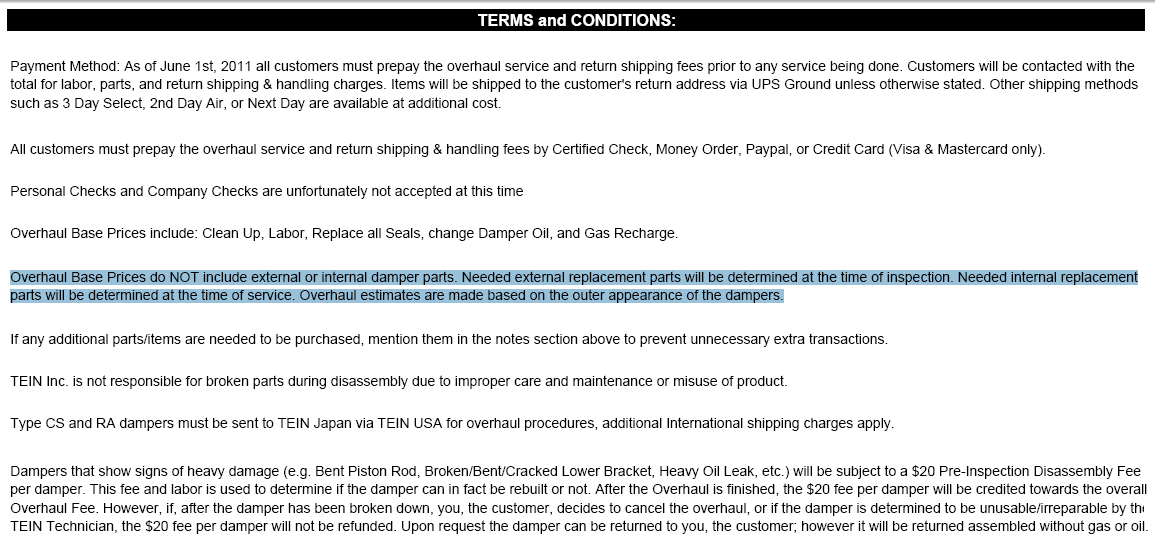
Recently it seems that many Overhaul customers whom have sent in their dampers for service have been under the assumption that the overhaul repair base price includes any other parts which may be needed or replaced. However, this is not correct.

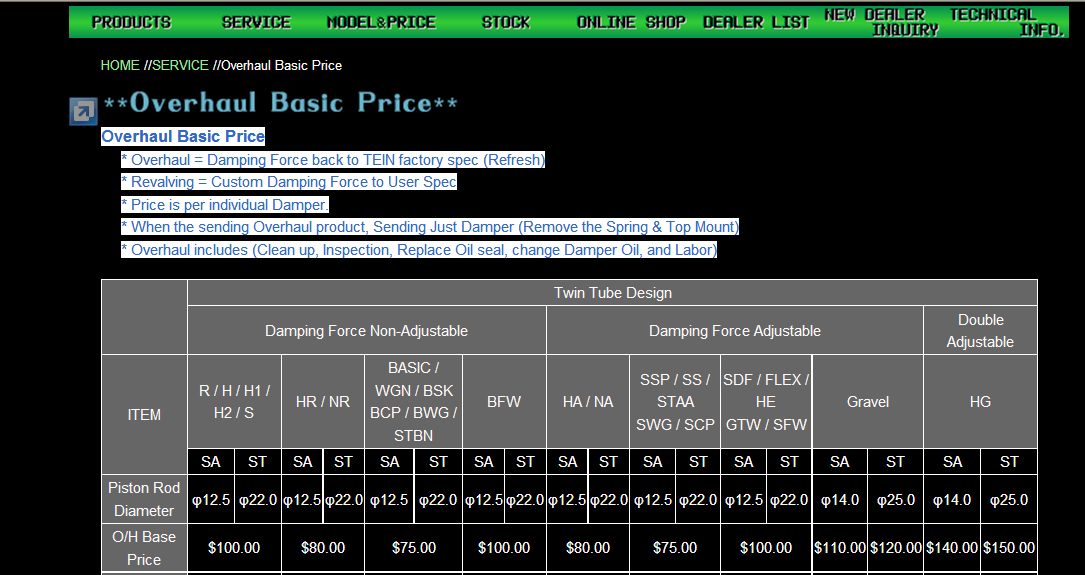
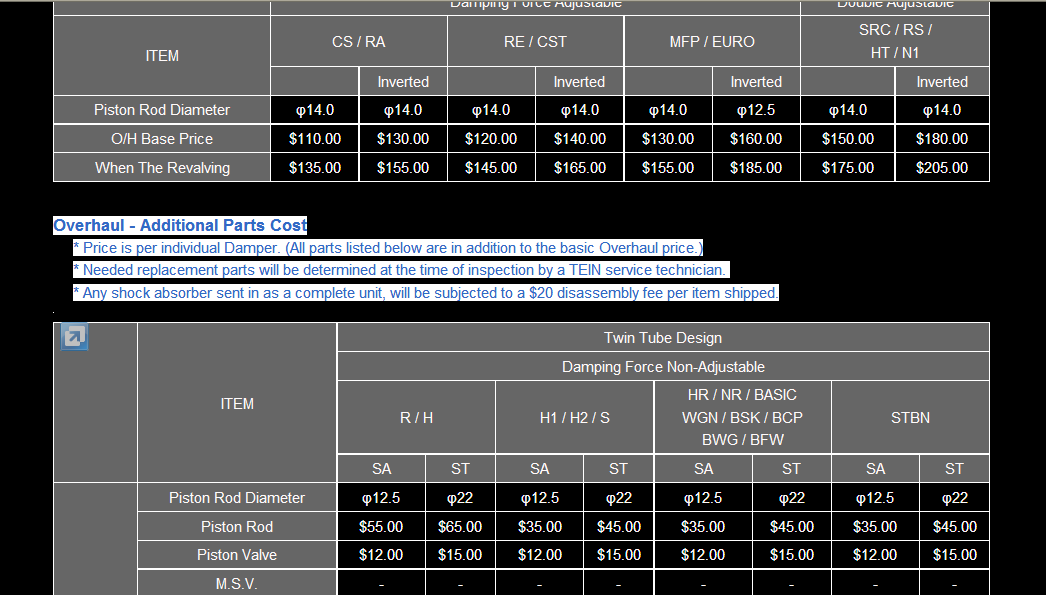
As an example, I will use the Super Street coilover overhaul base price. The base cost for the repairs, which includes damper oil, seals, nitrogen gas recharge, o-rings, and overhaul labor is $75.00 per damper. This service does not include (should they be required) any other internal or external components such as piston rod, piston valve, bump stop, dust boot, etc.

The area highlighted in white and blue on all three images shown below detail this info.

OH.Page.2

OH.Page.1

A few customers have claimed to have been told over the phone by a TEIN Staff that the total cost to repair one damper would be our listed base prices (ex. Super Street $75/ HA $80/ Type Flex $100) and would include extra parts, which is incorrect. These notes are also detailed on our overhaul agreement form which is the customer is to fill in and sign agreeing upon the terms of the service, and sent in with the dampers.

OH.Form

We would just like to bring this to everyone’s attention as to try and avoid any future confusion as well as show everyone that we do express the possibililty of extra charges for the service on top of the standard overhaul service.

Maintaining Your Investment

We know the purchase of coil-over kits can be an expensive investment, whether you’re buying our product line or a competitor’s. Some have to save up for the purchase while others can buy at their leisure. Nevertheless, maintaining your investment should never be overlooked.

Dirt and debris can potentially be caught in between the seat lock and threads. This can cause the seat locks to “Freeze” if you will, making it very difficult to remove or adjust your ride height. Even worse, dirt/debris can get caught in between the piston rod and seal prematurely damaging the damper(s). The seal will then eventually tear, causing the gas and oil to be released, making the damper(s) unusable and you as a customer very upset and irritated.

We recommend our coil-over systems to be periodically cleaned. You can hose down the dampers or put some love and elbow grease in to it and really detail them. Particularly focus on the piston rod and threads on the shock body. We also recommend to overhaul your damper(s) every 35,000 miles or three years. The internal gas, oil, and seals will be replaced. Doing so will prolong the life span of the dampers.

Keep in mind that upgrading your suspension and not maintaining it is like buying a new Porsche and never washing it. Or getting a new paint job and not waxing it. I can go on and on with similarities.

With that said,……Save your self a headache and  clean your darn suspension!!!

Oh, and of course, if you have any questions regarding overhauls, please feel free to shoot over an inquiry to tus_sales@tein.com!


Learning the OVERHAUL repair process

When it comes to overhauls I’m usually the person in charge of carrying out all the steps. Except for one which is the most important of them all , the actual repair. The way it works is as followed- We receive the package and check it in then we move it to our R&D department for a repair inspection. Upon the inspection I contact the customer and secure the repair payment and/or  final overhaul decision. Upon completion of repair a recontact the customer to verify shipping information and that’s where it ends.


The disassembling of our dampers is not that difficult. Breaking down the piston rod and internal components, then cleaning them from dirt, dust, rust, and debris  is also not that difficult. It does, however, get a little repetitive. Now, where it gets tricky is reassembling the internal components.  As some of the parts (shims) tend to look the same but are nevertheless different in design and thickness. There are many steps that need to be done to successfully overhaul a damper. I will save the details as they are confidential but I must say that re-greasing, and re-torquing all the components is the easiest step of all.


Well, now I have actually learned the repair process. Unfortunately for us here at TEIN one of our R&D staff members has left us to work as a CHP officer. Fortunately for me, I have now learned a new skill and got my hands on repair action. We’ll still leave that work for our trained engineers. As for me, I’m glad I’ve been able to learn more of the details that goes into an overhaul.