New England Forest Rally VIDEO

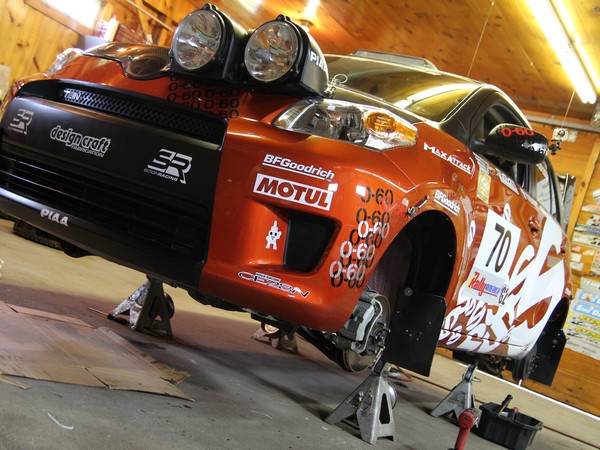
0-60 magazine just posted their video from the 2010 New England Forest Rally featuring their project Rally xD. Check out the soft landing at the 55 second mark. The HG dampers worked well under the especially harsh conditions of this rally and took the abuse of multiple jumps. Note: this car weighs in at over 3000 lbs. so it is in no way a light weight vehicle.

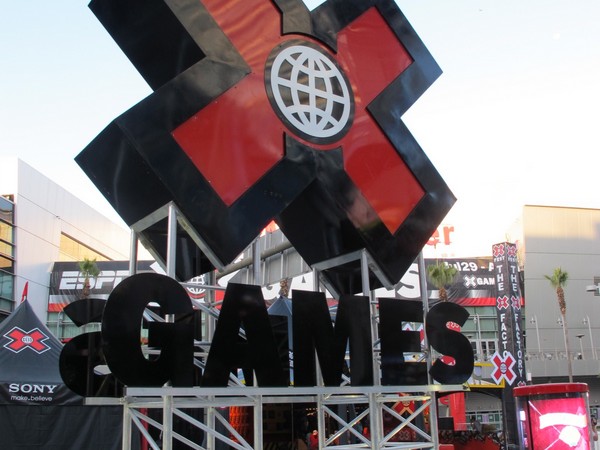
If you love rally racing, cars flying through the car and crashes check out this weekends X Games 16.  TEIN sponsored driver Stephan Verdier will be competing in his STi which is using TEIN Gr.N dampers.

Video courtesy of 0-60 Magazine and photo courtesy of Gordon Ting (0-60 Magazine).

EDFC Error Codes Explained

Hey whats up every one. Since Ryan has posted proper EDFC motor installation, I’ll give everyone tips on solving any error codes you may encounter after installation or later on down the road.

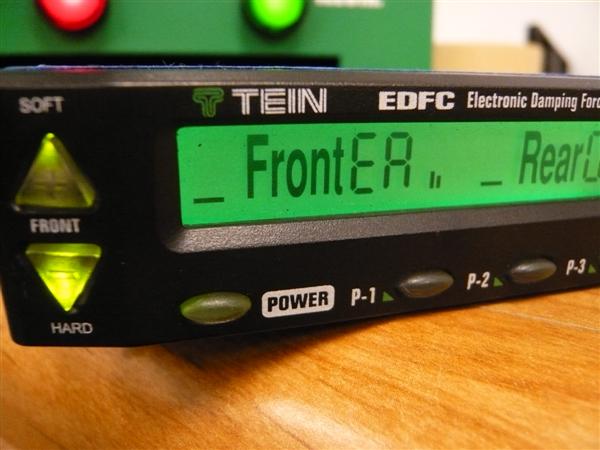
A common misconception on the EDFC display are the codes. There are three different error codes: ER, EL and EE. A fair amount of people seem to think that there is “EA” error code = Error All. The actual code is “ER” , error right side motor on either the front side or the rear side. Yeah, it looks like an “A” but that is a “R”. The below image shows an error for the right front side since the error is displayed for Front.

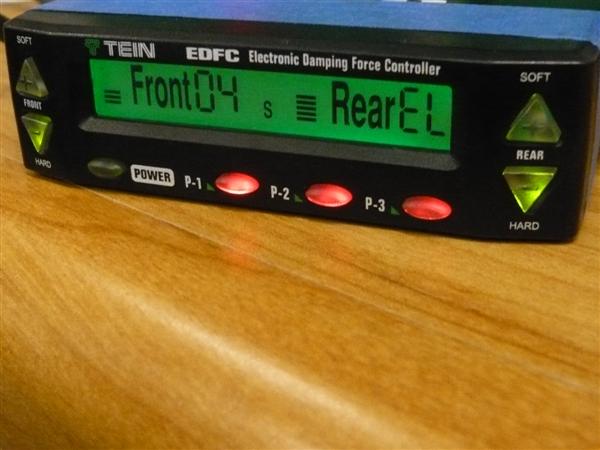
Next, code “EL” which means error left. In the image below the error is on the rear left side because the “EL” is displayed for Rear.

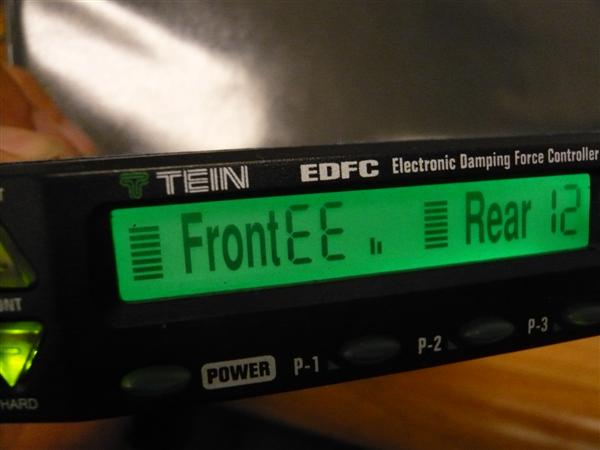
Lastly, code “EE” which means error on both right and left. In the image below, error right and left for the Front.

The error codes can be caused from several areas on or around the wiring and components. We will start with the most common source of the errors.

1) Harness plug between EDFC motor and EDFC wiring harness.

The terminals (pins) inside the plug can be pushed out slightly causing the connection to be lost.

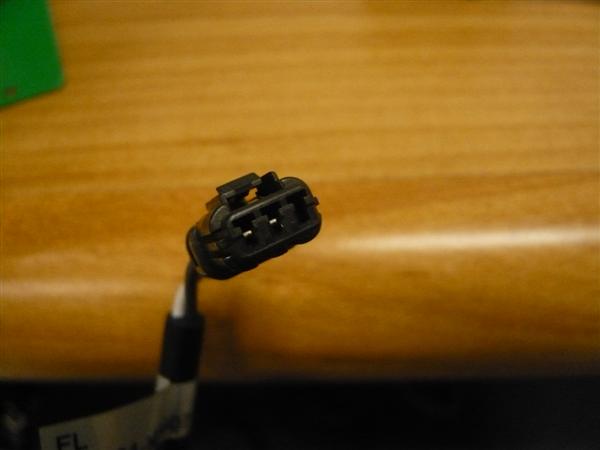
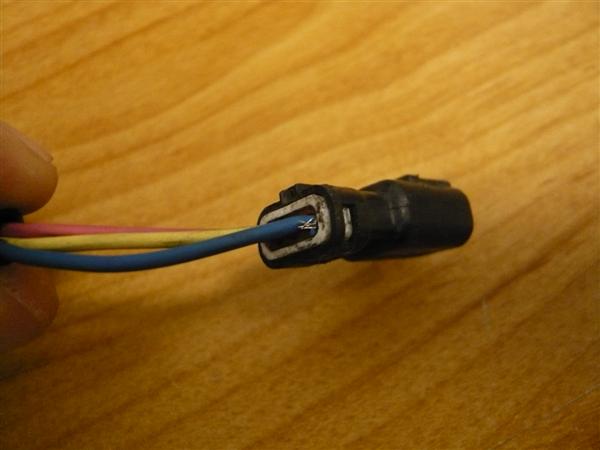
You can see on this male connector that the pin on the right has been pushed back not allowing a connection to be made.

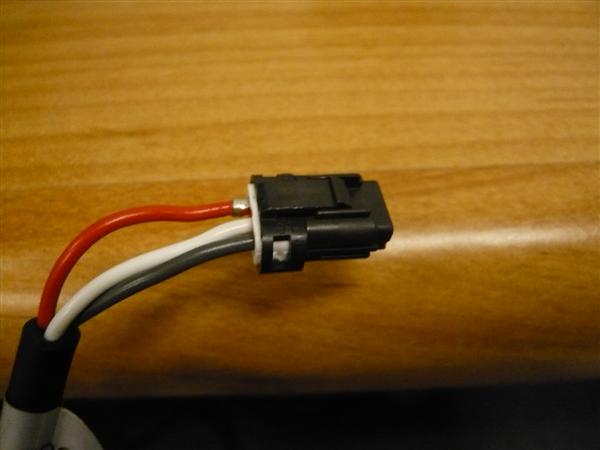
You can see the red wire on this female connector has gotten de-pinned.

Fix the problem by pushing the wire back into the plug and let it re-seat itself. When connecting the two plugs, hold the plug and wiring to ensure the pins do not get pushed out again.

If the wire has some stray or frayed wire not really holding on to the terminal, I recommend replacing the whole cable or motor to avoid damaging the control unit.

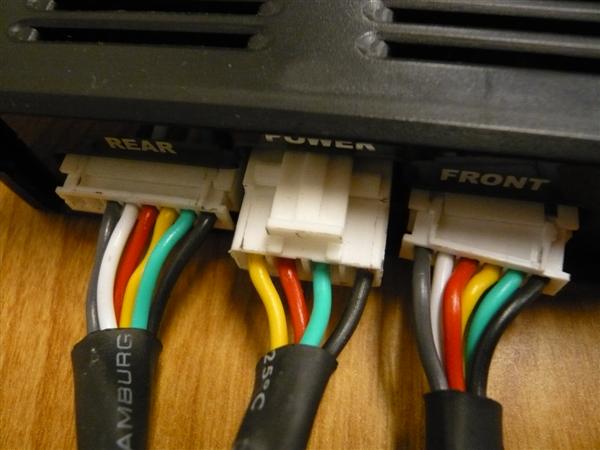
2) The harness plugs on the back side of the control unit are not plugged in completely. The thin white plugs for front and rear EDFC harnesses need to be plugged into the back of the controller perfectly. It should not be tilted as shown in the image below. So if your EDFC harness is pulling the connector to one side, it can easily cause an error.

Left and center plug correctly plugged in while the right plug is not fully connected.

Fix the problem by re-adjusting the harness. Changing the wiring route or using zip ties to secure the harness may help.

3) Frayed or damaged wiring. This is not likely on a brand new EDFC install. More the case on an EDFC system that suddenly starts throwing error codes. Depending on how the wiring was run throughout the vehicle the wiring could have become frayed or pinched over time thus causing damage to the harness and loss in connection.

The fix is to determine the problem area and repair or replace the wiring.

In a future post we will go over some trouble shooting tips for isolating EDFC problems.

Replacement parts can be purchased from the TEIN Online Shop or through a TEIN Authorized Dealer. To find the part number for the needed part please refer to the EDFC installation manual. If you no longer have your manual click the following link. If you have an older Silver EDFC Control unit the wiring and motors are different so please contact us for the correct part number – contact.

EDFC Motor Install Part 2

Here is part two of how to properly install EDFC motors (strut type, inverted shown). For this type of install is not as common as the last, but requires additional steps being that the motor is more exposed outside of the vehicle.

Additional tools you will need for this install is;

Small flat head screwdriver

1.5mm Allen wrench

Silicone sealant

For this install, it is recommended to do it with the damper off the vehicle and to remove the lower bracket for more clearance.

1st step: With a 1.5 mm Allen wrench, remove the click knob. Then you will need to use the 8mm click wrench to remove the click assembly. Once removed use the 3mm hex wrench to remove the original hex bolt from the damper.
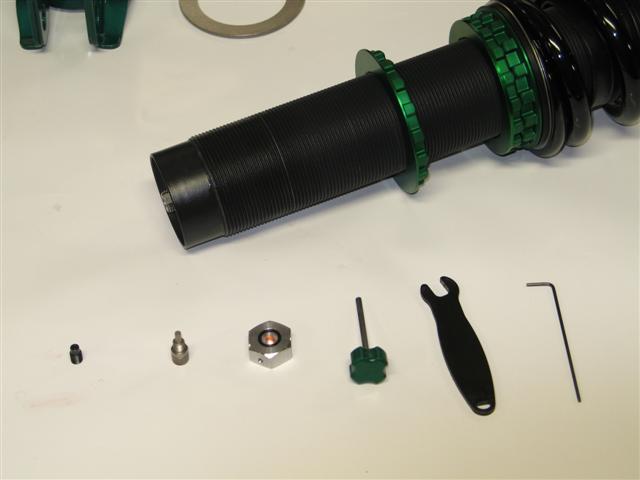
Parts removed; original hex bolt, click assembly, click knob. Along with tools used in removal process.

2nd Step: Add a small amount of supplied grease (orange bag) to the EDFC hex bolt threads and install the EDFC hex bolt until flush with the top of the piston rod. Be sure not to add threadlocker (red tube) to this part!
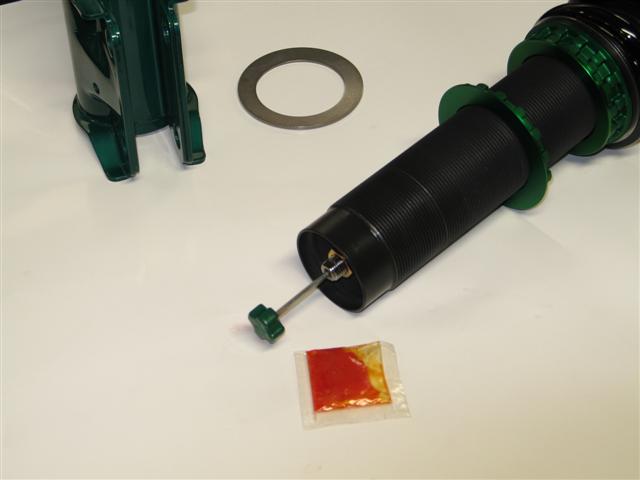
EDFC hex bolt installed with grease and flush with top of piston rod.

3rd Step: Add the supplied threadlocker (red tube) to the outside threads of the top of the piston rod. Please note, not a lot of threadlocker is needed nor does it need to cover all the threads.
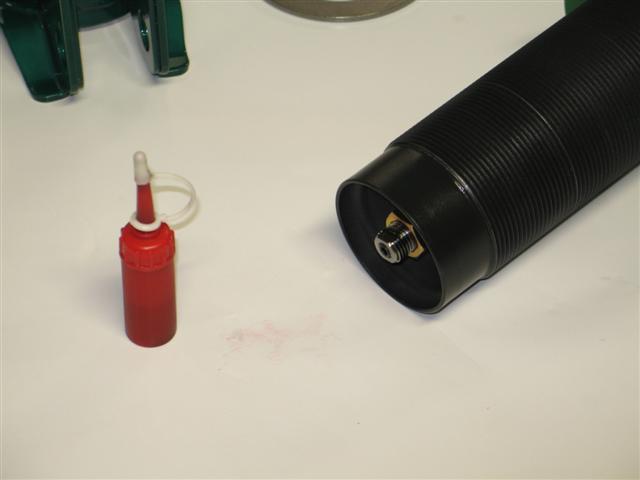
Area shown of where to apply the threadlocker to piston rod.

4th Step: Install the EDFC motor to the piston rod. This is the most important part and is sometimes easier with some help. What you need to do is place the EDFC motor shaft into the EDFC hex bolt. Now turn the EDFC motor 3 full rotations. At this point the EDFC motor should have started to thread onto the piston rod. Next, with your small flat head screwdriver, turn the top shaft of the EDFC motor 2 full turns clockwise (shown below). Continue to switch between turning the EDFC motor and top shaft in 3 or 2 specified full turn increments until the EDFC motor cannot turn anymore. The EDFC motor just needs to be hand tightened, not a lot of force is needed. Lastly turn the screw driver in both directions to ensure that the EDFC shaft can rotate freely.

NOTE: the EDFC motor or shaft does NOT need to be set to any particular position. Once the EDFC controller is turned on, it will self adjust.
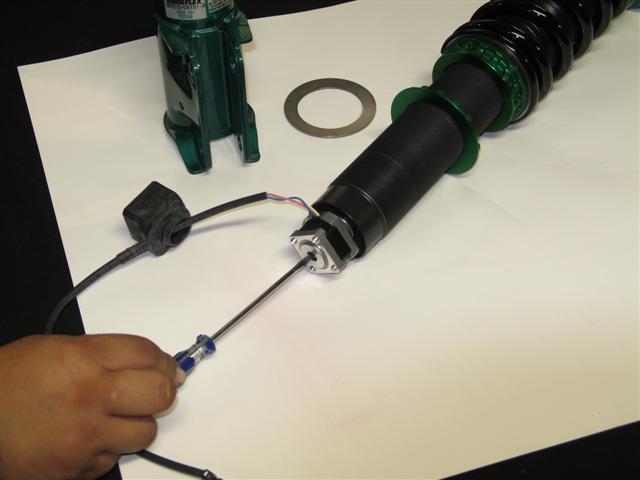
With your small flat head screwdriver, this is the motor shaft of which you will be turning 2 full turns between 3 full turns of the EDFC motor.

Now go ahead and bring the EDFC rubber dust cap up and cover the EDFC motor. Be careful not to rip the rubber cap. A little lubricant can be used to help install the dust cap. Be sure to confirm that the rubber cover is attached correctly. Otherwise dust or moisture can enter into the cover may shorten the life of the motor or cause trouble.

The last and most important step for this install would be to weatherproof the motors with a type of silicone sealant to areas shown in the picture below.
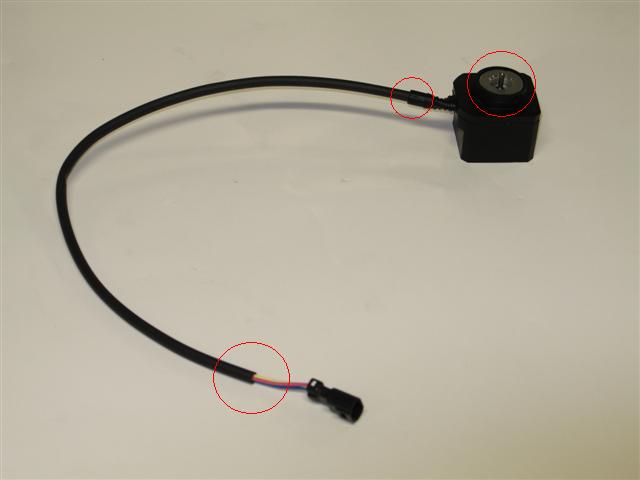
Be sure to add a silicone sealant to the circled areas to help protect the motors from getting damage from water.

Lastly use zip ties and tape to secure the EDFC wire. You want to avoid driveshafts and make sure there is plenty of slack for suspension movement. If there is limited space and you feel that the wire may come into contact with something, try to add a section of rubber hosing as added protection and periodically inspect the wiring.
New England Forest Rally 2010

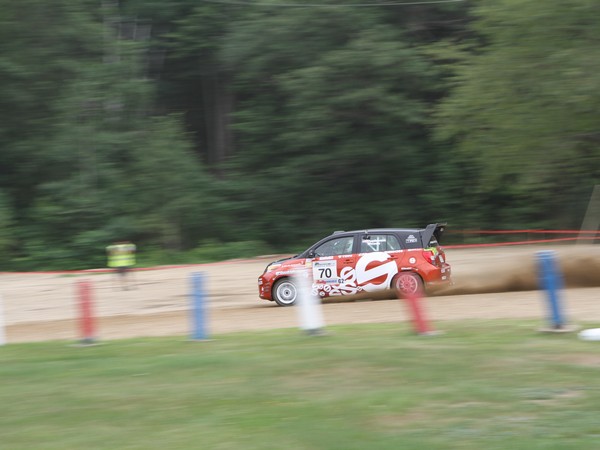
Recently arrived back from the New England Forest Rally (NEFR) in Maine. This was the final event for the 2010 Rally America series. Our sponsored 0-60 magazine Scion xD placed second in the FWD class losing to a high power Dodge SRT-4. Scion xD co-driver Catherine Woods clinched her first championship when the Scion crossed the finish line (driver, Chris Duplessis clinched his National title at the previous round).

The 0-60 rally xD has been a successful project finishing 2nd in two national events in two starts. An amazing accomplishment as the car is almost stock. Since the Oregon Trail Rally in May the car received a new Quaife differential, rear wing and slight weight reduction. The motor remains completely stock.

Car getting final prep work done before the rally inside driver, Chris Duplessis’s barn at his family’s farm, Pooh Corner Farm in Bethel, Maine.

NEFR is considered the harshest rally of the series. Of the 64 entries at Stage 1 only 41 started the final stage (Stage 12). The stages are littered with large rocks/ small boulders and even a few man made jumps.

Chris and Catherine blast through Stage 2.

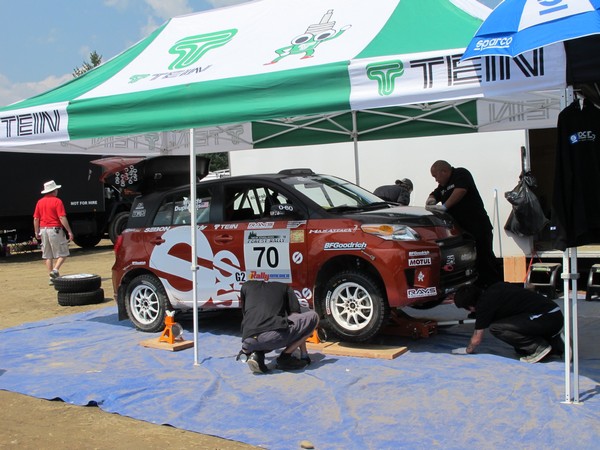
One of five services throughout the two day event. Most service times are 30-minutes which gives the crew enough time to inspect the entire car, change wheels, clean brakes, adjust the suspension, make any needed repairs and of course keep the car shiny.

At the finish line. 2nd place in 2WD.

Video by Rally America recapping NEFR 2010 and the 2010 season.

Special thanks to Forest Duplessis and the entire Duplessis family.

Photos courtesy of 0-60 magazine, Gordon Ting, Benson Ting and Gary Castillo of Design Craft Fabrication.

Sneed’s Speed Shop 1992 BMW 325is

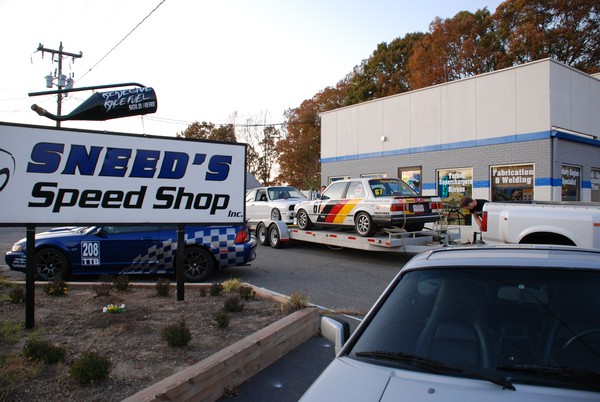
TEIN Authorized Dealer Sneed’s Speed Shop in North Carolina recently completed their 1992 BMW 325is road race car. Sneed’s has prepared the 325is to run in NASA GTS2 class for the 2010 season. Sneed’s Speed Shop owner and driver Chris Sneed has already grabbed a 2nd place finish and a WIN in the car’s first two starts!

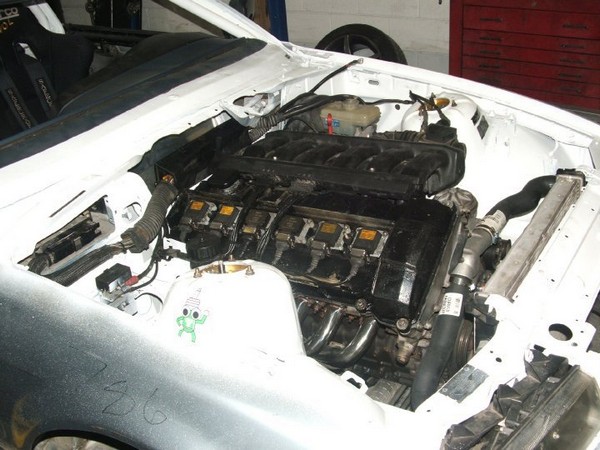
Sneed’s Bimmer features a non-vanos M50 2.5L engine per the NASA GTS2 rules.  Snowwhite as the car is affectionately called, sports a set of TEIN SSP coilovers front and rear , plus M3 brakes, Carbotech pads, Turner adjustable rear control arms and 17×9 ARC wheels with super sticky 245/40/17 Hoosier R6 tires.

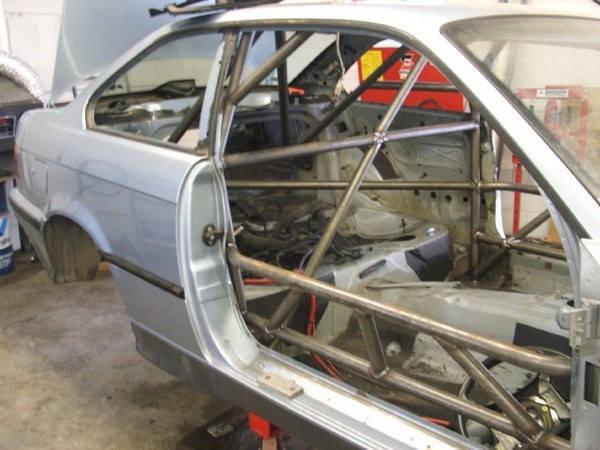
A custom built Sneed Speed roll cage keeps Chris safe and adds rigidity to the chassis. Sneed’s also added an in-house designed Sneed front splitter with dive planes as well as a Sneed carbon rear wing.
Sneed attributes the adjustability of the TEIN coilovers and Sneed’s Speed aero parts to being able to dial in the handling on the car so quickly.
Follow the car on facebook, Sneed Speed Shop.

Super Lap Battle Video w/ Janelle Ha

Mr. Super Lap Battle just sent me this video from SLB – Las Vegas. This was an exhibition type event which was invitation only. The event featured a few of the top contenders in various classes plus new comer Zenkai Motorsports. TEIN was well represented as Crawford, Evasive, SportCar Motion and Zenkai are all using TEIN coilovers.

Check out the video which features Janelle Ha.

Future Import Tuner magazine feature

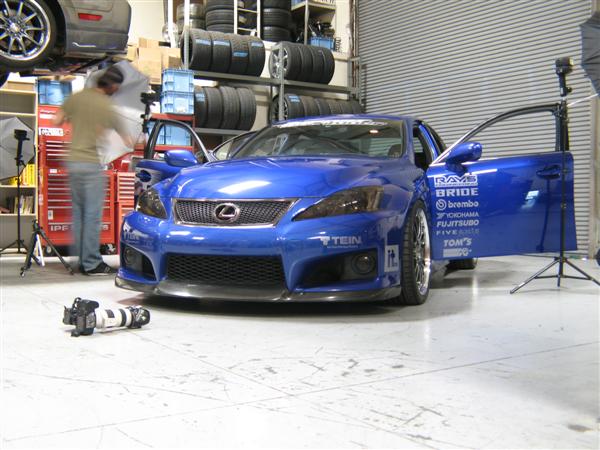
Luke Munnell of Import Tuner magazine was at TEIN yesterday shooting the Lexus ISF for a future feature. The ISF is an Import Tuner project car which TEIN USA sponsors. We have helped with the build and maintenance ever since the beginning of this project. The car was displayed at SEMA, CES and has competed at Super Lap Battle finals. It is the only newer body style IS to compete in SLB that I can remember. Tanner Foust drove the car to a 2:02 in the 2008 finals. I think the car can definitely break 2 minutes with the current NOS setup, wider tires and some aero upgrades.

Although Luke’s title is Technical Editor for Import Tuner magazine he along with all the editors do multiple tasks. One of Luke’s favs seems to be shooting feature vehicles.

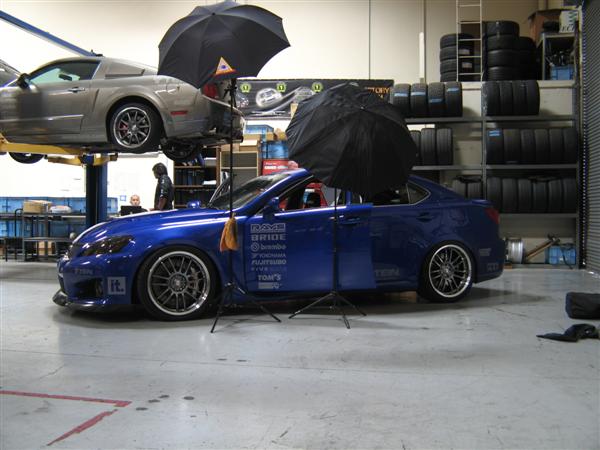
Setting up the lights for one of many pics. Each shot takes at least 10-15mins to setup and then constant tweaking until everything is perfect.

Our warehouse is not ideal due to sky lights, tons of reflections, etc… so the right lighting is key to getting a good clean shot.

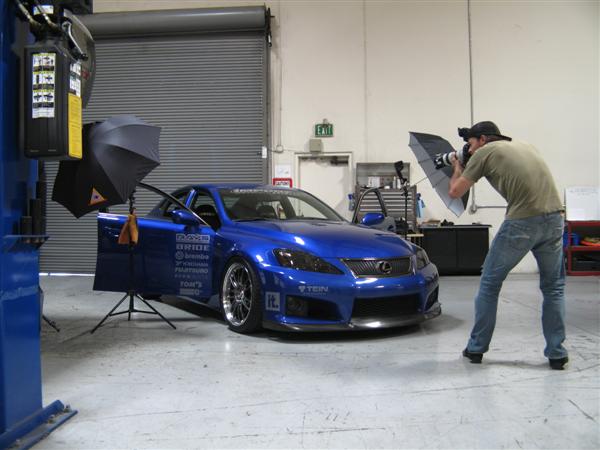
With everything in place it is time to shoot.

Luke will come back to shoot the exterior pics at one of his secret locations. Nah jk, just a spot nearby that he found on the way to TEIN. Pickup Import Tuner to see the full feature.

Mitsubishi Owners Day 2010

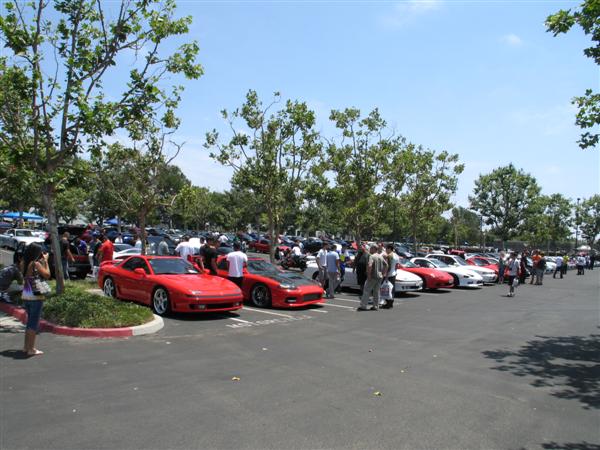
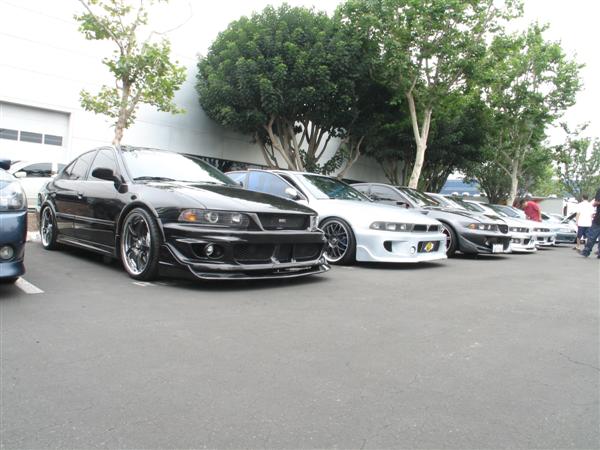
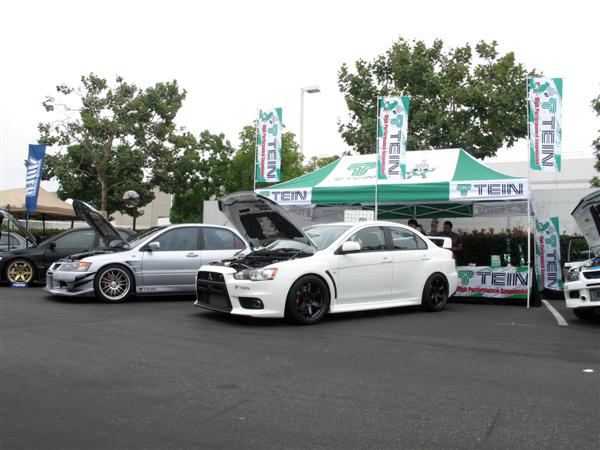
On Sat. we attended the MOD event held at Mitsubishi HQ in Cypress, CA. As one can imagine the event was filled with all models that Mitsubishi produced. The event included cars, girls, vendors, food and lots of free raffle prizes.

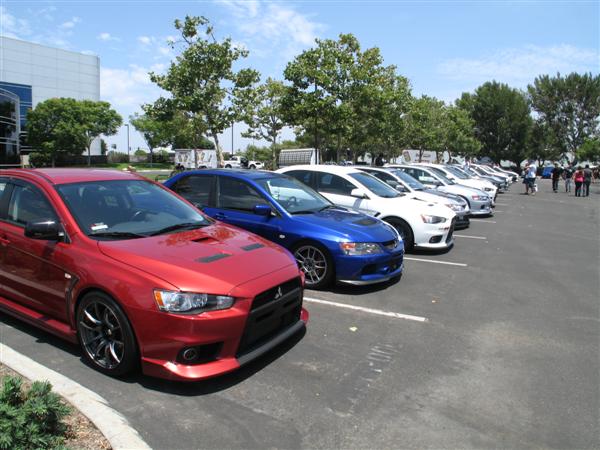
EVOs

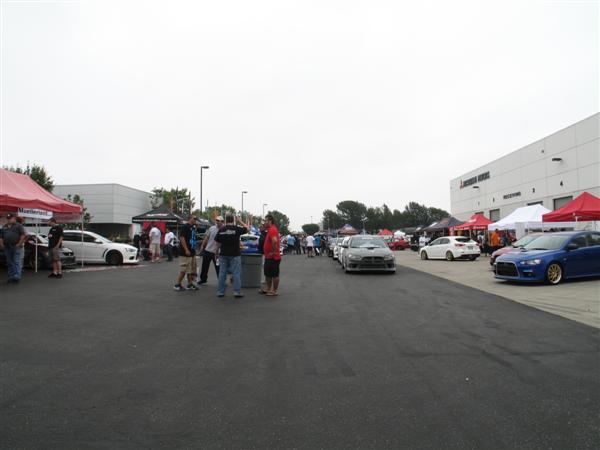
There were many vendors on hand including both manufacturers and shops.

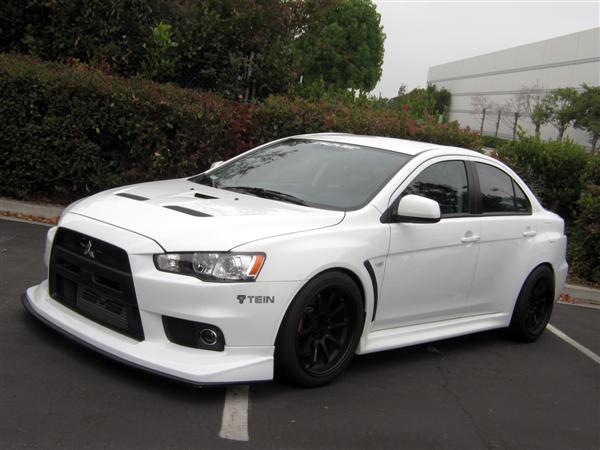
Our booth had two vehicles on display which are both owned by TEIN employees. Philip’s EVO 9 SE and Jon’s EVO 10 GSR.

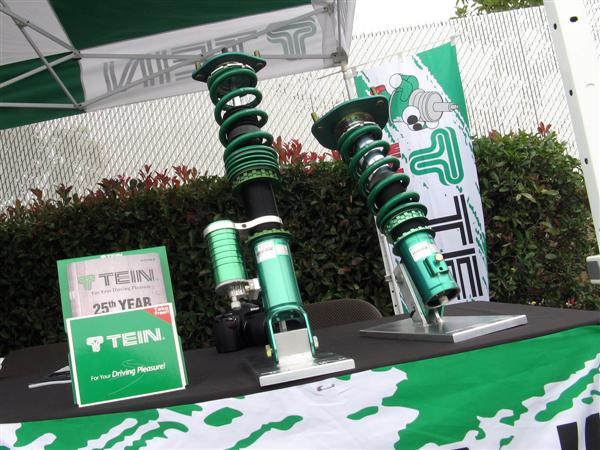
Few items including Super Racing Coilovers on display in our booth.

Right down the aisle from us was TEIN Authorized Dealer, Evasive Motorsports. Evasive sales rep. Dennis’s EVO X on display in their booth. His EVO features Mono FLEX coilovers, Volk CE28s, Voltex lip and a host of other parts.

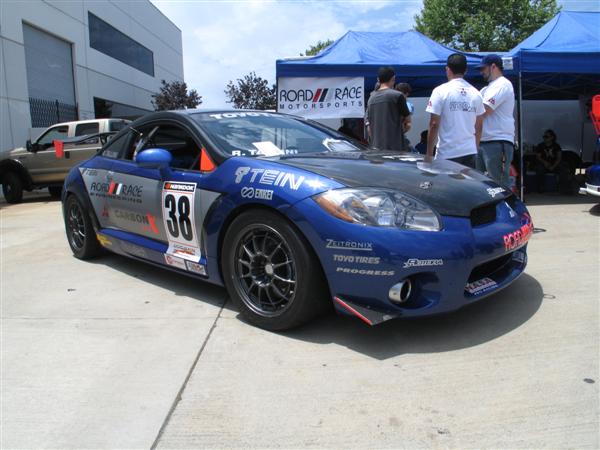
TEIN Authorized dealer, Road Race Motorsports had a large booth space and a few cars on display including Robert Tallini’s Eclipse race car. This car uses custom valved Super Street dampers.

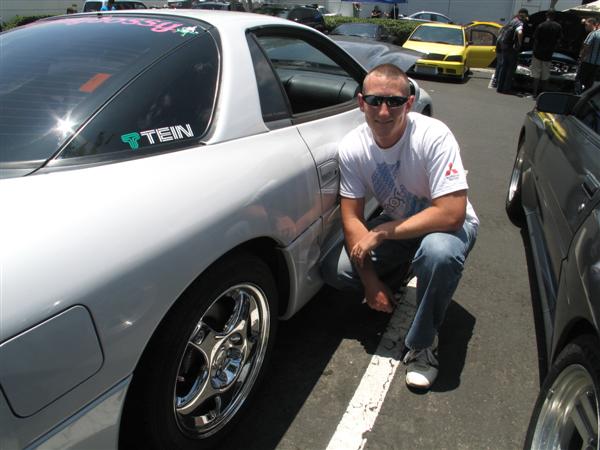
Walking through the show we met, Wes, a proud 3000GT VR4 owner using TEIN Flex coilovers.

Looking forward to MOD 2011.

For more coverage of MOD 2010 check out The Octane Report.

R&D Test Cars Needed.

Blog readers, greetings from the Tein USA Research and Development Section.

In the past, a majority of the blog posts done by R&D have been on vehicles which we had finished our testing on. We simply wanted to report on future products that you, the consumers, could look forward to.

As of late, however, we in R&D have run into a problem. We no longer have test cars to do testing on.

You see, with the continual release of new vehicles and models, there is no way for us to constantly look to just a few sources to provide us with these vehicles to do testing on.

We are completely reliant upon the consumers and enthusiasts, like yourself, to provide us with their personal vehicles to do the aforementioned testing on.

About the Testing itself:

Depending on the testing and the products being tested, the time frame that we require your vehicle for is usually 3-5 days.

Thinking of being without a vehicle for a bit of time may be a huge deterrent for many.

However, look on the bright side.

Free Suspension! Depending on the application, you may walk out with our lowering springs or you may walk out with  a set of our coilovers.

The installation will be professionally done by the R&D Engineers.


After the installation is finished we will perform a Basic Front-End Alignment and you’ll also be the first person to own the product.

If that sparks your interest and if you have the time to allow us with your vehicle, then check out this link and find out if your car is one of those that we are looking for. If you happen not to find your car on the list, no need to fret, check back every once in a while and we just may be in need of your car sometime down the line.

Class Wins at Redline Time Attack w/ video

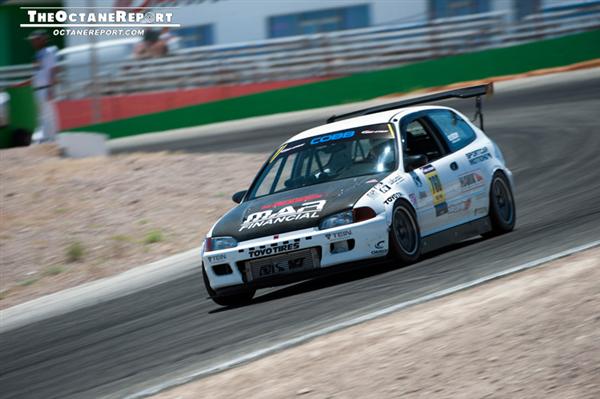
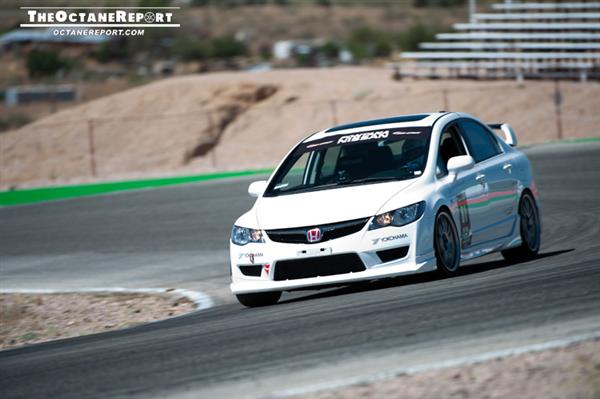
Congratulations to SportCar Motion and Evasive Motorsports for their class wins at Redline Time Attack Rd. 6 at Willow Springs Raceway in California.

Modified-FF
SportCar Motion’s EG Civic took home first place in the Modified-FF class with a time of 1:32.884. This high speed course suited the big power and aero package SportCar Motion prepared for this course. Driver Renzo Marsano beat the second place finisher by over 3 seconds. See the video below for one of Renzo’s laps.

Enthusiast-FF
Mike C. of Evasive Motorsports took home the class win in Enthusiast-FF class with a time of 1:38.941. Mike sits atop the overall points and is the strong favorite for the National Championship. Mike has driven the 2008 Civic Si Sedan to 4 class wins in 4 events. What makes that record even more amazing is that it is done with only a few key modifications. Mike’s Civic is using a revalved set of Mono FLEX dampers which we have been working with him on over the season.

Visit the Octane Report for full event coverage.

Photos courtesy of Duane Uyeda and Arthur Guo of the Octane Report and Loi Song of SportCar Motion.