Lowering Springs on Stock (OEM) Shock Absorbers

Quite often we’re asked about our lowering springs and if it’s okay to use with factory shock absorbers, or OEM, or even OEM replacement shock absorbers.

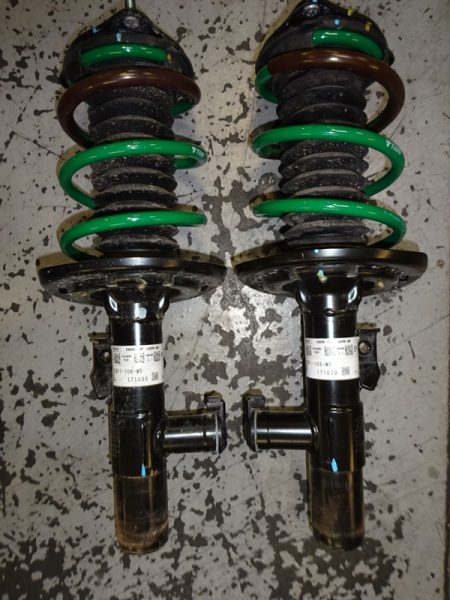
S.TECH Lowering Springs installed on 2017 Honda Civic Si factory (OEM) struts

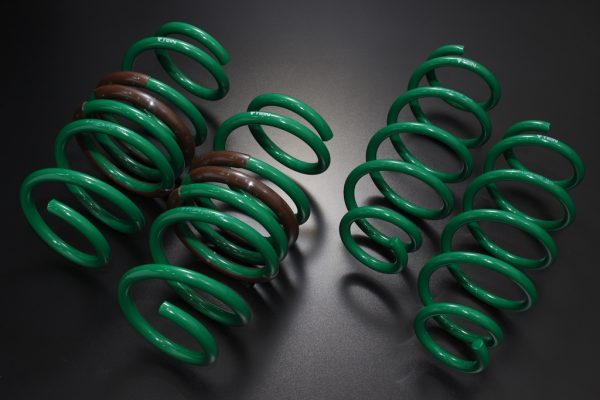
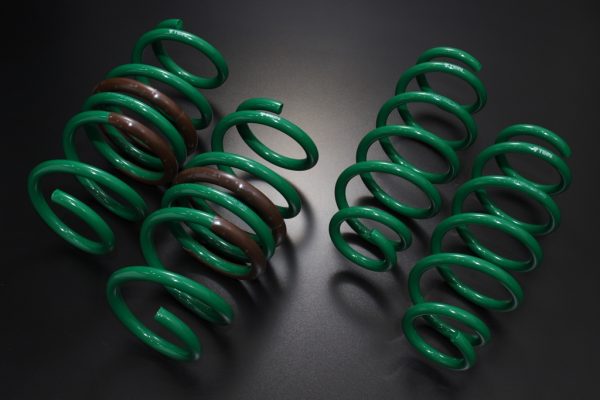
The easiest answer is yes, especially if they’re actual OEM factory shock absorbers. We can say yes as well for aftermarket replacement shock absorbers, but there is somewhat of a caveat. The issue is with the spring perch on shock absorbers or struts that have them. For our ENDURAPRO & ENDURAPRO PLUS premium replacement shock absorbers, we use 3D modeling of actual OEM shock absorbers to make our spring perches, then just modify the design so that it fits over our larger bodied shock absorbers. However, there are some instances where we make modifications for increased strength where we feel it may be necessary. This 3D modeling allows us to make very exacting designs so that it will work with OEM coil springs. And with that, we make sure that our S.TECH and HIGH TECH lowering springs have very similar designs for top and bottom coils to match the OEM coil spring.

Why we say there’s somewhat of a caveat with using our lowering springs on other aftermarket shock absorbers is because we’re not too sure how they model their spring perches. Some may use 3D modeling or a mold to create a negative simliar OEM type spring perch. However, we have seen some differences between some aftermarket replacement shocks and the OEM shocks they’re supposedly modeled after.

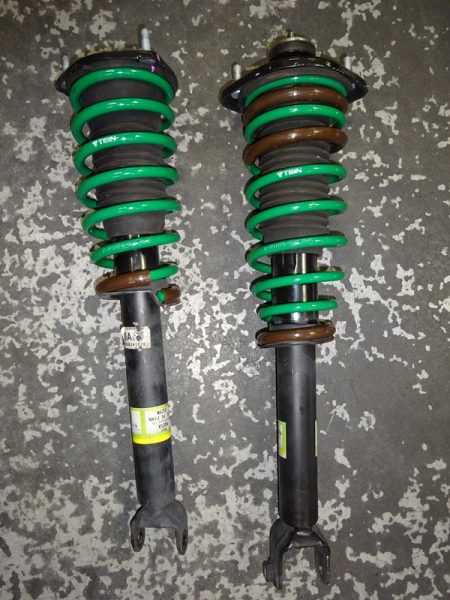
S.TECH Lowering Springs installed on 2019 Mazda Miata factory (OEM) shock absorbers.

Besides the design of the spring perch (if applicable), our lowering springs are not intended to be very aggressive in terms of spring rate. This is intentional, as we expect that many customers are planning on installing our lowering springs onto OEM shock absorbers. With that, we have to keep in mind the OEM shocks damper valving and whether or not it can handle a specific spring design.

Another unknown variable with aftermarket replacement shock absorbers is how they’re valved in comparison to their OEM counterpart. Referring back to our ENDURAPRO & ENDURAPRO PLUS shock absorber line, we decided to “optimize” damper valving. Now, this optimization may vary by vehicle model. But it most cases we’re actually increasing damping force (slightly stiffer). Again, there’s a bit of a variable, because we may increase/decrease compression or we may increase/decrease rebound damping force, or a combination of both. There’s no set method of how we decide to valve. In some instances we may actually decrease damping force, especially compression, if we feel the ride quality will benefit from that change. But for other aftermarket replacement shock absorbers, we cannot say the same thing. In fact, when we’ve tested some aftermarket replacement shocks to their OEM counterpart, we’ve wondered why some of these aftermarket shocks are quite a bit softer (we’ve yet to see the opposite- stiffer than OEM). This can pose some interesting results in ride quality when comparing certain aftermarket replacement shock absorbers with our lowering springs, regardless of them not being very aggressive.

We’re not necessarily trying to pitch our ENDURAPRO or ENDURAPRO PLUS shock absorbers (how can we resist, though?!). But just know that ideally an OEM shock absorber will suit you best since that is what we designed our lowering springs to work with.

Tesla Model 3 Suspension Arriving Soon!

So we’re a bit late to the party. But better late than never, I suppose. We’ve probably said this many times before.

As Electric Vehicles continue to grow in popularity, and with many nations looking to reduce carbon emissions or become carbon-neutral, it was only a matter of time for the Electric Vehicle market to take off. And it really has taken off.

That’s a great opportunity for aftermarket manufacturers such as TEIN. People may need to rely on their Electric Vehicle strictly for commuting. However, that doesn’t mean they cannot enjoy their car for what it offers at face value. As always, where there’s a vehicle, the performance market is not far behind, and everyone wants that extra bit of performance, whether it be in power or handling, or just to simply have something different or unique.

As many of you have seen by now, the modern Electric Vehicle, namely the Teslas, are quite quick in acceleration. The manufacturer has done pretty well in setting their cars up. But let’s be honest, they’re catering to a global market. You can’t appease each and every person with a “run-of-the-mill” Tesla, regardless of which model Tesla it is.

So, we’re coming out with some performance suspension kits, starting with the Model 3, and soon the Model Y.

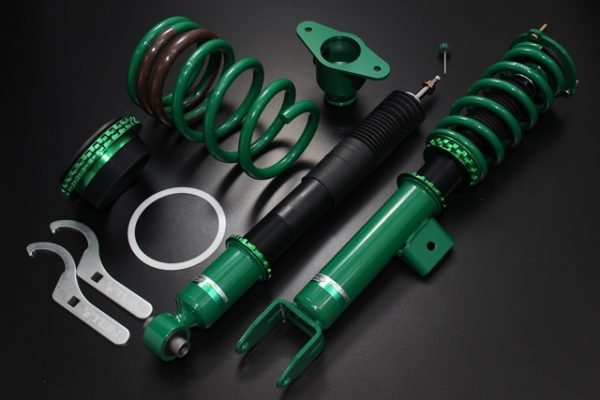
For the Model 3, both rear-wheel drive and all-wheel drive models, we’re making our S.TECH lowering springs, ENDURAPRO and ENDURAPRO PLUS shock absorbers, as well as our FLEX Z coilover kits.

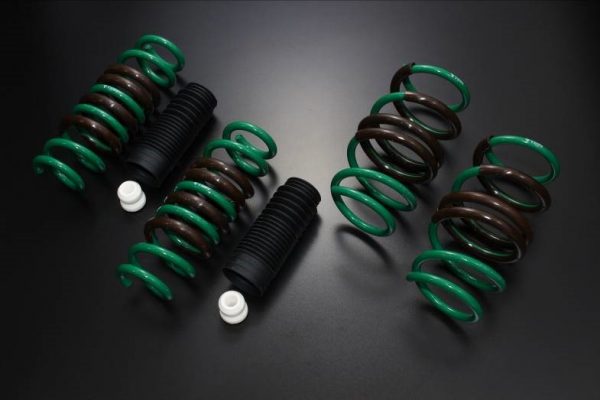
The S.TECH lowering springs will provide a nice lowered ride height without being too aggressive. These will pair well with OEM shocks and struts, but for sure our ENDURAPRO or ENDURAPRO PLUS shocks will be a better pairing.

S.TECH Lowering Springs for Tesla Model 3 RWD (Standard Plus Model)

Part number: SKGP2-AUB00

Ride height drop: Ft- -1.6″; Rr- -1.4″

MSRP: $385

*Sold as a set of 4 springs
S.TECH Lowering Springs for Tesla Model 3 AWD (Dual Motor; incl. Performance Model).

Part number: SKGP4-AUB00

Ride height drop: Ft- -1.2″; Rr- -1.4″

MSRP: $385

*Sold as a set of 4 springs

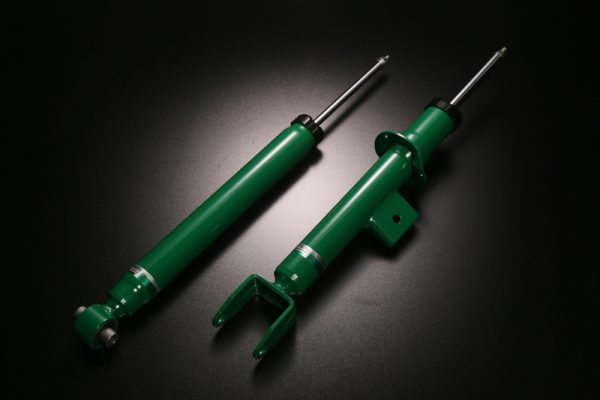
ENDURAPRO and ENDURAPRO PLUS (16-click damping adjustable) shocks are true performance replacement shocks. Damper tuning is optimized to reduce body roll and provide better response to fast inputs. But beyond the tuning, the internal Hydraulic Bump Stopper (HBS) in each shock absorber provide increased comfort and safety by reducing a typical shock absorber’s tendency under full compression (bottoming out) to oscillate. This feature also increases vehicle stability in emergency maneuvers, especially in vehicles with added weight. Also, although designed to be a direct OE fitment, we incorporate a lot of features typical of our coilover kits- larger diameter damper bodies (increased damper oil capacity, larger diameter piston rods, and use of ultra high-strength steel in its construction.

ENDURAPRO Shock Absorbers for Tesla Model 3 RWD

Part number:
ENDURAPRO-
FL- VSGP2-A1MS2-L
FR-VSPG2-A1MS2-R
Rear- VSGP3-A1MS2

ENDURAPRO PLUS-
FL- VSPG2-B1MS2-L
FR- VSGP2-B1MS2-R
Rear- VSGP3-B1MS2

MSRP:
ENDURAPRO-
VSGP2-A1MS2-L – $145
VSPG2-A1MS2-R – $145
VSGP3-A1MS2 – $120

ENDURAPRO PLUS-
VSPG2-B1MS2-L – $160
VSGP2-B1MS2-R – $160
VSGP3-B1MS2 – $135

*sold as individual units

**Model 3 AWD (Dual Motor) shock absorbers coming soon!

Our FLEX Z coilovers, on the other hand, are for consumers who need much more than what our lowering springs and performance shocks can offer. FLEX Z coilovers provided full-length adjustability (separate spring preload and ride height adjustment), 16-way damping adjustment, upper mounts for front and rear dampers, high-rate springs, and valved to provide greater handling performance without compromising ride feel. For sure, much more aggressive for street, but not at the ride quality penalty typically associated with aftermarket coilover kits. Lastly, our FLEX Z coilovers are compatible with our optional Electronic Damping Force Controllers (EDFC)- ACTIVE and ACTIVE PRO, giving you the added benefit of damping adjustment from the driver’s seat. No need to have to manually set your damping by hand, and you can also save up to 10 different presets. However in Active mode, you can have damping that changes based on driving speeds or g-force load. This EDFC setup makes the FLEX Z a true adaptive suspension setup.

FLEX Z Coilover Kit for Tesla Model 3 RWD

Part number: VSGP2-C1AS3

Spring Rates: Ft- 9kg/mm (504lbs/in); Rr- 10kg/mm (560lbs/in)

MSRP: $1,200

*Model 3 AWD (Dual Motor) coilover kit coming soon!

So again, we’re late to the party. We tend to take our time on product development to make sure we get it right, and to make sure we have products that fill the needs of our customers. If you need help deciding on what suspension setup suits you the best, please give us a call at 562-861-9161, or email us at tus_sales@tein.com, and we’d be happy to assist you in getting the suspension you need!

A90 Supra S.TECH Rear Bump Stop Modification

Featured

With the newly released S.TECH lowering springs for the A90 Toyota Supra, we wanted to put a notice out to owners about modifications needed to the rear bump stops.

S.TECH Lowering Spring set part number: SKTJ4-S1B00

Our S.TECH spring kit (part number: SKTJ4-S1B00) includes a pair of bump stops and dust boots specifically for the rear shock absorber. However, it is to be used in conjunction with a modified OEM bump stop.

Please follow along as we show you what needs to be done.

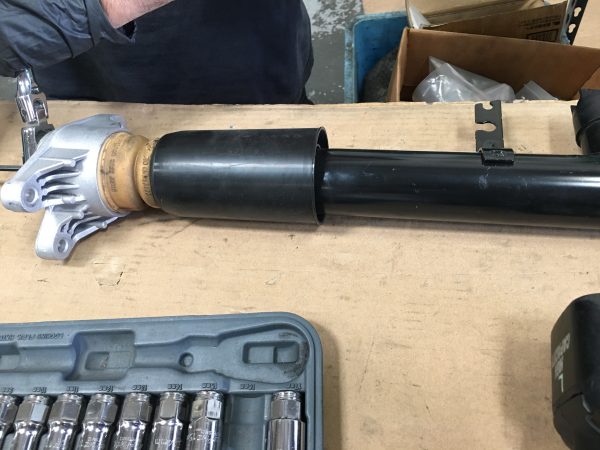
First, the rear shock absorber mount needs to be removed. Then, the the OEM bump stop can be pulled out of the mount. Now, the OEM dust boot is simply press fitted around the OEM bump stop. You can just pull the dust boot out, or you can leave it attached. Either way, the OEM bump stop needs to be trimmed significantly, and the portion to be removed also removes the OEM dust boot. Our included TEIN dust boot will replace this piece.

The rear shock absorber mount needs to be removed from the shock absorber assembly.

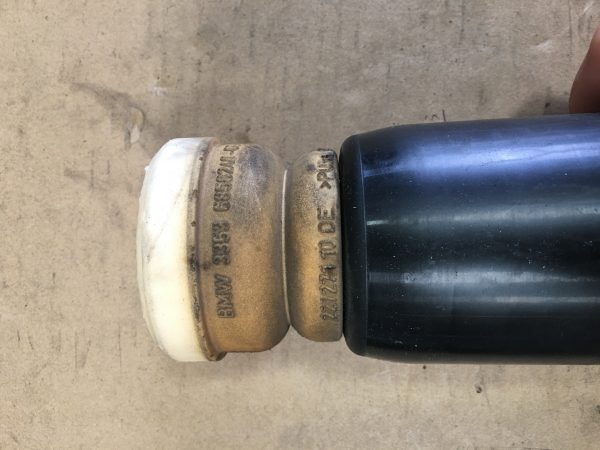
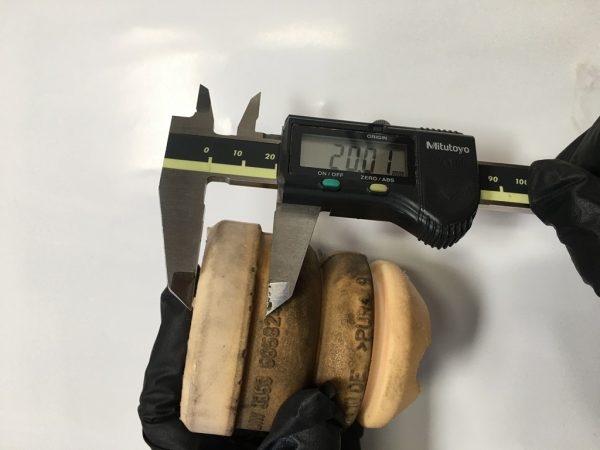
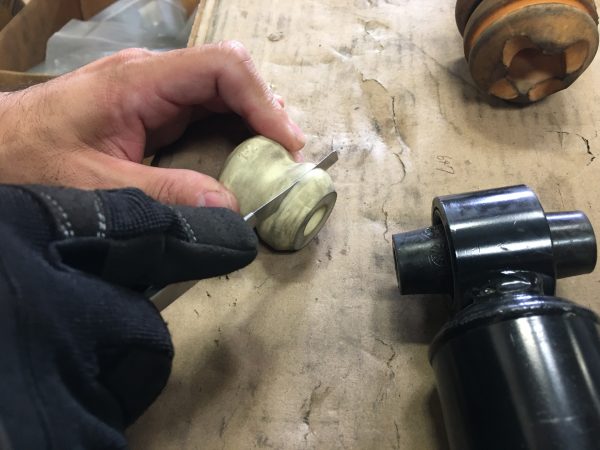
With the OEM bump stop removed, you need to measure 20mm from the top of the bump stop (widest portion) down and mark this location. This 20mm piece will be reinstalled in the rear shock absorber mount. You can use a razor blade (utility knife will do fine) to cut the bottom portion of the OEM bump stop off.

The OEM bump stop and OEM dust boot are assembled as one piece. The OEM dust boot is easily removed by pulling it off the OEM dust boot.
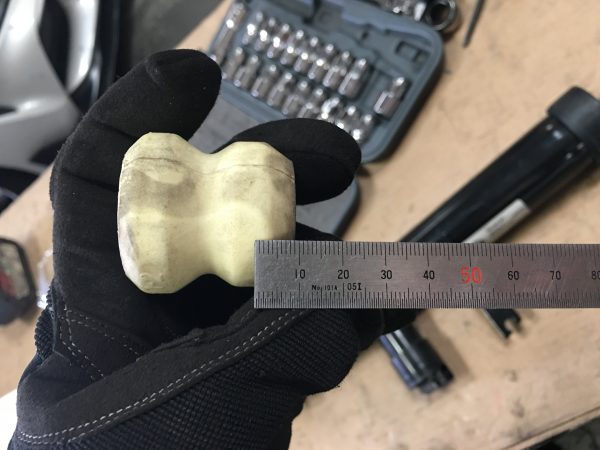
The top of the OEM bump stop will need to be remained. This should be 20mm thick after trimming.

Now, the included TEIN bump stop also needs to be trimmed. 10mm needs to be trimmed off the bottom (narrow portion) of the TEIN bump stop.

The included TEIN bump stop also needs to be trimmed, too. The bottom portion needs 10mm but from the bottom, which is the narrow portion of the bump stop.
A utility knife makes trimming of the OEM and TEIN bump stop easy work. Just use caution when cutting.

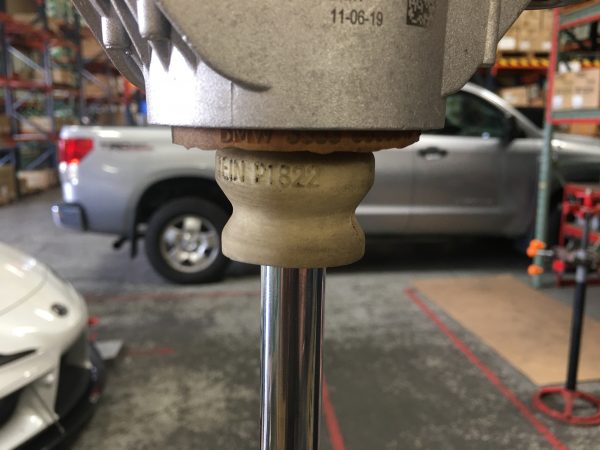
This picture shows how it is to look on the rear shock absorber (without the TEIN dust boot, for example only) along with the trimmed OEM bump stop.

For reinstallation, hand fit the modified TEIN bump stop onto the piston rod. Then, fit the TEIN dust boot onto the piston rod.

Then, reinstall the rear shock absorber mount (with the trimmed OEM bump stop hand pressed in) onto the piston rod. Now you can tighten the rear shock absorber mount with the 16mm flange nut.

Make sure the TEIN dust boot and bump stop are placed up against the trimmed OEM bump stop (basically you are going to sandwich the top of the TEIN dust boot against the trimmed OEM bump stop and trimmed TEIN bump stop).

The final assembly should look like this. The TEIN bump stop is covered by the TEIN dust boot, and both pieces are pushed up against the trimmed OEM bump stop. The TEIN bump stop is a tight fit around the piston rod in order to keep the TEIN dust boot in place and to protect the piston rod from any debris damage while driving.

The rear shock absorber assembly is now ready to be installed back onto the vehicle.

ENDURAPRO PLUS 20K Mile Inspection

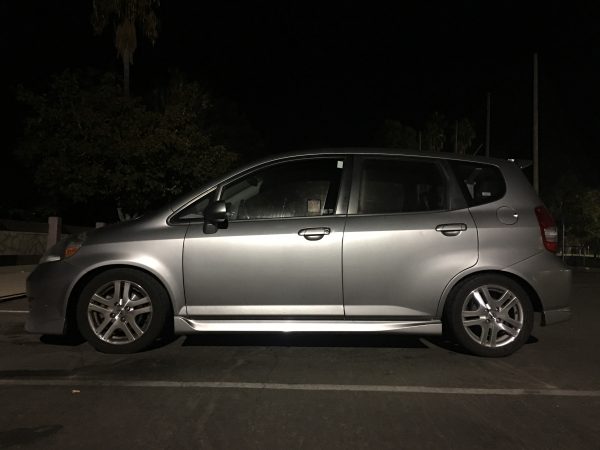
I’m lucky enough to be one of the first in the U.S. to put our new ENDURAPRO shock absorbers to use in the U.S. My 2008 Honda Fit was fitted with the ENDURAPRO PLUS (16-click damping adjustable) shocks and struts, which I eventually added our S.TECH lowering springs, around March 2018. I figured it’s time to visually inspect these shocks and see how they’ve held up.

As previously mentioned, this car is typically my daily commuter for work. I average about 14,000 miles in driving a year. While I technically have just over 21,000 miles on these ENDURAPRO PLUS shocks, the other miles I drive for the year has been on my truck. Still, I think over 21k of miles on our ENDURAPRO PLUS shocks is a pretty good age to finally give them a look-see. Mind you, the average shock absorber lifespan is typically 36,000 miles in the U.S. Not too sure how that average came to be. We see shock absorbers last much longer than that. Quite honestly, I should have inspected these shocks a long time ago (a reminder to all to inspect their cars)!

Prior to giving you a run-down of the inspection, I will say that overall the shocks still feel great! Over time, I’ve readjusted the damping click settings simply to find that “sweet spot” in comfort. After all, installing lowering springs will alter the ride quality. Currently I have the fronts and rears set to 8 clicks from stiff (essentially the middle setting). I had previously had it somewhat softer in front and stiffer in back, as I felt it worked well whenever I had the car fully loaded. I may end up softening the front just a little, once everything is reinstalled.

Speaking of fully loaded, that is probably the most awe inspiring experience that showcases how our shock absorbers perform! It really is! As you probably already know, our ENDURAPRO/ENDURAPRO PLUS line includes internal Hydraulic Bump Stoppers, which helps alleviate that ever-so-fun suspension oscillation whenever the car is at maximum capacity.

Again, since it’s my daily commuter, typically there isn’t much extra weight in the car, other than my kids’ seats and some kids junk in the back seats. With lowering springs that are a bit stiffer than stock, it can feel relatively firm over bumps and gaps in the highway. Overall, our S.TECH springs aren’t terribly stiff.

However, after my bi-weekly trip to Costco, which usually consists of purchasing several cases of bottled water, my kids’ diapers and formula, and a bunch of other necessities you have no choice but to purchase in bulk, the trunk gets heavily loaded, and you can both see and feel that added weight. Then add my sons, when i have to pick them up at their Nana’s house. It’s basically like I’m loaded for a long-distance road trip.

This is where our Hydraulic Bump Stopper really comes in to play. Our Southern California highways are anything but smooth, and there are plenty of large gaps, expansion joints, dips, pavement cracks/potholes, ramp-like bumps over overpasses, etc. It’s a great way to put suspension to work, and at highway speeds, this provides us with a horrific ride, and one that puts our vehicles through pure torture. Did I mention that I also have to listen to “Elmo’s Song” on repeat whenever the kids are in the car???

But seriously, over this type of highway terrain, TEIN’s Hydraulic Bump Stopper really does its part in helping absorb these high-speed impacts, preventing the polyurethane bump stop from doing that work and helping the shock absorbers rebound nice and smoothly. Honestly, it has to be one of the more rewarding parts of my commute. Now I can understand what trophy trucks must feel like over big jumps,,,,,, just at a much smaller scale. Hahahaha!

Anyway, on to the inspection:

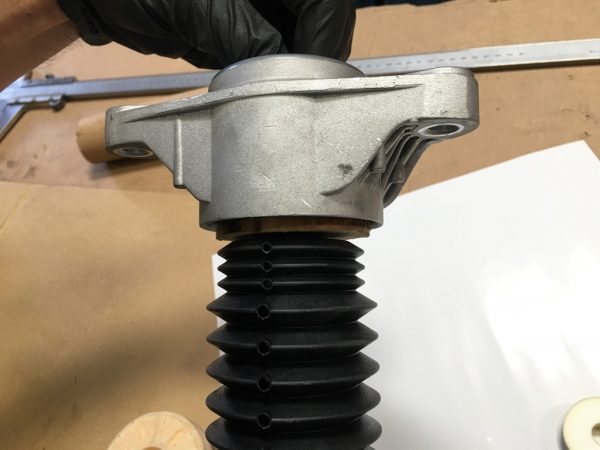
One thing I noticed was the front strut mounts were making a bit of noise, especially when steering at slow speed. I initially thought it was the bearing making the noise. But, for all I know it could have been a problem with the struts. This just confirms it was indeed the upper mount. However, as mentioned during the initial installation of these ENDURAPRO Plus shock absorbers, the front mounts probably contributed to a slightly lower ride height than target, due to the mostly rubber mount taking a set after 80,000 miles of use. Now at 101,000 miles, it is time to change these components out to fresh new factory style mounts.

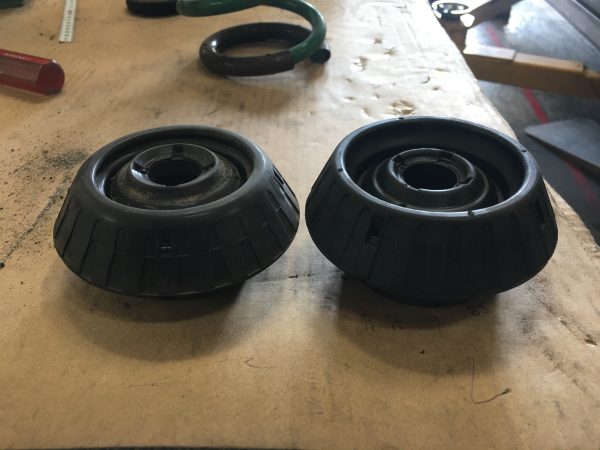
Old mount on the left, new on the right. You can see how the mounts have sagged over time. It was starting to make some noise, most notably at low-speed.

For the rears, the only thing I noticed was a hole being worn into one section of the dust boot. Looks to have made contact with the tire. Not a big deal, and replacement dust boots are readily available.

I also checked gas pressure while the shocks were off the car, and all of them seemed fine. By checking I mean I fully compressed each damper by hand and checked the rebound, as well as tried different damping settings during the same procedure. I will say the damping click adjusters were slightly stiff up front. However, that could be due to not using the included ADD Caps to cover them (this keeps dust out of the system). A simple spray of WD-40 or similar type lubricant will displace any dirt or corrosion in between the click knob and its base. Also, any exposed thread on the piston shafts for the front dampers accumulated some surface rust. A wire brush cleaning and some WD-40 helps clean that up. But since I removed the struts from the original upper mounts, the threads got a decent clean up simply from the removal process.

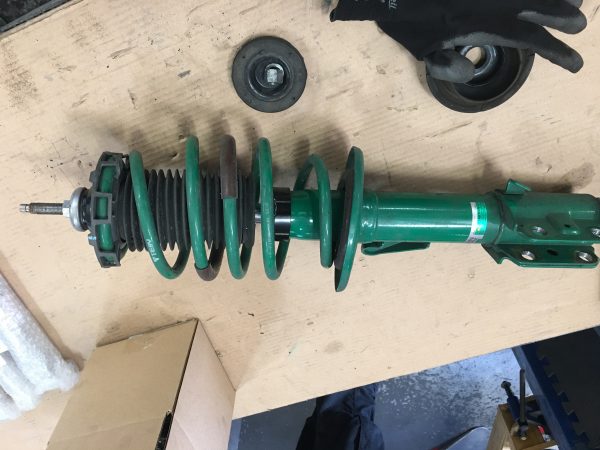
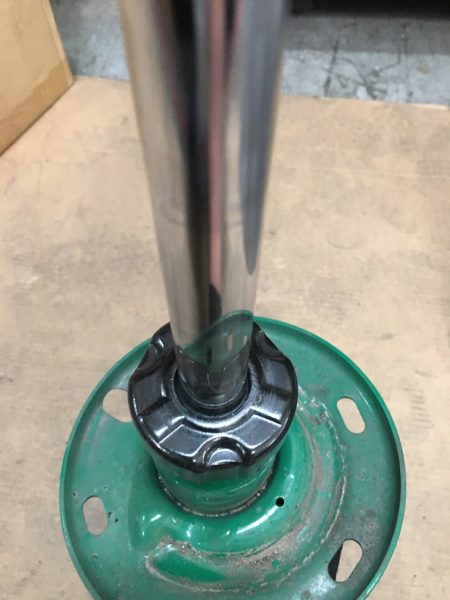
Front strut out. I needed to remove the bearing, as I thought this also contributed to noise I was hearing at low-speed driving.
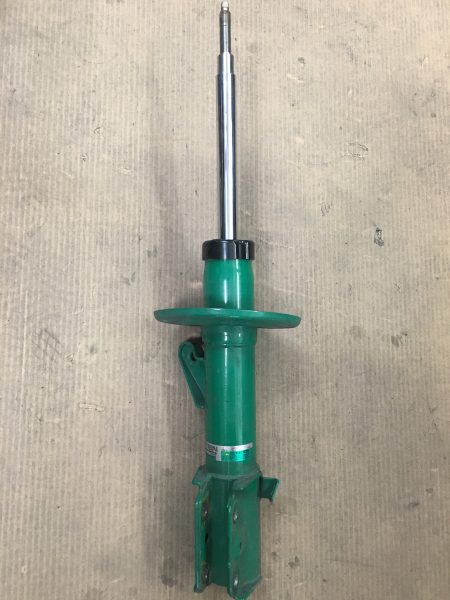
With the bearing out, I decided to inspect the shock. All components removed help to make a more detailed inspection.

While I’ve had the ENDURAPRO shock absorbers off, I checked bushings in the control arms, ball joints, sway bar end links, and tie rod ends just to make sure of their condition, which fortunately they are. I’m sure at some point I’ll change out the front lower arms (bushings by themselves are not readily available). For the rear twist bar, it’s hard to source just the rear bushing, so I’m going to keep searching for a solution.

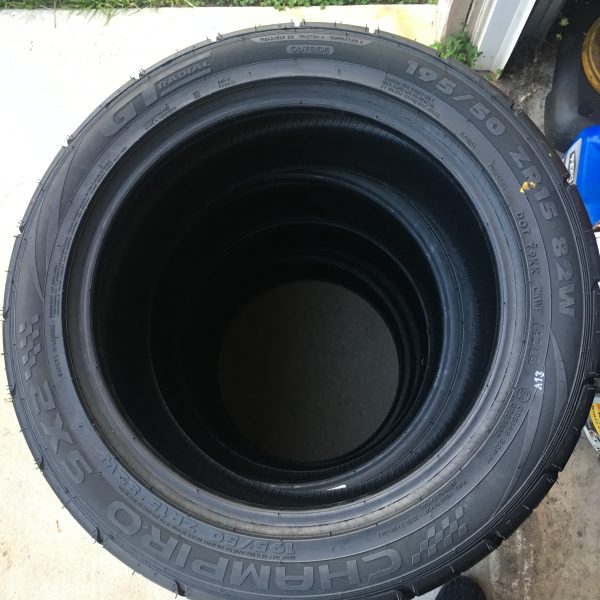
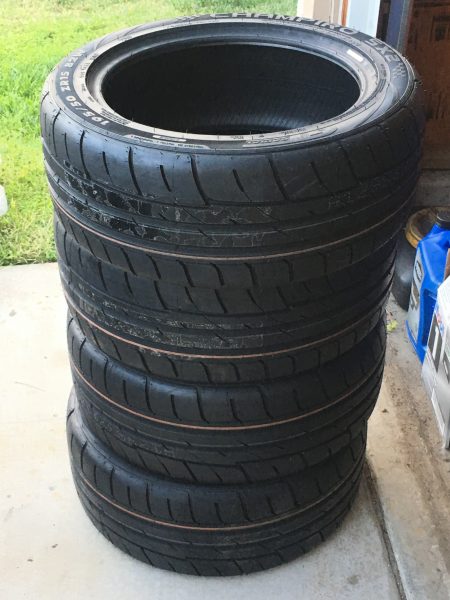
I did have the tires changed at around the 3,000 mile mark on these shock absorbers. I wanted to try something a bit more sport oriented, but not very expensive. Also, my “tuning philosophy” (if you will) for starting to modify a car is usually in the order of- decent tires, sport (not race) brake pads/shoes, and some decent suspension (as in shock absorbers and possibly springs), especially if there is a damping adjustable option. This before ever considering more power. With ENDURAPRO Plus shocks and S.TECH lowering springs and some Stoptech Sport pads and plain rotors installed, I needed decent tires. So, I contacted the guys at GT Radial to order a set of their Champiro SX2 Summer tires. I’ve followed the 86 Cup group and saw that these tires offer very decent performance and very good wear resistance, and I wanted to try something other than all-season tires that this car has used over the years. I opted for a size slightly smaller in diameter than stock just to see if there was any gain in performance.

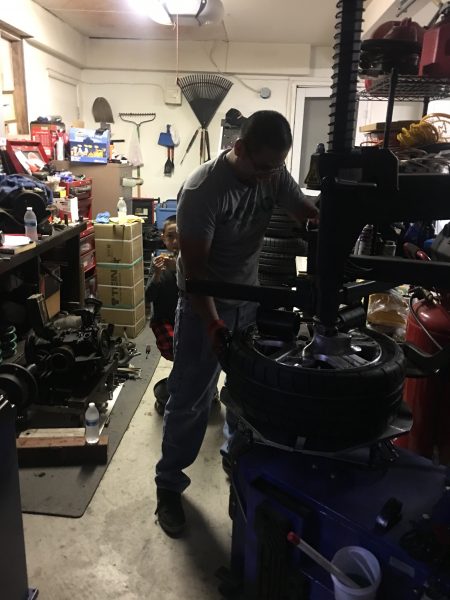
A new set of tires go on the Fit, courtesy of GT Radial
A big thanks to Gonzo, who invited me over to his Chateau. He’s got a full tire changing station in his garage! His son Enzo also came out to help. Good kid!

I will say that these SX2 tires still provided very good comfort. Being a daily commuter, this car only gets an occasional spirited drive. For me, that comes with the excitement of driving through Angeles Crest, since it’s kind of in my “back yard”. Interestingly enough, I found that these tires at 31psi cold, and a 13-click front shock setting (soft) and 6-click rear shock setting (somewhat stiff) had very good and predictable feel. I could very lightly get the back end to rotate with a touch of left-foot braking, and the feeling was pretty consistent throughout my drive through the hwy. The Fit is a very front-heavy car, so it takes a little coaxing to get the car to turn in, since the car understeers easily. One thing I could appreciate from these tires is the wear resistance. Rated as a 200 treadwear, these tires held up better than some 360 treadwear tires I had on previously (which actually only lasted about 13,000 miles before I changed them out to these SX2’s). Dunno what the deal is with that, but those are my figures.

Mind you, these aren’t all-season tires, so I take it a little easier during rainy days. However, wet weather driving is actually quite nice on this setup. Not that I was expecting to hydroplane on a summer tire on wet pavement, it actually handled heavy rain and puddles very well.

While this is sounding like a tire review, what I’m getting at is that these small changes to this daily driven econobox (TEIN S.TECH Springs, ENDURAPRO Plus Shock Absorbers, and GT Radial SX2 tires) have already made this car more enjoyable for my drive. Does it make me miss having a much more sporty car? Absolutely. But, gotta work with what I got. I think most importantly is the value of all these parts as a whole- Not a lot of money spent (granted, I got the shocks for free for testing on my car) to “upgrade” the car. So, for most of you guys looking to make your car a little bit faster and more fun to drive, this should be something to think about.

By the way, the slightly smaller diameter tires I chose actually helped improve a few things such as MPG (when I really take it easy on driving) and acceleration (most notably in higher gears). I was expecting MPG to be a bit worse. However, it has affected actual speedometer readings a tad, but the factory speedometer reads ~1 MPH lower than actual.

All in all, I’d say I’m more than pleased with the car as it currently sits. Not a ton of money invested in getting some performance out of it. Decent suspension, very good tires, and sportier brake pads up front, and I’m a happy camper!

TEIN Endura Pro Plus Shock Absorbers

This is probably the single most anticipated product from TEIN, for me at least. Why? Probably because I’m reaching a point in my life where I want a simple suspension setup that will work well, and I can do away with a bunch of features I will not really use often. In other words, I’m getting old and lazy.

The TEIN group has been discussing this new line, which is a premium shock absorber, for probably the past five years (to my knowledge). We’ve wanted to get into the replacement shock absorber line for some time now, but we wanted something that had an appreciable difference to the well-known aftermarket shock absorbers already on the market.

So, after all these years and years of discussion and product development, we now have our Endura Pro and Endura Pro Plus shock absorber line.
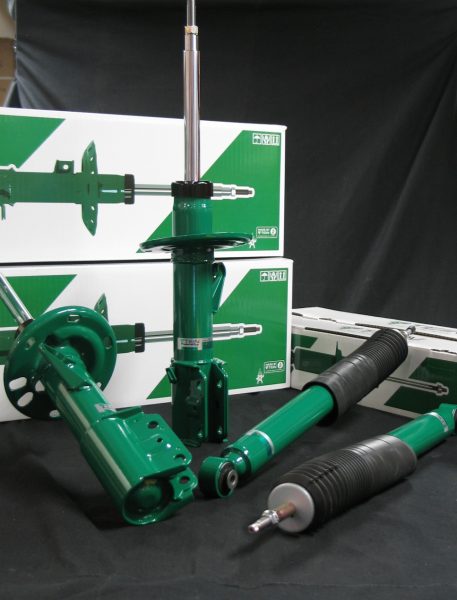
These shock absorbers are completely compatible with OEM vehicles. As stated, it is a replacement shock absorber. HOWEVER, it is far from a simple replacement. We’ve gone an extra step in making them a high performance shock absorber. In saying that, this product is not the same type of suspension as our existing line of coilovers, which in many cases offer a firmer ride and drastically reduced vehicle body motion (sway, squat, dive). The Endura Pro/Endura Pro Plus line does offer a very comfortable ride quality, but internally it is much different than a standard twin-tube shock absorber you’ll find as an OEM shock.

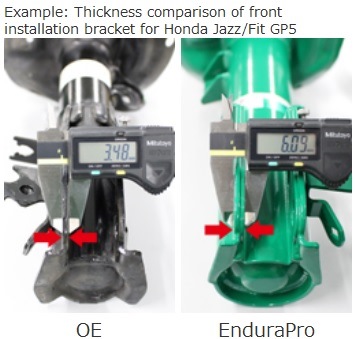
For starters, we actually have increased the internal capacity of the shock absorbers. In most cases, our Endura Pro/Endura Pro Plus shock absorbers are the same length as an OEM shock (a few applications use a slightly shorter damper body), but we also use larger diameter damper bodies, thus the internal volume is greater. In doing so, we’ve increased damper oil capacity over a standard shock absorber for the same vehicle application. That translates to better endurance (long-term driving) and increased longevity. It also allows us to use a larger than OEM piston valve which provides a greater damping force range.
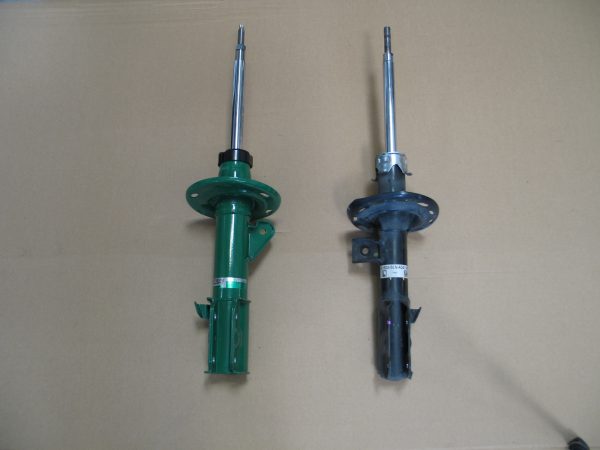
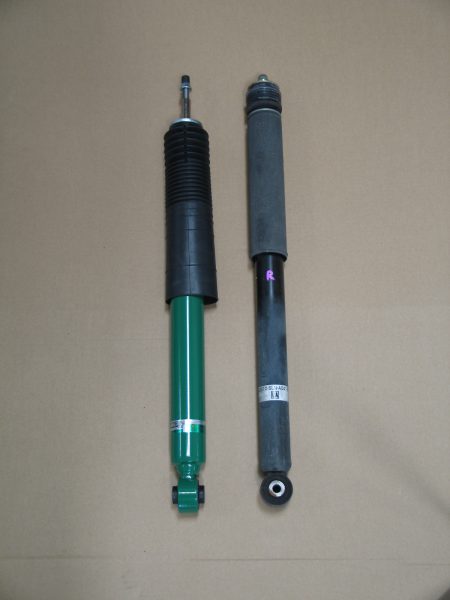
For strut type applications, we use thicker piston rods (22mm dia.) able to withstand greater lateral loading that struts are subjected to.
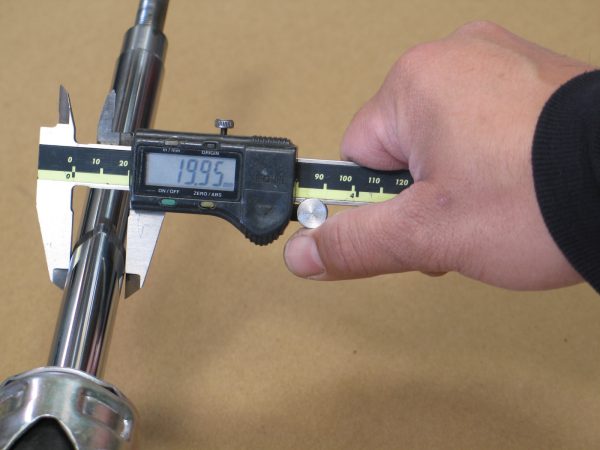
OEM Strut Piston Rod
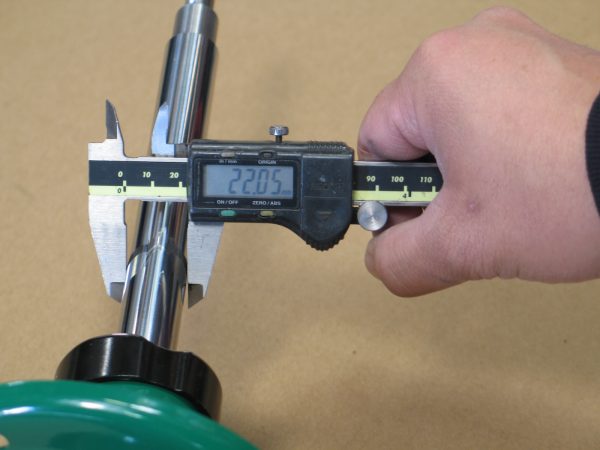
Endura Pro Strut Piston Rod

Since we use the same high-strength steel as used in our coilover kits, it allows us to reinforce areas of the damper, like the lower brackets on strut type suspensions, or the spring seat or sway bar bracket, without a large penalty in weight. In fact, for some applications the Endura Pro shock absorber is actually lighter than OEM!
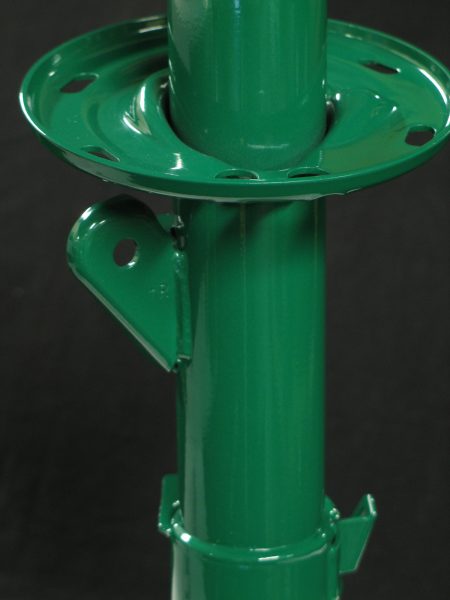
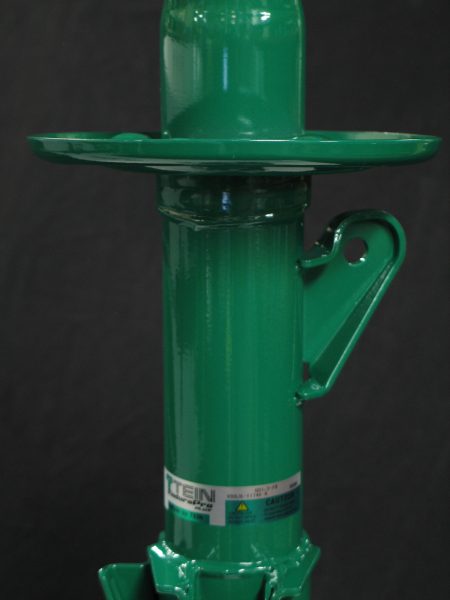
Depending on the vehicle application, we will include necessary hardware to make the installation easier, such as collars, bump stoppers/washers, dust boot, bump stop, etc.
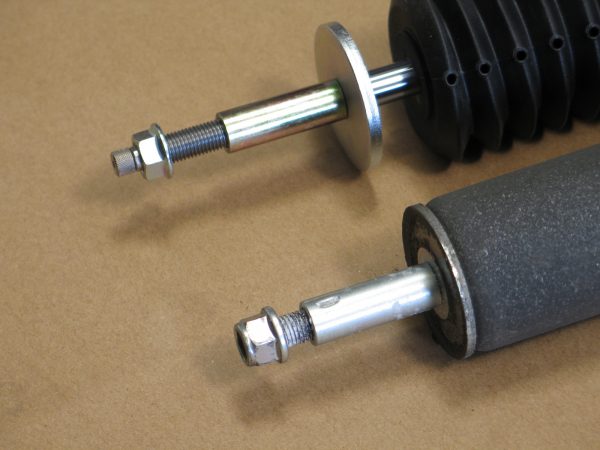
OEM shock (bottom) has a crimped collar, making removal of the dust boot, bump stop, and washer impossible. Endura Pro will include new hardware if necessary.

One new feature recently only applied to the TEIN FLEX A coilover kit has now made its way into every Endura Pro/Endura Pro Plus shock absorber- our Hydraulic Bump Stop. With the aforementioned FLEX A line, the only other TEIN product to incorporate a Hydraulic Bump Stop is our Gr.N rally coilovers. The off-road crowd probably knows a fair deal about how a hydraulic bump stop works- it creates higher damping force on compression to prevent the suspension from bottoming out completely, then allows the suspension to settle in a very controlled manner on rebound. What you end up with is a reduction in suspension oscillation (excessive up and down movement, or “porpoising”). Never before has a replacement shock absorber ever had such a feature.
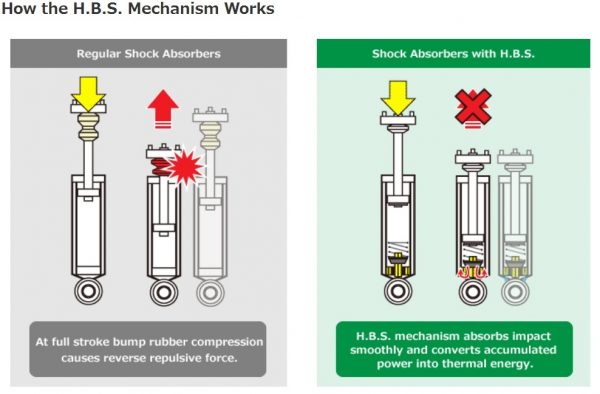
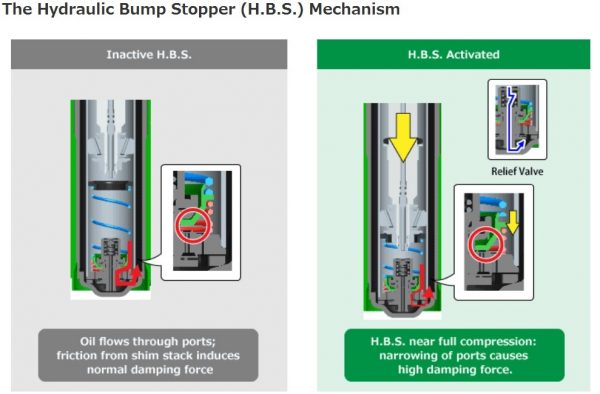
The Endura Pro Plus line, specifically, has 16-way damping adjustment, similar to our other damping force adjustable coilover kits like STREET ADVANCE Z, FLEX Z, MONO SPORT, etc. This gives the end user the ability to set their suspension to their preferences depending on their driving conditions. As an added bonus to having this damping adjustment, this technically makes the Endura Pro Plus shock absorbers EDFC series compatible! With EDFC, now you can control the shock absorber damping settings directly from the driver’s seat. Opt for the EDFC ACTIVE or EDFC ACTIVE PRO series, and you’ll get adaptive damping force control based on speed or g-force loading! EDFC is a universal application for our 16-way adjustable TEIN dampers, so any car can use this setup (some vehicles may require modifications or adapters to make the EDFC Motors fit properly)!
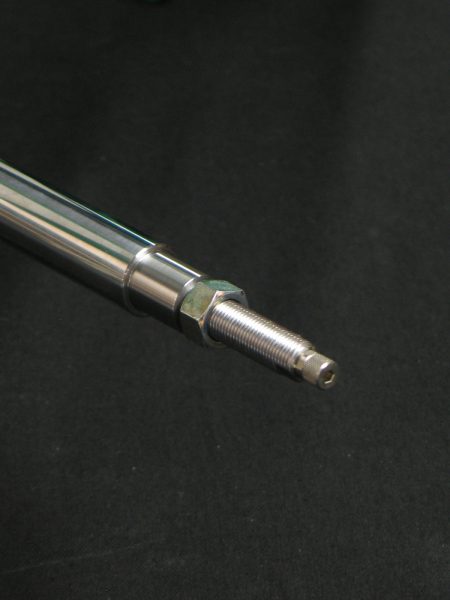
Click knob for damping adjustment on strut type Endura Pro Plus
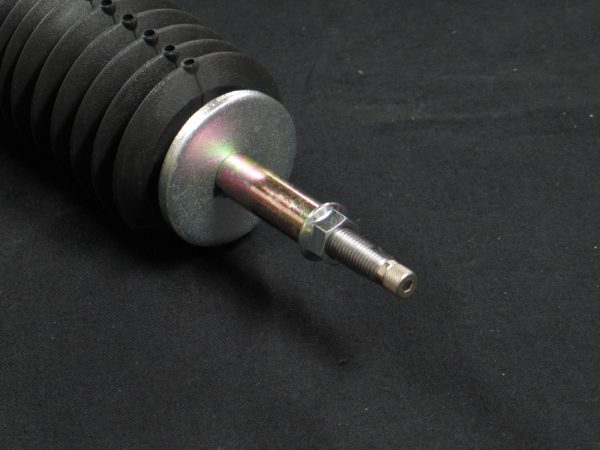
Click knob for damping adjustment on Endura Pro Plus

Lastly, the Endura Pro/Endura Pro Plus line adopts our new fully sealed structure in helping keep manufacturing costs (and MSRP) down. These shock absorbers will be available for sale individually, but we’ll also be offering them as a complete set with TEIN S.TECH lowering springs!

So again, this new Endura Pro/Endura Pro Plus line is far from a simple replacement shock absorber, and now I can say I know that personally.

After constant nagging to my boss, I wanted to see if we would be making some for the GD3 Honda Fit (2007-2008). Since I’ve taken ownership of my dad’s Fit, I’ve grown to love driving it. It’s by no means a fast car (quite the opposite, actually. I’ll just call it “brisk”), but it is small, lightweight for its size, and kind of fun to drive in a spirited manner. And it’s a practical car for me now that I have a small family of my own. The Fit also saves me from wasting gas in my truck driving solo to and from work, so it’s now my daily driver.

Now, with 80,000 miles, which is relatively low for this year vehicle, I can feel the suspension is not as it was when it was newer. Of course that can be from a number of things, but the shock absorbers are a pretty high wear and tear item in the suspension, so that felt like the cause. After removal of the shocks and compressing them by hand, there was still at least some nitrogen charge in all the shocks, but maybe not enough to really provide good rebound force.

Anyway, to get to the point, I finally got a set of Endura Pro Plus shock absorbers for the Fit!


DISCLOSURE– The Endura Pro Plus shock absorbers I’m using are designed for the Japanese market GD3 Honda Fit, which is not a direct fitment for the front.


This required some modification to the knuckle brackets by boring out the bolt holes to 14mm. Still, this isn’t a direct fitment even after this modification. The struts are the same length as the US Honda Fit OEM strut, however the spring seat and sway bar bracket are 20mm higher than the OEM strut (fortunately this poses no clearance issues). So, this actually does translate into a slightly higher front ride height. For my Fit, it was approximately 12mm higher than stock ride height in the front.

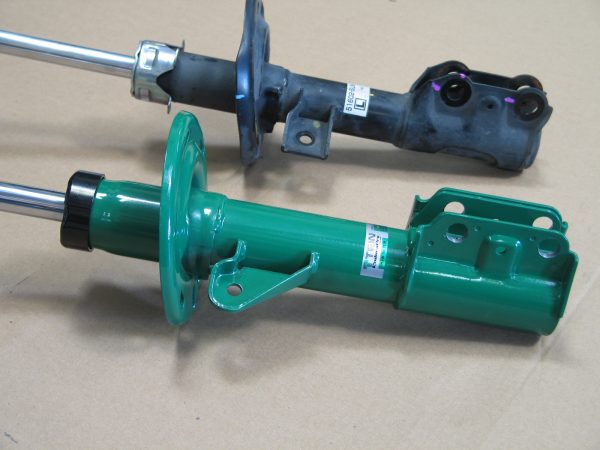
*Endura Pro Plus Strut (bottom) had bolt holes in lower bracket bored to fit USDM GD3 Honda Fit.
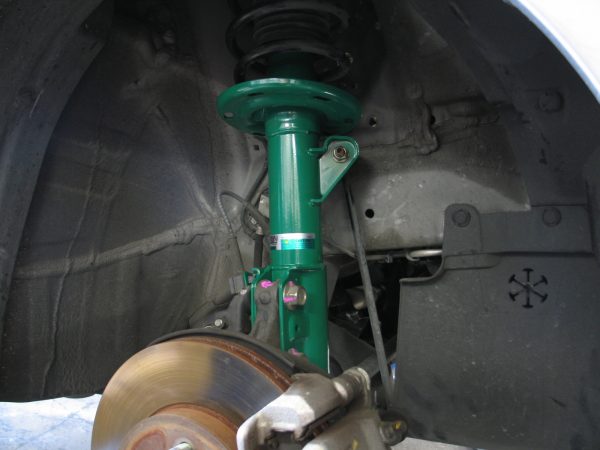
The rear dampers are a direct fit, so no problems there.
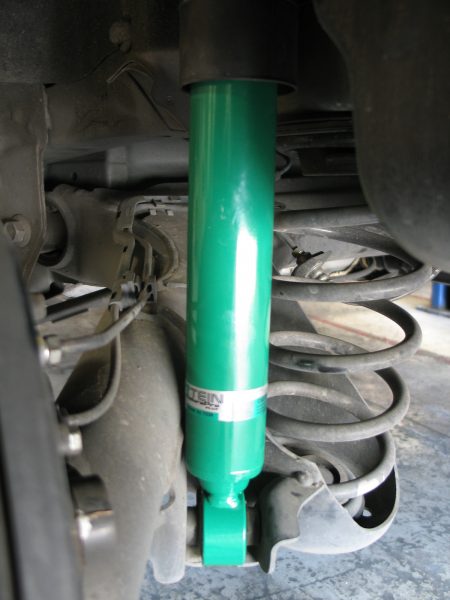
Clearance at the bottom is very close to the axle beam, due to the larger diameter body of Endura Pro/Endura Pro Plus shock absorber. Fortunately no contact with the beam, even at full droop.

With the shock absorbers set at 8 clicks (middle) front and rear, the ride quality felt very much as I remembered the car feeling like when new. That was ten years ago though, so I really only have a memory to go off of. One of my co-workers said that the shocks set to 16 clicks (softest) was actually an improvement over the worn OEM dampers. At 0 clicks (stiffest) it is actually a noticeably firm ride quality, but far from being jarring (the Fit uses soft springs). I found that a 12 click front and 10 click rear was more to my preference. So I drove on that for about a week, until one of the guys here (Gonzo, aka Cpt. Slammo, aka Monster Tuck) kept telling me “it needs to be lower”…. ughhh.

I actually wanted to lower the car a little anyway. Go figure. I mean that’s really what TEIN suspension is known for doing, so it’s only natural to want to use the products I help sell. So, I bought a set of our S.TECH lowering springs for the Fit (part # SKB36-AUB00). Knowing that the front struts are now a bit higher than the OEM strut, I thought the car would look a little funny with a slightly raised front end. But, to my surprise the ride height actually has a relatively even drop front and rear (referring to tire-fender gap)! The front actually dropped a little over 2″ front and 1.2″ rear (we spec S.TECH’s for the GD3 fit at -1.8″ front and -1.2″ rear). So even with the Endura Pro Plus front struts having higher spring seat position than OEM, it’s nearly about the same ride height as our test data. That difference can be due to the strut mounts (being mostly rubber) starting to sag.

As for ride quality, now it feels more in line with how one of our coilover kits feel, like a STREET ADVANCE Z for example. Not incredibly stiff, but nice and sporty with good compliance for my daily commute. The extra flexibility in having damping adjustability is a worthwhile upgrade, especially if you’re considering using lowering springs with new shock absorbers.

All in all, I’d say this is probably the happiest I’ve been with driving the Fit. The lowering springs really helped reduce the body motions (the Fit has a pretty tall roof line). The reduction in body sway is a dramatic improvement! I’ve found a damping setting on the Endura Pro Plus’s that works really well with the S.TECH’s.

In general, as a replacement shock absorber, the Endura Pro line is a great improvement over the factory suspension. Adding the adjustability I get with the Endura Pro Plus shocks gives me a chance to find a ride quality I prefer!

More information on the Endura Pro/Endura Pro Plus shock absorber line can be found on our website
 

Bump Stop Trimming

Without a doubt lowering springs is easily one of our biggest sellers. It’s a simple upgrade for someone wanting to lower their vehicle but not wanting to really sacrifice much in the way of ride quality, and it’s also much more affordable than a coilover kit. This is an especially common upgrade for people with newer vehicles, or cars still under warranty (or maybe they don’t have much to spend since they just got a new car).

As many of you may know, we make our lowering springs compatible with factory (OEM) dampers. Not necessarily in just fitment, but also in spring rate. Our lowering springs are not very aggressive. If you take a look at our lowering springs’ specifications for your vehicle, you may see that the ride height drop is not too aggressive (maybe better than some other manufacturers). Some other applications of our lowering springs may seem to be very aggressive. It’s all a matter of how much room we have to play with when designing our lowering springs.

Most important for customers is reducing the tire to fender gap. As of the past few years, the request is for a “flush” fitment, where the tire just closes up the gap with the top of the fender opening. As much as possible, we want to create that type of fitment for the customers, even making a staggered ride height drop for front and rear to achieve a nice and even wheel gap. But, where we reach limitations is the factory damper stroke length.

Some factory suspensions have very limited stroke length, and this makes it increasingly difficult to design a spring that will aggressively lower a vehicle. That isn’t the only limitation. We look at clearance with the fender, within the wheel well, as well as how it may affect steering/suspension geometry. We always design our lowering springs to give you the most ride height drop in as safe a level as possible.

So, in regards to trimming bump stops- why is this important? If we find that aspects, other than damper stroke length, seem to be very generous, we know that we can make a lowering spring that will work with a shortened bump stop. So we include a chart by vehicle application that shows how much you will need to trim for front and rear when installing our lowering springs.

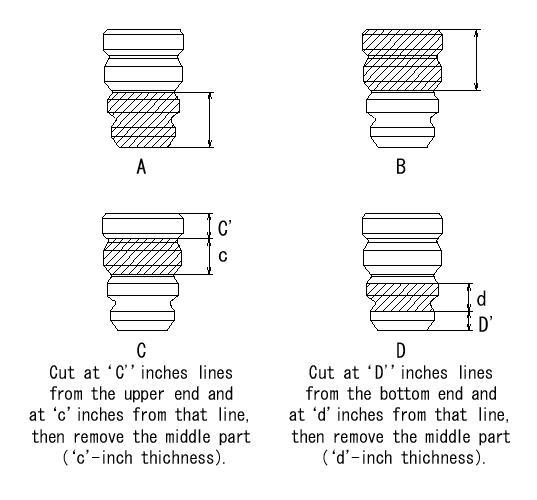
Some cases may require a different type of trimming style for the bump stop. Typically it is just trimming the bottom portion of bump stop and retaining the top piece (A Type). Sometimes it’s the reverse (B Type). In other cases, you may need to trim a middle section and retain the top and bottom piece (C or D Type). See below the different style cuts we recommend, depending on the vehicle:


bump stop trim style

We know several customers skip the bump stop trimming step. This can cause several issues. We’ve added this measure so that you can retain a bit more stroke length at the newly lowered ride height. This also helps improve ride quality. Because the bump stop is made of a high durometer polyurethane material, it is like a secondary spring, but a really stiff secondary spring. Since the dampers are not valved to handle such a stiff secondary spring, it can make rebound feel really harsh. Some may say bouncy. Constantly hitting the bump stop can cause the damper to prematurely wear or potentially blow out, too.

bump stop trim 001

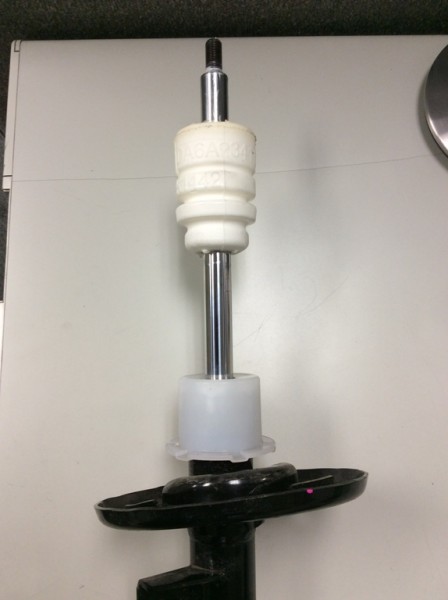
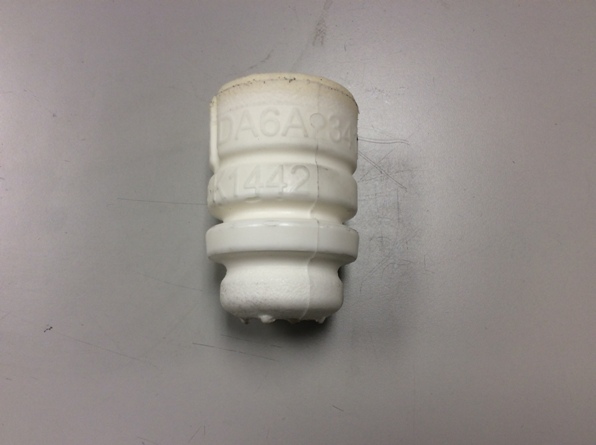
Bump Stops come in all sorts of goofy shapes. Mind you, these were engineered with a specific design.

bump stop trim 003

The bump stop itself is a really lightweight piece, but it is of a high durometer and takes a lot of force to compress. At least it is easy to cut into.

Fortunately, you can cut easily into the bump stop using a box cutter/safety blade. It slices pretty easily.

bump stop trim 004

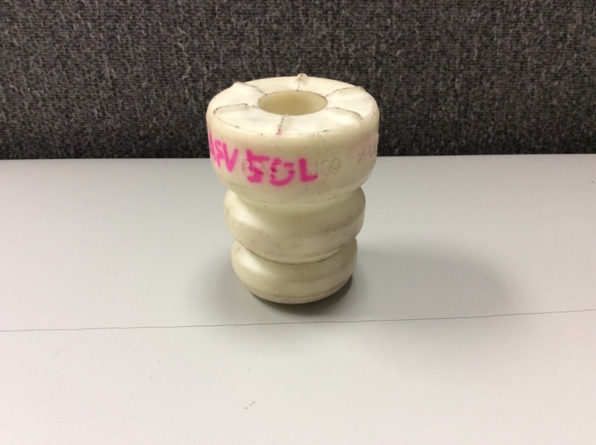
Here’s a picture of a 2015 Camry bump stop. This is a more typical design that we see- top is a larger outside diameter and tapers, with billows that make it easier to determine which section we recommend trimming.

bump stop trim 005

Using a safety blade, we’re able to cut a bottom portion of the Camry’s bump stop. We’ll be retaining the larger piece on the left and reinstalling onto the front strut.

bump stop trim 006

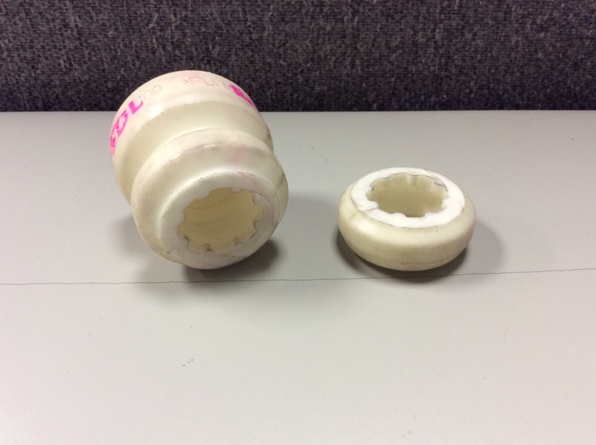
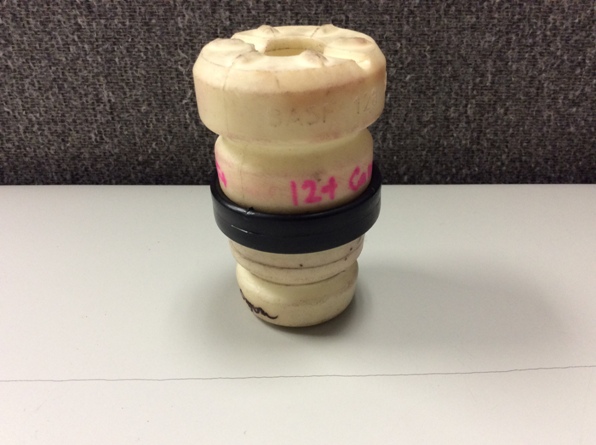
This bump stop uses some plastic ring, likely to control the bump stop’s compression. In our case, we need to trim a middle section.

bump stop trim 007

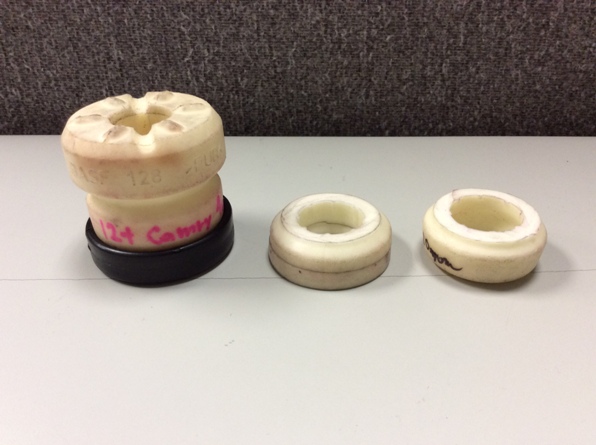
We cut this into three pieces, and the middle piece will be removed. The remaining top (left) and bottom piece (right) will be reassembled on to the damper.

So, while you will have your suspension taken a part for a little while when installing our springs, take the time to see if your bump stops will need to be trimmed. Check the included instructions with our lowering springs to find out that info.

Specialized Lowering Springs?

We rant on and on about our ability to make custom damper kits for vehicles, especially vehicles that no longer have any aftermarket support. This program is the easiest way to get a custom set of suspension made for an otherwise obsolete vehicle.

What we fail to really mention is that we have the ability to do custom springs. Actually, we take that back- we have mentioned that, because some kits don’t allow the use of a ride height adjustable setup. For vehicles that utilize a spring separate of the damper, we custom wind springs specifically for that application. So, there you go! We can make custom springs for you!

We recently did a set for Toyota. While we cannot cough up the details just yet (I’m sure you can figure it out if you search hard enough within this post 😉 ), we’ll just say it is for a platform we don’t already have product available for. And actually, they weren’t looking to do much to this car. The request was a set of lowering springs that would give the car a 1″ drop front and rear.

And here they are:

SPD (Toyota Highlander Lowering Spring) 003 resize

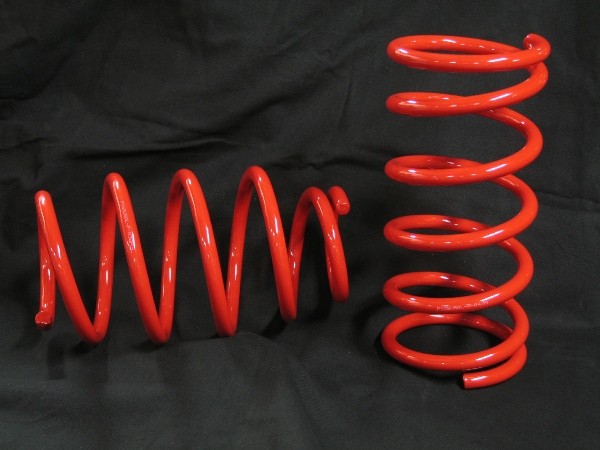
If you’re thinking “What the hell is an Eibach spring doing in a TEIN blog post?”, well then that’s a burn. This red color was at their request. That’s fine by us. We can basically do custom colors anyway. So if they want red springs, red springs it is!!!
We must mention that custom springs are not cheap. A set of four coil springs go for $700 retail. Ay yi yi!!! However, if this is something that may lead to a person wanting to do a private line of springs through us, the cost (which includes a development fee) will basically be covered on the first spring order. Not uncommon, as we’ve done that before, especially with our coilover kits.

We can also do remanufactured springs (springs of an older/discontinued line). Those start at $560 retail for a set of four.

The only types of springs we do not manufacture are torsion beams/bars or leaf springs.

So, if you have a need for custom coil springs, give us a ring. We can definitely help you out!!!


Beware of Poor Quality Springs!

We’ve put a great video out on YouTube showcasing the effects of a poor quality spring compared to our own springs:


Goes to show that not all products are created equal. We spend a lot of resources for our research and development departments,  and for good reason. We’ve built a great reputation of offering high quality performance parts at pretty reasonable prices. We have to uphold that reputation, and to do so means constant product development.

It’s sad to know that there are “high performance” suspension manufacturers that are mass producing components without ever testing them. We put each and every one of our designs through rigorous testing to ensure their reliability and performance. Everything we design must pass our extensive tests before it ever reaches you, our customer.

I’d rather spare you the whole “you get what you pay for” speech because, in some cases, the consequences of not knowing the first time around could mean your safety, and potentially your life. So, take it from us- if you really want something, don’t choose what you think is the second or third best option just because it will save you some money. Purchase from a reputable manufacturer. Purchase with confidence. Most of all, purchase wisely. If you don’t have the money now, you should save up for what you really want. Or, just shop around and find a great price from one of any of our authorized TEIN dealers.

For a list of our authorized TEIN dealers, please visit the following link:

http://www.tein.com/dealer_list/index.html


TEIN UnAuthorized Dealer Purchase Advisory

Why is it important to consider purchasing through a TEIN Authorized Dealer? This type of question is commonly asked by consumers looking to purchase product from non-authorized TEIN dealers. The reason we strongly suggest this is to avoid any issues with both product authenticity as well as any potential warranty claim.

Product which is claimed to be warrantied will have to be sent back through the seller in which the purchase had been made through. The reason for this is that the products selling origin must be traced back to the initial sale to the TEIN Authorized Dealer, helping us to confirm this purchase and purchase date. This is not always as easy to do, as many Online Retailers tend to push off the customer to the manufacturer for claims processing.

This demonstrates the overall service these types of sellers are willing take on when they  “assist their customers”. It’s sad to see that many sellers claim to have “Customer Service” only to make a quick sale, or bring up their seller points.

EBAY POSTS

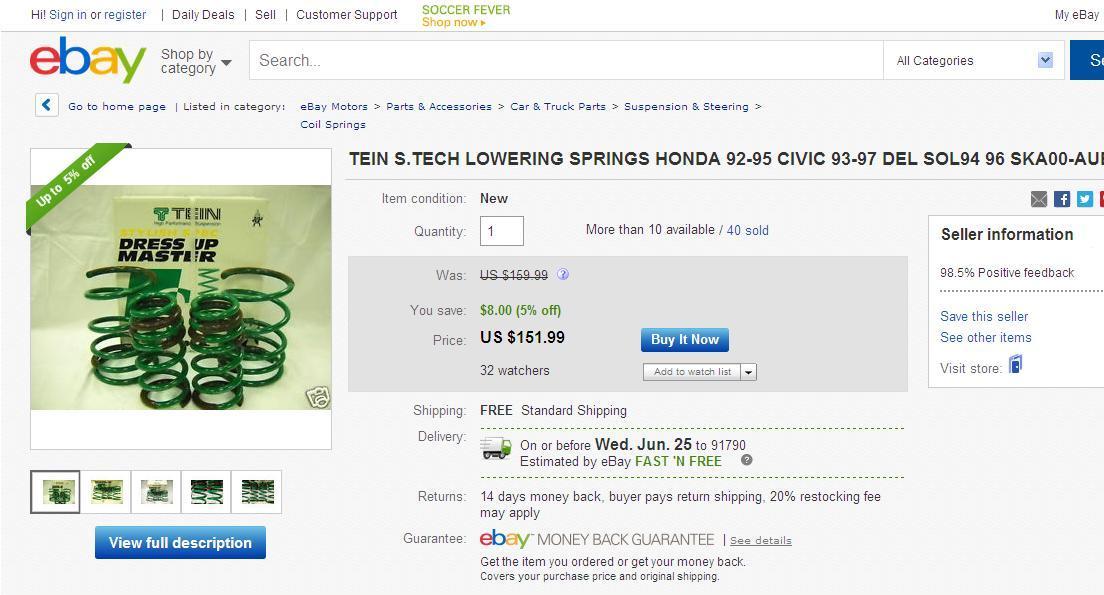
As we had mentioned both via blog posts and on our website, counterfeit TEIN products are still out there, whether they’re lowering springs or coilovers mimicking our product lines. At times the counterfeit can be distinguished by an image the seller uses, but certain counterfeits which look extremely similar usually need to be sent in for inspection.

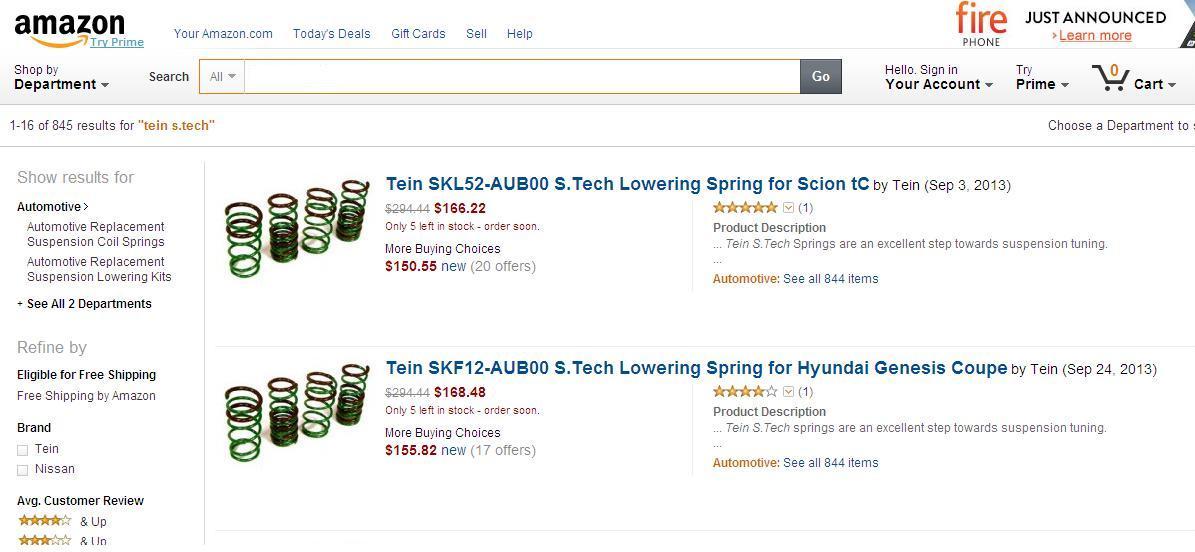
Amazon Post

Purchasing through a TEIN Authorized Dealer assures you that the product is going to be a genuine TEIN item. Our authorized dealer will also be able to assist you with product installation and or technical support, and prompt assistance with claims as the records will be quick to access.

DISCONTINUED BUT STILL AVAILABLE?

Can TEIN reproduce a spring or coilover kit that has been discontinued for a while now? This answer is YES!!!
Consumers still contact us in search of a product we had offered a few years back which ends up being discontinued
and no longer available. Before we could only point the consumer towards dealers which may possibly have some product still available or another manufacturer. However, the option to have this type of kit reproduced is now available.

Starting price to have a set of lowering springs reproduced is $560.00. For a coilover reproduction, a
general price increase of around 30% to the original MSRP price would apply and would be for any previously
manufactured coilover. Please take note that at times the newer model coilover design may be recommended in
place of the kit inquired, as it may be cost-friendly, and/or some internal components are a better design on the
newer design kits. In some cases some older components are no longer available, so we may need to incorporate newer components in place of them, and that may mean a slight redesign. This is not to say that the original kit can not be reproduced, it may just be a little more expensive especially if there any design changes necessary. Of course these reproduction kits are Special Order from Japan and would have a standard time frame of 2 to 3 months to arrive to the U.S.


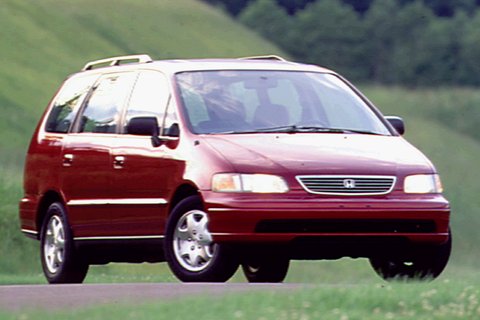
1995-HondaOdysseyAd01

1993_lexus_gs_300_4_dr_std_sedan-pic-5141740651926997878


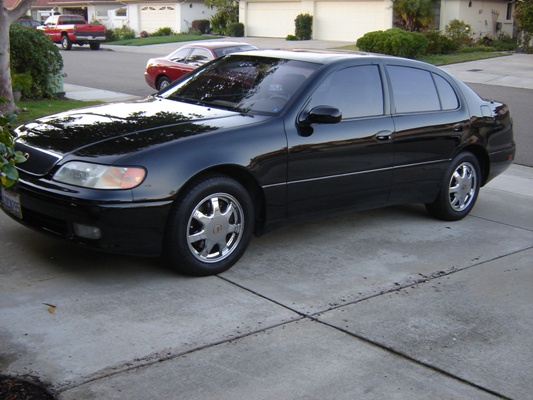
This reproduction option will definetely come in handy for those older 94-96 Honda Odyssey, and 93-97 Lexus GS300, and 99-04 Mazda Protege drivers that can not get ahold discontinued TEIN products.