We get a lot of questions on how to properly install EDFC motors. So here are step by step directions on how to install an EDFC motor to your EDFC compatible coilover (shock type, non-inverted shown). If not installed correctly, it could damage the EDFC motors and possibly the coilovers.
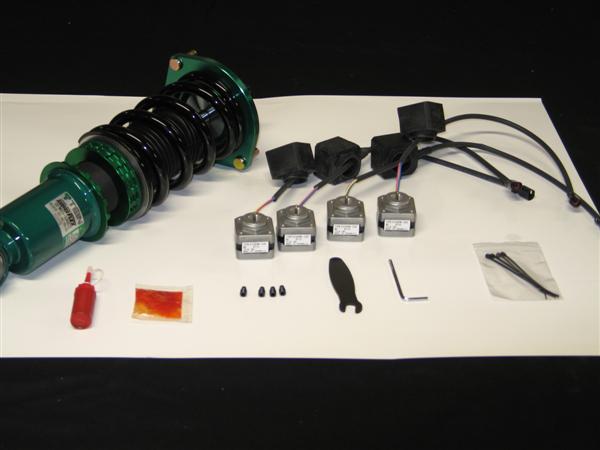
Layout of parts that are included with our EDFC Motor Kit and a few items from the controller kit.
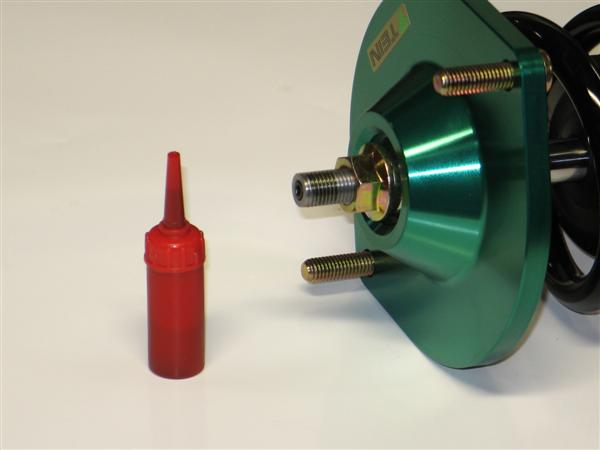
Tools shown from left to right: threadlocker, grease, EDFC hex bolts, 8mm click wrench, 3mm allen wrench and zip ties.
** Additional parts you will need for this install is a small flat head screwdriver (not included)**
1st Step: Remove the add cap. Then use the 8mm click wrench to remove the click assembly. Once removed use the 3mm hex wrench to remove the original hex bolt from the damper.
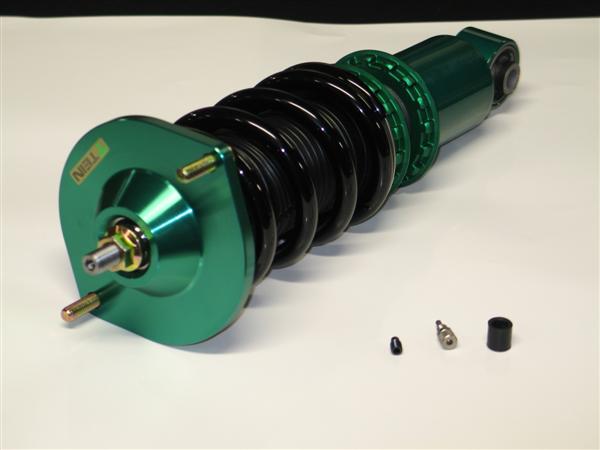
Parts removed; original hex bolt, click assembly and add cap
2nd Step: Add a small amount of supplied grease (orange bag) to the EDFC hex bolt threads and install the EDFC hex bolt until flush with the top of the piston rod. Be sure not to add threadlocker (red tube) to this part!
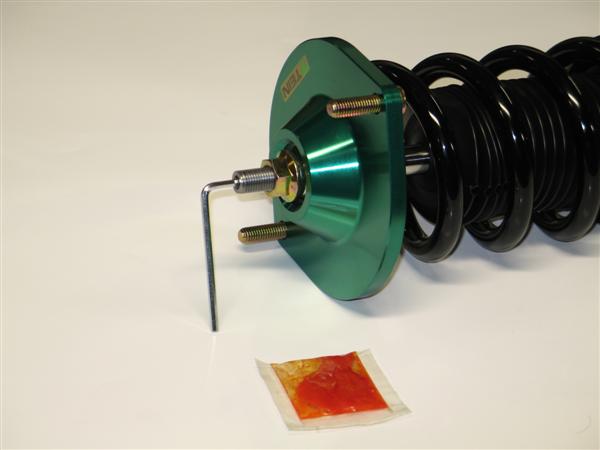
EDFC hex bolt installed with grease and flush with top of piston rod.
3rd Step: Add the supplied threadlocker (red tube) to the outside threads of the top of the piston rod. Please note, not a lot of threadlock is needed nor does it need to cover all the threads.
Area shown of where to apply the threadlocker to piston rod.
4th Step: Install the EDFC motor to the top of the piston rod. This is the most important part and is sometimes easier with some help. What you need to do is place the EDFC motor shaft into the EDFC hex bolt. Now turn the EDFC motor 3 full rotations. At this point the EDFC motor should have started to thread onto the piston rod. Next, with your small flat head screwdriver, turn the top shaft of the EDFC motor 2 full turns clockwise (shown below). Continue to switch between turning the EDFC motor and top shaft in 3 or 2 specified full turn increments until the EDFC motor cannot turn anymore. The EDFC motor just needs to be hand tightened, not a lot of force is needed. Lastly turn the screw driver in both directions to ensure that the EDFC shaft can rotate freely.
NOTE: the EDFC motor or shaft does NOT need to be set to any particular position. Once the EDFC controller is turned on, it will self adjust.
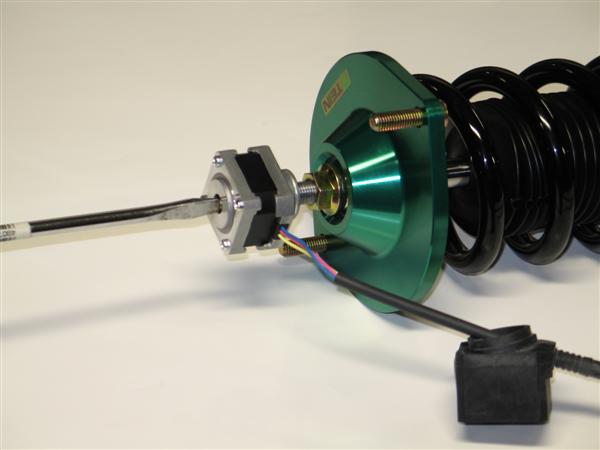
With your small flat head screwdriver, this is the motor shaft of which you will be turning 2 full turns between 3 full turns of the EDFC motor.
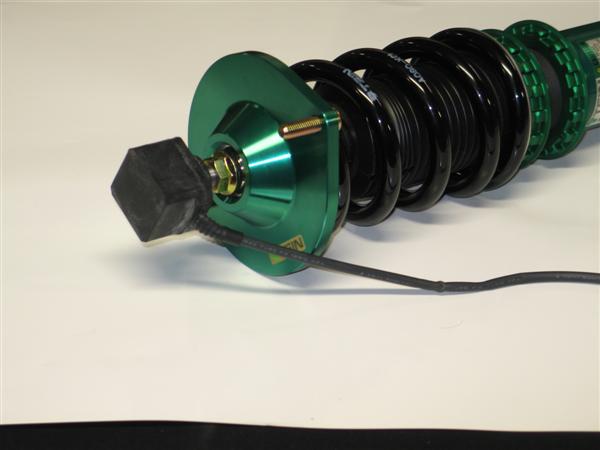
Now go ahead and bring the EDFC rubber dust cap up and cover the EDFC motor. Be careful not to rip the rubber cap. A little lubricant can be used to help install the dust cap. Be sure to confirm that the rubber cover is attached correctly. Otherwise dust or moisture entering into the cover may shorten the lifetime of the motor or cause trouble. Use a zip tie to secure the tail of the dust cap and wire harness.
One coilover all finished.
Now its time for the remaining 3 coilovers.
Last thing to do would be once the coilovers are installed, you can use the zip ties to secure excess EDFC motor wires out of the way of getting damaged.
Please stay tuned, I will be continuing with EDFC motor install on strut type coilovers (Regular and Inverted) w/anti-tangle strut kit and EDFC Controller wiring install.