As of March 20th, 2020, the state of California has imposed a “Safer at Home” order, basically making all residents stay at home during this COVID-19 outbreak. However, there are some caveats.
In general, the “Safer at Home” order is mandatory for all residents in the state, in an effort to reduce people to potential COVID-19 exposure in large groups. Initially imposed on Los Angeles City, it quickly became a county matter, and now affects the whole state.
This has forced many businesses to close, or at least operate under shorter business hours or fewer staff. Restaurants are only allowing for take-out orders (or drive-thru, if available).
But, as mentioned, there are some caveats to this order. This means that “essential businesses” can continue to operate. Obvious businesses, in general, are medical and health care related offices/facilities, city/county government services (excluding court houses), food providers/restaurants (again, take-out and drive-thru. No dine-in), and automotive services (gas stations, repair shops, parts retailers), as well as several manufacturing industries.
“Non-essential” business are places like bars, gyms, entertainment/event centers, and such.
We fall under automotive supply. And since many of our automotive customers are still opened for services, we don’t want to interrupt the sale of replacement parts for their customers. And, to customers who have shock absorbers to repair/overhaul, we will continue to do so under our normal business hours, until otherwise informed by local/state/federal governments.
We know customers rely on our products for their daily transportation. We don’t want you to be without your means of transport. Our support for you is just as important as your support for our products.
So, with that said, TEIN USA, Inc. will continue to operate under normal business hours (9:00a- 6:00p) Monday-Friday. But, just to mention now, we will be closed on March 31, 2020 for our bi-annual inventory. So no shipping or will-calls that day.
It’s been a pretty hectic and scary past couple of months, and with the outbreak of Coronavirus COVID-19, it’s brought many businesses in all industries to nearly halt all activity or at least slow them down tremendously. Government officials are imposing moratoriums in all states and, most concerning, nearly all countries.
In Los Angeles County, where TEIN USA, Inc. headquarters is based, many public and private schools are closed, restaurants, bars, and other common places for social gathering, have been either forced to close, or reduce customer interaction to take-out/to-go services only.
We, however, are still operating, doing our best to service our customers as best we can, and we’ll continue to do so until informed otherwise. But, as you can imagine, this outbreak has already taken its toll on TEIN’s manufacturing facilities in China and in Japan. We are starting to see how this affects our imports for our coilovers and springs.
In a way, though, we’re fortunate to have a product that customers want. However, we don’t expect you to all ignore the obvious. This is a time for us to all take inventory at home, and make sure we have the necessary supplies to stay healthy at home, such as food, cleaning/disinfectant supplies, and such. That also includes us TEIN USA staff. While we still have to work, we are exposed to the same dangers as any one of you. Our priority isn’t necessarily to make a suspension sale right now. So, please do what you can to stay safe, even if that means isolating yourself at home.
We hope to see good progress in stopping the spread of the virus in the very near future, and when it does, we’ll be around to service you all once again.
With the release of the current body style Civic FLEX Z Coilovers, we have been receiving more and more inquiries of how the EDFC Motors would mount, specifically the rears due to its limited accessibility. Luckily a close friend of ours was interested in the EDFC Active for his vehicle so I went ahead and did the install for him.
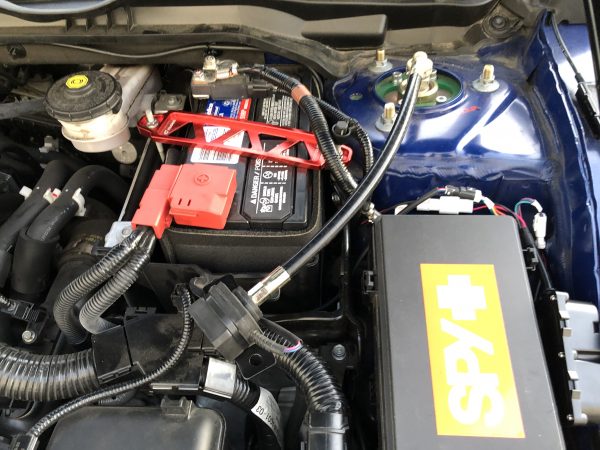
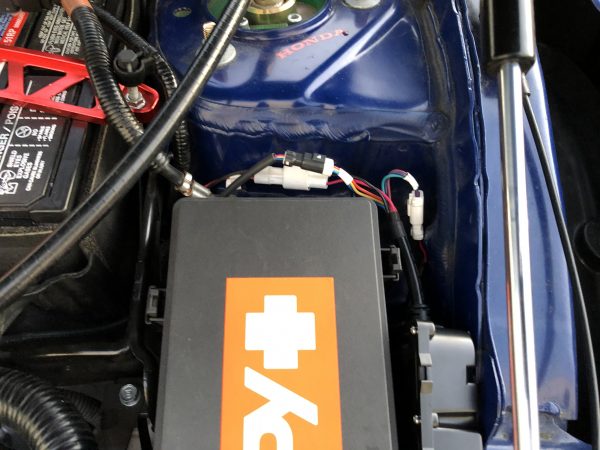
Since I had never really had a chance to look over the vehicle you can say I went into this blindly. Initially accessing power for the EDFC Active controller and driver units seemed to be impossible (at least in the engine compartment area) without requiring modifictions. I basically just wired up all three to the main fuse box under the dash. Also for reference, the Driver Unit power cables are be able to reach the main fuse box under the dash, the rear being longer and front slightly shorter in length. I was under the impression that they were the same length. The front Driver Unit was installed next to the Engine Compartment Fuse Box and the rear was placed on the backside rear bulkhead. Both were in decent areas for placement. However it’s eventually up to you on the placement for the driver units. Just make sure the heat sink portion of the driver unit has enough space to dissipate heat. Power source was setup first as I wanted to avoid staining any of the interior, since the rears required the shocks to be removed.
Engine Compartment Driver Mount
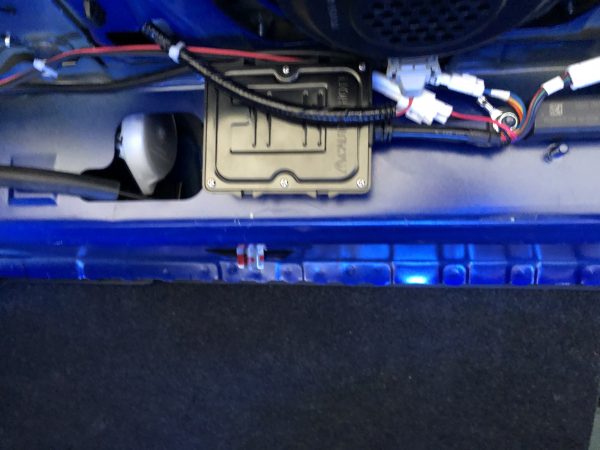
Rear Bulkhead Driver Unit Mount
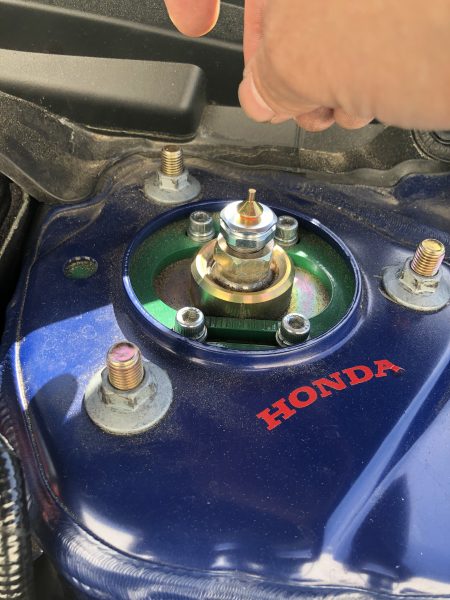
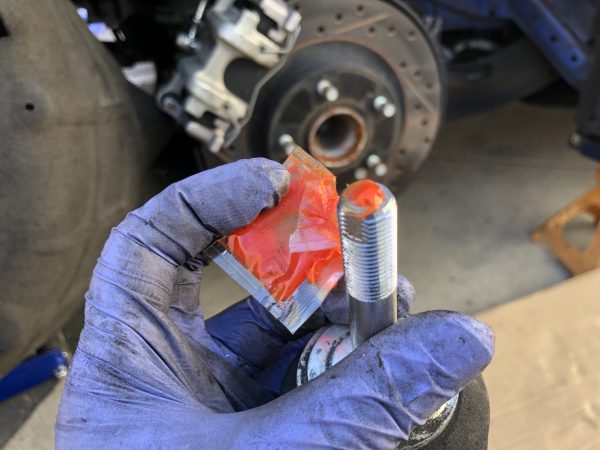
Installation of the front for this Civic required the use of the EDFC Motor Extension Kit to relocate the motors. Although it looks like the EDFC Motor will clear the hood, it in fact does not. The Click Assembly is first removed with the Hex Bolt. Once removed I applied the supplied grease to the hex bolt hole, wiping any excess grease from the piston shaft.
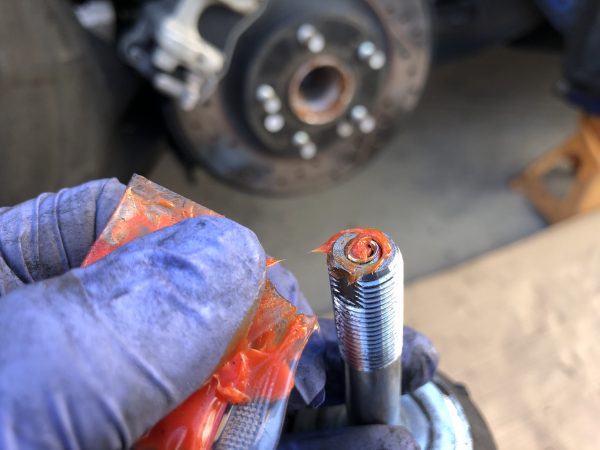
Next a small amount of Thread Locker (also included with the EDFC Motor Kit) is lightly applied to the piston shaft outer thread on both sides (where the Extension Kit’s Top Adapter screws on to).
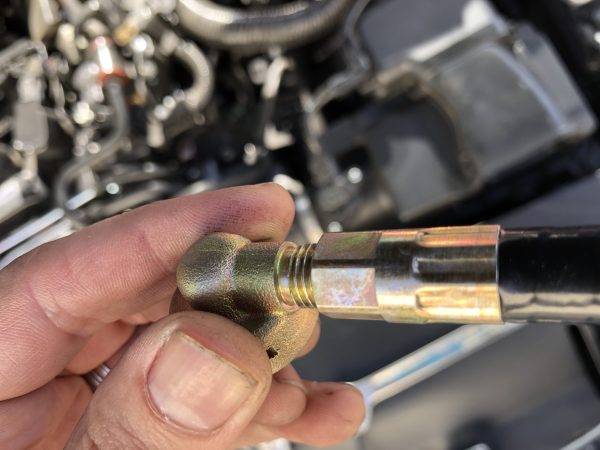
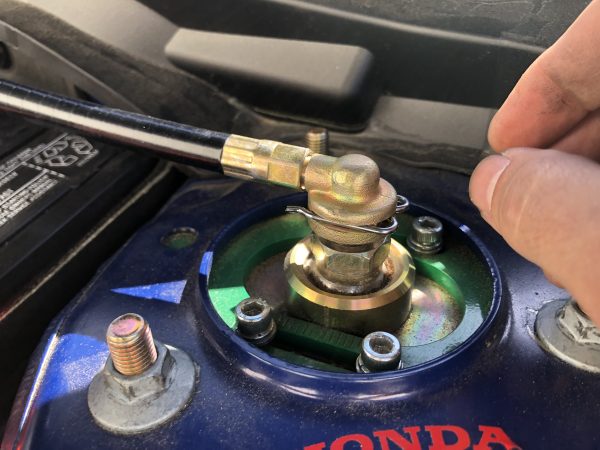
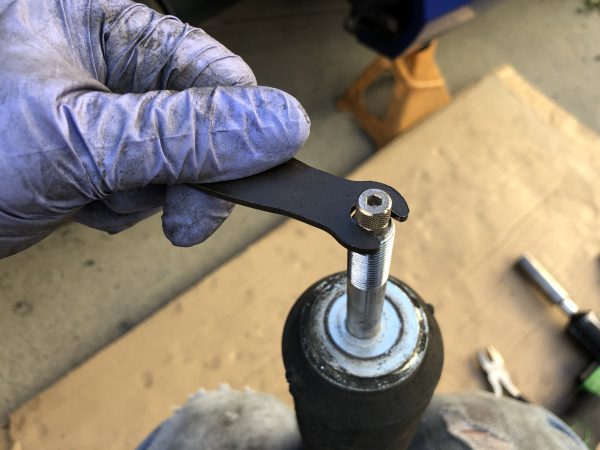
Then the Top Adapter base is tightened onto the shaft using a 19mm wrench. Please note that a very minimal amount of force was exerted to the Top Adapter and should not be overtightened as it can break. Next the gold adjusting rod (Conversion Rod) is installed in the Top Adapter hole.
Prior to installing the 90 degree angle (Cover) and clip to the Top Adapter, I installed the Extension adding threadlocker on it and hand tightened it. Make sure that the Inner Shaft is turned out as to avoid any hangups with it against the gold Conversion Rod when installing.
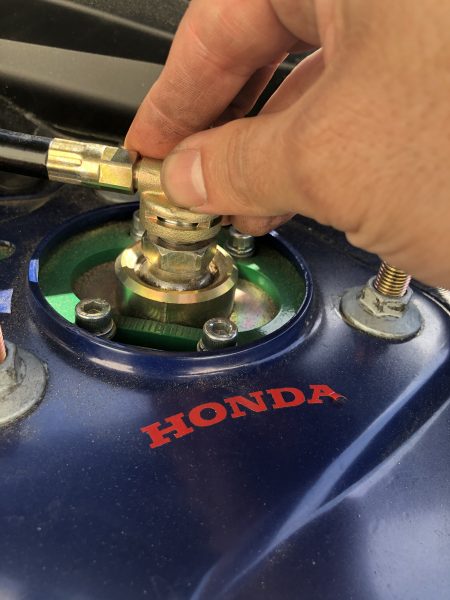
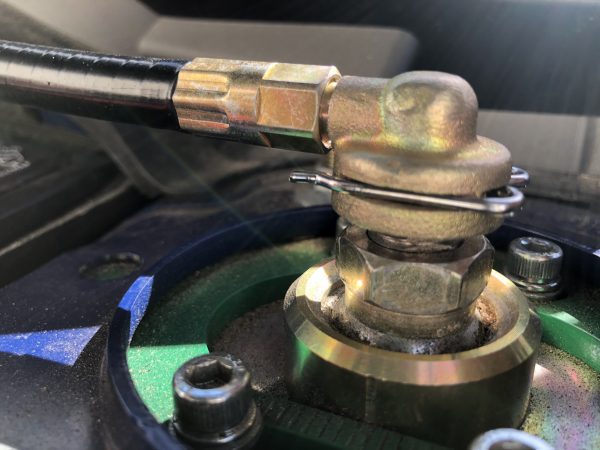
Then proceed to install them on to the Top Adapter pressing down firmly to also press down the gold Conversion Rod and allow you to insert the locking clip to lock against the base. Afterwards add threadlocker to the other end of the Extension and proceed to install the EDFC Motor and also hand tightened it. Motor mounting location is up to you as some may have different locations preferred then the ones I had chosen. Also, do not bend the Extension (no U bends). It only allows a minimal amount of bending.
The fronts were not too bad to install. However, the rears were another story. Since only TEIN Japan had a chance to do an EDFC installation noting down key areas in the rear shock’s mounting tower where the EDFC motor cable is to exit, this gave us an opportunity to see if this would be the same for U.S. market applications. The wheelwell liner should be removed before uninstalling anything as it allows for a clear view of the shock mount tower area.
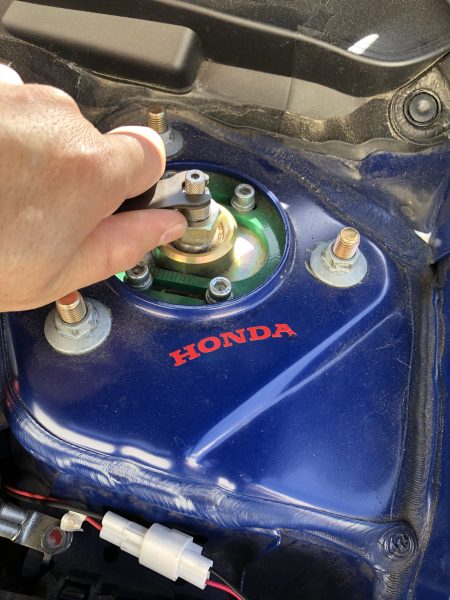
Due to limited accessibilty of the lower shock bolt, the rear spring should also be removed. Once the shock is removed the upper mount also needed to be disassembled to allow removal of the click assembly.
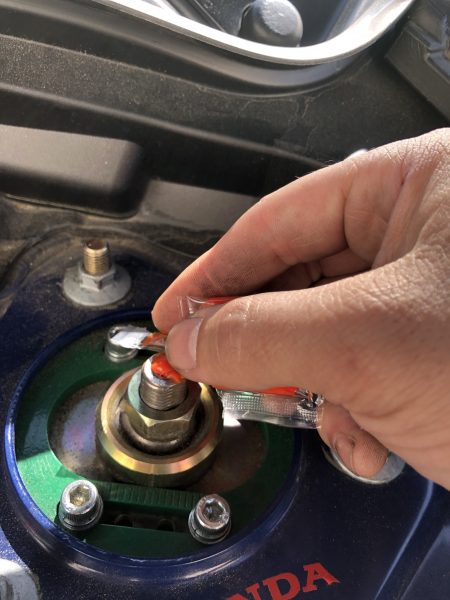
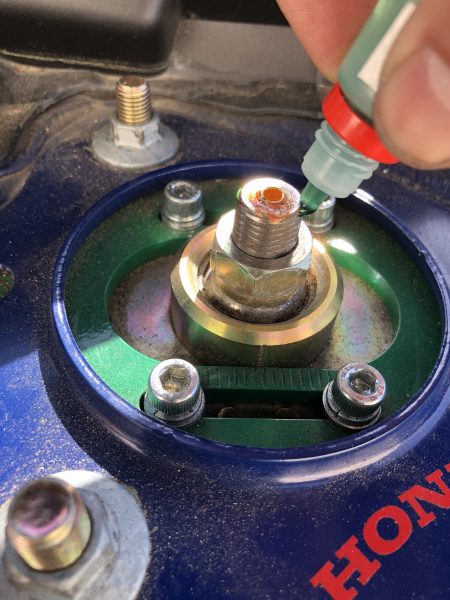
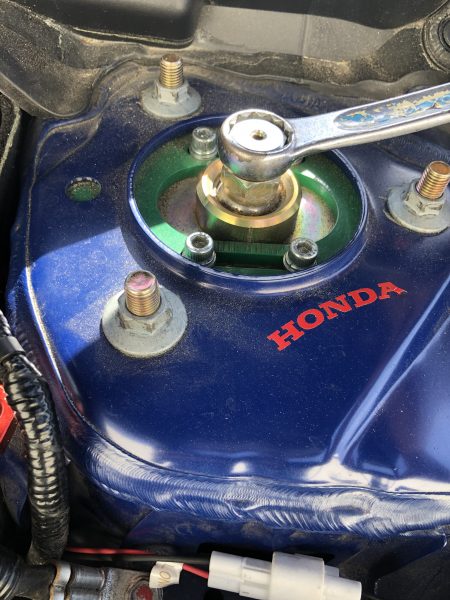
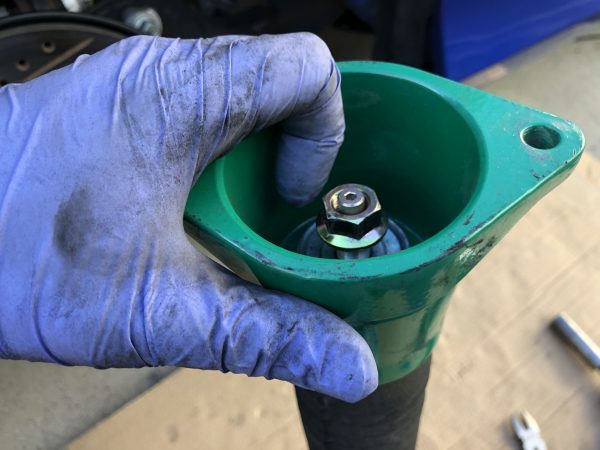
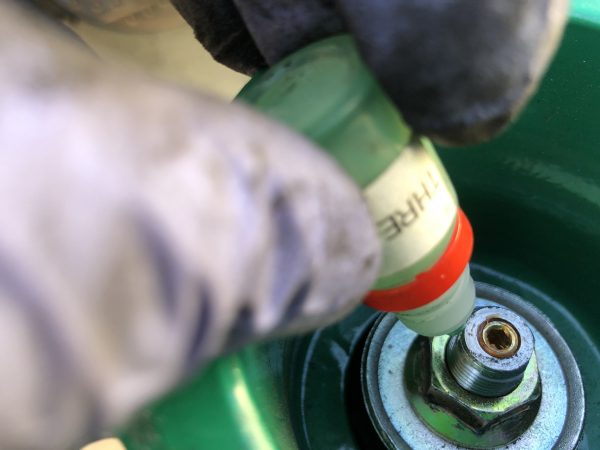
Once the click is removed apply the grease into the hex bolt hole then (applicable to EDFC ACTIVE and ACTIVE PRO models) install the supplied gold color hex bolt flush with the top of the piston rod. Reinstall the mount back on the damper. Apply grease to the hex bolt, then apply threadlocker to the piston shaft threads.
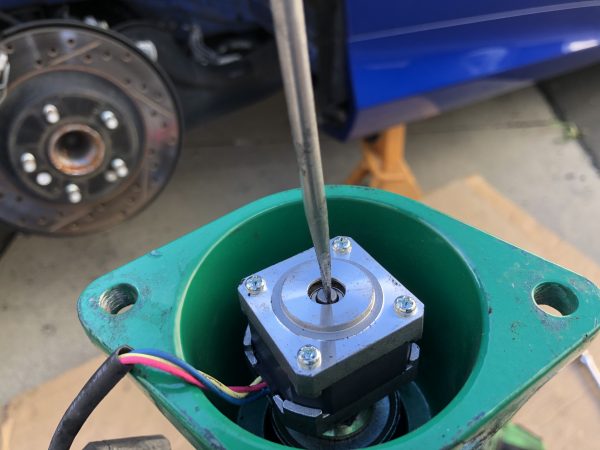
Proceed to install the EDFC motor hand tight to the threaded piston rod. Now, check that the EDFC Motor’s shaft turns freely by using a flathead screwdriver to turn the shaft- you should be able to complete several turns in either direction (it should eventually stop in either direction). The EDFC Motor cover was a slight pain to install since accessibility of the motor inside the cup-shaped upper mount was extremely limited. On a side note, I have seen where the Motor cover was preinstalled and a slit cut on the top of the EDFC Motor allowing for screwdriver access to the Motor’s shaft. Then once you check for free movement of the shaft, the slit can be resealed with silicon. Either method of EDFC Motor install works.
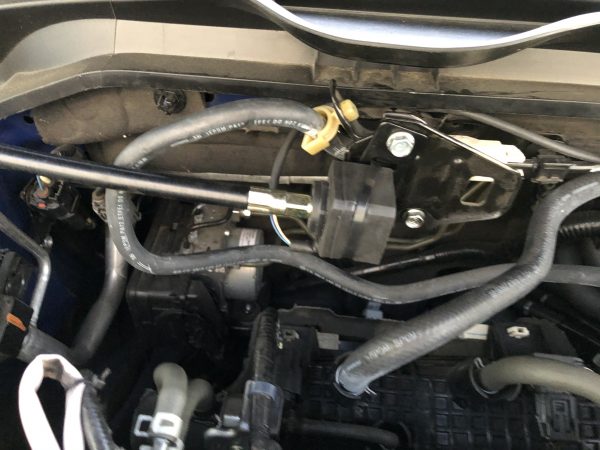
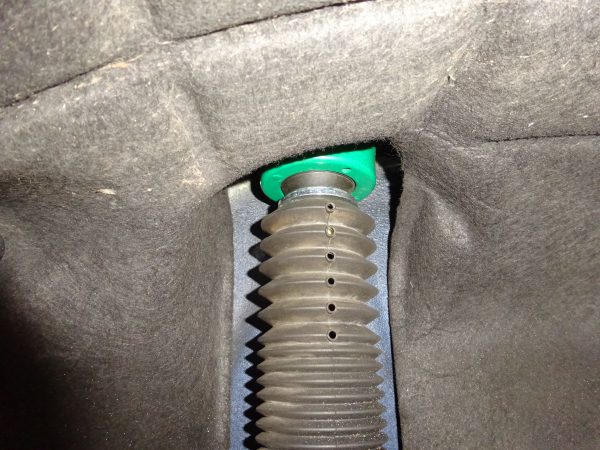
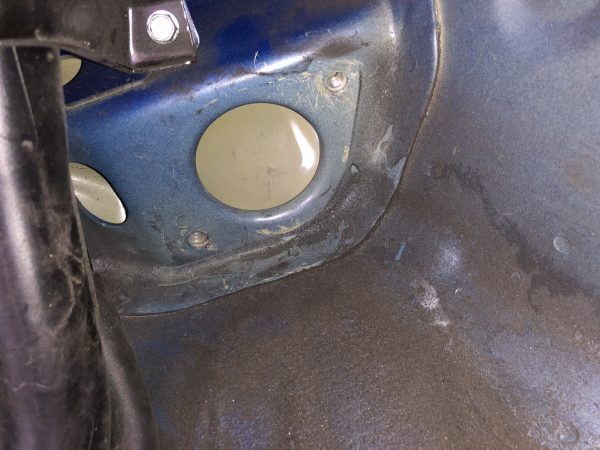
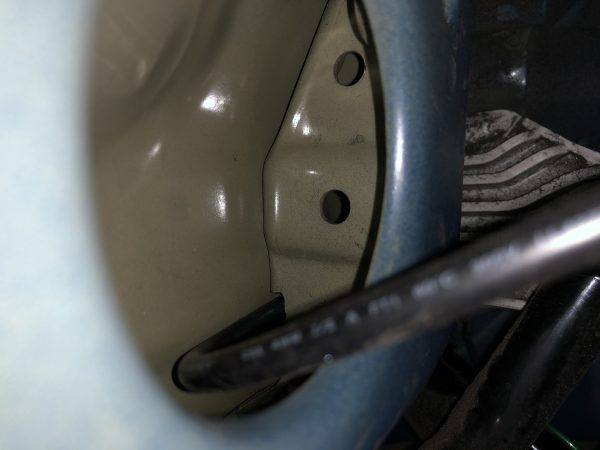
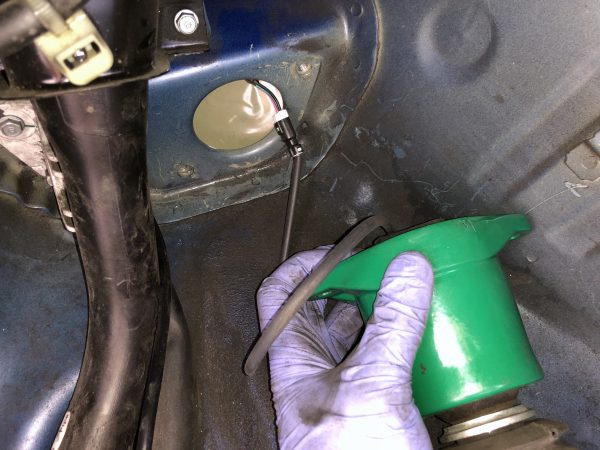
Prior to reinstalling shock, the EDFC Mid-Cable would need to be installed. As you can see in the images, there is a small access hole next to the main tower hole where the shock would mount.
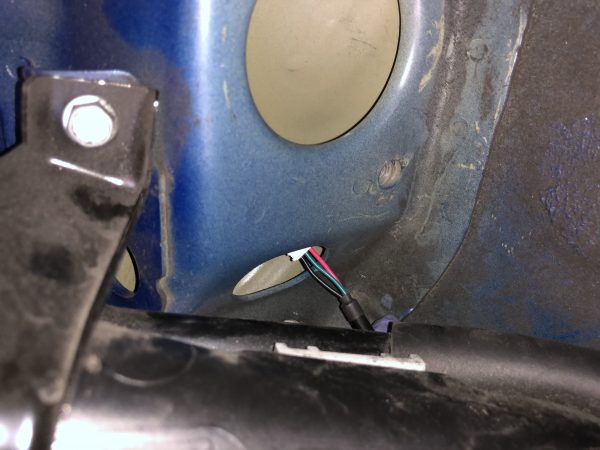
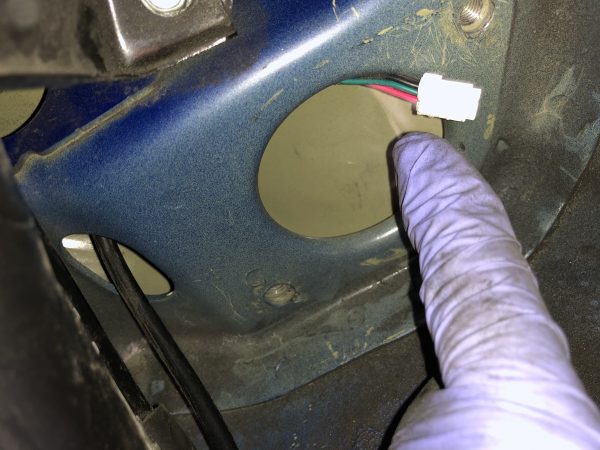
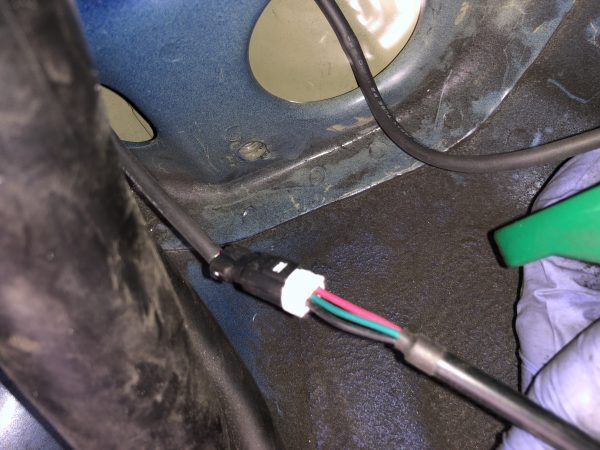
The male connector of the mid cable needs to be fed through the smaller access hole over to the shock hole. Please take note that the cable connector also needs to be pushed through a small clearance on the top upper corner of the smaller access hole (as shown in the noted image).
Once pushed through, position the shock on its mount (I recommend to install the bolt through the lower shock eye ring bushing for support.) then connect the two cables together and gently pull the mid cable and EDFC motor cable through. During this time you would also need to move the shock’s upper mount closer to the tower to avoid tearing the cable wire. Once the shock mount is close enough, a bolt can be threaded on to hold the upper mount in place allowing for the cable slack to be removed then the mount to be completely reinstalled. Afterwards you can reinstall the shock bolt and spring, applying suspension preload when tightening up the loosened bolts.The EDFC Mid Cables were ran through existing grommets into the trunk area to the driver unit.
Though this install took a little longer than anticipated, we have a better understanding for installing EDFC ACTIVE (and EDFC ACTIVE PRO) on 2017+ Honda Civic models. Hope this helps out for any out there looking to install our EDFC systems on similar applications. As per usual you can alway contact us direct should you have any technical questions.
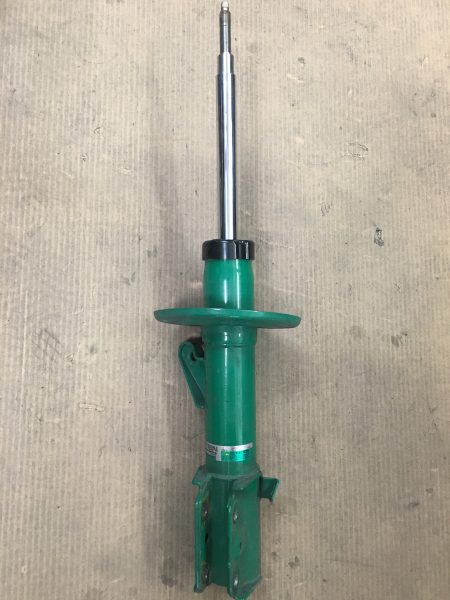
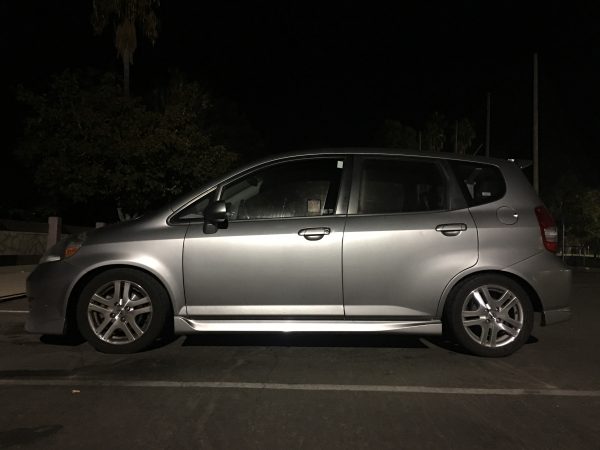
I’m lucky enough to be one of the first in the U.S. to put our new ENDURAPRO shock absorbers to use in the U.S. My 2008 Honda Fit was fitted with the ENDURAPRO PLUS (16-click damping adjustable) shocks and struts, which I eventually added our S.TECH lowering springs, around March 2018. I figured it’s time to visually inspect these shocks and see how they’ve held up.
As previously mentioned, this car is typically my daily commuter for work. I average about 14,000 miles in driving a year. While I technically have just over 21,000 miles on these ENDURAPRO PLUS shocks, the other miles I drive for the year has been on my truck. Still, I think over 21k of miles on our ENDURAPRO PLUS shocks is a pretty good age to finally give them a look-see. Mind you, the average shock absorber lifespan is typically 36,000 miles in the U.S. Not too sure how that average came to be. We see shock absorbers last much longer than that. Quite honestly, I should have inspected these shocks a long time ago (a reminder to all to inspect their cars)!
Prior to giving you a run-down of the inspection, I will say that overall the shocks still feel great! Over time, I’ve readjusted the damping click settings simply to find that “sweet spot” in comfort. After all, installing lowering springs will alter the ride quality. Currently I have the fronts and rears set to 8 clicks from stiff (essentially the middle setting). I had previously had it somewhat softer in front and stiffer in back, as I felt it worked well whenever I had the car fully loaded. I may end up softening the front just a little, once everything is reinstalled.
Speaking of fully loaded, that is probably the most awe inspiring experience that showcases how our shock absorbers perform! It really is! As you probably already know, our ENDURAPRO/ENDURAPRO PLUS line includes internal Hydraulic Bump Stoppers, which helps alleviate that ever-so-fun suspension oscillation whenever the car is at maximum capacity.
Again, since it’s my daily commuter, typically there isn’t much extra weight in the car, other than my kids’ seats and some kids junk in the back seats. With lowering springs that are a bit stiffer than stock, it can feel relatively firm over bumps and gaps in the highway. Overall, our S.TECH springs aren’t terribly stiff.
However, after my bi-weekly trip to Costco, which usually consists of purchasing several cases of bottled water, my kids’ diapers and formula, and a bunch of other necessities you have no choice but to purchase in bulk, the trunk gets heavily loaded, and you can both see and feel that added weight. Then add my sons, when i have to pick them up at their Nana’s house. It’s basically like I’m loaded for a long-distance road trip.
This is where our Hydraulic Bump Stopper really comes in to play. Our Southern California highways are anything but smooth, and there are plenty of large gaps, expansion joints, dips, pavement cracks/potholes, ramp-like bumps over overpasses, etc. It’s a great way to put suspension to work, and at highway speeds, this provides us with a horrific ride, and one that puts our vehicles through pure torture. Did I mention that I also have to listen to “Elmo’s Song” on repeat whenever the kids are in the car???
But seriously, over this type of highway terrain, TEIN’s Hydraulic Bump Stopper really does its part in helping absorb these high-speed impacts, preventing the polyurethane bump stop from doing that work and helping the shock absorbers rebound nice and smoothly. Honestly, it has to be one of the more rewarding parts of my commute. Now I can understand what trophy trucks must feel like over big jumps,,,,,, just at a much smaller scale. Hahahaha!
Anyway, on to the inspection:
One thing I noticed was the front strut mounts were making a bit of noise, especially when steering at slow speed. I initially thought it was the bearing making the noise. But, for all I know it could have been a problem with the struts. This just confirms it was indeed the upper mount. However, as mentioned during the initial installation of these ENDURAPRO Plus shock absorbers, the front mounts probably contributed to a slightly lower ride height than target, due to the mostly rubber mount taking a set after 80,000 miles of use. Now at 101,000 miles, it is time to change these components out to fresh new factory style mounts.
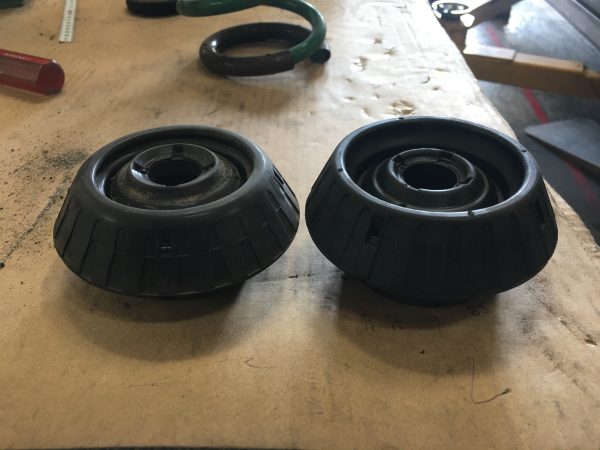
Old mount on the left, new on the right. You can see how the mounts have sagged over time. It was starting to make some noise, most notably at low-speed.
For the rears, the only thing I noticed was a hole being worn into one section of the dust boot. Looks to have made contact with the tire. Not a big deal, and replacement dust boots are readily available.
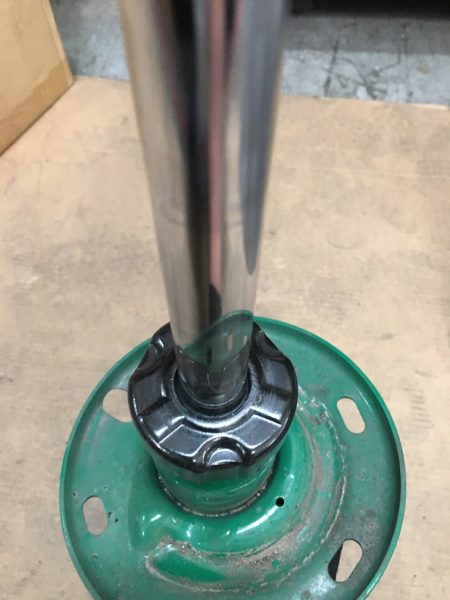
I also checked gas pressure while the shocks were off the car, and all of them seemed fine. By checking I mean I fully compressed each damper by hand and checked the rebound, as well as tried different damping settings during the same procedure. I will say the damping click adjusters were slightly stiff up front. However, that could be due to not using the included ADD Caps to cover them (this keeps dust out of the system). A simple spray of WD-40 or similar type lubricant will displace any dirt or corrosion in between the click knob and its base. Also, any exposed thread on the piston shafts for the front dampers accumulated some surface rust. A wire brush cleaning and some WD-40 helps clean that up. But since I removed the struts from the original upper mounts, the threads got a decent clean up simply from the removal process.
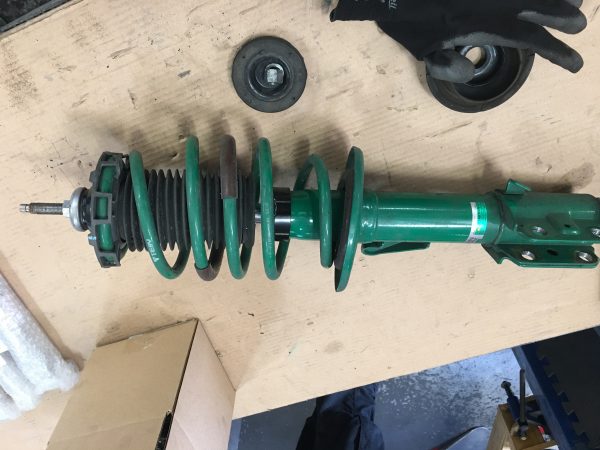
Front strut out. I needed to remove the bearing, as I thought this also contributed to noise I was hearing at low-speed driving.With the bearing out, I decided to inspect the shock. All components removed help to make a more detailed inspection.
Good thing I inspected the struts! There was some dirt I had to clean up around the dust seal.
While I’ve had the ENDURAPRO shock absorbers off, I checked bushings in the control arms, ball joints, sway bar end links, and tie rod ends just to make sure of their condition, which fortunately they are. I’m sure at some point I’ll change out the front lower arms (bushings by themselves are not readily available). For the rear twist bar, it’s hard to source just the rear bushing, so I’m going to keep searching for a solution.
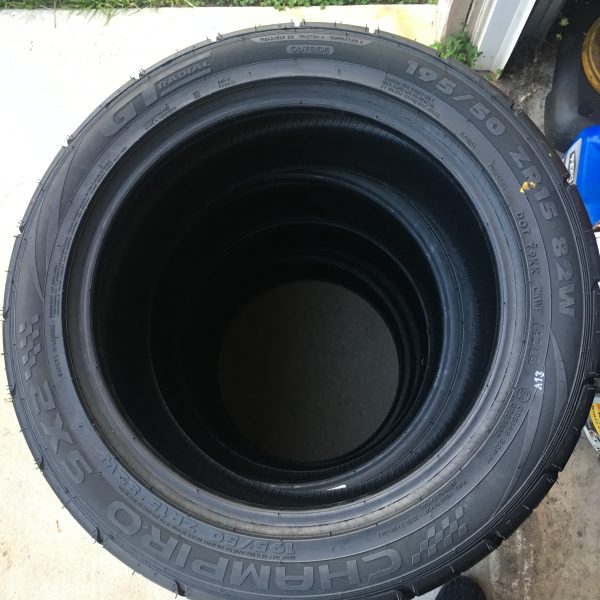
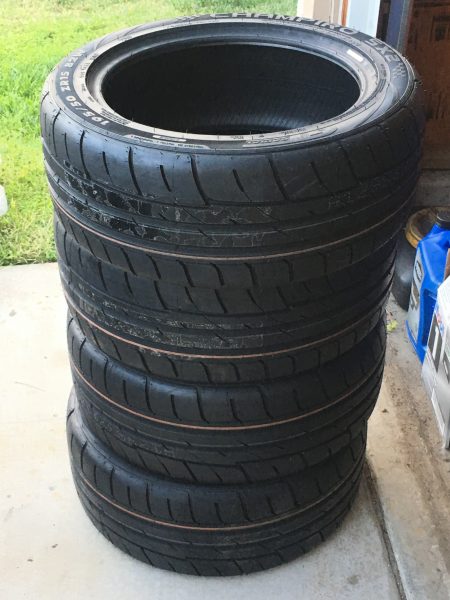
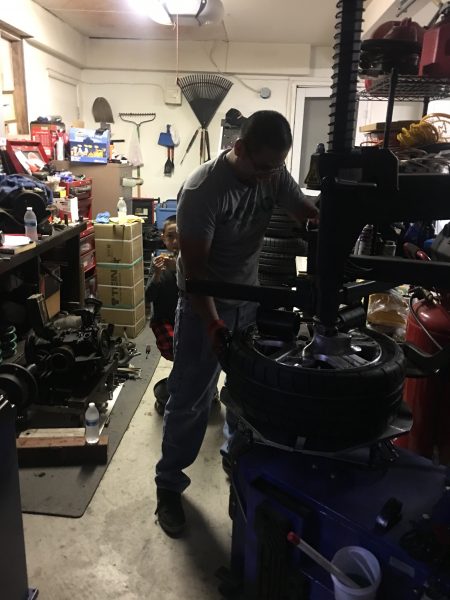
I did have the tires changed at around the 3,000 mile mark on these shock absorbers. I wanted to try something a bit more sport oriented, but not very expensive. Also, my “tuning philosophy” (if you will) for starting to modify a car is usually in the order of- decent tires, sport (not race) brake pads/shoes, and some decent suspension (as in shock absorbers and possibly springs), especially if there is a damping adjustable option. This before ever considering more power. With ENDURAPRO Plus shocks and S.TECH lowering springs and some Stoptech Sport pads and plain rotors installed, I needed decent tires. So, I contacted the guys at GT Radial to order a set of their Champiro SX2 Summer tires. I’ve followed the 86 Cup group and saw that these tires offer very decent performance and very good wear resistance, and I wanted to try something other than all-season tires that this car has used over the years. I opted for a size slightly smaller in diameter than stock just to see if there was any gain in performance.
A new set of tires go on the Fit, courtesy of GT RadialA big thanks to Gonzo, who invited me over to his Chateau. He’s got a full tire changing station in his garage! His son Enzo also came out to help. Good kid!
I will say that these SX2 tires still provided very good comfort. Being a daily commuter, this car only gets an occasional spirited drive. For me, that comes with the excitement of driving through Angeles Crest, since it’s kind of in my “back yard”. Interestingly enough, I found that these tires at 31psi cold, and a 13-click front shock setting (soft) and 6-click rear shock setting (somewhat stiff) had very good and predictable feel. I could very lightly get the back end to rotate with a touch of left-foot braking, and the feeling was pretty consistent throughout my drive through the hwy. The Fit is a very front-heavy car, so it takes a little coaxing to get the car to turn in, since the car understeers easily. One thing I could appreciate from these tires is the wear resistance. Rated as a 200 treadwear, these tires held up better than some 360 treadwear tires I had on previously (which actually only lasted about 13,000 miles before I changed them out to these SX2’s). Dunno what the deal is with that, but those are my figures.
Mind you, these aren’t all-season tires, so I take it a little easier during rainy days. However, wet weather driving is actually quite nice on this setup. Not that I was expecting to hydroplane on a summer tire on wet pavement, it actually handled heavy rain and puddles very well.
While this is sounding like a tire review, what I’m getting at is that these small changes to this daily driven econobox (TEIN S.TECH Springs, ENDURAPRO Plus Shock Absorbers, and GT Radial SX2 tires) have already made this car more enjoyable for my drive. Does it make me miss having a much more sporty car? Absolutely. But, gotta work with what I got. I think most importantly is the value of all these parts as a whole- Not a lot of money spent (granted, I got the shocks for free for testing on my car) to “upgrade” the car. So, for most of you guys looking to make your car a little bit faster and more fun to drive, this should be something to think about.
By the way, the slightly smaller diameter tires I chose actually helped improve a few things such as MPG (when I really take it easy on driving) and acceleration (most notably in higher gears). I was expecting MPG to be a bit worse. However, it has affected actual speedometer readings a tad, but the factory speedometer reads ~1 MPH lower than actual.
All in all, I’d say I’m more than pleased with the car as it currently sits. Not a ton of money invested in getting some performance out of it. Decent suspension, very good tires, and sportier brake pads up front, and I’m a happy camper!