ENDURA PRO Install

With the Endura Pro line still relatively new to Premium OEM replacement market, we would like to continue the promotion with another Endura Pro install. This installation of our Endura Pro dampers was done on a 2011 Toyota Carmy base model. Being that the vehicle was in for some other product testing, we said “why not” and see how the install goes.

Upon initial side by side comparison between the factory and the Endura Pro, they are overall similar with the exception of the strut body being thicker larger on the Endura Pro for added oil capacity which improves the durability and increases damping force performance long-term.

When we design our Endura Pro line replacement struts and shocks, we try our best to mimic the OEM strut or shock design as to allow worry free component and coil spring installation.

With the Endura Pro Plus offering the damping force adjustability, some top strut mount covers may not pop on as before and would need to be removed. However the struts and shocks will include our add caps to protect the click adjuster from any debris.

Since all of the OE strut components were in decent shape, we proceeded to just clean them up the install them on the Endura Pro as seen in the image below.


With all components installed including the upper mount being tightened down, everything lined up just as it would on the factory struts. Even the install onto the vehicle, all components lined up and mounted as they should.

Initial test drive impressions left me very surprised. Now obviously most folks would feel that this is biased being that I work for TEIN USA INC. However this was based on how the factory felt as well as other vehicle experiences with the auto parts Monroe and/or cheaper replacements. I feel that the vehicle rode as though it were brand new from the dealership even though with around 70K on the chassis. This would put the factory shocks slightly over the manufacturers recommended  replacement interval of 50K for shocks and struts which can attribute to the original struts being worn but not completely blown. Now another contributor to this ride would be from the Hydraulic Bump Stop system offered on both ENDURA PRO lines.

I can honestly say I am impressed with the ENDURA PRO and look forward to getting a set for my daily driver civic as I am interested in ride comfort of the Hydraulic Bump Stop and the damping force adjustment offered on the ENDURA PRO PLUS. I will definitely be making a post on the install one the time comes.


The Importance of Tire Pressures

It’s quite clear that customers come to us looking to increase handling performance for their vehicles. After all, suspension upgrades are some of the most commonly made changes to vehicles. Fortunately, we’ve continued to make improvements to suspension technology that has proven results.

However, one overlooked aspect in handling is monitoring tire pressures. Of course, the type of tire and the appropriate size you use is also just as important, but you want to make sure that the tire pressures match what is necessary for your particular vehicle.

Clearly, not all tire manufactures are the same, and many have their own proprietary compounds and tire carcass construction. Each manufacturer has their own claims of how and why their tires perform better than their closest competitor. What tire works best for your needs is going to be up to you to find out for yourself. It really will be a bit of trial and error for you to find out your best tire. But, as the saying goes, you get what you pay for…

Tire pressure is important in that it not only inflates the tire, it gives the tire its structure and allows it to work as designed. For example, a tire with no pressure (just at ambient pressure) will just be deflated. The sidewalls will flex and the tread patch will actually cup (where the center portion of the tread isn’t actually in contact with the road surface). 15 psi (pounds per square inch) will finally add some structure to the tire, but still leave the sidewall of the tire improperly unsupported. Still, the tread patch will most likely be cupped under load. 25 psi will give more structure to the sidewall and the tire is finally starting to get a good contact patch on the road. Really low tire pressures can also cause greater heat build up in the tire and can cause a blow out. Up to about 32 psi, which most passenger cars tend to operate best at, the sidewall’s have greater support and now the tread patch has better coverage on the road.

Even under heavy loading, the sidewall provides enough support and control when tire pressure is optimized. Traction is also at its highest since the tread patch has greater surface area on the road.

Up from there, once you start exceeding the tire pressures past its recommended levels, even by just a few psi, the contact between the tread patch and road will be less, sidewalls even stiffer. You’ll even notice it in your steering, as it starts to become increasingly easy to turn. There comes a point where the contact patch between tread and road become too small and unsafe (especially on wet road surfaces). Also, the tire will be so stiff that there’s barely any give in the sidewall. You may very well be skipping over bumps on the road at higher speeds.

When racing, tire pressures should be monitored after every session out on track. As you can imagine, heat build up from driving will affect the internal pressure of the tire, typically increasing a few psi. These pressures don’t simply drop after a few minutes of cool down, so it may be necessary to bleed that extra build up of pressure so that you can maintain the performance of the tire. Otherwise you may spend some time altering other aspects of your car or driving style to make it handle better. Make note, however, of any changes you made to the pressure, especially if bleeding excess. Once your tire cools down, the pressures should be checked again and reset to recommended levels (especially if you’re driving home from the track on the same set of tires).

Gymkhana is actually very tough on tires. Driver’s depend on the predictability of their tires to be able to make quick transitions, using a combination of steering, braking, and accelerating to make the car rotate and navigate very tight turns.

For daily driving, as mentioned earlier, it is still important to monitor your tire pressures. Each corner won’t maintain the same pressure due to a number of factors. If your alignment is perfect or near perfect, but your car seems to be pulling either left or right, check your tire pressures to make sure they are at recommended levels. Uneven tire wear can also be a factor of tire pressure (however, so is alignment).

What it comes down to is finding the best balance in comfort, traction, and safety. Fortunately all tire manufacturers work out these details for you. It’s best to follow manufacturer recommendations, then making small changes (1 psi at a time; even 0.5 psi if you can notice the difference) to suit your preference.

So, be sure to check your tire pressures, if possible, on a weekly basis. Especially before and during a track day. Also, it is best to check the tire pressures when tires are cold (or when the vehicle has been at rest for a long period), unless as aforementioned it is between track sessions.

Basic Suspension Maintenance Time!

Have you been inspecting your suspension periodically? No?? Why not???

Just like most other aspects of your vehicle, an inspection of your suspension should be done. We typically like to inspect all suspension components, not just coilovers, during every oil change (every 5,000 miles). Suspension, and not just the shock absorbers, have quite a bit of components that will wear out over time. In the case of our adjustable suspension, there’s also the factor of more movable components that need to be inspected and tightened to specification.

DSC00364

It’s not uncommon for us to get calls about noise that customers are getting from their suspension, only to find that the noise isn’t related to our coilover, but something like a worn control arm bushing, worn sway bar end link, worn ball joint, or even factory upper mounts with worn rubber components (which, I’m sorry but, we do not sell OEM components).


When it comes to inspecting our coilovers, it is a good idea to inspect items like the spring seats and seat locks. Make sure these are still torqued to specification, following our owner’s manual included with your coilover kit.


****************************************************************************************************************************************
Prior to continuing, we must note that we highly recommend that a technician/mechanic perform such maintenance work. Should you choose to do any installation or maintenance work yourself, please do so at your own discretion. The following is simply information regarding our coilovers and for reference only.

****************************************************************************************************************************************

project supra seat lock

Seat locks that adjust the spring height/preload should be torqued to 42lbs-ft (+/- 2lbs-ft).

Seat locks for MacPherson strut types (that lock the lower bracket to the shock body) should be torqued to 101lbs-ft (+/- 3lbs-ft).

Seat locks for multi-link setups (that lock the lower bracket to the shock body) should be torqued to 51lbs-ft (+/- 2lbs-ft).

Seat locks for H.A.S. designs (height adjust systems, where the spring is separate from the shock) should be torqued to 42lbs-ft (+/- 2lbs-ft).

Other components to inspect on our coilovers are items like the dust boot, bump stop, and (if applicable) rubber spring seats.  Some older models of TEIN suspension use a rubber spring seat between the seat lock and spring. This can start to crack over time. If so, get a replacement, or upgrade to the newer spring seat design that does without this rubber spring seat.

If you have our pillowball mount or upper mount included with your coilovers, also check to make sure all components are tightened down properly.

IMG_0117 (Custom)

Some upper mounts included with our kit have a few components that need to be inspected, especially MacPherson strut type designs that have camber adjustability. The cap screws that allow you to slide the pillowball mount for camber must be tightened down to 14 lbs-ft. The flange nuts that secure the upper mount to the strut tower vary by manufacturer, but those never really require anything more than 20 lbs-ft.

Also, coilovers that include our own upper mount may include our own pillow nut. It’s essentially a collared nut that keeps the piston shaft centered in the pillowball. The collared portion will go into the pillowball itself as you tighten. For front strut type designs, this should be torqued to 45lbs-ft, while rears that are not strut type design (like a multilink setup) require 20lbs-ft.

As to torque values for securing our coilover to the lower control arms, you should reference the factory values of the vehicle manufacturer. These can be sourced online through a quick search, or through automotive forums for your specific vehicle (which should be easy to find).

For front strut type coilover applications that reuse the OEM upper mount assembly, it would also be wise to make sure the strut assembly can rotate freely from left to right. Since the car needs to steer, the OEM upper mount has a bearing that allows the strut assembly to rotate with the knuckle assembly whenever you do steer. In some cases, the bearing can be worn and cause a grinding type sound.

Let’s say you’ve done all this basic maintenance, buttoned everything up, and now going for a drive. Maybe you noticed some squeaking noises. Have you checked your control arm and sway bar bushings?

In many cases, bushings are difficult to inspect. Sometimes their placement makes it very hard to see. You may even need to drop an arm just to be able to get a good look at the bushing. Fortunately, most rubber bushings last pretty long and typically only need to be inspected every 3ok miles or so.


When rubber bushings do go bad, they start to crack and as they pivot, they will squeak. Rubber bushings aren’t like many of the polyurethane, or even Delrin type bushings (highly inadvisable for street use), that are free pivoting. Most rubber bushings have a steel outer shell and a steel inner shell or tube, which are bonded because of the rubber. So that means that as the control arm pivots around its axis, the rubber has to stretch and compress. Eventually, as a rubber bushing dries out, it will start to tear itself apart, and that is what creates noises.

IMG_0847 (Large)revised

Replacing an old, worn rubber trailing arm bushing with a free pivoting polyurethane bushing. As you can see here, the trunnion wasn’t even attached to the bushing anymore. The rubber completely broke off. Fortunately, the trunnion’s placement prevented the arm from completely being loose and dropping out of position. Still, that can cause major damage to the underside of your car, and even cause erratic handling.

IMG_0948 (Large)revised

Freshly inserted trailing arm bushing with the trunnion cleaned of old rubber and reinserted into the new bushing. Because the trunnion is now able to pivot freely, it must be inspected frequently and lubricated to prevent the bushing from drying out. Otherwise, it will start to crack and create creaking or squeaking noises while driving.

Some notes about polyurethane bushings:

Polyurethane bushings, which are very common in aftermarket performance, have some distinctions that make them a likely upgrade for most consumers. Poly bushings, even though offered in various durometers (hardness), have better NVH characteristics than rubber bushings. And, because many of them are much harder than rubber, they don’t deflect as much under load, contributing to better maintained wheel alignment. When they do deflect, they tend to have better memory and can return to shape much more consistently.

00a6e_1s (Small)

TEIN Polyurethane Control Arm Bushings for GRB Subaru. These require a special type of lubricant (included with the kit) to prevent them from drying out.

However, polyurethane can also dry out. And there’s a special grease that’s needed for periodic maintenance, which most aftermarket bushing manufacturers either provide or sell their proprietary grease.

IMG_0892

So, periodically inspect your bushings since they are just as critical for a properly operating suspension.

Having a great handling car is obviously very fun, but it still requires upkeep to maintain that great performance you expect out of it.


Adjusting Damping on a TEIN Coilover

Just a quick reminder to those who are new to our adjustable suspension, specifically regarding damping setting (soft to stiff, and vice versa).

With the exception of some racing kits like our N1 dampers or Gr.N rally dampers, our damping adjustable kits are 16-way adjustable, or 16 usable settings, if that’s easier to understand.

Our adjustment knob for damping.

Our adjustment knob for damping.

Now, we get plenty of calls about customers who have 27 or 30-way adjustable damping. If you don’t have an N1 or Gr.N damper kit, then please pay attention- there are only 16 usable damping settings.

Yes, the adjustment knob may have more than 16 detents as you turn the knob, but we advise you not to exceed the 16th click (counter clockwise, if you’re staring directly at the knob).

If you're staring at the adjustment knob, clockwise is stiff, and counter clockwise is soft.

If you’re staring at the adjustment knob, clockwise is stiff, and counter clockwise is soft.

So, to find out what click setting you’re on, count the number of clicks while turning the knob clockwise until it stops. That figure will be what damping setting you’re at. If you counted more than 16 clicks, you were well past any usable damping setting our kit was designed with. So, now that you’ve turned the knob clockwise until it stops, you’re now at our 0 (zero) click setting, which is the stiffest setting. Simply turn the knob counter clockwise until you find the setting you prefer (again do not exceed 16 clicks).

Why we ask you not to exceed the 16 click setting- it does not offer any benefit or additional change in damping force. In fact, leaving the setting somewhere past the 16th click can cause damage to the needle valve’s setting. So don’t do it.

You may be wondering- “Why would we have an adjuster with more that 16 click settings if knob can easily surpass the 16th click?” Good question. We use the same click knob on our race coilovers, such as the aforementioned N1 and Gr.N damper kits. It was more cost-effective for us to create a click knob that we can use across all models of our damping adjustable suspension, so we simply applied this same knob to our SUPER STREET, STREET ADVANCE/STREET ADVANCE Z, Type FLEX/STREET FLEX/FLEX Z, MONO FLEX/MONO SPORT, SUPER RACING, and several other coilovers that have 16 usable damping settings.

From our owner’s manual:

click-setting

Why Nitrogen Gas for Dampers?

When we get this question, it’s typically assumed that the customer thinks we only fill our dampers with nitrogen gas. We get this question at shows, even though we have our clear damper models that people can try for themselves and literally see the damper oil inside the damper.

We in fact do use nitrogen gas, but the damper’s internal volume also comprises of damper oil as well. Whether it is a twin tube or monotube setup, they both use damper oil and nitrogen.

twin and mono

The damper oil, which is a specific weight and proprietary for our use, is what helps us regulate damping force. Our shims, which are used to control oil flow through the piston valve (and base valve, if applicable), are matched with this weight oil and it makes our engineers’ jobs easier when determining valving specifications for each application or for revalved dampers.

The oil also helps to transfer kinetic energy (and friction) from the the damper’s operation into heat energy, which is then dissipated through the damper body and radiated into the air.

Nitrogen gas is filled to a certain pressure, determined when we’ve calculated how much damper oil each damper is to receive (and how much the piston shaft will displace during compression). Nitrogen gas does several things. For one, it helps to allow the piston shaft to compress into the damper. If, for example, we only filled the damper with oil and we filled it completely (with no air gaps), the piston shaft wouldn’t compress into the damper at all. This is because oil is incompressible.

The piston shaft requires a certain volume within the damper. Think of it as going into a pool that’s filled to the brim with water. When you go in, you will displace some of that water. No matter how slowly you enter the pool, the water will want to spill out. The piston shaft wants to do the same exact thing, pushing oil out of the damper. But since it is fully sealed, there’s nowhere for the oil to go, so the piston shaft can’t compress.

Nitrogen is compressible, on the other hand. If we fill the remaining internal volume with nitrogen gas (at a specific pressure), the piston shaft will now have room to compress into the damper. I mentioned that the gas has to be at a specific pressure. Too much pressure and the shaft will basically have a hard time compressing into the damper. Again, because gas still has mass, it has to be a controlled amount that you pressurize the damper to. This effectively creates damper rebound. Since the piston shaft can compress into the damper in one direction, the piston rod can rebound in the opposite direction. Now we have a damper that offers control for both compression and rebound, and the shim stacks on the piston valve help control the speed of the piston valve for a given velocity.

Nitrogen also has some distinct advantages than using air. Air contains mostly Nitrogen by volume (depending on the altitude, that may change slightly), but because air also comprises of oxygen and hydrogen, there’s a chance that moisture can form within the damper. We use nitrogen because it helps reduce aeration and cavitation during damper operation. Very high piston speeds can create cavitation, which translates into a momentary loss in damping force. Aeration is the formation of bubbles in the damper oil, which also affects damping force. If we used just air as the remaining volume in the damper, these problems will be exacerbated. Using only nitrogen helps reduce these potential problems.

Nitrogen also expands at a constant rate compared to just air. That means a more consistent internal pressure as the damper operates. Because it also has a greater density than just air, that means a damper can hold its pressurized charge for a longer period of time.

One other characteristic is that nitrogen is inert. It’s safe to use for shock absorbers. It will not react to other components of the damper, even the damper oil. Keep in mind, however, that shock absorbers are pressurized. The nitrogen may be inert, but the damper oil can be flammable (which is why we warn end-users of exposures of shock absorbers to open flames).

In a monotube damper, the nitrogen charge is separated by a floating (or “free”) piston. That means that the oil is completely separate of the nitrogen. Since the floating piston is free moving, as the piston shaft compresses into the damper, the floating piston will compress the nitrogen charge.

On a twin tube damper, the oil and nitrogen share the same volume. While the inner tube, or working tube, of the damper is basically all damper oil, the outer tube is a mix of some of the damper oil while the top (because the gas is lighter than damper oil) is nitrogen. So, as the piston shaft compresses into the damper, the oil is physically compressing the oil in the outer tube.

There are a few issues that can exist with a twin tube damper. For one, it works best when near vertical alignment and with the base valve towards the bottom. Again, because nitrogen is lighter, it’s tendency is to rise to the highest point inside the damper. But, the base valve can only work properly in damper oil, otherwise it will lose damping effectiveness. This is why you never really see an inverted twin tube setup, unless you were to have one of our HG dampers (which you can read about The Pains of Rally Racing), then it’s technically possible. Although best in a near vertical alignment, you can position a twin tube at a few degrees from vertical, so long as the nitrogen doesn’t have a chance of entering the working tube. However, if nitrogen were to enter the working tube, it can be worked out into the outer tube during function. But, while it is still in the working tube, it can create a gap in damping force until the gas eventually works its way into the outer tube again.

There are other inert gases that can technically be used, but nitrogen’s density is far greater and meets the purposes of a damper’s function pretty well.

So, there you have it. We use nitrogen AND oil in our dampers.


What Makes TEIN Suspension High Quality

Without a doubt, our cars face some of the harshest conditions. No matter where you live, whether it’s high desert, or the extreme cold (with snowfall), vehicles have to operate to the best of their abilities.

TEIN’s founders knew this full well when they decided to go into the shock absorber manufacturing business. As some of you may already know, our founders had a passion and career in rally racing, one of the toughest of motorsports for production vehicles.

Suspension, being a very important factor in terms of comfort and handling performance, must also operate in such extreme conditions. Also, it’s placement (within the wheel wells, besides brakes, and, in some cases, near the engine), means that they must also operate through extreme temperature fluctuations. Suspension, among other vehicle components whether in commuting or racing, have to face some of the most grueling of conditions and have to provide consistent performance from start to finish, and that start to finish can last anywhere from a couple of minutes to nearly a full hour of continuous use. Or even a full day, like we’ve experienced in 24 hour racing at Nurburgring. A shock absorber (damper), by design, is really an energy dissipator, which means that it must convert kinetic energy (damper stroke) into heat energy, and that heat energy is not easily radiated/dissipated away from the damper. Because of that, a mechanical damper has to take some seriously high levels of abuse that many of us are unaware of.

Our damper oil has to be able to provide consistent performance during these temperature fluctuations. That means that the viscosity of the oil should also be consistent. Otherwise, the dampers will provide a very large range in damping force, which is not ideal and makes handling far less predictable.

DL-TEIN-EDIT-7

We use a proprietary grade of damper oil in order to maintain consistent performance. Some forms of racing, such as rally racing, put the oil under the worst circumstances, in some cases reaching temperatures as elevated as 320 degrees Fahrenheit. Engine oil typically sees operating temperatures near the 300 Fahrenheit levels as well , but from heat mainly transmitted from combustion cycles. So that just goes to show how much punishment our suspensions must endure. Even a short drive in your daily commuter can easily get street suspension into the 150 degree Fahrenheit temperature range.

Even the most basic material we use for our suspension, our steel damper bodies and lower brackets, are ultra high-strength, allowing us to make a light yet resilient structure for our shock absorbers. The use of ultra high-strength steel allows us to use less material for a given design application without sacrificing its strength. That translates to lower weight, especially compared to OEM suspensions.

TEIN Japan New Facility (Jan 4, 2016 094 TEIN Japan New Facility (Jan 4, 2016 076

We use several grades of aluminum alloy for components such as our spring seats/seat locks, upper mounts, lower brackets, and even damper bodies, all determined based on the types of use they are designed for. The most commonly used grade of aluminum is our 2017 series alloy (duralumin), followed by 6061 series, and 7075 series. Each grade is properly heat treated to provide us with optimum strength for its given application.

ALUMINUM BILLET GRADES TEIN Japan New Facility (Jan 4, 2016 086

The spring steel we use is no different than what you can find from other well-known manufacturers, SAE 9254 vanadium steel. This material, when manufactured properly, provides an extremely resilient coil spring design, able withstand millions of strokes without sagging. Our manufacturing processes assure a worry-free spring for years and years of continued use, and that is absolutely critical for us.

SAE 9254V preform Coil Forming

We use cold drawn steel piston shafts. Cold drawing our piston shafts avoids having to use any type of coating or plating, which over time can be come brittle and break off the piston shaft surface. By cold drawing the steel piston shaft, it creates a near-finished and case hardened surface that only has to be polished for added low-friction operation. In the past, we had experimented with different low friction coatings. However, these proved to be short term, and longevity was our biggest concern.

TEIN Japan New Facility (Jan 4, 2016 050

Our piston valves, critical in providing our required damping force for each vehicle application, are developed and manufactured in-house. We use a PTFE lining on the sliding surfaces of the piston valve. This low-friction coating allows the damper to do the work it’s designed for, and not by account of friction caused by the sliding surfaces of the piston valve within the walls of the damper body. This extra step provides consistent damping force, no matter the internal temperature of the shock absorber.


We also use proprietary coatings to protect our suspension components, such as our patented ZT coating for threaded shell cases and adjustment tubes. This has proven to withstand some of the toughest weather and driving conditions in racing atmospheres to daily commuting. Our patented 2-Layer/1-Bake powdercoating process (adding one layer of zinc and another layer of our green powder paint), a process pioneered and used exclusively by TEIN, not only provides a very durable shell case coating against corrosion, but also improves our manufacturing efficiency. All of our coatings are constantly tested through our artificial aging and salt water spray testing, and even compared to other suspension manufacturers’ coating methods, to ensure that we’re providing our customers with a kit that will last for many years. All shell cases and brackets are surface treated to make sure proper adhesion of our coatings.

SHOT BLASTING POWDER PAINTING

Lastly, TEIN meticulously tests and develops suspension kits for each and very application we make. In doing so, we also ensure that our customers are receiving a kit that will provide the greatest handling performance for their needs. For anyone that believes that our shock absorbers are the same for every single vehicle model, they are absolutely incorrect. One area we continually pride ourselves on is our research and development, a constant evolution of suspension technology, and an adaptation to the consumers needs for performance suspension.


DSC00368 DSC00367 DSC00364

We’re always very proud of what we make. It isn’t enough for us to simply rely on the name and reputation we’ve earned. We’ll continue to develop the best performing and quality suspension at a reasonable price. When you buy a TEIN product, know that our continuous efforts go into making a high quality product for you to use for many years.

Coilover Claim That Are Mis-Installations

Many times we receive claims of defective dampers leaking oil which are then requested to be repaired or exchanged under warranty. For the most part the actual cause of the damper failure would be due to mis-installation. Now regardless if its you first time doing a coilover install or have  many years of working in automotive repair, a mis-installation can occur at any time. For the most part the installation instructions included with our coilover systems are straight forward but are usually never read through properly, overlooking the important advisories placed throughout the instructions. Following these advisories will of course lead to a problem free installation.
IMG_2785

A common disregarded advisory detailing to avoid clamping the piston shaft to tighten the damper top nut. Most consumers and “Mechanics” often are unable to tighten up the top nut claiming that holding the piston shaft body would be the only way to tighten the top nut which would lead up to the coilover to leak. For a better visual understanding what can happen to the piston rod if clamped down, please see the images below of a discarded damper.

P1110132

P1110134


P1110133

Now to the point of this blog post. This is in no way a manufacturing defect of the coilover. The markings on the piston shaft are what can be referenced as “The Smoking Gun” as it is an obvious tall tale sign that something had been used on the shaft. Do not use anything to clamp down the piston shaft. Our kits would either offer special machined sections of the piston shaft that can be held with a wrench or incorporate the use of the upper spring seat in conjunction with the included adjusting wrenches to hold the piston shaft. If the top nut turns even when tightened but not torqued down, placing the vehicle load on that specific corner then torqueing the top nut will work.

P1110137 P1110138

P1110141P1110146P1110140

When it comes to any product claims, we do our best in repairing those that respectively are a manufacturing defect. If the item is not covered under warranty an explanation is given and detailed for the consumer to further understand the reason for the warranty decline.

Coil Spring Material

I know some (if not all) of you people really care about what you buy. Although many of us are not engineers, we can tell good designs from bad designs. What we cannot typically tell is what are good materials and bad materials simply by looking at pictures.

Lowering springs can be found by many manufacturers. Many of them claim to use the same materials as “such and such well-known brand”. And they may be correct (since there are several spring manufacturers that let small brands outsource through them). But, some small brands may request a different material to get their price point way way down. These days, a set of good quality springs can average the $275 mark. Anything below that is not necessarily questionable, but I’d be wary of them (unless it is a discounted price from a known brand and reputable retailer, and you can confirm the product is authentic- beware of counterfeits!).

To get right to the point, TEIN uses SAE 9254V, which is a Chrome Silicon Vanadium alloy. This is not an uncommon material. Many well-respected brands state this alloy as their material of choice for their springs.

nothondaaccordstech2013

So, we get this Chrome Silicon Vanadium wire, which is in a “soft” state, and feed it through a machine that first draws out the wire and straightens it, then pulls it through a mandrel that makes the wire diameter consistent. Then we can feed it through our machine to form coil springs.

SAE 9254V preform

These massive hula hoop looking things are the chrome silicon vanadium steel wire we use for our springs. Still in a relatively soft state, it will be fed through dies to straighten out and ensure consistent diameter before being fed through a computer controlled coiling machine.

Coiling of the wire alloy is done in a cold state (not ice cold, btw). This is done “cold” because most all of our springs are not very large in wire diameter. It’s easy for us to form in such a condition. It’d be a different story if our coil springs were used for trains or huge trucks. This method also eliminates one step- preheating the wire, which can alter the alloys molecular structure and potentially weaken the material.

Coil Forming

If you’ve read other articles about coil spring manufacturing, you’ll hear it likened to pasta being formed. These computer controlled machines can make adjustments as wire is being fed into the machine, allowing us to make many different shapes of springs, like our taper or barrel springs. This is what sets spring manufacturers apart from one another. Each manufacturer has their own design.

There is still a heat treatment step to follow our process anyway, which is the next step after cold winding. This adds strength to the alloy by realigning the molecular bond of the alloy. Close attention is paid during this step, as it needs to be timed properly and at the correct temperature. Improperly heat treated springs can either sag or break, depending on how long the heat treatment process went.

heat treating/tempering

Finished coil springs which have been cut from the coiling machine will next go through heat treatment. Cold forming of the coils can alter the molecular structure of the wire, so heat treating helps to realign this molecular bond prior to the next stages of processing.

Depending on the vehicle application, the next step is flat grinding the spring ends. This is important because this allows the spring load to be evenly distributed across the spring’s surface area. However, this is only an important step if the factory spring design requires flat grinding. In other words, the springs we make must have matching ends to the factory setup in both the spring perch and upper seat assembly.

flat ground

IMG_0349 (Flat Ground Spring End)


Our shot peen process is the next step. This takes tiny steel balls (called “shot”) and impacts the spring at high velocity. This is a stress relieving process. Impacting the spring surface is likened to a blacksmith hammering a piece of iron. It shapes and compacts the surface, giving it strength. This, however, leaves the core of the wire spring “soft”. That is what you’d want, because if the inner core of the wire spring is strengthened, it can make it brittle.

Finished Wind

The heat treated coil springs will then be sent to shot peening for stress relieving and surface compaction.

We then go through a Setting process, which puts the spring under load for a specified period of time and at an elevated temperature. This lets the spring settle to the correct length and is also a quality control measure. After setting, we inspect the springs to make sure they fall within specification prior to the final step- powdercoating.

Presetting

We use a urethane powder paint, but prior to that, we apply a zinc powder base for corrosion resistance. They are baked on at the same time and can last the life of the spring.

Powder Painting

Our 2-stage powder paint process ensures a long lasting spring with excellent surface corrosion protection.

Labeling

Labeled springs will go through a final stage of inspections prior to pairing and packaging.

We have a great success rate with our springs. While we do offer a 1 year warranty against spring sag (more than 5mm), it is not to say that a spring will never sag. The repetitive cycling of a spring (compressing and extending) weakens a spring over time. However, the materials and processes we use provide a very long lasting spring. It is not very common for us to see a spring that has sagged, even after years and well over 150,000 miles of use.

Nothing much changes when we manufacture our springs for coilovers. The same processes are used. The only exception is our Racing Spring line.

Racing Springs use a SWOSC-KV material, which offers very similar properties as our SAE 9254V springs, but we can now make a much more lightweight spring. That’s a benefit when trying to keep weight of a race car down. This weight savings is accomplished by winding a spring with less material. The only downside to such lightweight springs is the spring stroke maximum. These have much shorter stroke length for a given spring free length and wire diameter. Exceeding the design’s spring stroke can cause them to sag.

Spring design is critical, for obvious reasons (performance being one of the main ones). But material is just as critical, if not more so. We want to utilize the best material that won’t cost a pretty penny. So, when looking for springs, be picky about the ones you really want. Know that TEIN puts a lot of time to engineer a great performing product at a great value.

As we’ve mentioned, a well engineered spring can make a world of difference, especially in terms of safety.


Effects of Aerodynamics on Suspension

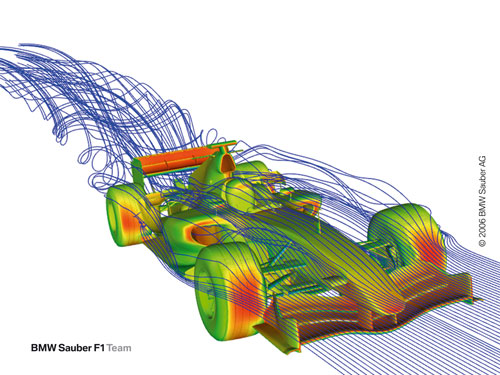
Enzo Ferrari was once quoted for saying, “Aerodynamics are for people who can’t build engines.” Funny guy, that man. Colin Chapman, however, saw aerodynamics as the future of F1, which reflects heavily on the design direction of the F1 cars you’ve seen for the past four decades. It has been used effectively and with amazing results.

If you follow much on the ever-growing Time Attack racing series, you’ll see or hear about aerodynamics. Other than amazing and tractable power that most engines can be tuned for these days, along with a great suspension and tire package, the only way to tick off several tenths of a second from your lap seems to be crazy aero. Incredibly crazy aero. So much so that the cars on track resemble upside down airplanes. Makes me wonder exactly how much downforce these kitted cars are generating.

Top Fuel S2K

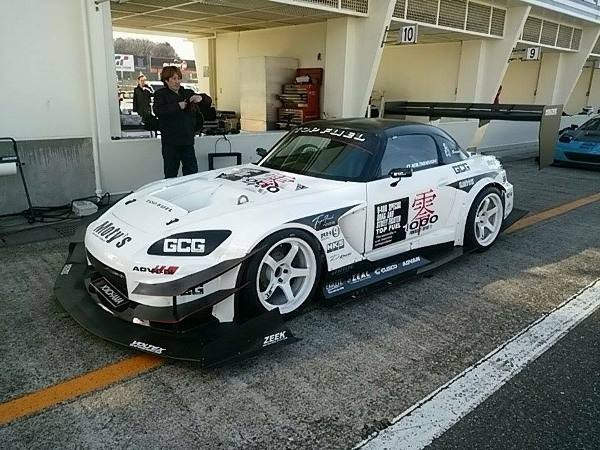
This hammerhead shark looking thing comes from the Top Fuel team in Japan. Currently breaking records at Tsukuba and Fuji Speedway. The front splitter and rear wing are waaaaay too wide for use on the street, which this car will probably never see again anyway. Downforce is what’s keeping these fully prepped unibody cars fast (as well as tons of power).

Aerodynamic tuning seems to be a fairly straightforward approach these days, with many people fabricating their own front splitters, canards, flat bottoms, and rear diffusers. While this post is not necessarily about how aerodynamics work both positively and negatively, it is important to know that it is very effective, and it takes more fine tuning of the rest of your vehicle to make the aero work in harmony with your car.

So how does all this extra downforce from aerodynamic gain affect suspension?

Evasive Blue S2K

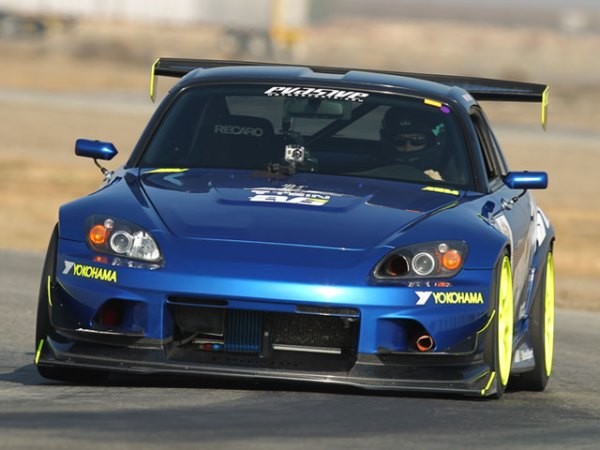
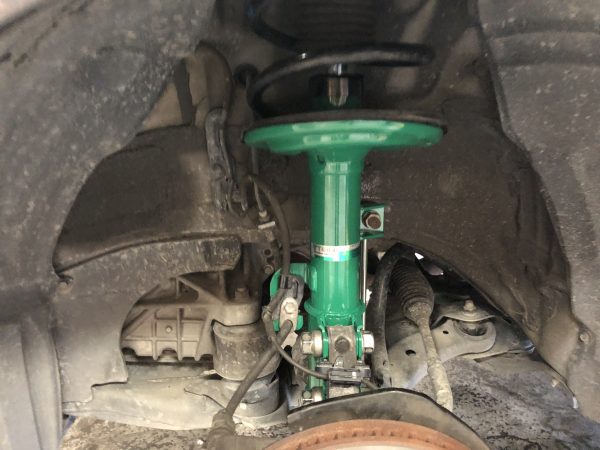
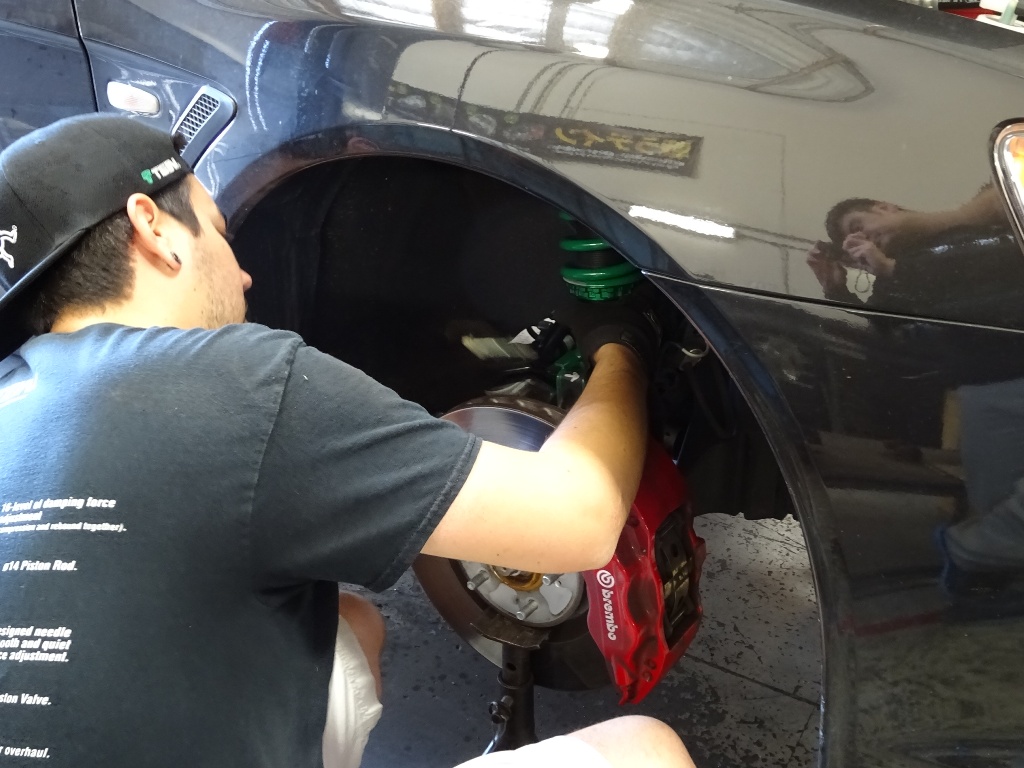
This Evasive S2000 had a full aero package. Front splitter, flat bottom under tray, & rear wing work together to generate sufficient downforce. Using street tires (treadwear 180) and Evasive Motorsports’ own Evasive-Spec TEIN Super Racing dampers, this Street RWD class Time Attack car broke records at Buttonwillow in Street RWD class events.

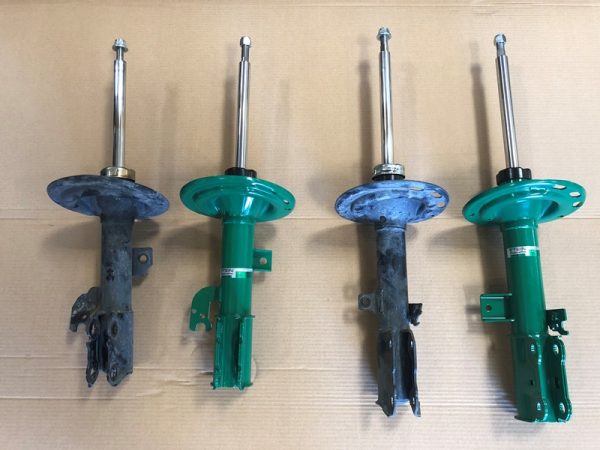
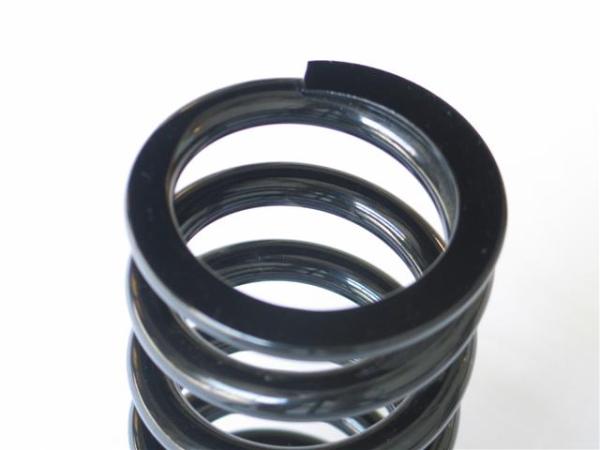
When we set up a suspension kit for a vehicle, we have to factor several items prior to deciding which spring rates will work best, followed by how we will valve the dampers depending on what the driver experiences. After all, it is the driver’s confidence we’re trying to build up, which in turn translates into a high performing car if they can do their part behind the wheel.

Evasive GT-R Braking

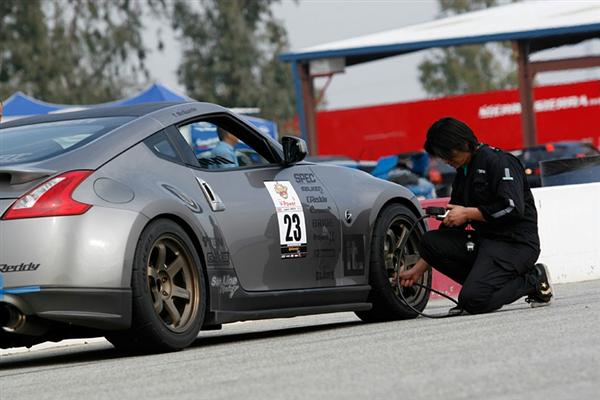
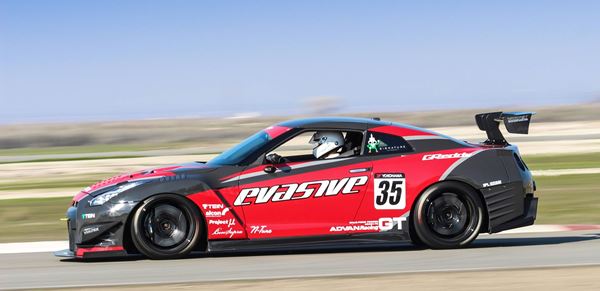
Believe it or not, this GT-R from Evasive Motorsports has relatively mild aero components. Still, it’s a matter of finding the right balance for the vehicle at differing speeds. For us as a suspension manufacturer, we’re always concerned with how the stability of the car is affected through body dynamics, whether under turning, accelerating, or braking (as in this picture).

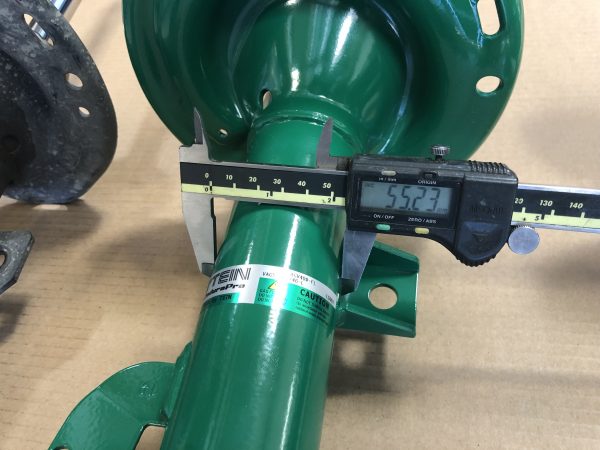
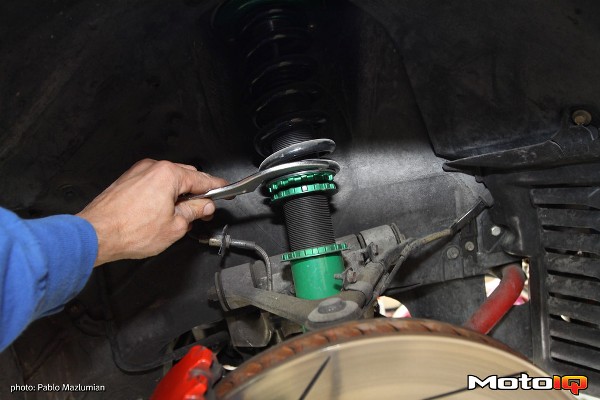
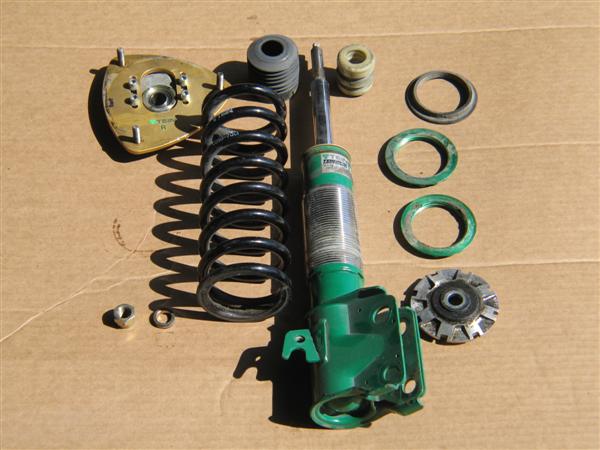
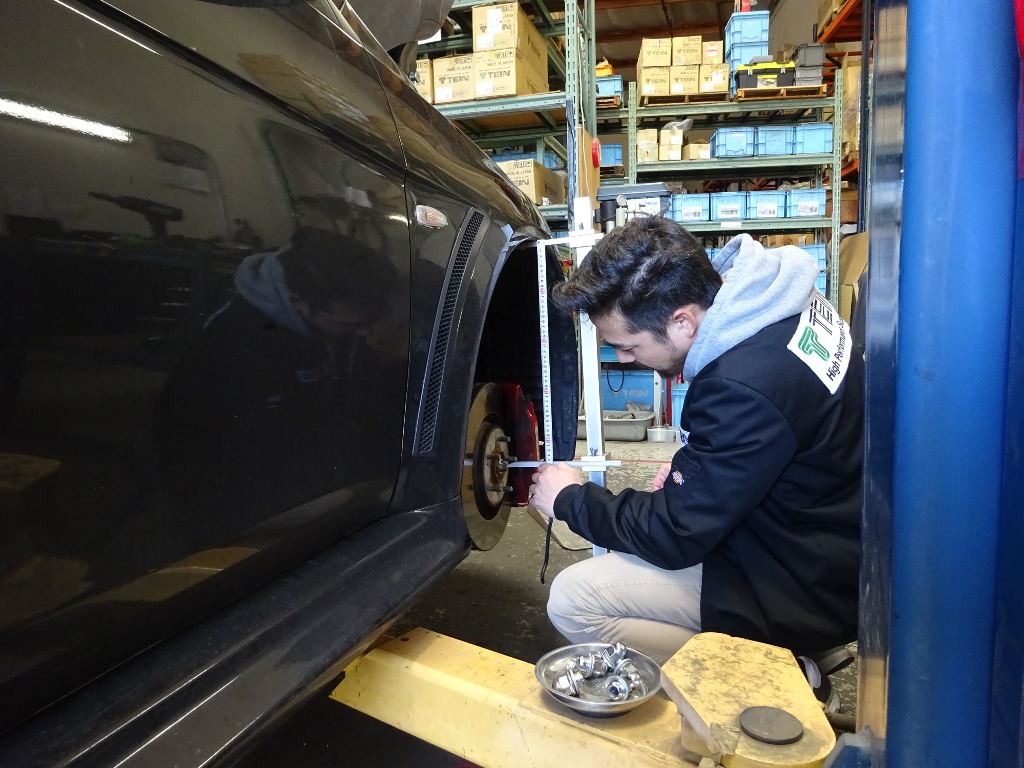
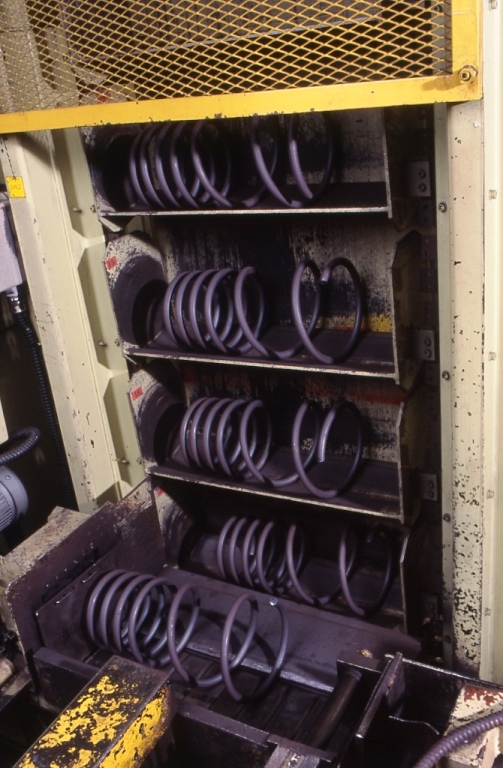
We also have to take into account what type of ride height the customer wants to achieve, which in turn affects the damper length, including droop/extension and bump stroke. Keep in mind that your steering geometry must be set for that specific ride height, as you want minimal effect in bump steer.

Evasive S2K Turn

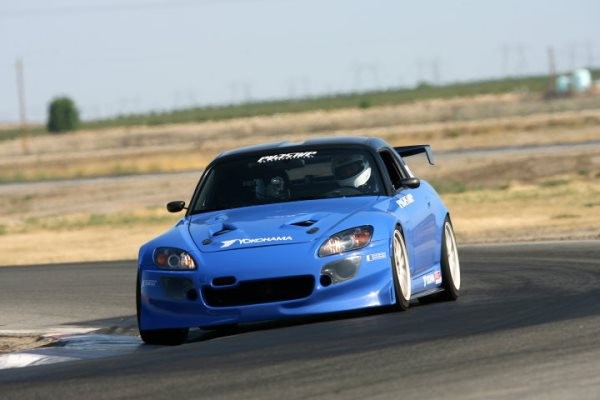
This S2000 going through a turn looks like it is flat relative to the curve. However, you can see that the asphalt is slightly cambered, and the inside wheels/tires need to droop down and maintain contact for greater traction, which it is doing. Otherwise if the wheels were to have lost contact, traction suffers and the balance is thrown off. This car also has relatively mild aero additions.

In its heyday, aero tuning wasn’t understood as it was today. Early reports in F1 stated that the vehicle would oscillate, or “porpoise”, at varying speeds. If the suspension setup was too soft, this problem could be exacerbated by this porpoising phenomenon. This effect disrupts airflow and causes instability as speed increases.

F1 typically has the best examples of the effect of downforce on suspension. For one, F1 cars of today have incredibly stiff suspension. Some control arms actually don’t even have any pivoting point and rely on flexing to provide suspension movement. If you’ve seen an F1 car in action, you’ll know that, for the most part, the circuits they drive on are very smooth. Nevertheless, suspension is still necessary as the car still has to pass through gaps, curbing, etc. However, F1 regulations allow a tire with a really huge sidewall. So this in turn acts as suspension (just without proper damping; also helps create a fairly large contact patch for the tire). If it were tires with a very low aspect ratio (small sidewalls) the car would have to rely on softer suspension, which is what they want to avoid doing.

Still, when you watch an F1 car, you can notice how little body roll there is (it’s noticeable, but not as severe as a street car). The suspension does move, so it is functional. It seems though that the tires, as they deflect and deform through turns, adds to body motion.

sahara f1 kerb

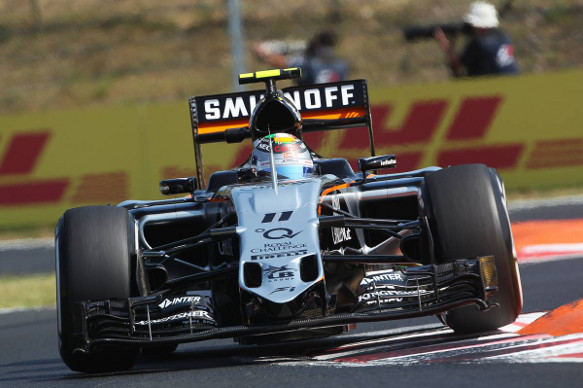
Obviously this Sahara Force India car is going past a curb, which makes the car look like there is some body roll. Of course there is some roll, just very minimal.


massa ferrari

This older spec Ferrari shows just a bit more body roll at turn-in.

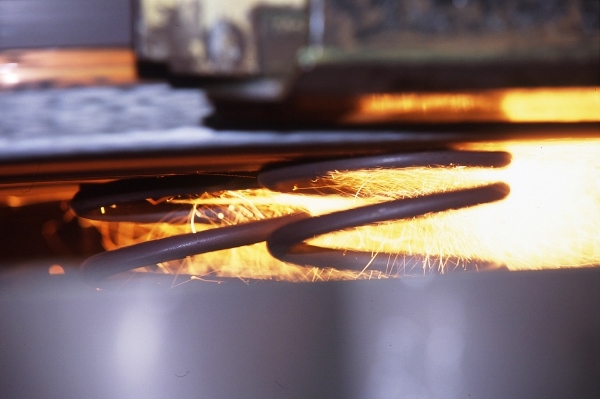
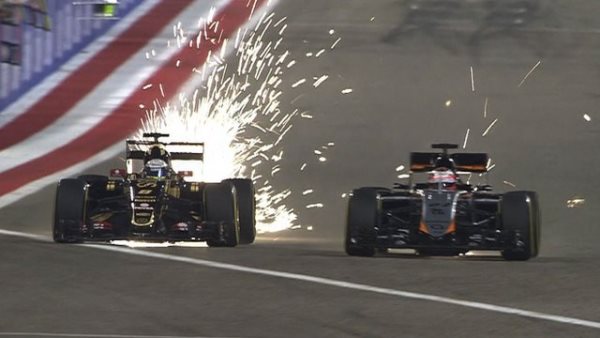
But, on straightaways, it is clear that F1 car suspension is working. Thankfully this has been made clear in the 2015 regulations as all cars must use a titanium skid plate. And when this skid plate makes contact with the ground, it makes an amazing shower of sparks seen coming out the car’s back end. Why is this helpful? because clearly the car is making enough downforce to cause the skid plate to scrape along the ground.

lotus f1 sparks

We kinda dig the show current F1 cars put on, especially with their titanium skid plates.

This is a factor that is still important with street cars set up for racing. You may find a need for super stiff suspension, but for the most part we don’t have, or get, to drive on super smooth circuits like F1 cars do. That means we need a suspension that can track the road surface better and help maintain good traction. Super stiff suspension with very little droop travel with literally be skipping off the curbs and bumps. It wouldn’t take a whole lot to make the car feel unsettling. So, therein lies the problem. Then, once you add aero parts like a front splitter, flat bottom, rear diffuser, & rear wing, you’re compounding the problem. It’s a balancing act.

For the most part, our Super Racing dampers are designed and valved with some specific spring rates in mind for each application. In fact, some of our sponsored teams, like SportCar Motion and Evasive Motorsports here in the U.S., have pretty aggressive aero on their Time Attack vehicles, yet they still use our recommended spring rates. Really aggressive aero, and even a change in stickier tires, may require a small change in spring rate, maybe something slightly stiffer (+2kg/mm), and that is more than enough.

Ultimately, it is best to try a suspension kit as-is at our recommendations, do your testing, work on any other additional modifications you make to the vehicle, continue testing, then you can assess what changes you need to make to your suspension. It can be as simple as damping force changes, ride height changes, or spring rate change. Starting with an out-of-the-box setup is at least a good baseline. Just as with any other modification you make to your car, modifications to suspension can also be made. We’ve already spent the time to engineer the the suspension kit for your specific application (albeit a relatively stock vehicle), so that gives you a great baseline to start with.

Since I brought up what Enzo Ferrari said- “Aerodynamics are for people who can’t build engines”, how about this new engine for the 488 GTB:

ferrari-488-gtb-engine-image

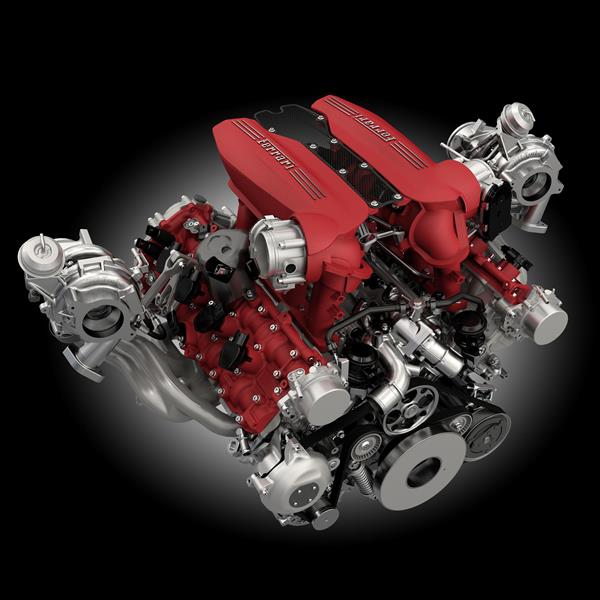
Damn, that looks sexy.


One extra thought- while it’s nice to try and pioneer your own aero setup for your car, sometimes it’s best to go with a tested/developed setup for your car. Piecing together components from different manufacturers, although looking very similar and wanting to create similar effects, may not net the results you are looking for. Aerodynamic tuning can be very tricky to get right, depending on what you want to achieve.

CFD-ANSYS-BMW-SauberF1

Bump Stop Trimming

Without a doubt lowering springs is easily one of our biggest sellers. It’s a simple upgrade for someone wanting to lower their vehicle but not wanting to really sacrifice much in the way of ride quality, and it’s also much more affordable than a coilover kit. This is an especially common upgrade for people with newer vehicles, or cars still under warranty (or maybe they don’t have much to spend since they just got a new car).

As many of you may know, we make our lowering springs compatible with factory (OEM) dampers. Not necessarily in just fitment, but also in spring rate. Our lowering springs are not very aggressive. If you take a look at our lowering springs’ specifications for your vehicle, you may see that the ride height drop is not too aggressive (maybe better than some other manufacturers). Some other applications of our lowering springs may seem to be very aggressive. It’s all a matter of how much room we have to play with when designing our lowering springs.

Most important for customers is reducing the tire to fender gap. As of the past few years, the request is for a “flush” fitment, where the tire just closes up the gap with the top of the fender opening. As much as possible, we want to create that type of fitment for the customers, even making a staggered ride height drop for front and rear to achieve a nice and even wheel gap. But, where we reach limitations is the factory damper stroke length.

Some factory suspensions have very limited stroke length, and this makes it increasingly difficult to design a spring that will aggressively lower a vehicle. That isn’t the only limitation. We look at clearance with the fender, within the wheel well, as well as how it may affect steering/suspension geometry. We always design our lowering springs to give you the most ride height drop in as safe a level as possible.

So, in regards to trimming bump stops- why is this important? If we find that aspects, other than damper stroke length, seem to be very generous, we know that we can make a lowering spring that will work with a shortened bump stop. So we include a chart by vehicle application that shows how much you will need to trim for front and rear when installing our lowering springs.

Some cases may require a different type of trimming style for the bump stop. Typically it is just trimming the bottom portion of bump stop and retaining the top piece (A Type). Sometimes it’s the reverse (B Type). In other cases, you may need to trim a middle section and retain the top and bottom piece (C or D Type). See below the different style cuts we recommend, depending on the vehicle:


bump stop trim style

We know several customers skip the bump stop trimming step. This can cause several issues. We’ve added this measure so that you can retain a bit more stroke length at the newly lowered ride height. This also helps improve ride quality. Because the bump stop is made of a high durometer polyurethane material, it is like a secondary spring, but a really stiff secondary spring. Since the dampers are not valved to handle such a stiff secondary spring, it can make rebound feel really harsh. Some may say bouncy. Constantly hitting the bump stop can cause the damper to prematurely wear or potentially blow out, too.

bump stop trim 001

Bump Stops come in all sorts of goofy shapes. Mind you, these were engineered with a specific design.

bump stop trim 003

The bump stop itself is a really lightweight piece, but it is of a high durometer and takes a lot of force to compress. At least it is easy to cut into.

Fortunately, you can cut easily into the bump stop using a box cutter/safety blade. It slices pretty easily.

bump stop trim 004

Here’s a picture of a 2015 Camry bump stop. This is a more typical design that we see- top is a larger outside diameter and tapers, with billows that make it easier to determine which section we recommend trimming.

bump stop trim 005

Using a safety blade, we’re able to cut a bottom portion of the Camry’s bump stop. We’ll be retaining the larger piece on the left and reinstalling onto the front strut.

bump stop trim 006

This bump stop uses some plastic ring, likely to control the bump stop’s compression. In our case, we need to trim a middle section.

bump stop trim 007

We cut this into three pieces, and the middle piece will be removed. The remaining top (left) and bottom piece (right) will be reassembled on to the damper.

So, while you will have your suspension taken a part for a little while when installing our springs, take the time to see if your bump stops will need to be trimmed. Check the included instructions with our lowering springs to find out that info.