EDFC Motor Install

We get a lot of questions on how to properly install EDFC motors. So here are step by step directions on how to install an EDFC motor to your EDFC compatible coilover (shock type, non-inverted shown).  If not installed correctly, it could damage the EDFC motors and possibly the coilovers.

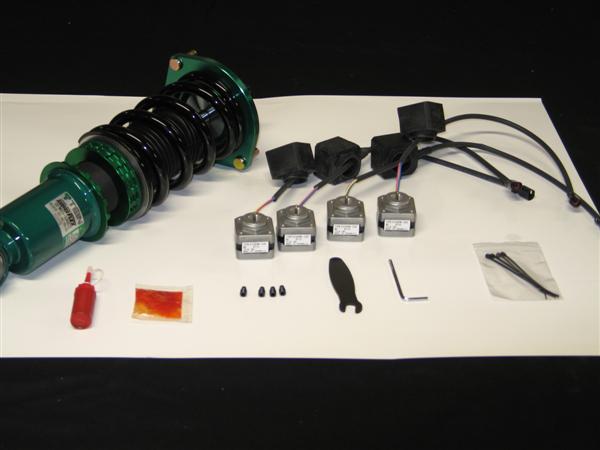
Layout of parts that are included with our EDFC Motor Kit and a few items from the controller kit.

Tools shown from left to right: threadlocker, grease, EDFC hex bolts, 8mm click wrench, 3mm allen wrench and zip ties.

** Additional parts you will need for this install is a small flat head screwdriver (not included)**

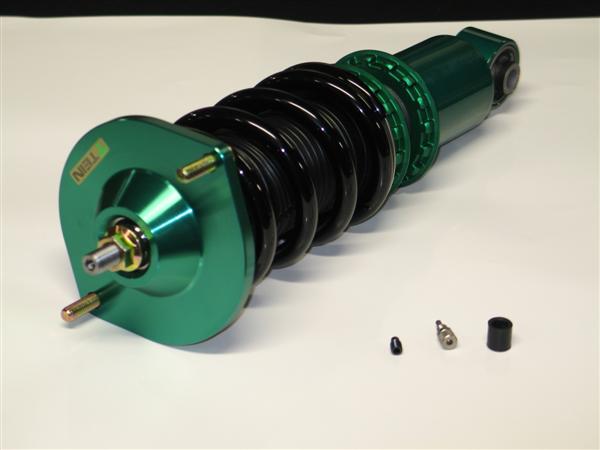
1st Step: Remove the add cap. Then use the 8mm click wrench to remove the click assembly. Once removed use the 3mm hex wrench to remove the original hex bolt from the damper.

Parts removed; original hex bolt, click assembly and add cap

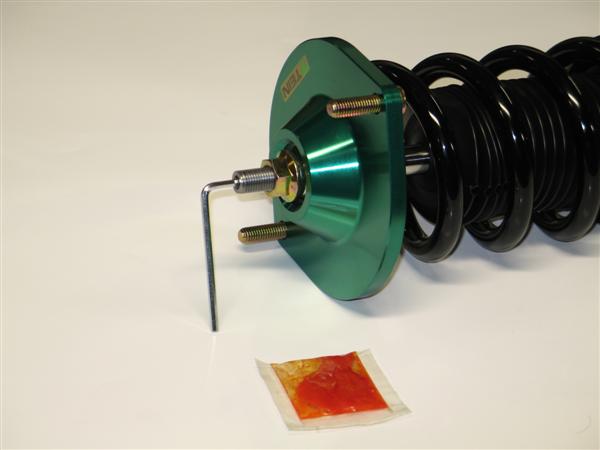
2nd Step: Add a small amount of supplied grease (orange bag) to the EDFC hex bolt threads and install the EDFC hex bolt until flush with the top of the piston rod. Be sure not to add threadlocker (red tube) to this part!

EDFC hex bolt installed with grease and flush with top of piston rod.

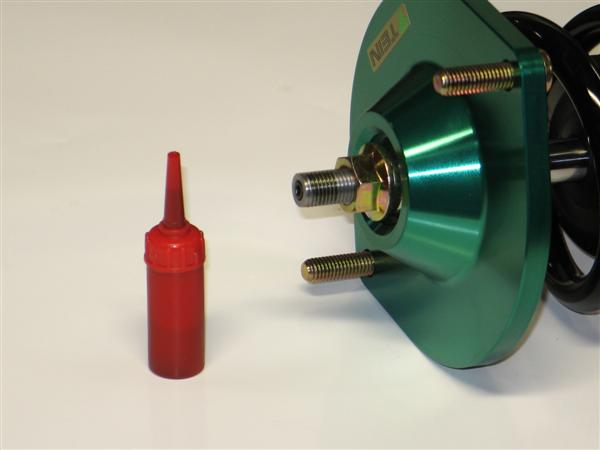
3rd Step: Add the supplied threadlocker (red tube) to the outside threads of the top of the piston rod. Please note, not a lot of threadlock is needed nor does it need to cover all the threads.

Area shown of where to apply the threadlocker to piston rod.

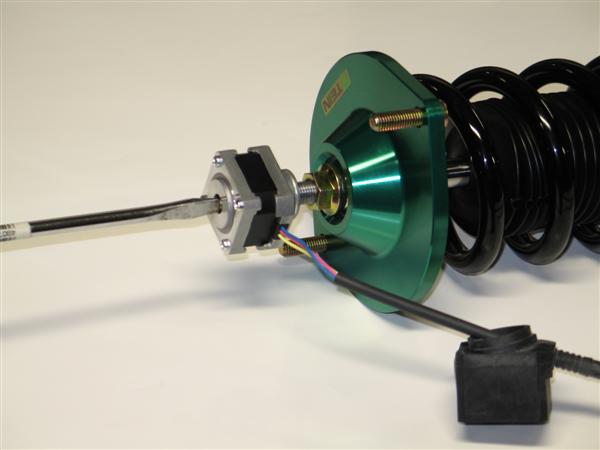
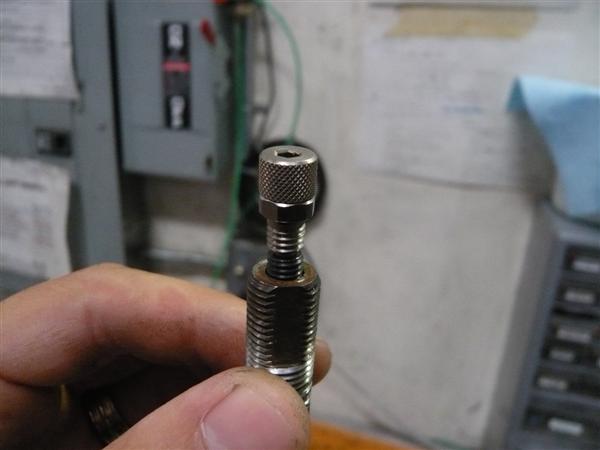
4th Step: Install the EDFC motor to the top of the piston rod. This is the most important part and is sometimes easier with some help. What you need to do is place the EDFC motor shaft into the EDFC hex bolt. Now turn the EDFC motor 3 full rotations. At this point the EDFC motor should have started to thread onto the piston rod. Next, with your small flat head screwdriver, turn the top  shaft of the EDFC motor 2 full turns clockwise (shown below). Continue to switch  between turning the EDFC motor and top shaft in 3 or 2 specified full turn increments until the EDFC motor cannot turn anymore. The EDFC motor just needs to be hand tightened, not a lot of force is needed. Lastly turn the screw driver in both directions to ensure that the EDFC shaft can rotate freely.

NOTE: the EDFC motor or shaft does NOT need to be set to any particular position. Once the EDFC controller is turned on, it will self adjust.

With your small flat head screwdriver, this is the motor shaft of which you will be turning 2 full turns between 3 full turns of the EDFC motor.

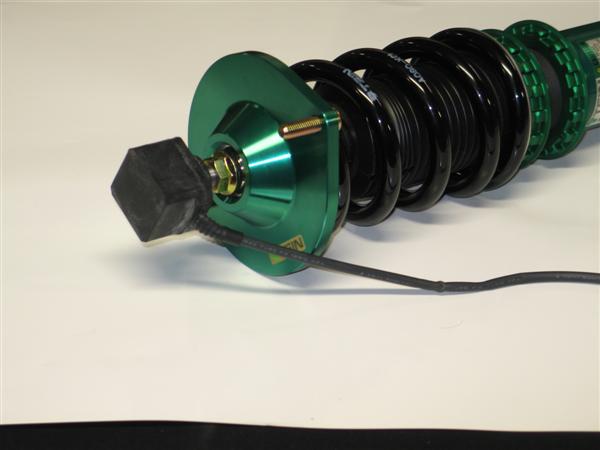
Now go ahead and bring the EDFC rubber dust cap up and cover the EDFC motor. Be careful not to rip the rubber cap. A little lubricant can be used to help install the dust cap. Be sure to confirm that the rubber cover is attached correctly. Otherwise dust or moisture entering into the cover may shorten the lifetime of the motor or cause trouble. Use a zip tie to secure the tail of the dust cap and wire harness.

One coilover all finished.

Now its time for the remaining 3 coilovers.

Last thing to do would be once the coilovers are installed, you can use the zip ties to secure excess EDFC motor wires out of the way of getting damaged.
Please stay tuned, I will be continuing with EDFC motor install on strut type coilovers (Regular and Inverted) w/anti-tangle strut kit  and EDFC Controller wiring install.

What is M.S.V?

A few years back, TEIN had developed the Micro Speed Valve(M.S.V) and applied it to the Comfort Sport, Euro Damper, Mono Flex, select Super Racing and the Group N. Dampers.

For some consumers, this little feature goes without notice. However, from a performance standpoint this feature pays big dividends in both ride comfort and handling performance.

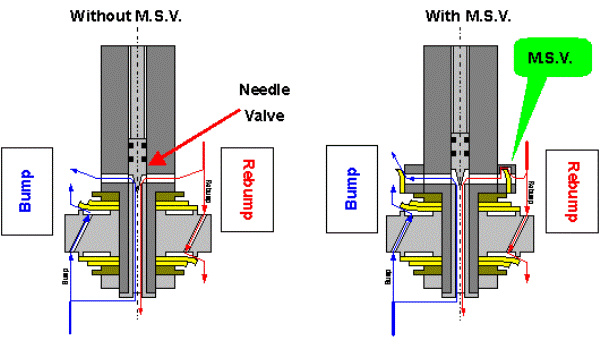
Here’s a simple diagram of how M.S.V functions

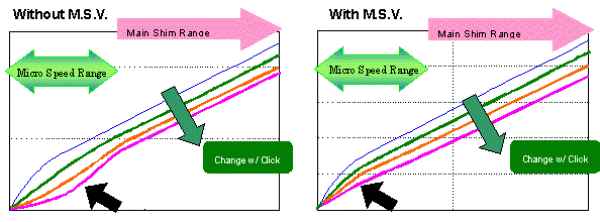
M.S.V functions best under low speed damping. (Basically any type of vehicle body movement is at low speed damping). Normally, a damper without this feature would have a slight dip in its damping curve which tends to worsen as the click adjustment is changed to a softer setting, as shown in the below chart

Again, this is much more beneficial under low speed damping, attributing to increased stability under braking, as well as quicker steering response. Not to mention that overall ride quality will be improved.
With M.S.V,  the damper will now have a much more consistent curve in damping. As mentioned, some consumers may not be able to differentiate such a change. But, to a rally competitor this item is just as beneficial as many of the components that comprise the Group N. Dampers.

TEIN is constantly looking for ways to improve our products. Through extensive testing and development under extreme racing conditions, we have been able to make products that work for the everyday driver. The M.S.V is one of TEIN’s proprietary features I think deserves notice.

First Time Driving @ US Circuit

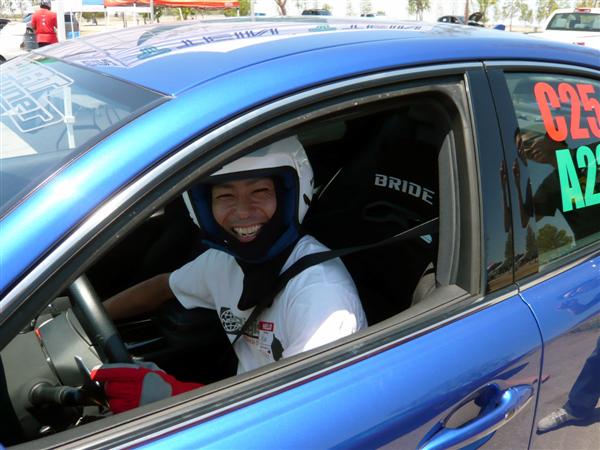
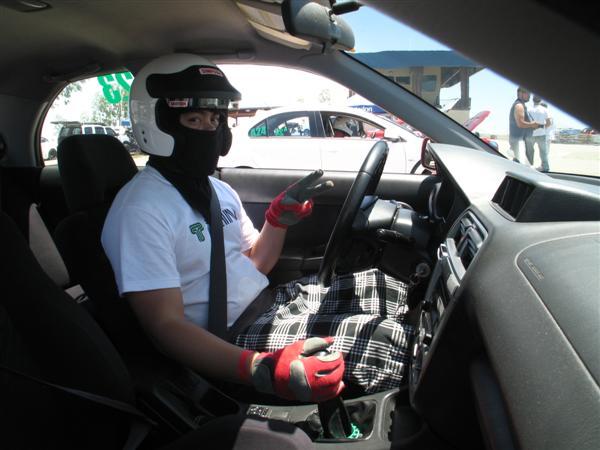
Hello everyone, my name is Yukio Hirayoshi. I am the accountant for TEIN USA. I came from Japan just a few months ago. I went to Buttonwillow Raceway with other TEIN USA staff on 6/19. It was my first time driving at a US circuit.

We arrived at 7:30a.m. I spent 2.5 hours from my house in Southern California to get to BW raceway which is near Bakersfield. On the drive I noticed how much open land there is and how I could see very far. I thought, ah, it’s America. There are not many locations in Japan like this.

My first impression for this circuit is really flat and open. I could see 60% of entire circuit from the pit.

I was entered in the beginner class. This class only allows passing on the home straight. It is a nice rule to drive safely for me.

The event organizers put orange pylons to mark braking, entrance and apex of corners which made it easier for me. I was surprised that you can drive with just a T-shirt and shorts at the circuit. It is one of the good things about America’s circuit because it was a hot and sunny day.

I did not drive so hard, only maybe 60%. I was just enjoying the drive and learning this circuit.

I had a chance to ride in the passenger seat of one of the instructor’s car, Greddy EVO X driven by Takeshi-San. It was fast and lots of fun. I could not say anything while sitting in the passenger’s seat because I was trying to hold on and watch driving line. I could see my co-worker in front of us with EVO 9, AWD cars are fast!

I had a lot of fun driving and riding as a passenger at this event. Next time I’d like to bring BBQ grill then my day will be PERFECT!

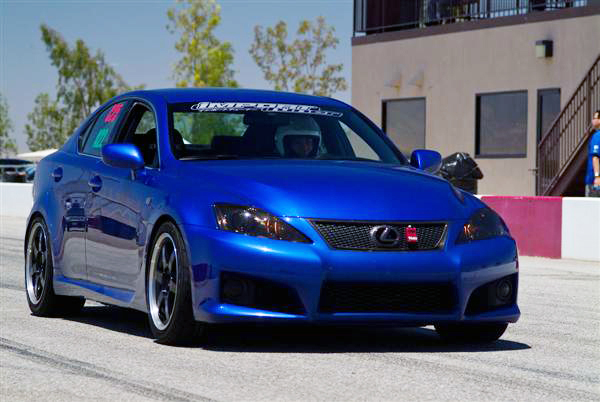
Thank you to the organizer – Industry Day and to Carter for letting me drive ISF.

Photos credits to Joey Leh of Octane Report, Jonathan Velasquez, Hannah H. and Naoko N.

Fun Times at ButtonWillow Raceway

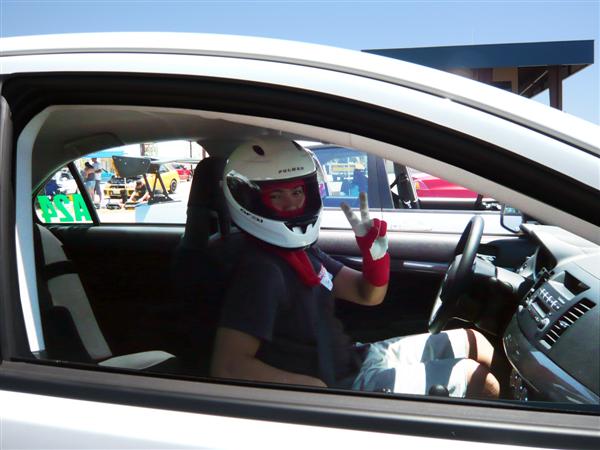
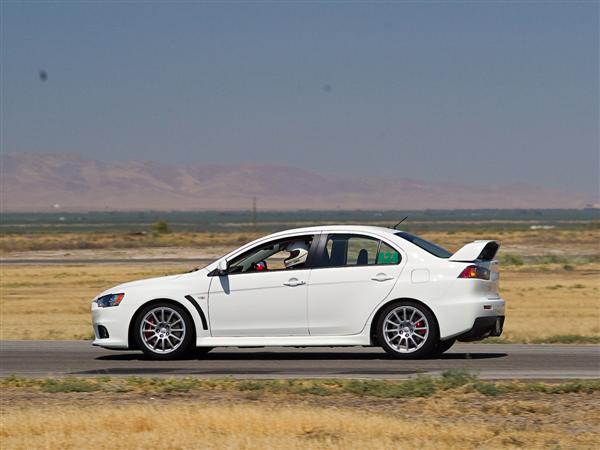
This past Saturday was Industry Track Day 6 at ButtonWillow Raceway. Six of the TEIN staff drove at the event in cars ranging from a stock 2009 Civic Si to a modified Lexus ISF. For two of the staff this was the first time they had ever been to a real road course. It was fun to see everybody’s lap times getting quicker throughout the day and hearing the light-hearted trash talking.

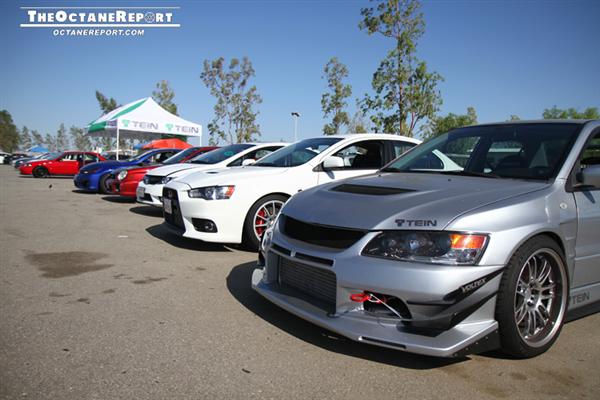
Staff cars lined up and waiting for the sessions to begin.

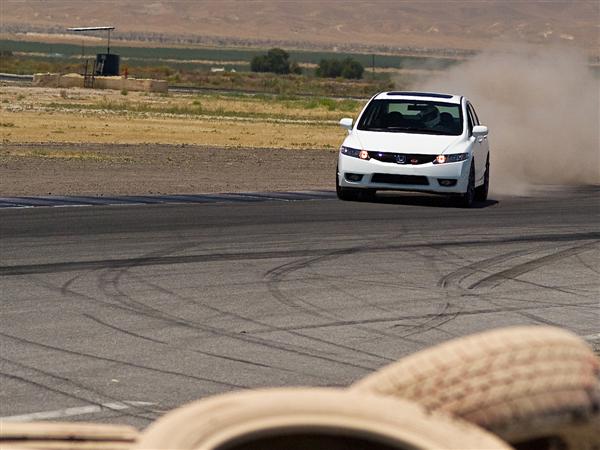
Ryan – 2009 Civic Si. All stock except for when he swapped to 17″ Gram Lights with Advan Neova AD07s in the second session. Best Time of the Day 2:29

Drifting an FF?

Birthday boy Jon – 2010 Evo X. Mono Flex coilovers, EDFC, SuperPro RCA. Best Time of the Day 2:20

“It’s my Birthday and I’m 2 yrs old.”

First time at the track with the new car. So Clean.

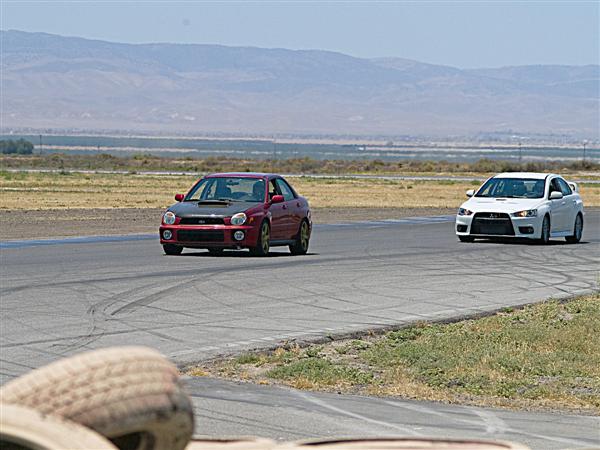
Paul – 2002 WRX. Engine bolt-ons and S.Tech lowering springs. Best Time of the Day ~2:19

Paul resembling Subaru ace Roger Clark with the open face helmet and mask.

Philip – 2006 EVO 9. 365WHP and lots of mods. Best Time of the Day 2:09

Cruising around.

Nakai and Hirayoshi – 2008 Lexus ISF. Performance version Comfort Sport coilovers, EDFC, LE-37s, Neova AD07s and a few minor bolt-ons. Nakai’s Best Time of the Day 2:11, Hirayoshi’s Best Time of the Day 2:27

Cooling off between sessions. This thing sounds mean with custom Fujitsubo exhaust and paddle shift 8 speed.

It was a fun day to hangout outside of the office, joke around and DRIVE. Everyone is already looking forward to the next event.

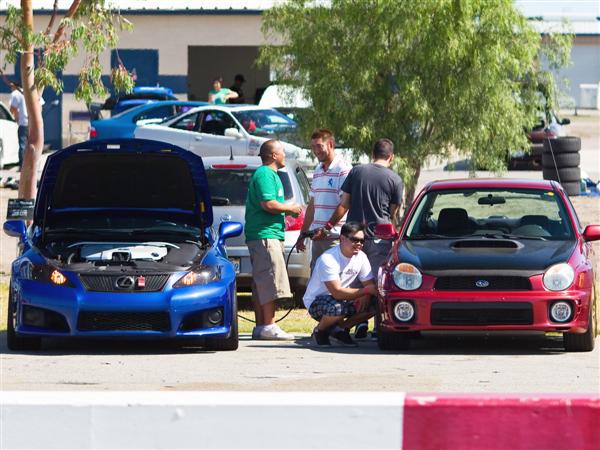
Checking Tire Pressures and comparing driving lines between sessions.

Paul keeping Birthday Boy Jon behind him. Jon’s cries of “Let Me Pass” could be heard from the pits.

Fun Times.

Go to the OctaneReport to see more coverage of the event.

Photos courtesy of Joey Leh of the Octane Report, Jonathan Velasquez, TEIN staff and wives.

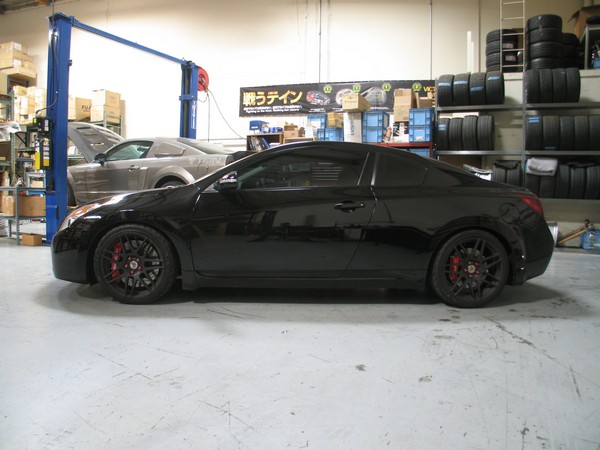
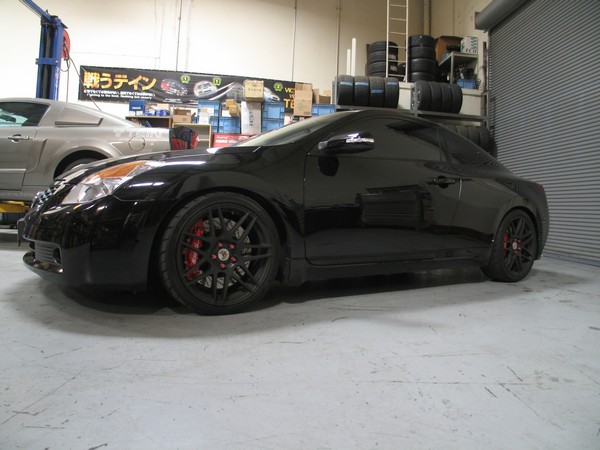
08+ Nissan Altima Coupe 3.5 Lowering Springs

Lowering Spring testing for the 08+ Nissan Altima Coupe 3.5L V6 Cylinder models has been completed.

The S.Tech Springs, which will be available shortly, for the 3.5L V6 models.

The ride height drop for the 3.5L V6: Front -50mm and Rear -50mm,

The actual drop may vary by models due to the weight of different components (ie Transmission, Packages, etc.)

We will also be conducting Lowering Spring testing on the 2.5L I4 Coupe, 2.5L I4 Sedan, & 3.5L V6 Sedan soon.

SuperPro Roll Center Adjusters

TEIN is the exclusive distributor for Australian made SuperPro brand of polyurethane bushings. We recently got some SuperPro roll center adjusters in stock. One of the guys here with a new EVO X decided he wanted a set so I took pictures of his install. Since the front lower control arms needed to come off this was the best time to also upgrade the front arm bushing as well.
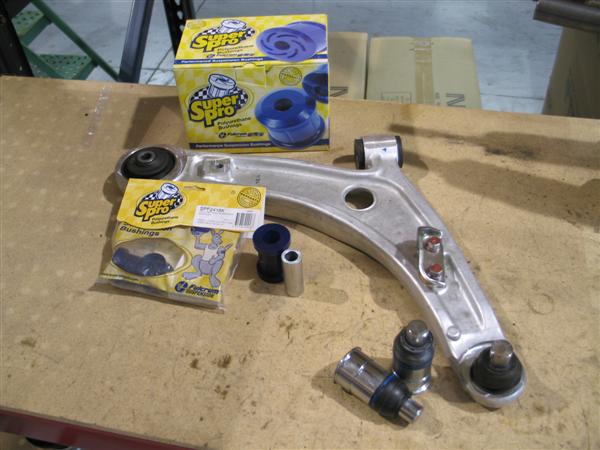
Here is a picture of all the new parts.

SuperPro RCA for EVO 8/9/10, Part # SPF-FPR-004

SuperPro Polyurethane Bushing for front lower control arm – front inner, Part # SPF2418K

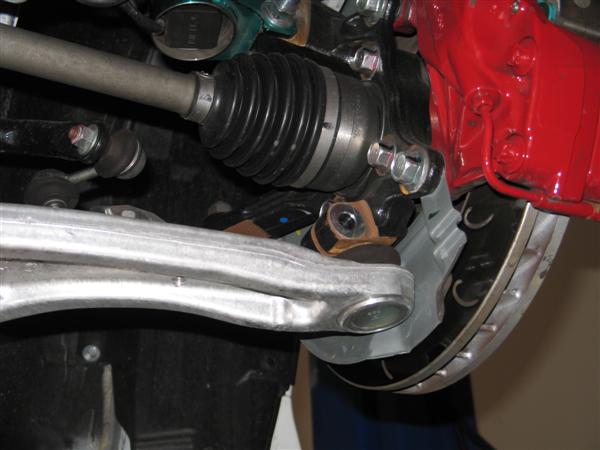
Remove ball joint to hub bolt, disconnect swaybar link and two bolts securing the inner points of the lower control arm.

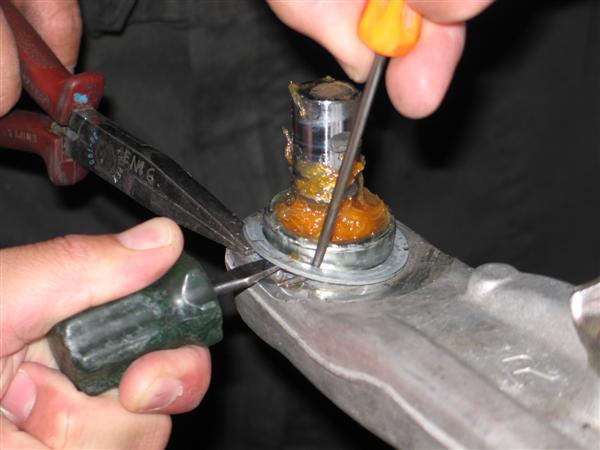
Pop the dust boot off and remove the C-Clip. An extra set of hands makes things easier.

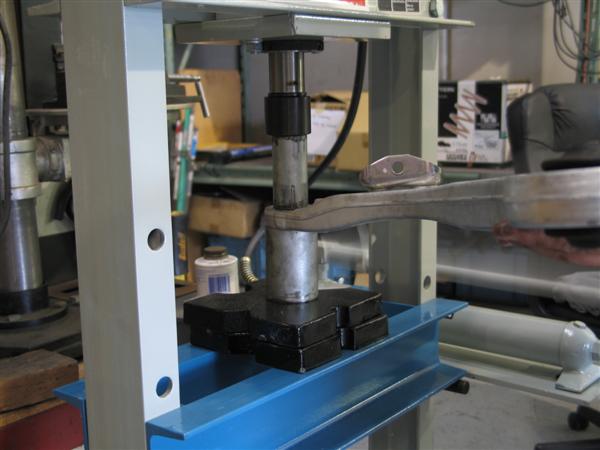
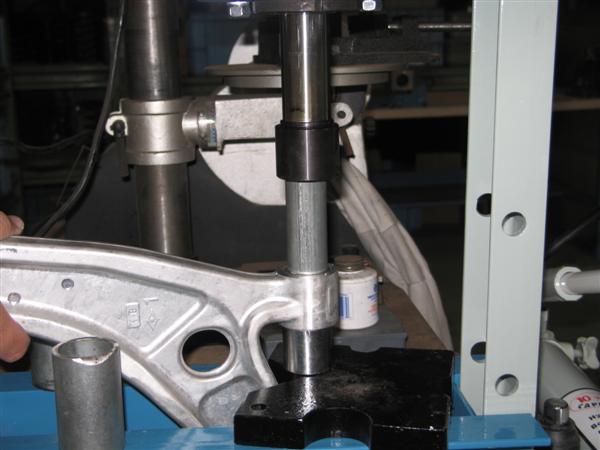
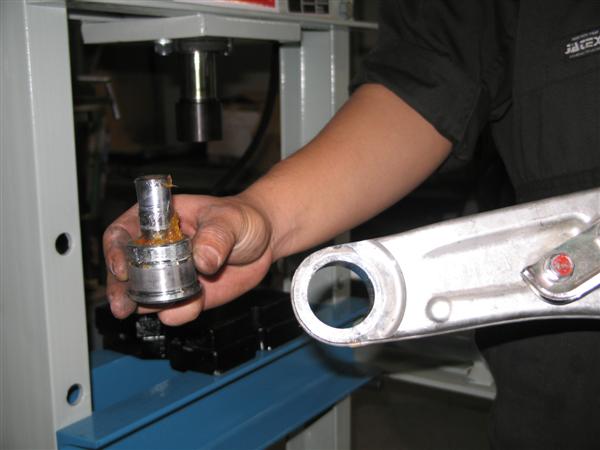
Easiest and safest to use a hydraulic press to remove the OEM ball joint. Other option is a rent or buy a ball joint tool kit. Note that on the underside of the arm a small ring of aluminum may break off or stretch when the ball joint is pressed out – this is normal.

OEM ball joint removed. Cleanup any heavy scratches to the arm (there should not be any if the press was used properly).
Here you can see the OEM ball joint next to the new SuperPro unit. The SuperPro unit has a taller base instead of a taller shaft like other manufacturers. This makes it more rigid.

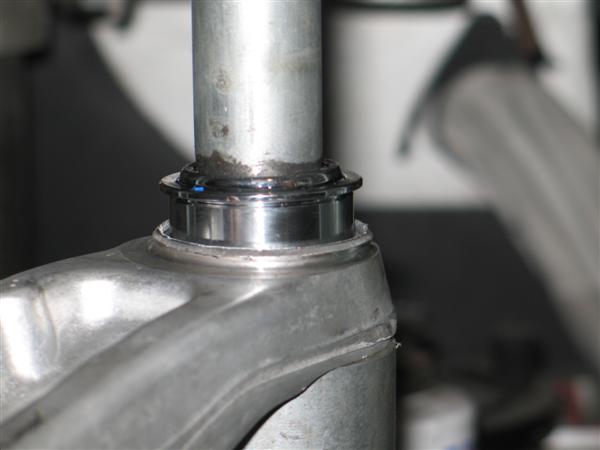
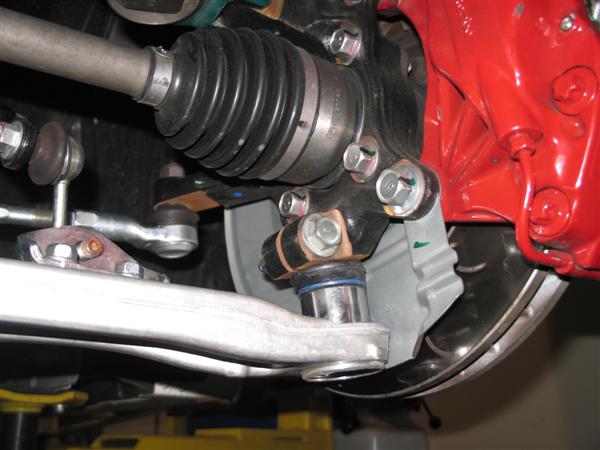
Press in the new RCA. Make sure the RCA sits all the way in which will make the groove for the C-Clip flush with the top of the arm.

Install the C-Clip.

Pressing out the front inner bushing. Takes a little creative positioning to get everything to line up perfectly.

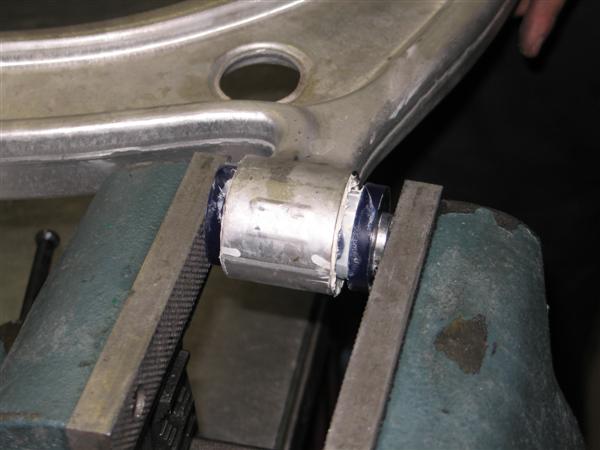
Cleanup the arm from any scratches and install the new SuperPro bushings. Use plenty of grease and insert the two bushings first. Then grease the pin and use a vice or press to push it in.

Arm installed. You can clearly see the height difference. Make sure to torque all bolts to factory settings.

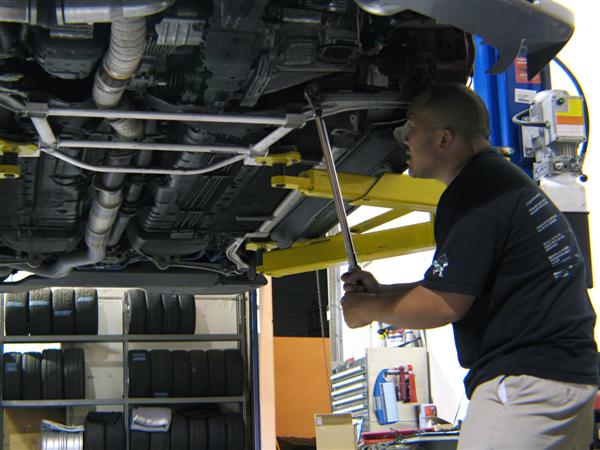
This bolt should be tightened and torqued while the car is at 1G so that the bushing’s natural position is at ride height and not full suspension droop.

You will notice that the SuperPro kit does not include new taller tie rod ends. According to SuperPro engineers new tie rod ends are not needed but due to high consumer demand SuperPro will be including new tie rod ends in the near future.

Lastly have an alignment done as both camber and toe will have changed.

Preparing for the Track

This coming weekend will be the Industry Track Day (ITD) at Buttonwillow Raceway in CA. The course is most famous for US Time Attack. ITD is designed for persons working in the aftermarket automotive industry to get together and have some fun. Six members of the TEIN staff have signed up for the event and this is about what we think is important for anyone going to the track.

Here is my normal routine before going to the track.

FRESH FLUIDS

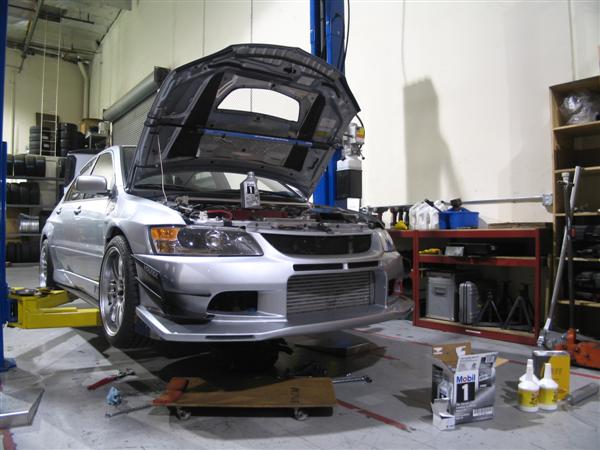
A week or few days before I go to the track I give the car a thorough inspection and fluids change.  I do not recommend doing it the night before because it does not give sufficient time to check for leaks or fix any problems that you might find.

For my car a fluid change consists of engine oil, oil filter, transmission oil, transfer case oil, differential oil, and brake bleeding. It may differ for various persons but I would rather spend $50-75 on fluids than potentially damaging  something. At the very least I think engine oil is a must. Before and after the fluid change I carefully inspect for any leaks. Lastly I check and top off fluid levels for: brake/ clutch reservoirs, coolant, power steering, etc…

Inspection and Torque Check.

Using a service manual I go over all the major suspension bolts to ensure they are tight and torqued to factory specs. I visually inspect the suspension components, exhaust components, wheels/ tires, engine/ drivetrain for cracks or damage.

Especially for the suspension I re-torque all the knuckle bolts, control arms, top mounts (camber bolts) and all the seat locks on the coilovers. Next I use a paint marker to mark the position of the bolts and nuts  so I can easily see if anything is getting loose. I think spending a little time in the convenience of a garage is well worth the peace of mind and security of knowing your car is in top condition.

Reference Material
Torque settings for TEIN coilovers:

  • Top nut varies depending on kit and application, see instruction manual.
  • Four small camber bolts on top mount should be torqued to 12.3-13.7 ft-lbs
  • The lower bracket lock. Strut type should be torqued to 101 ft-lbs and SA type 51 ft-lbs.
  • The spring seat and lock should be torqued to 41 ft-lbs.

At the track you can expect a tech inspection before your car is allowed on track. Most tech inspections include checks for:
Leaking fluids, wobbly wheel bearings, tire condition, secure battery with covers over the terminals, secure seat, proper safety belts, working turn signals and brake lights, helmet check and removal of any loose items any where inside/ outside of the car.

You can usually download the tech inspection sheet before hand and is a great check list prior to going to the track. Some organizers also have shops which can tech your car prior to the track event.

Items to bring

Lastly I pack up my car with my track essentials:

  • Vehicle Jack
  • Jack Stands
  • Simple hand tools
  • Torque Wrench (especially important if you run aftermarket lug nuts or spacers as lug nuts should be re-torqued before every session)
  • Various sized zip ties
  • “Racer’s Tape” – duct tape
  • Tire Pressure Gauge
  • Extra 1-2 quarts of fresh engine oil
  • Helmet and proper clothing (ensure the helmet rating meets track organizations standards)
  • Drinking water and maybe even a small ice chest
  • Sun Screen and a hat

Now that all the preparation is complete, it is time to have some fun driving the car that I have spent all my money and time modifying.

JDM MINI VANS

I have been asking my co-workers in Japan what are the hot new cars and they always say that the most popular applications for TEIN Japan are for Mini Vans. I couldn’t believe it. Why would people buy a Mini Van when they can get used Type R, Skyline, S15, S13/14 with OEM SR20DET, GC8 STI, etc… for good prices. They tell me that younger generations are not as interested in speed, power and handling as past generations. Young people want convenience, comfort, good gas mileage, storage space, etc… Sounds like my dad. So I decided to look into the JDM mini vans and here is what I found.

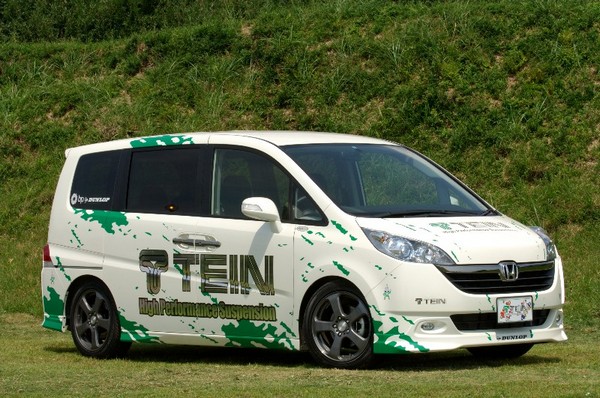
Honda StepWagon RG1

This is the Honda StepWagon. Not a fan but it is actually one of the most popular mini vans in Japan. Since Japan is small and the roads are tight, many new cars are built taller to provide more room. If the car is too wide it has limited areas to park and is hard to drive on narrow residential streets. Already on its fourth generation. Automatic sliding doors on both sides, K20 or K24 power and CVT.

Toyota Estima ACR50W

These smaller mini vans look more like wagons then vans. They even have a hard time out in Japan trying to classify these vehicles, but they finally just classified them as mini vans. This is the Toyota Estima which is the JDM name for Previa. Ultra popular with available V6, sliding second row seats with foot rest, power folding third row, etc…

Toyota Vellfire GGH20W

This Toyota Vellfire (variant of Alphard) is considered a full-size “mini van.” To me it looks like a bug with two separate set of eyes. For some of you out there, you might be asking yourselves why does this car have two sets of headlights. Well it seems that it was just a design change for the Vellfire version. One is actually for High Beams and the other for regular headlights. This is a baller mini van. Features include voice navigation, blind corner monitor, self parking system, auto cruise, lane monitoring system, etc… the thing almost drives itself. Price tag can go up around $60K.

This is a decently popular model and the only one out of all the mini vans in this post that I would actually consider purchasing, a Honda Stream. (I’m not a fan of big cars, I drive a CR-X). The higher end model comes with 2.0L, 150HP, CVT with paddle shifters. Sits 5 and has plenty of space for my pitbull, Mykaela.

Honda Stream RN6

These are just some of the mini vans that they have in Japan. TEIN develops many coilovers for these applications including Basic Wagon, Super Wagon, Basic Flex Wagon, Super Flex Wagon, Super Flex Wagon SUPER LOW DOWN, GT Wagon and Hybrid Wagon Damper (Hydraulic Ride Height Adjustment).  The mini van applications are the best sellers in Japan. These coilovers can be purchased through any of our authorized dealers as a special order but unfortunately they would not fit anything here in the US.

TEIN Coilover PRICE DROP

As of today, June 14th, TEIN USA has lowered the MSRP price on all* BASIC, Super Street, Super Street with Mounts and FLEX coilovers.  Price decrease is about 10% which relates to some significant savings. On some part numbers the price has changed by $290. Median price change is $160.

The product remains completely unchanged. This is simply a price drop. If you have been saving your money for a set of coilovers now is the time to buy TEIN.

Do not settle for inferior products. Many of the cheaper brands have come and gone over the past few years. Once they are gone there is zero product support/ service. TEIN has been producing coilovers for 25 years and we are growing. We test fit each application, coilovers are made in-house and we have two US locations for product service.

*Price decrease does not include special order JDM applications.

Quick Click Fixes

The TEIN adjustable damping force coilover click adjuster is commonly misdiagnosed part. Misdiagnosed because many customers with stuck or broken adjustment knobs (click assembly) think that repair or replacement requires the damper to be sent to us for repair. For many stuck adjustment knobs a new replacement click assembly is not required. Here are some tips you can use if you encounter a stuck click adjuster or are looking to replace a broken unit.

Click adjuster or Adjustment knob may be located at the top and/or bottom of your coilover depending on type.

Stuck or seized Click Assembly

A click assembly that does not turn smoothly or turn at all may be a quick and easy fix IF there is enough space to work on the unit.  The problem is usually caused by debris getting lodged in between the knob and knob base.  Between the two halves there is a spring loaded ball bearing (located under the knob) moves into machined divets (located on the knob base). Debris can stop the movement of the ball or become lodged into the divets. Another cause could be moisture build up inside the coilover piston rod causing the small hex bolt to seize. THE FIXES:

1) Try to use compressed air to dislodge any dirt or debris between the two halves of the click assembly.

2) Remove the click assembly. Then clean and re-lubricate the hex bolt.

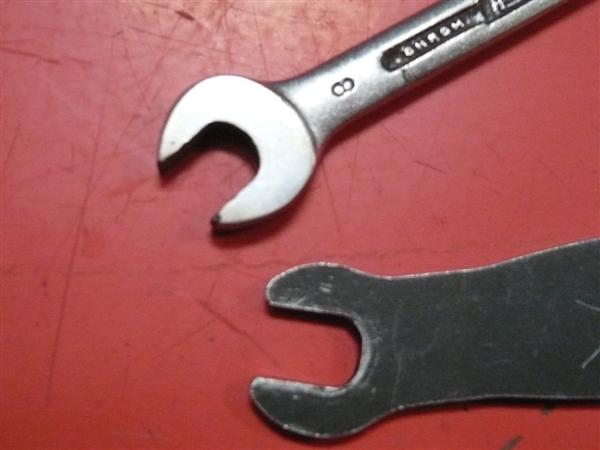
A TEIN Click Assembly Wrench (black), Part #SST01-F1126, MSRP $5 can be purchased from our online store.

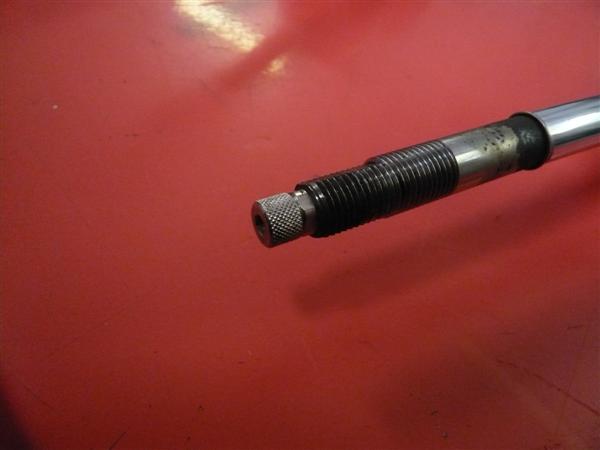
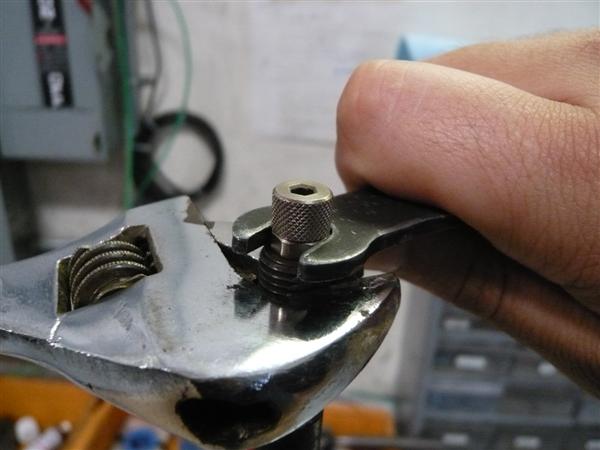
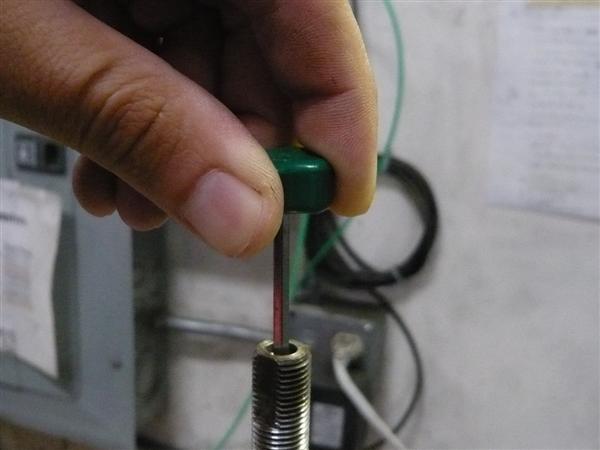
To do the second fix you will need a TEIN 8mm wrench or a modified standard 8mm wrench (grinded to 3mm thickness). Use the 8mm thin wrench to remove the click assembly (see image below). A crescent wrench can be used to keep the piston shaft from spinning (be sure not to damage the threads on the piston shaft). Next use the click adjustment tool or a 3mm allen wrench to remove the hex bolt (see image below).

Using the TEIN Click Assembly Wrench and a crescent wrench to remove the click assembly.

After the click assembly is removed use the click adjustment tool to remove the small hex screw inside the piston shaft.

Both click assembly and hex bolt can be cleaned with some mild parts cleaner.

Scroll to the bottom on instructions for re-assembly.

Note: TEIN coilover kits do include a rubber add cap to prevent moisture and debris from forming but I would still recommend checking the assembly once in a while.

Replacing a broken click assembly

The click assembly can break in two different places. One, the top half of the knob (knurled section). Second, is the bottom tip of the click assembly (resembles hex bit or allen key).

Replacing a broken click assembly may be a little more work if bottom tip has broken off inside the piston shaft. This may require the coilover to be removed from the vehicle if it cannot be easily removed.

First remove the click assembly using the same method stated above.

This is what the click assembly looks like when the top half is missing.

After the click assembly is removed inspect it to see if the bottom tip is intact or not.

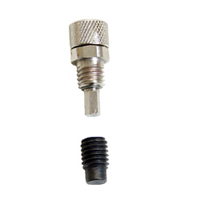
This is a complete Click Assembly (silver) with Hex Bolt (black).

You can see the click assembly has a knurled top section, 8mm hex and threaded section and bottom 3mm hex tip.

This exact assembly can be purchased on our online shop, Part #SPS12-G0047.

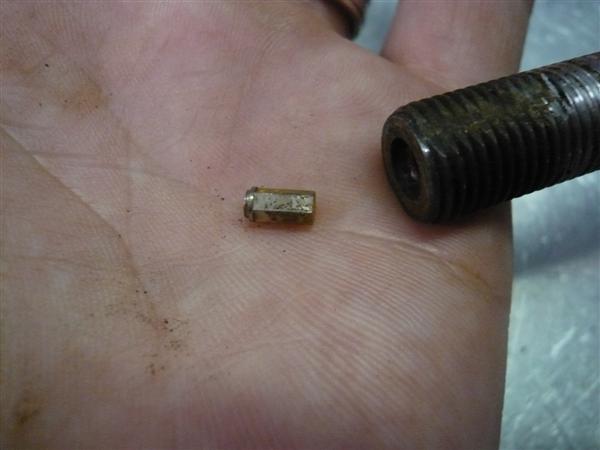
If the bottom tip has broken off extract it with a pick tool or magnet. If the tip is stuck in the hex screw you may need to use lubricant and lightly tap the piston shaft to help dislodge it. In this case the plastic end of a screw driver or plastic hammer works well. Be careful when using a tool to extract the lodged piece as the inner and outer threads can be damaged. Use Caution.

Broken piece of the bottom tip of the click assembly.

Installation of Click Assembly and Hex Bolt

With the click assembly off the piston shaft and hex bolt removed. Clean and lightly lube the threads inside the piston rod with light grease. When installing the new click assembly and hex bolt, you can use the click assembly, click adjustment tool, or allen key to thread in the hex bolt. We recommended to insert the hex bolt about 3/4 of the way to allow the click assembly to catch the hex.

Insert the bottom tip of the click assembly into the hex bolt and screw in.

Tightening the click assembly to 12 inch pounds torque or snug (do not over torque).

Check to make sure the click knob can rotate smoothly in both directions. Then adjust click knob to desired setting. Remember turn the click knob to full clockwise position (Zero setting or stiffest setting), then turn counter-clockwise to desired position (16 setting or softest position). Click assembly may click more than 16 times but going past 16 clicks does nothing for adjustment and repeatedly exceeding 16 clicks may cause internal shock damage.

If the click assembly or hex bolt can not be removed it may be required to send in the damper to determine condition and have the parts removed. Worst case scenario would be a new piston rod with overhaul (this is a rare case scenario).