Coil Spring Material

I know some (if not all) of you people really care about what you buy. Although many of us are not engineers, we can tell good designs from bad designs. What we cannot typically tell is what are good materials and bad materials simply by looking at pictures.

Lowering springs can be found by many manufacturers. Many of them claim to use the same materials as “such and such well-known brand”. And they may be correct (since there are several spring manufacturers that let small brands outsource through them). But, some small brands may request a different material to get their price point way way down. These days, a set of good quality springs can average the $275 mark. Anything below that is not necessarily questionable, but I’d be wary of them (unless it is a discounted price from a known brand and reputable retailer, and you can confirm the product is authentic- beware of counterfeits!).

To get right to the point, TEIN uses SAE 9254V, which is a Chrome Silicon Vanadium alloy. This is not an uncommon material. Many well-respected brands state this alloy as their material of choice for their springs.

nothondaaccordstech2013

So, we get this Chrome Silicon Vanadium wire, which is in a “soft” state, and feed it through a machine that first draws out the wire and straightens it, then pulls it through a mandrel that makes the wire diameter consistent. Then we can feed it through our machine to form coil springs.

SAE 9254V preform

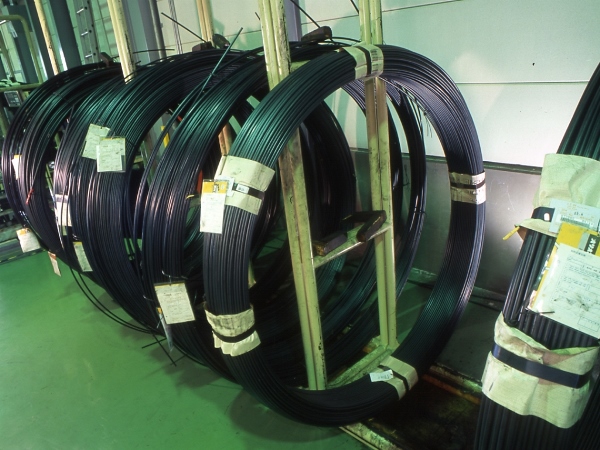
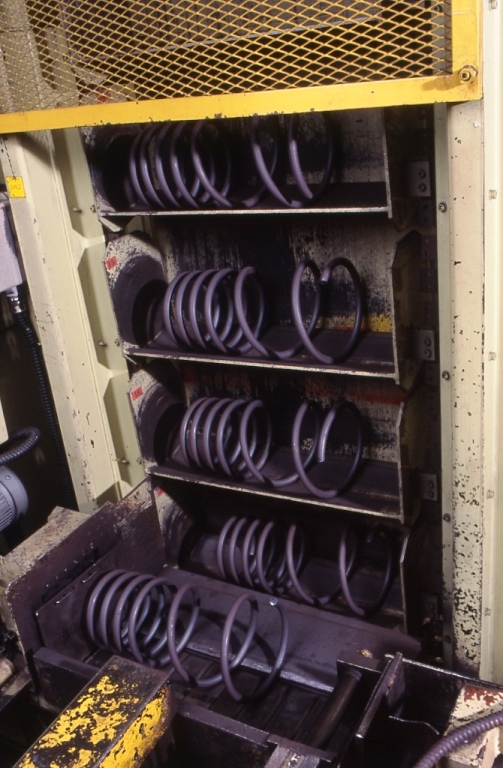
These massive hula hoop looking things are the chrome silicon vanadium steel wire we use for our springs. Still in a relatively soft state, it will be fed through dies to straighten out and ensure consistent diameter before being fed through a computer controlled coiling machine.

Coiling of the wire alloy is done in a cold state (not ice cold, btw). This is done “cold” because most all of our springs are not very large in wire diameter. It’s easy for us to form in such a condition. It’d be a different story if our coil springs were used for trains or huge trucks. This method also eliminates one step- preheating the wire, which can alter the alloys molecular structure and potentially weaken the material.

Coil Forming

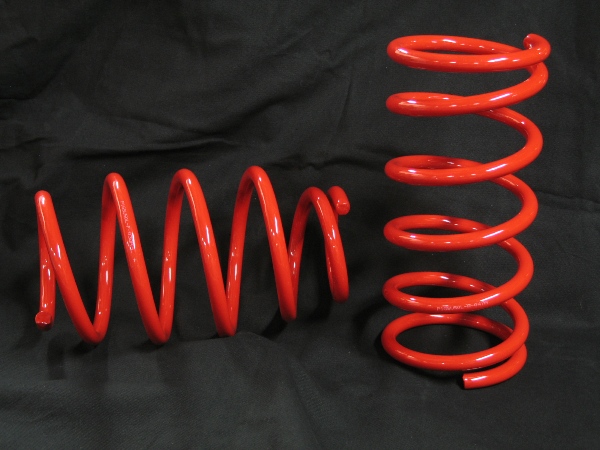
If you’ve read other articles about coil spring manufacturing, you’ll hear it likened to pasta being formed. These computer controlled machines can make adjustments as wire is being fed into the machine, allowing us to make many different shapes of springs, like our taper or barrel springs. This is what sets spring manufacturers apart from one another. Each manufacturer has their own design.

There is still a heat treatment step to follow our process anyway, which is the next step after cold winding. This adds strength to the alloy by realigning the molecular bond of the alloy. Close attention is paid during this step, as it needs to be timed properly and at the correct temperature. Improperly heat treated springs can either sag or break, depending on how long the heat treatment process went.

heat treating/tempering

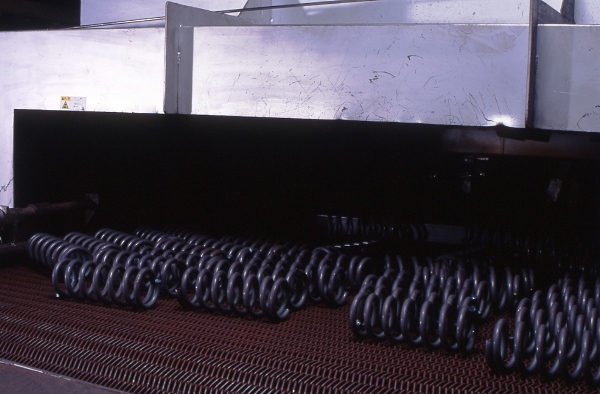
Finished coil springs which have been cut from the coiling machine will next go through heat treatment. Cold forming of the coils can alter the molecular structure of the wire, so heat treating helps to realign this molecular bond prior to the next stages of processing.

Depending on the vehicle application, the next step is flat grinding the spring ends. This is important because this allows the spring load to be evenly distributed across the spring’s surface area. However, this is only an important step if the factory spring design requires flat grinding. In other words, the springs we make must have matching ends to the factory setup in both the spring perch and upper seat assembly.

flat ground

IMG_0349 (Flat Ground Spring End)


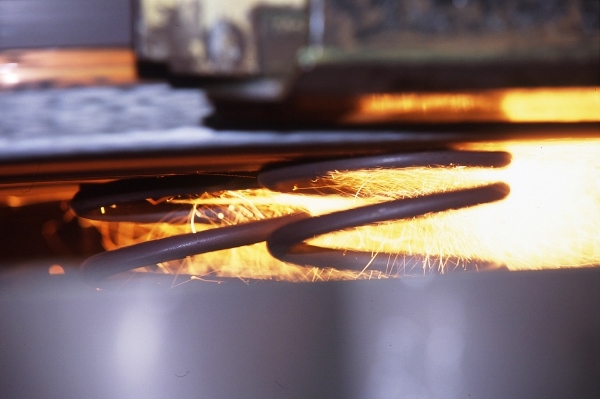
Our shot peen process is the next step. This takes tiny steel balls (called “shot”) and impacts the spring at high velocity. This is a stress relieving process. Impacting the spring surface is likened to a blacksmith hammering a piece of iron. It shapes and compacts the surface, giving it strength. This, however, leaves the core of the wire spring “soft”. That is what you’d want, because if the inner core of the wire spring is strengthened, it can make it brittle.

Finished Wind

The heat treated coil springs will then be sent to shot peening for stress relieving and surface compaction.

We then go through a Setting process, which puts the spring under load for a specified period of time and at an elevated temperature. This lets the spring settle to the correct length and is also a quality control measure. After setting, we inspect the springs to make sure they fall within specification prior to the final step- powdercoating.

Presetting

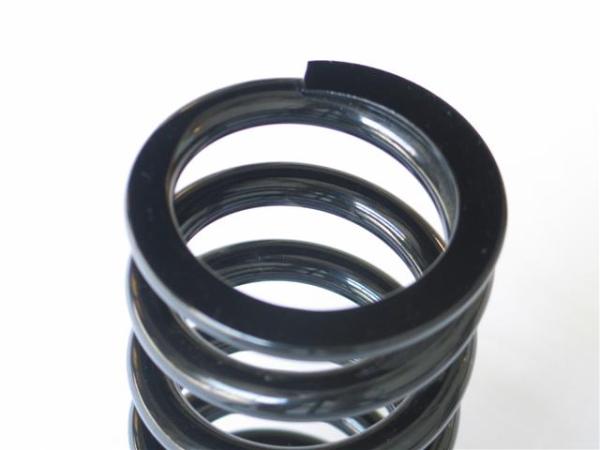
We use a urethane powder paint, but prior to that, we apply a zinc powder base for corrosion resistance. They are baked on at the same time and can last the life of the spring.

Powder Painting

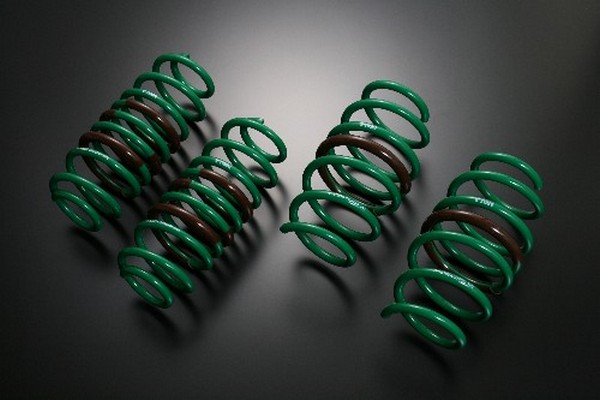
Our 2-stage powder paint process ensures a long lasting spring with excellent surface corrosion protection.

Labeling

Labeled springs will go through a final stage of inspections prior to pairing and packaging.

We have a great success rate with our springs. While we do offer a 1 year warranty against spring sag (more than 5mm), it is not to say that a spring will never sag. The repetitive cycling of a spring (compressing and extending) weakens a spring over time. However, the materials and processes we use provide a very long lasting spring. It is not very common for us to see a spring that has sagged, even after years and well over 150,000 miles of use.

Nothing much changes when we manufacture our springs for coilovers. The same processes are used. The only exception is our Racing Spring line.

Racing Springs use a SWOSC-KV material, which offers very similar properties as our SAE 9254V springs, but we can now make a much more lightweight spring. That’s a benefit when trying to keep weight of a race car down. This weight savings is accomplished by winding a spring with less material. The only downside to such lightweight springs is the spring stroke maximum. These have much shorter stroke length for a given spring free length and wire diameter. Exceeding the design’s spring stroke can cause them to sag.

Spring design is critical, for obvious reasons (performance being one of the main ones). But material is just as critical, if not more so. We want to utilize the best material that won’t cost a pretty penny. So, when looking for springs, be picky about the ones you really want. Know that TEIN puts a lot of time to engineer a great performing product at a great value.

As we’ve mentioned, a well engineered spring can make a world of difference, especially in terms of safety.


Bump Stop Trimming

Without a doubt lowering springs is easily one of our biggest sellers. It’s a simple upgrade for someone wanting to lower their vehicle but not wanting to really sacrifice much in the way of ride quality, and it’s also much more affordable than a coilover kit. This is an especially common upgrade for people with newer vehicles, or cars still under warranty (or maybe they don’t have much to spend since they just got a new car).

As many of you may know, we make our lowering springs compatible with factory (OEM) dampers. Not necessarily in just fitment, but also in spring rate. Our lowering springs are not very aggressive. If you take a look at our lowering springs’ specifications for your vehicle, you may see that the ride height drop is not too aggressive (maybe better than some other manufacturers). Some other applications of our lowering springs may seem to be very aggressive. It’s all a matter of how much room we have to play with when designing our lowering springs.

Most important for customers is reducing the tire to fender gap. As of the past few years, the request is for a “flush” fitment, where the tire just closes up the gap with the top of the fender opening. As much as possible, we want to create that type of fitment for the customers, even making a staggered ride height drop for front and rear to achieve a nice and even wheel gap. But, where we reach limitations is the factory damper stroke length.

Some factory suspensions have very limited stroke length, and this makes it increasingly difficult to design a spring that will aggressively lower a vehicle. That isn’t the only limitation. We look at clearance with the fender, within the wheel well, as well as how it may affect steering/suspension geometry. We always design our lowering springs to give you the most ride height drop in as safe a level as possible.

So, in regards to trimming bump stops- why is this important? If we find that aspects, other than damper stroke length, seem to be very generous, we know that we can make a lowering spring that will work with a shortened bump stop. So we include a chart by vehicle application that shows how much you will need to trim for front and rear when installing our lowering springs.

Some cases may require a different type of trimming style for the bump stop. Typically it is just trimming the bottom portion of bump stop and retaining the top piece (A Type). Sometimes it’s the reverse (B Type). In other cases, you may need to trim a middle section and retain the top and bottom piece (C or D Type). See below the different style cuts we recommend, depending on the vehicle:


bump stop trim style

We know several customers skip the bump stop trimming step. This can cause several issues. We’ve added this measure so that you can retain a bit more stroke length at the newly lowered ride height. This also helps improve ride quality. Because the bump stop is made of a high durometer polyurethane material, it is like a secondary spring, but a really stiff secondary spring. Since the dampers are not valved to handle such a stiff secondary spring, it can make rebound feel really harsh. Some may say bouncy. Constantly hitting the bump stop can cause the damper to prematurely wear or potentially blow out, too.

bump stop trim 001

Bump Stops come in all sorts of goofy shapes. Mind you, these were engineered with a specific design.

bump stop trim 003

The bump stop itself is a really lightweight piece, but it is of a high durometer and takes a lot of force to compress. At least it is easy to cut into.

Fortunately, you can cut easily into the bump stop using a box cutter/safety blade. It slices pretty easily.

bump stop trim 004

Here’s a picture of a 2015 Camry bump stop. This is a more typical design that we see- top is a larger outside diameter and tapers, with billows that make it easier to determine which section we recommend trimming.

bump stop trim 005

Using a safety blade, we’re able to cut a bottom portion of the Camry’s bump stop. We’ll be retaining the larger piece on the left and reinstalling onto the front strut.

bump stop trim 006

This bump stop uses some plastic ring, likely to control the bump stop’s compression. In our case, we need to trim a middle section.

bump stop trim 007

We cut this into three pieces, and the middle piece will be removed. The remaining top (left) and bottom piece (right) will be reassembled on to the damper.

So, while you will have your suspension taken a part for a little while when installing our springs, take the time to see if your bump stops will need to be trimmed. Check the included instructions with our lowering springs to find out that info.

Specialized Lowering Springs?

We rant on and on about our ability to make custom damper kits for vehicles, especially vehicles that no longer have any aftermarket support. This program is the easiest way to get a custom set of suspension made for an otherwise obsolete vehicle.

What we fail to really mention is that we have the ability to do custom springs. Actually, we take that back- we have mentioned that, because some kits don’t allow the use of a ride height adjustable setup. For vehicles that utilize a spring separate of the damper, we custom wind springs specifically for that application. So, there you go! We can make custom springs for you!

We recently did a set for Toyota. While we cannot cough up the details just yet (I’m sure you can figure it out if you search hard enough within this post 😉 ), we’ll just say it is for a platform we don’t already have product available for. And actually, they weren’t looking to do much to this car. The request was a set of lowering springs that would give the car a 1″ drop front and rear.

And here they are:

SPD (Toyota Highlander Lowering Spring) 003 resize

If you’re thinking “What the hell is an Eibach spring doing in a TEIN blog post?”, well then that’s a burn. This red color was at their request. That’s fine by us. We can basically do custom colors anyway. So if they want red springs, red springs it is!!!
We must mention that custom springs are not cheap. A set of four coil springs go for $700 retail. Ay yi yi!!! However, if this is something that may lead to a person wanting to do a private line of springs through us, the cost (which includes a development fee) will basically be covered on the first spring order. Not uncommon, as we’ve done that before, especially with our coilover kits.

We can also do remanufactured springs (springs of an older/discontinued line). Those start at $560 retail for a set of four.

The only types of springs we do not manufacture are torsion beams/bars or leaf springs.

So, if you have a need for custom coil springs, give us a ring. We can definitely help you out!!!