
With the release of the current body style Civic FLEX Z Coilovers, we have been receiving more and more inquiries of how the EDFC Motors would mount, specifically the rears due to its limited accessibility. Luckily a close friend of ours was interested in the EDFC Active for his vehicle so I went ahead and did the install for him.
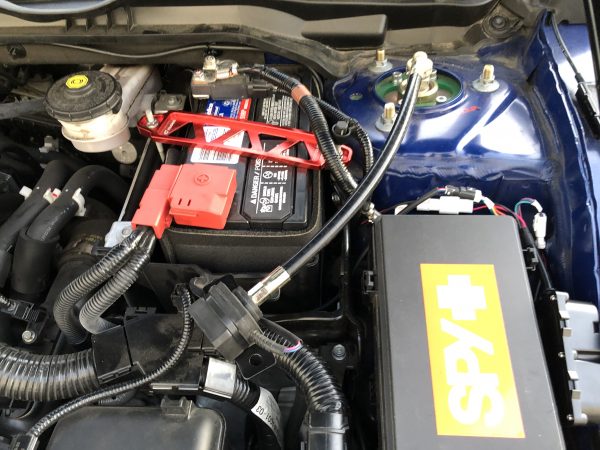
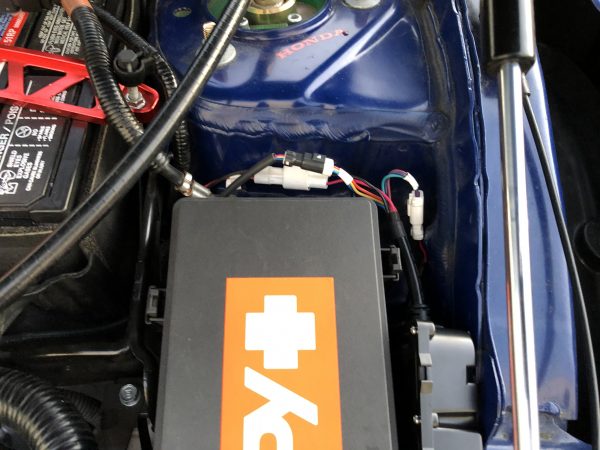
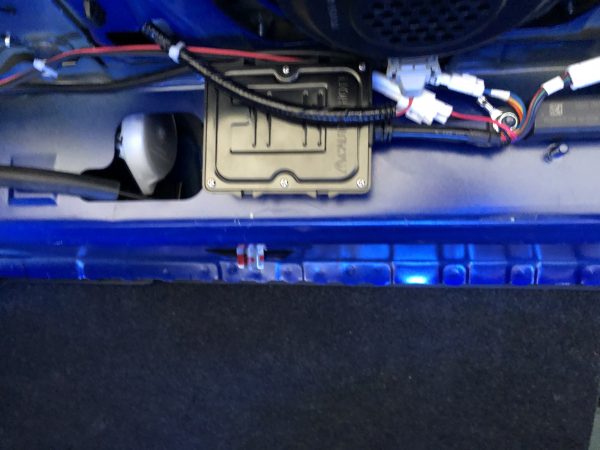
Since I had never really had a chance to look over the vehicle you can say I went into this blindly. Initially accessing power for the EDFC Active controller and driver units seemed to be impossible (at least in the engine compartment area) without requiring modifictions. I basically just wired up all three to the main fuse box under the dash. Also for reference, the Driver Unit power cables are be able to reach the main fuse box under the dash, the rear being longer and front slightly shorter in length. I was under the impression that they were the same length. The front Driver Unit was installed next to the Engine Compartment Fuse Box and the rear was placed on the backside rear bulkhead. Both were in decent areas for placement. However it’s eventually up to you on the placement for the driver units. Just make sure the heat sink portion of the driver unit has enough space to dissipate heat. Power source was setup first as I wanted to avoid staining any of the interior, since the rears required the shocks to be removed.
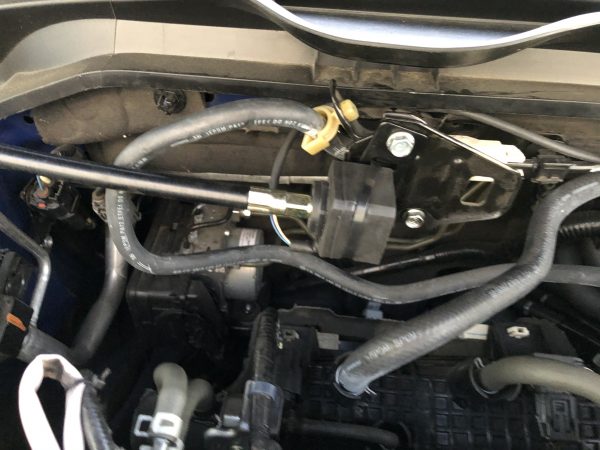
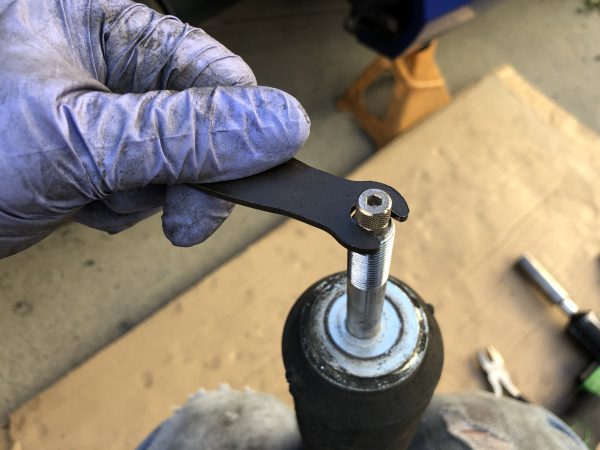
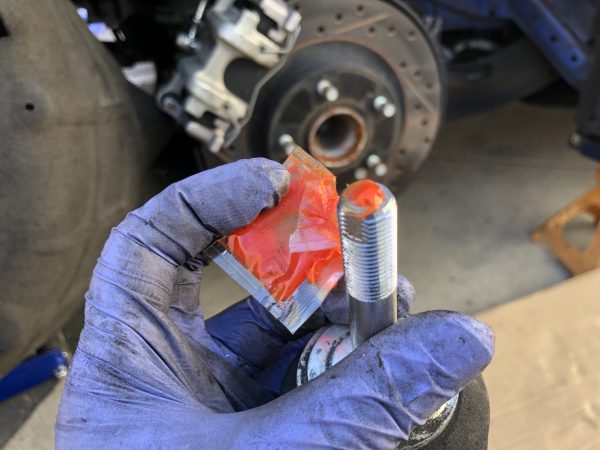
Installation of the front for this Civic required the use of the EDFC Motor Extension Kit to relocate the motors. Although it looks like the EDFC Motor will clear the hood, it in fact does not. The Click Assembly is first removed with the Hex Bolt. Once removed I applied the supplied grease to the hex bolt hole, wiping any excess grease from the piston shaft.
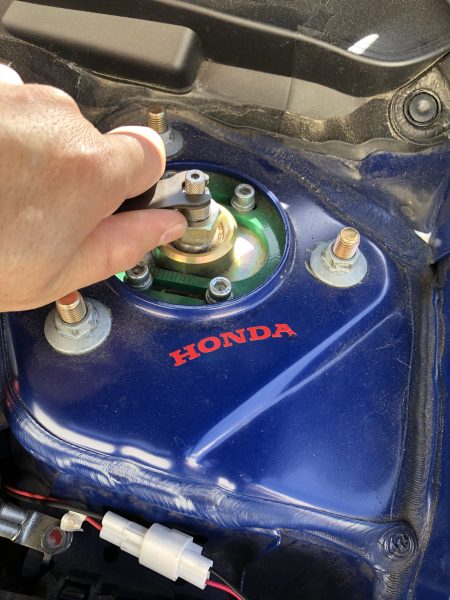
Next a small amount of Thread Locker (also included with the EDFC Motor Kit) is lightly applied to the piston shaft outer thread on both sides (where the Extension Kit’s Top Adapter screws on to).
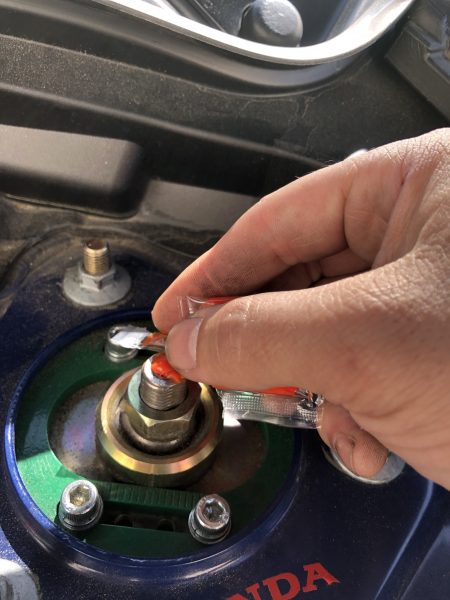
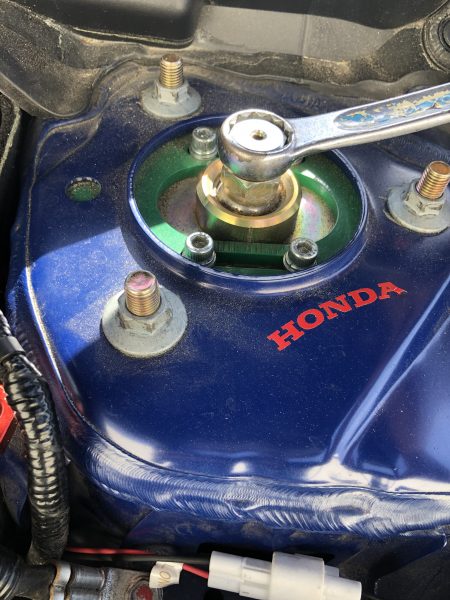
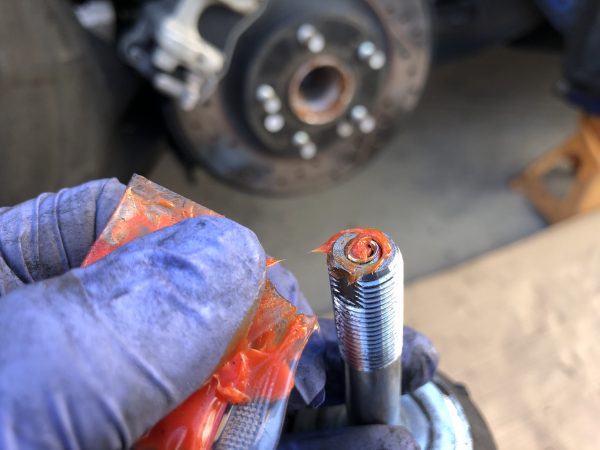
Then the Top Adapter base is tightened onto the shaft using a 19mm wrench. Please note that a very minimal amount of force was exerted to the Top Adapter and should not be overtightened as it can break. Next the gold adjusting rod (Conversion Rod) is installed in the Top Adapter hole.
Prior to installing the 90 degree angle (Cover) and clip to the Top Adapter, I installed the Extension adding threadlocker on it and hand tightened it. Make sure that the Inner Shaft is turned out as to avoid any hangups with it against the gold Conversion Rod when installing.
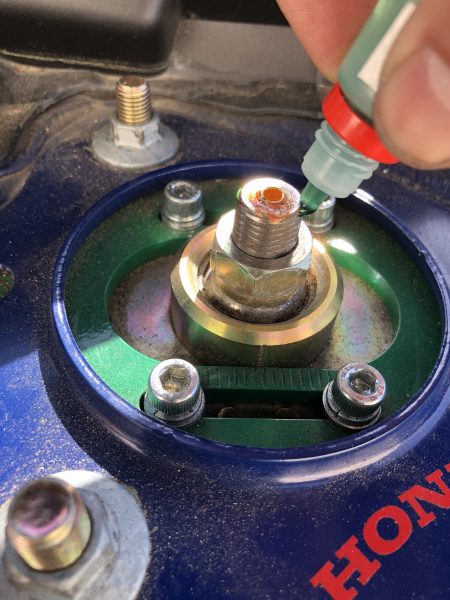
Then proceed to install them on to the Top Adapter pressing down firmly to also press down the gold Conversion Rod and allow you to insert the locking clip to lock against the base. Afterwards add threadlocker to the other end of the Extension and proceed to install the EDFC Motor and also hand tightened it. Motor mounting location is up to you as some may have different locations preferred then the ones I had chosen. Also, do not bend the Extension (no U bends). It only allows a minimal amount of bending.
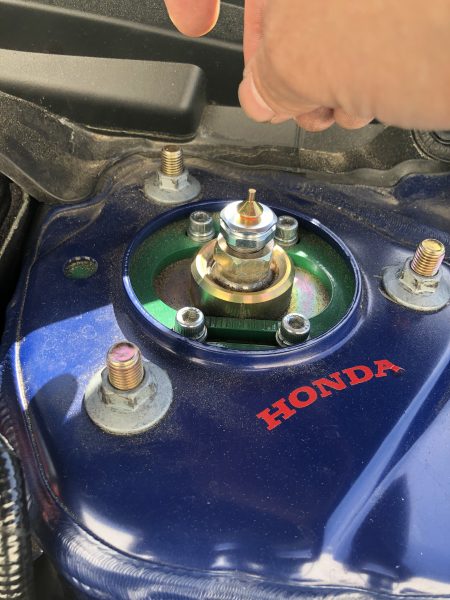
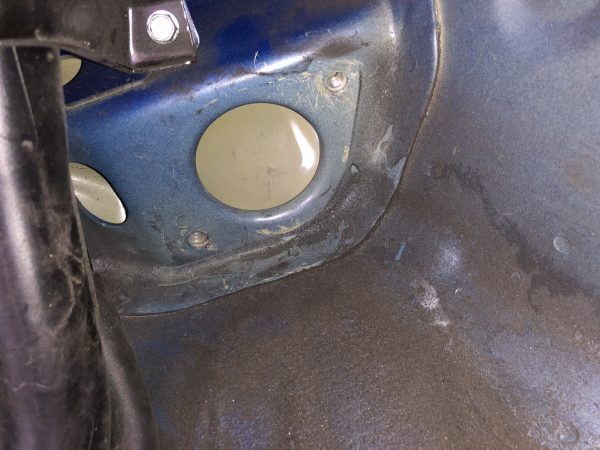
The fronts were not too bad to install. However, the rears were another story. Since only TEIN Japan had a chance to do an EDFC installation noting down key areas in the rear shock’s mounting tower where the EDFC motor cable is to exit, this gave us an opportunity to see if this would be the same for U.S. market applications. The wheelwell liner should be removed before uninstalling anything as it allows for a clear view of the shock mount tower area.
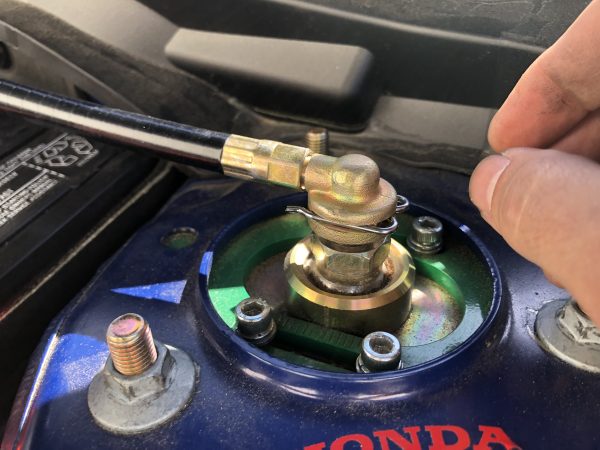
Due to limited accessibilty of the lower shock bolt, the rear spring should also be removed. Once the shock is removed the upper mount also needed to be disassembled to allow removal of the click assembly.
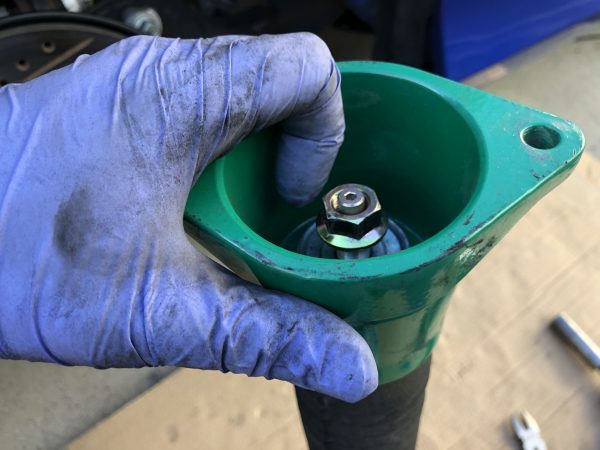
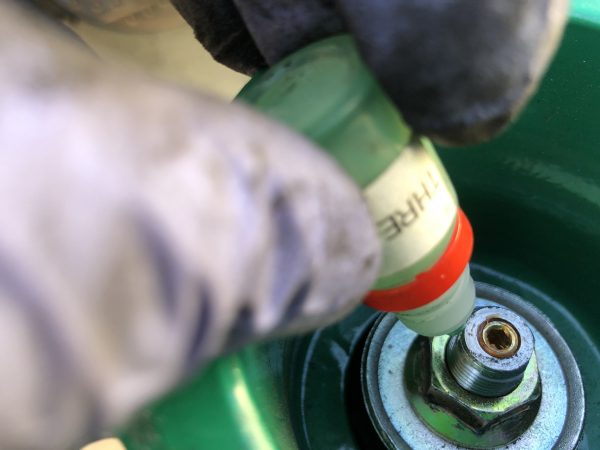
Once the click is removed apply the grease into the hex bolt hole then (applicable to EDFC ACTIVE and ACTIVE PRO models) install the supplied gold color hex bolt flush with the top of the piston rod. Reinstall the mount back on the damper. Apply grease to the hex bolt, then apply threadlocker to the piston shaft threads.
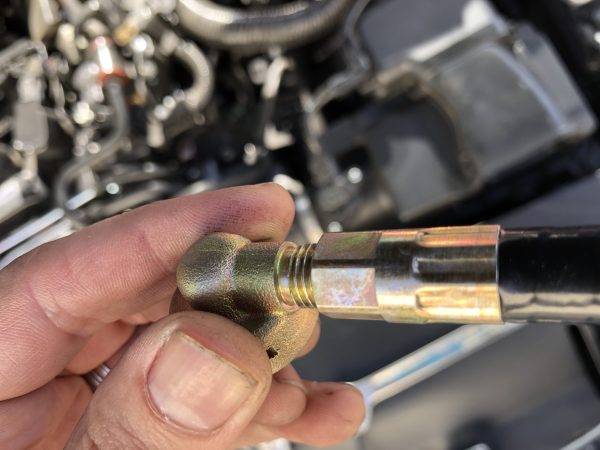
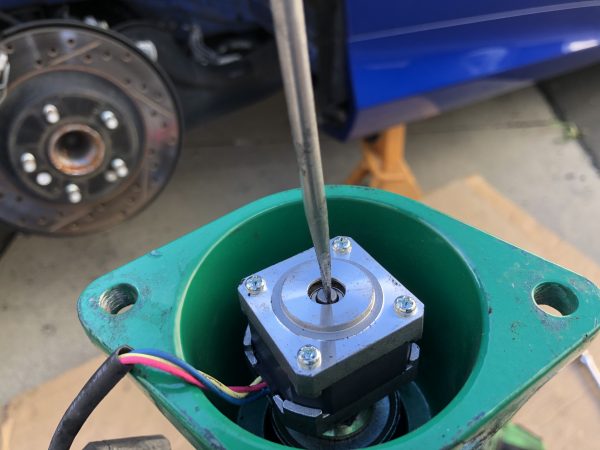
Proceed to install the EDFC motor hand tight to the threaded piston rod. Now, check that the EDFC Motor’s shaft turns freely by using a flathead screwdriver to turn the shaft- you should be able to complete several turns in either direction (it should eventually stop in either direction). The EDFC Motor cover was a slight pain to install since accessibility of the motor inside the cup-shaped upper mount was extremely limited. On a side note, I have seen where the Motor cover was preinstalled and a slit cut on the top of the EDFC Motor allowing for screwdriver access to the Motor’s shaft. Then once you check for free movement of the shaft, the slit can be resealed with silicon. Either method of EDFC Motor install works.
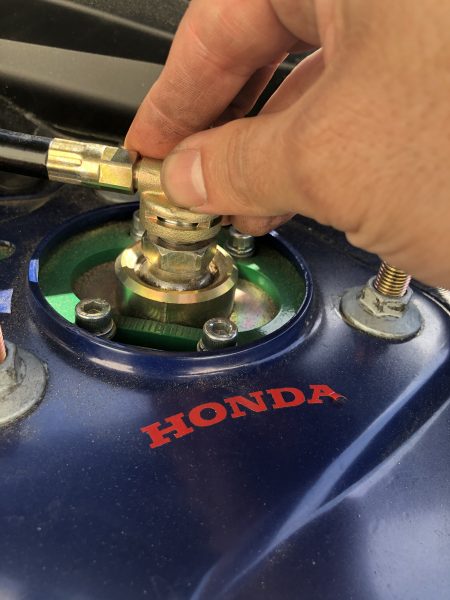
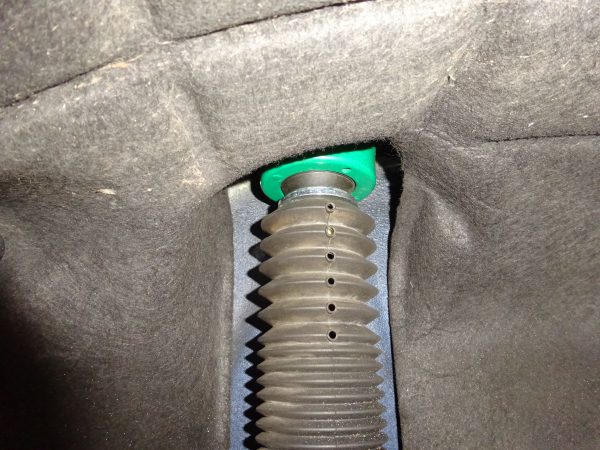
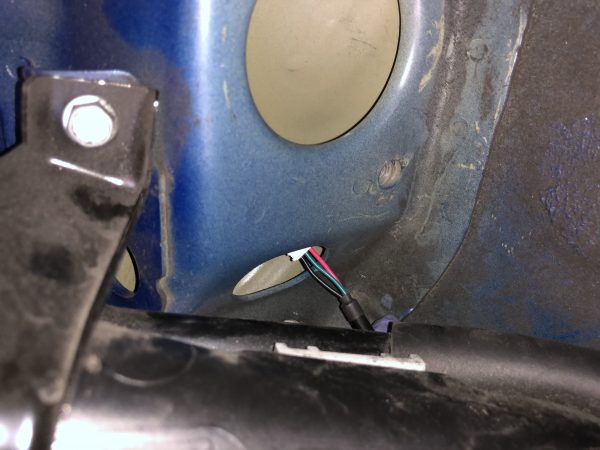
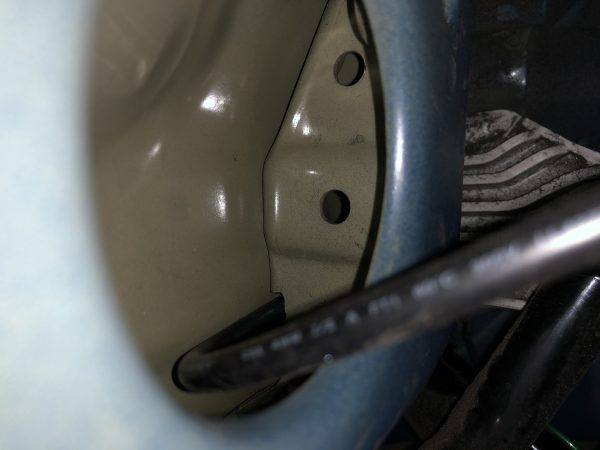
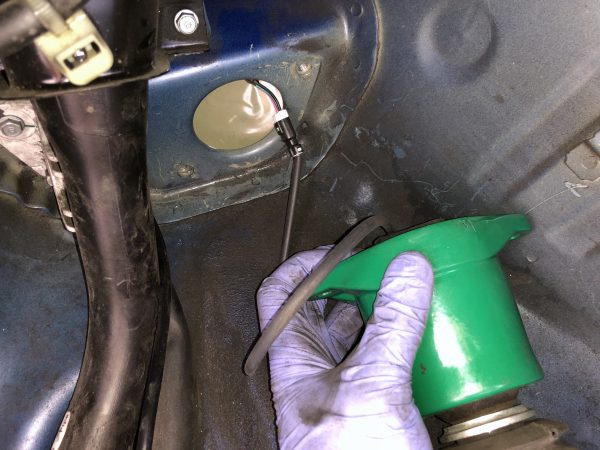
Prior to reinstalling shock, the EDFC Mid-Cable would need to be installed. As you can see in the images, there is a small access hole next to the main tower hole where the shock would mount.
The male connector of the mid cable needs to be fed through the smaller access hole over to the shock hole. Please take note that the cable connector also needs to be pushed through a small clearance on the top upper corner of the smaller access hole (as shown in the noted image).
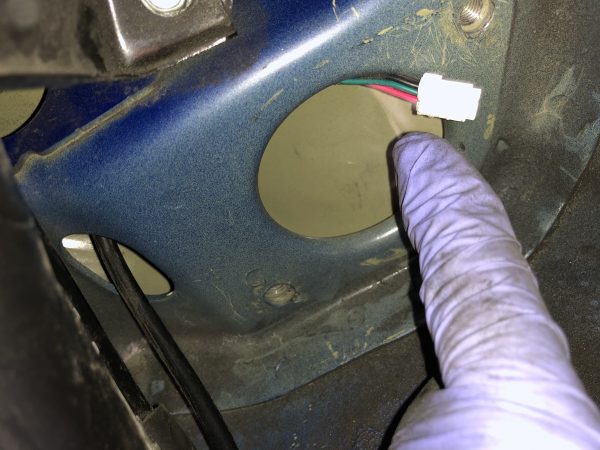
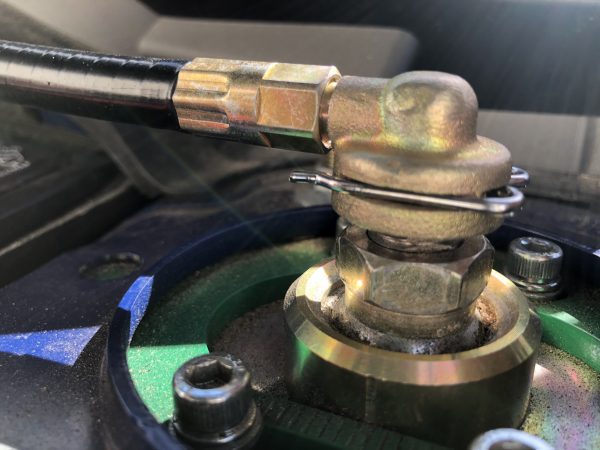
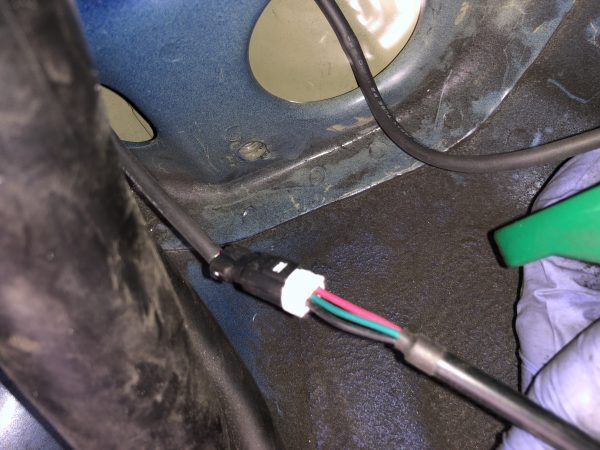
Once pushed through, position the shock on its mount (I recommend to install the bolt through the lower shock eye ring bushing for support.) then connect the two cables together and gently pull the mid cable and EDFC motor cable through. During this time you would also need to move the shock’s upper mount closer to the tower to avoid tearing the cable wire. Once the shock mount is close enough, a bolt can be threaded on to hold the upper mount in place allowing for the cable slack to be removed then the mount to be completely reinstalled. Afterwards you can reinstall the shock bolt and spring, applying suspension preload when tightening up the loosened bolts.The EDFC Mid Cables were ran through existing grommets into the trunk area to the driver unit.
Though this install took a little longer than anticipated, we have a better understanding for installing EDFC ACTIVE (and EDFC ACTIVE PRO) on 2017+ Honda Civic models. Hope this helps out for any out there looking to install our EDFC systems on similar applications. As per usual you can alway contact us direct should you have any technical questions.