OVERHAUL PISTON ROD CHANGE

We have received many overhauls over the years, a lot of the times we Highly suggest to change the piston rod out due to scratches, dents, pinhole damage. Below you will find the images of why we highly recommend to have them changed.

inspec_0708_2
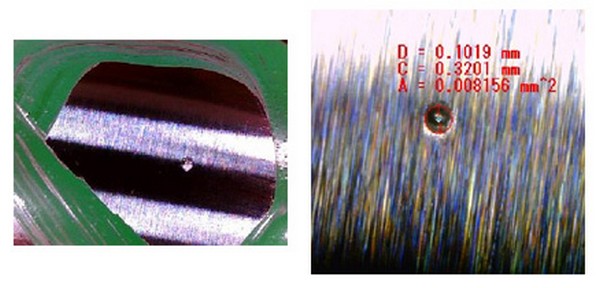
Above is the Microscopic view of a Pinhole damaged Piston Rod. As you can see if the piston rod is reused like that, that pinhole can rip or damage the new seal, and gas can leak from where the pinhole contacts a portion of this seal due to improper sealing.

See on the image below how it can have multiple damages that would require to highly change the piston rod for a new one.
inspec_10

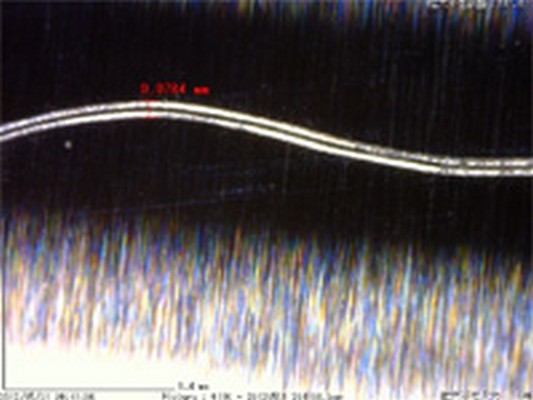
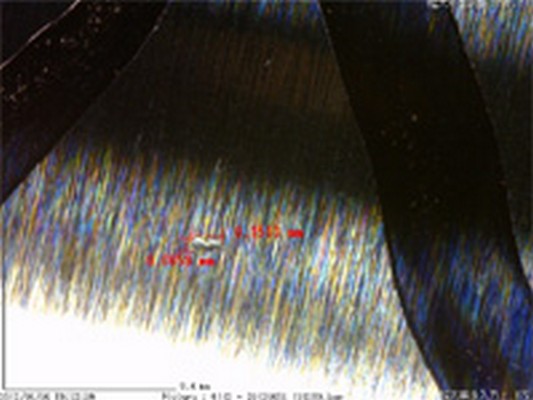
The image below is of a Microscopic image of a Linear Scar on the piston rods. This would need to be changed due to that deep liner scar. Same problems can happen where the dust seal may be damaged from contact with this scar, and gas leaking past the seal since the scar creates a gap (improper seal).


inspec_30

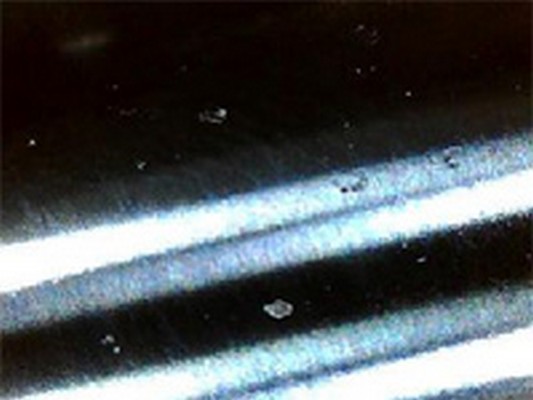
Scratches on the piston rod are one of the most common. Below you will find the Microscopic image of the scratched area will give you a better understanding as to why we would need to change the piston rod for the rebuilt.

inspec_12

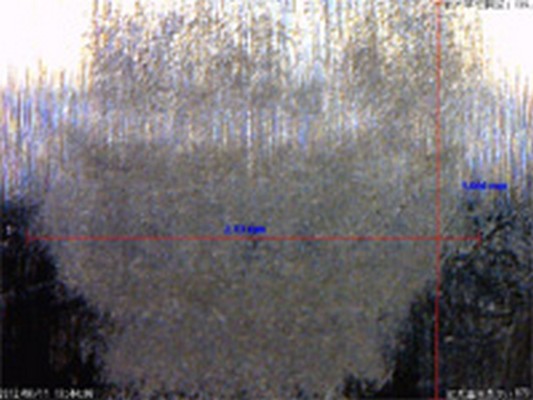
Last but not least would be the Microscopic Image of the Dents, these dents can be done to the piston rods from any rocks or debris on the road.

inspec_14

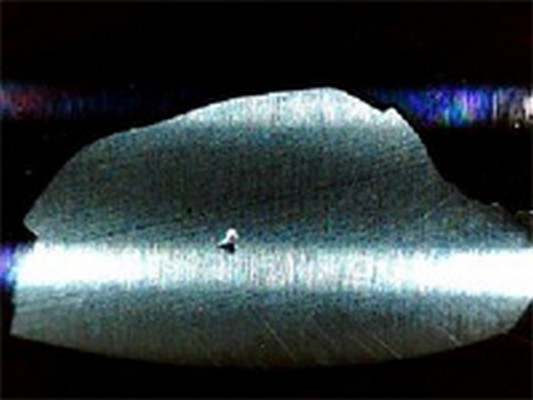
This is how it would normally look on the piston rod without the microscopic image.

inspec_15

As you can see why we would highly recommend to have these type of piston rods changed. All of these could have been one of the major problems that might have blown your dampers initially.

If you have any questions regarding our overhaul services and/or pricing, please feel free to contact us.


EDFC Fitment Check

Back again with some more useful tech info this time for EDFC fitment verification.

We are always receiving calls regarding EDFC fitment on older kits or kits which may not have any details of EDFC compatibility. I was able to obtain some info on some specific areas ,clearances, and measurements that should be focused on when checking for compatibility.


Checking piston shaft compatibility

Inspect the top threaded portion of the of the dampers piston shaft making sure that the shaft is threaded all the way to the top of the shaft. Some shafts may have the flat machined edges, but the threads continue on the other rounded sides. Those can still work. The other type as shown below would have an area around the top of the piston shaft with no threads which not allow the EDFC motor to mount up.


Measuring piston shaft thread amount

Taking a measurement of the same area which protrudes out from the mount, measuring from the edge of the nut to the tip of the shaft. If the measurement is more than 7mm in length, then the EDFC would have enough space to bolt on. Any less and there would not be sufficient space for the motor.


Checking compartment space for EDFC motor

 Taking a measurement from the top of the click assembly a vertical measurement of over 24mm as well as a 50mm horizontal measurement using the center of the piston shaft as the center point. Any clearances less than those detailed would interfere with either the hood or other engine compartment components and/or interior.


Caution! When checking these areas please note that the measurements provided above are the minimum required clearances for the EDFC motor installation. Please keep in mind that depending on the mount type used on the damper kit, the motor might move vertically which may require further clearance. Modifications and/or removal of supportive device around piston shaft top, insulator and/or interior might be required to allow for fitment. EDFC, in conjunction with any tower bars/strut bars may not allow enough clearance across the piston shaft for certain applications. Installation of the EDFC on any vehicles/ dampers on which TEIN had not confirmed fitment compatibility should be done at your own discretion. TEIN assumes no responsibility for any damaged and warranty void for such installations.

 Always exercise caution when trying to install the EDFC units on your application whether the kit has been confirmed for fitment or the guide detailed above is being used to determine fitment. Uncertain of the installation? You can always take a look back at an early post for the EDFC installation for help.

http://teinusa-blog.com/edfc-motor-install/