The benefits of SuperPro Polyurethane Bushings

Hey Everyone check out these SuperPro videos, view the benefits of having these polyurethane bushings versus the OEM rubber bushings.

As you can see the major difference between the stock and SuperPro bushings.

For more information on suspension and bushings and how it benefits doing the change over from rubber bushing to polyurethane bushings check out this other video.

For information on how you can purchase SuperPro check out the following link http://www.tein.com/products/superpro.html

B(uild).Y(our).O(wn).B(eater)

Normally, I’d make fun of dudes wearing Emo jeans. But in retrospect, they’re probably very effective in preventing the wearer spend money, since they’ll have a hard time accessing money in their pockets because their pants are too tight. So haha on them and on me!

I bring this up because we are faced with yet another recession. Sucks to hear, I’m sure. However, it’s a serious matter for so many of us that have doubts of our job security, or in transition into a new career, or live paycheck to paycheck. You should think thrice before spending your hard-earned money.

But a recession can’t prevent all of us from having fun, right? Well, not so fast there, bud. I may have some cash in my pocket, but that doesn’t mean I can spend money like a mad man. It’s time to be smart with my money, put some cash aside for that rainy day. It’s better to be safe than sorry. And I don’t know about you, but being in debt is no longer for the elitist. It’s a club most American’s are a part of. Bigger than FaceBook. FACEDBook, is more like it.

However, if you are a penny pincher, you can always find ways to have fun on the cheap. Who says you always have to buy new? Who says expensive is always better? There are a lot of great pre-owned cars out there at very affordable prices. Some of you already have a great car to build upon, but you don’t even know it.

I like breezing through Craigslist for cheap cars that have great performance potential. How about a ’91 Civic Si for $3000? All stock, clean title, clean interior, and 117k miles (LOW for its age, if it’s the original motor), and Red! Ahhhh, takes me back to my high school days. Nice buy if you ask me! Still has A/C, a tape deck and TWO (count ’em) speakers! Wawaweewahhh!! Good deal.

Assuming you buy this car in good condition, and had another 3 grand put aside for mods, you’d have yourself a nice daily driver/beginner’s track tool.

Let’s see what mods are available during my work,,, uh, I mean, research hours.

949 Racing’s durable 15×8 6UL wheels are affordable at $159/ea.

You can get a nice set of 225/45/15’s mounted on them for around $450.

TEIN’s SS-P’s are a nice coilover package for a start in road racing, while still having more than enough compliance for daily commuting.

DSA36-2USS1, msrp $1390

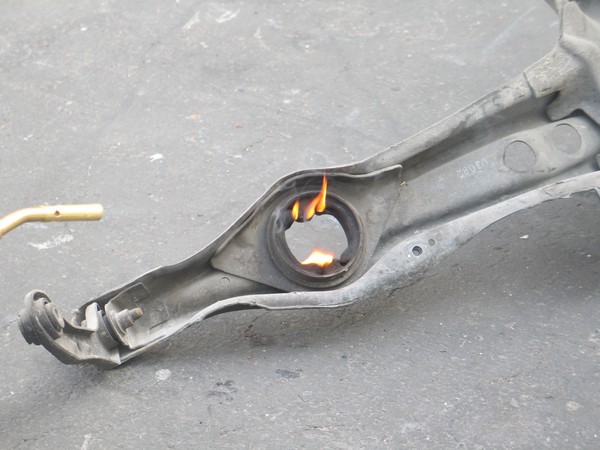
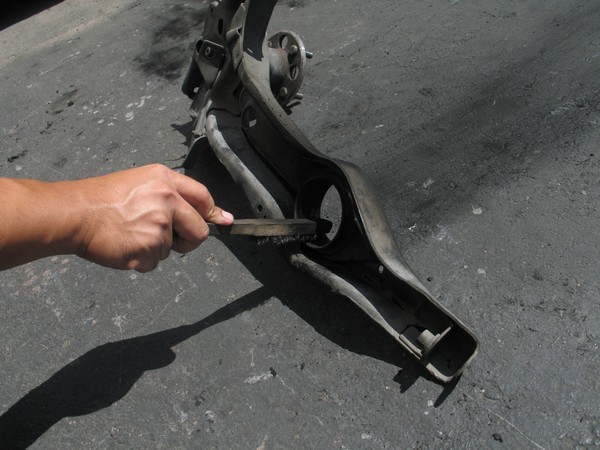
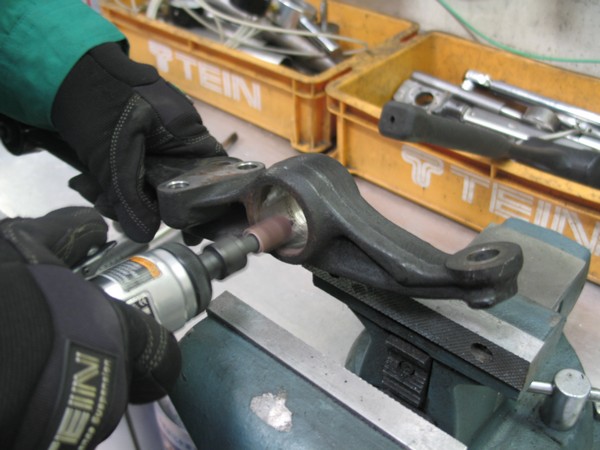
So that’s about $2,476 spent. With another $524, I can change out a few bushings. The rear trailing arm bushing goes out pretty quick. Super Pro makes one, part number SPF0807K for $113.

Super Street magazine’s project EF. The car came to us with the bushing already ripped completely out.

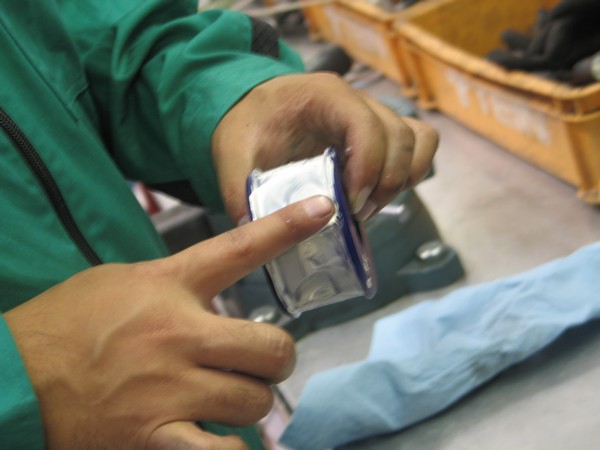
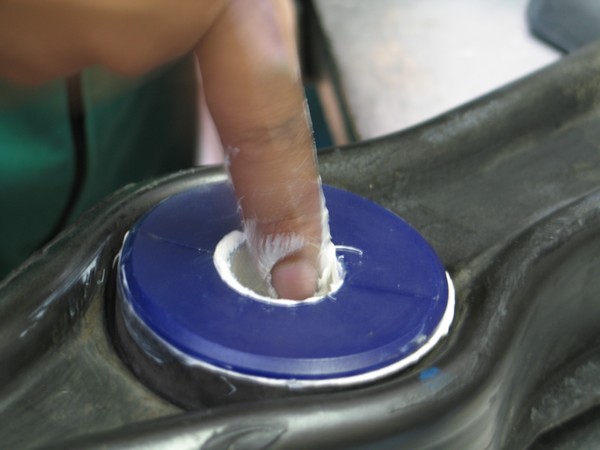
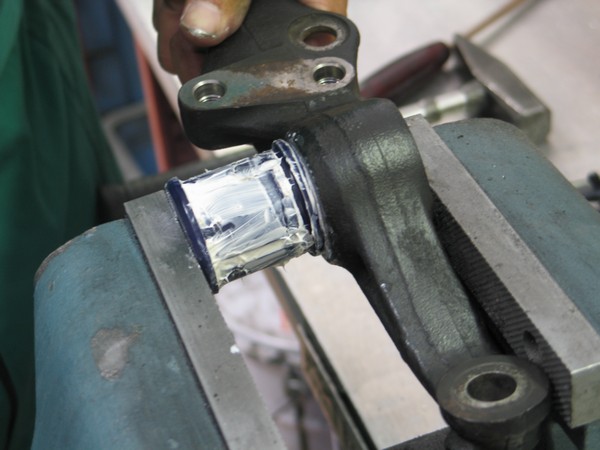
With the new SuperPro bushing installed = no more slop or wandering rear end.

They also have some sway bar mount bushings (front- SPF1528-__*K *different inside diameters available $27, rear-SPF1532-__*K *different inside diameters available $21).  You’d still have enough money to do other bushings, but the aforementioned tend to wear early. I’d probably apply that extra money into a nice set of brake pads, brake fluid, and maybe change rotors, unless resurfacing them is good enough. Then a simple oil change and coolant flush, followed by a basic check up on spark and timing would complete it for me.

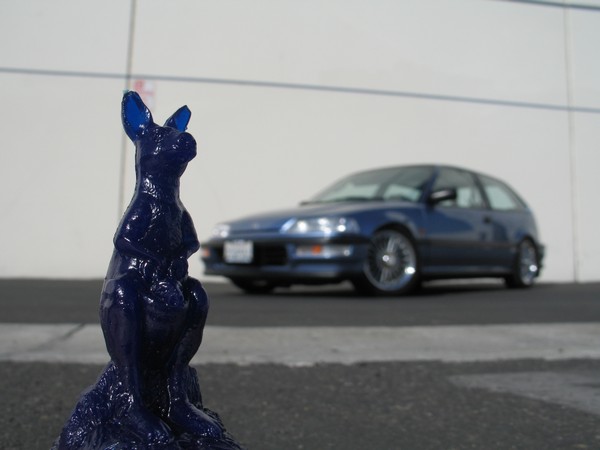
Not a bad way to start, if Honda’s are your thing. This car is a great platform to build upon, and with the coilovers, you’ll be able to experiment with different spring rates. You can also get the dampers revalved if you want to try much stiffer springs. Beyond that, engines of similar size or even a B-Series, and now K-Series motor, can be swapped in. But hey, let’s keep it simple for now. With this setup, you’ll be,,,,,,,, well,, you’ll be slow. But with a low power motor, you can improve on other skills, such as learning to maintain your momentum through turns, or establish your vehicle’s limitations, as well as build up your track skills and memory. From there, sky’s the limit. Budget’s the limit, too. You can be the next Stig (look at the above Civic pic for motivation)!

So, not to fear, those of you with limited budgets. Be good with your money, or face some serious financial woes. Be a wise saver and shopper. Research before you buy, and don’t by crap! Some of you may be able to score these parts mentioned as used goods! Dunno about the bushings, though.

Take it easy, guys and girls and happy tuning!

SEMA Show 2010

The SEMA show is less than 2 weeks away. It is an exciting time for car enthusiasts as many project cars are unveiled revealed and new parts are revealed. TEIN is back as an exhibitor after a one year hiatus. We decided not to build any cars this year but are sponsoring a few high profile vehicles. The Lexus, Scion and Honda booths all have brand new builds sitting on TEIN coilovers.

0-60 Magazine Lexus Project. Check out the finished car in the Lexus booth. NOT a traditional Lexus build.

We will also be leaking a new TEIN coilover in our booth before the Tokyo Auto Salon debut as well as displaying some new products from SuperPro polyurethane bushings. If you have access to the show please come by and visit our booth, 24513.

For any of our dealers or new potential dealers who read this blog, we will be having SEMA Specials during the show so be sure to make an appointment with us or drop by.

Super Pro Engine Pitch Mount for 02-07 WRX & 04-07 STI

A very popular modification for Subaru WRX and STI owners is improving the engine/transmission rigidity by changing motor mounts, transmission mount, and the engine pitch mount( also known as an engine pitch stop or dog bone).

One of the most readily available upgrades is the Subaru Group N pieces. A few Subaru dealerships even stock these pieces.

I’m trying one mod at a time, starting with the Group N motor mounts. These mounts definitely increase NVH( Noise, Vibration, and Harshness). That lumpy boxer idle is even more pronounced at idle. To me, it’s not a big deal- I kinda like it!

I then tried out the Group N pitch mount, and although the rubber bushings are harder in durometer over the OE piece, I wasn’t so thrilled about the OE-like plastic arm stamped STi- I always thought it was a reinforced(still plastic) piece. Oh well. I’m no engineer. So if it works, it works. Initial impressions- same amount of NVH, as far as I can tell. No real change in driving feel.

Anyways, in conjunction with some other mods I have on my car, especially that massive APS Top Mount Intercooler which makes underhood clearances as tight as it possibly can be, I noticed under hard acceleration that quick shifting causes the intercooler y-pipe to hit the firewall bracket supporting the pitch arm, slightly. Not a very comforting sound.

Removal of the Intercooler is necessary to access the Pitch Mount. 2 bolts and 3 hose clamps need to be removed, as well as a few hoses from the breather assembly.

Just recently, I got my hands on Super Pro’s Aluminum/Polyurethane engine pitch stop(p/n SPF3205). Nicely finished in a blue anodize(which will sadly go unnoticed thanks to my Intercooler), this piece looks more like a con-rod. The poly bushings are also a nice snug fit into the firewall bracket and motor bracket.  Easy enough to install, save for the shoehorned intercooler as an obstruction, it’s just two bolts to loosen/tighten.  Total time with a standard intercooler should be no more than 20 minutes. For you front-mount intercooler owners, even quicker.

With the intercooler removed, the pitch mount is clearly visible.

Initial impressions- not much NVH than the Group N pitch mount, and definitely no contact with the y-pipe and firewall bracket under quick shifts, as mentioned earlier. Great! Goes to show that some small changes can make a difference.

Comparison of the Super Pro and STi pitch arm

The Super Pro mount is a snug fit. A little grease helps fit it into its bracket.

Installed.

In retrospect, starting with this piece  would’ve been a better start. I’m only guessing that this piece would’ve reduced the chances of the y-pipe interfering with the firewall bracket from the beginning. Next install is the Group N transmission mount. A bit more NVH to deal with…. yay.

Enjoy!

SuperPro Roll Center Adjusters

TEIN is the exclusive distributor for Australian made SuperPro brand of polyurethane bushings. We recently got some SuperPro roll center adjusters in stock. One of the guys here with a new EVO X decided he wanted a set so I took pictures of his install. Since the front lower control arms needed to come off this was the best time to also upgrade the front arm bushing as well.

Here is a picture of all the new parts.

SuperPro RCA for EVO 8/9/10, Part # SPF-FPR-004

SuperPro Polyurethane Bushing for front lower control arm – front inner, Part # SPF2418K

Remove ball joint to hub bolt, disconnect swaybar link and two bolts securing the inner points of the lower control arm.

Pop the dust boot off and remove the C-Clip. An extra set of hands makes things easier.

Easiest and safest to use a hydraulic press to remove the OEM ball joint. Other option is a rent or buy a ball joint tool kit. Note that on the underside of the arm a small ring of aluminum may break off or stretch when the ball joint is pressed out – this is normal.

OEM ball joint removed. Cleanup any heavy scratches to the arm (there should not be any if the press was used properly).

Here you can see the OEM ball joint next to the new SuperPro unit. The SuperPro unit has a taller base instead of a taller shaft like other manufacturers. This makes it more rigid.

Press in the new RCA. Make sure the RCA sits all the way in which will make the groove for the C-Clip flush with the top of the arm.

Install the C-Clip.

Pressing out the front inner bushing. Takes a little creative positioning to get everything to line up perfectly.

Cleanup the arm from any scratches and install the new SuperPro bushings. Use plenty of grease and insert the two bushings first. Then grease the pin and use a vice or press to push it in.

Arm installed. You can clearly see the height difference. Make sure to torque all bolts to factory settings.

This bolt should be tightened and torqued while the car is at 1G so that the bushing’s natural position is at ride height and not full suspension droop.

You will notice that the SuperPro kit does not include new taller tie rod ends. According to SuperPro engineers new tie rod ends are not needed but due to high consumer demand SuperPro will be including new tie rod ends in the near future.

Lastly have an alignment done as both camber and toe will have changed.

SuperPro Polyurethane Bushing Install

You may or may not know that TEIN is the exclusive US Distributor of SuperPro Polyurethane Bushings.

About a year ago we did a install of these bushings on a Honda Civic EF Hatch for Super Street magazine.

SuperPro bushings are sold by individual placements and by vehicle kits. This allows the buyer to purchase exactly what is desired if not an entire kit. Each package of bushings comes with bushings, grease packet, and inner tubes if needed. You can actually see what each part number comes with by going to the online catalog. Some kits require reusing steel shells or housings that is part of the OE bushing. This requires a bit of processing.

Although this may be a task that any novice is capable of doing, when in doubt, contact a reputable shop that can do this for you.

Depending on the type of bushings removal can be done with an acetylene torch or press.

Removal by Acetylene Torch

First of all make sure you have all the proper equipment, and remember, safety is always top priority.  First, you must apply heat evenly with a acetylene torch. You want to make sure to get heat on the top, bottom and the middle of where the bushing will be coming out from.

Removal by Hydraulic or Arbor Press

Hydraulic press with dies on top and bottom. Not a lot of force is needed. You may hear a pop when the bushing shell initially breaks it bond with the arm.

Sometimes a little prep work will make pressing out the bushing a little easier especially if you cannot find a die that fits perfectly.

Clean Up

Once the bushing comes out please make sure that you grind down any excess material that is left on. You can use a heavy grit sand paper or a wire brush. Make sure that the inside is smooth so that there are no obstructions that may interfere when pressing in the new bushing. You can spray paint the part that you are replacing the bushing on to prevent any corrosion from happening to the part.

Installation of new Polyurethane Bushing and Inner Tube

Once the bushing is ready to be installed, you will need to apply grease thoroughly on the bushing and on the inside of the part that it will be installed on.

You can use a vise to press in the bushings and housing or also a bushing press kit that is offered through SuperPro.

Installation of arm back to vehicle

The last step will be to install the part that you changed the bushing on back on the car. Please note to torque down the bolts to its specific torque setting. Before tightening any bolts, it is recommended to preload the suspension to simulate a load similar to when the vehicle is on the ground(1g). Otherwise, tightening any bolts while the suspension is at full droop(fully extended) will put tension on the bushing causing it to wear out quicker, make noise while driving, as well as alter ride height. The picture below shows the left rear suspension at 1G, car is off the ground and the floor jack is being used to simulate ride height.

Removal video using acetylene torch.

You can also take a look at Fulcrum Suspension’s website for additional removal / installation videos through these links.

Hydraulic Press Removal

Pressing In with an Arbor Press

Pressing In with a bench vice

<object width=”480″ height=”385″><param name=”movie” value=”http://www.youtube.com/v/dqo43St5fu0&hl=en_US&fs=1&”></param><param name=”allowFullScreen” value=”true”></param><param name=”allowscriptaccess” value=”always”></param><embed src=”http://www.youtube.com/v/dqo43St5fu0&hl=en_US&fs=1&” type=”application/x-shockwave-flash” allowscriptaccess=”always” allowfullscreen=”true” width=”480″ height=”385″></embed></object>