
While make my daily rounds through car industry blogs, I came across this sexy beast. Spoon Sports NSX-R featured on Speedhunters blog.

Photo from www.speedhunters.com
Coming from mainly a Honda background, of course anything Spoon catches my attention. This high revving, naturally aspirated and track ready NA2 looks like a blast to drive.
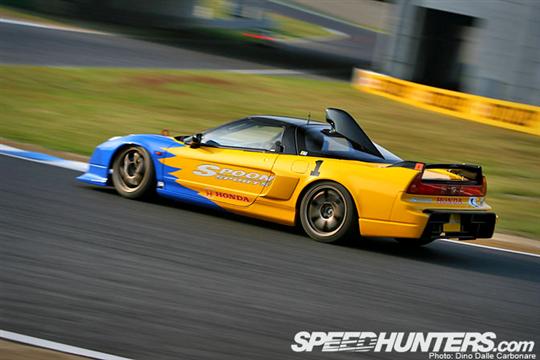
Photo from www.speedhunters.com
Whats this?! Yep this vehicle is running our Aluminum N1 Coilovers. This full length, mono tube suspension offers separate 20 x 20 way compression and rebound adjustment (available in either aluminum or steel construction). The stroke and valving have been specifically designed for circuit racing conditions to provide maximum grip. *For Race Use Only
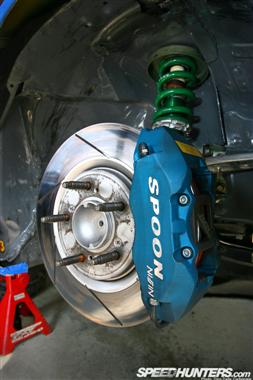
Photo from www.speedhunters.com
For this full feature and many more, please follow the Speed Hunters Blog
Author Archives: Jonathan L.
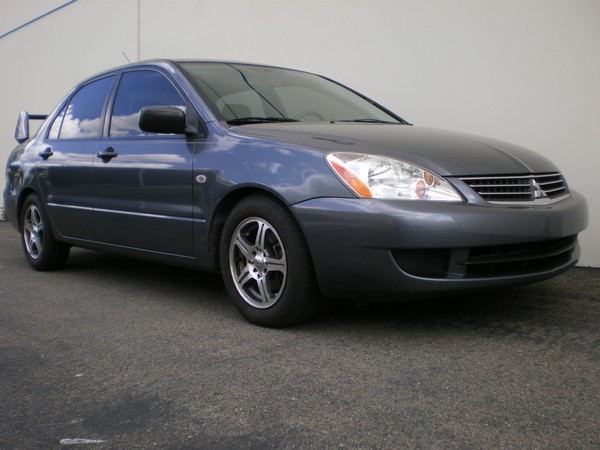
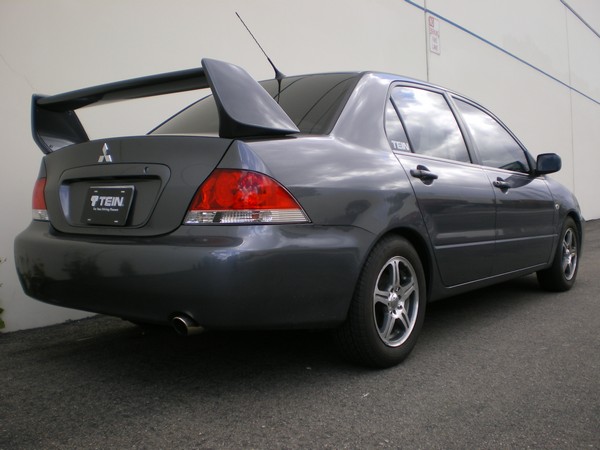
ATTENTION 06-07 LANCER S.Tech Springs
Attention to all 06-07 Lancer ES owners.
The S.Tech Lowering Springs (Part #: SKE06-AUB00) that are marketed for 02-07 Lancers will NOT work on your vehicles.
During recent testing we have found that the OEM Strut/Shock Absorber design has changed on the 06-07 Lancer ES models.
When purchasing S.Tech Lowering Springs for your vehicle, purchase Part #: SKR66-AUB00 which are originally meant for 02-07 OZ Rally & Ralliart Lancers.
The ride height drop for 06-07 Lancer ES: Front -40mm and Rear -25mm
The actual drop may vary by vehicle due to the weight of different components (e.g. Transmission, Packages, etc.)
Torque Your Dampers Pt. 2
In continuation of covering the proper methods of torquing our dampers we will be covering how to torque the Top Lock Nut.
Torque Specs will not be covered this time around, only the proper methods for torquing. To find the correct Torque Specs for you vehicle’s dampers consult the Installation Manual that came with your kit. For those who have dampers that require use of the stock upper mounts, consult the factory torque specs.
If your dampers use TEIN upper mounts but you don’t have the original Installation manual, contact us at 562-861-9161 or email at tus_sales@tein.com. We can send .pdf copies of our installation manuals to you.
Once again, the use of a table mounted vice to keep the dampers from moving (covered HERE) is recommended.
These are the tools needed to properly torque the Top Lock Nut:
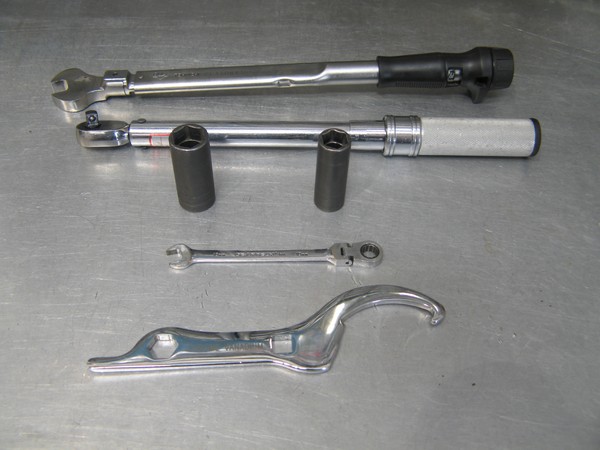
1 Torque Wrench with Spanner Wrench Adapter (17mm and/or 14mm depending on your vehicle application)
1 3/8 Inch Torque Wrench (A 1/2 Inch Torque Wrench may not provide low enough torque settings)
1 21mm Socket
1 17mm Socket
1 14mm Socket
[Sockets needed depend on your vehicle application]
1 Open Ended 10mm Spanner Wrench
1 Open Ended 8mm Spanner Wrench
[Spanner Wrenches needed depend on your vehicle application]
1 Tein ADJ Wrench
Strut Type Dampers
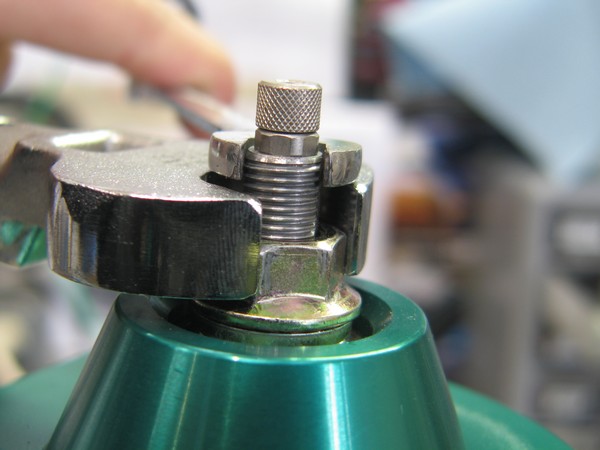
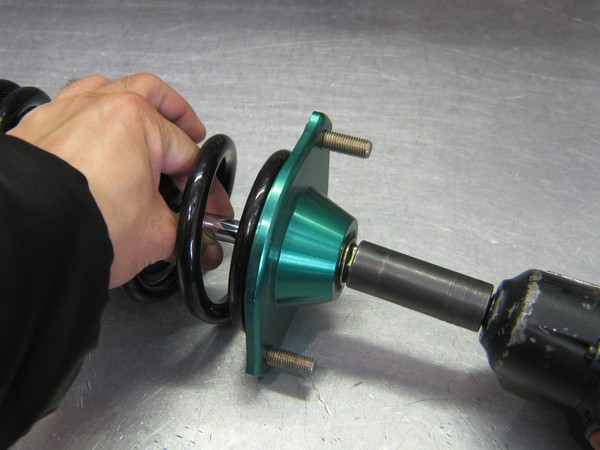
Some Strut Type Dampers’ Piston Rods have notches machined into the top section [Pictured Below],
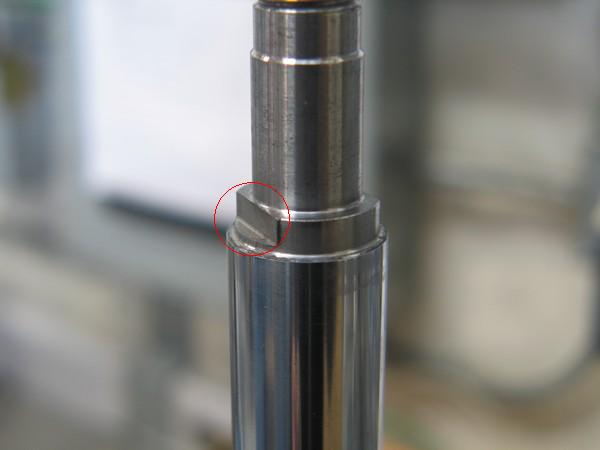
that correspond and line up with notches in the Upper Spring Seat [Pictured Below].
When assembling the damper make sure these notches line up. If they are not lined up while tightening the Top Lock Nut, the Piston Rod and/or the Upper Spring Seat will become damaged.
With everything assembled and lined up correctly; using the TEIN ADJ Wrench to hold the Upper Spring Seat and the 3/8 Inch Torque Wrench with the correct socket on the Top Lock Nut, turn until you hear the click.
Some Strut Type Dampers do not utilize a TEIN Upper Spring Seat. As the above method will not work for those dampers refer to the method used on SA Type Dampers below.
SA Type Dampers
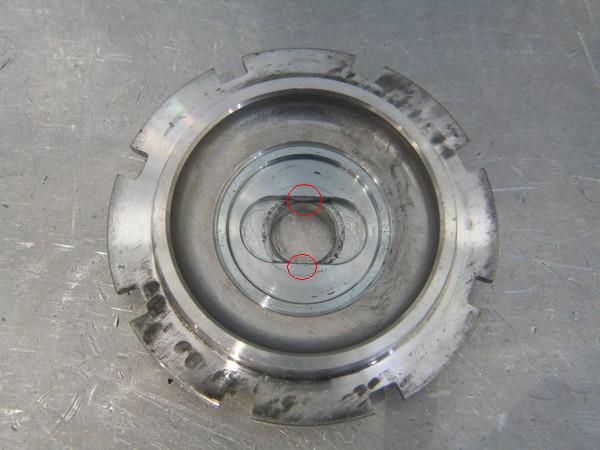
SA Type Dampers’ Piston Rods have machined notches that accommodate a 8mm or 10mm Spanner Wrench.
[Pictured Below]
[Spanner Wrench size will vary depending on your vehicle application]
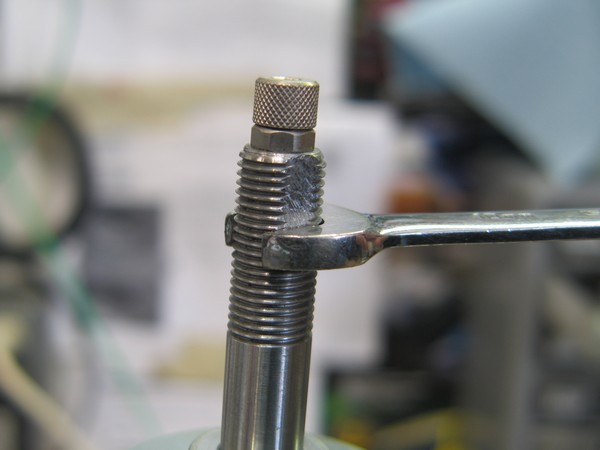
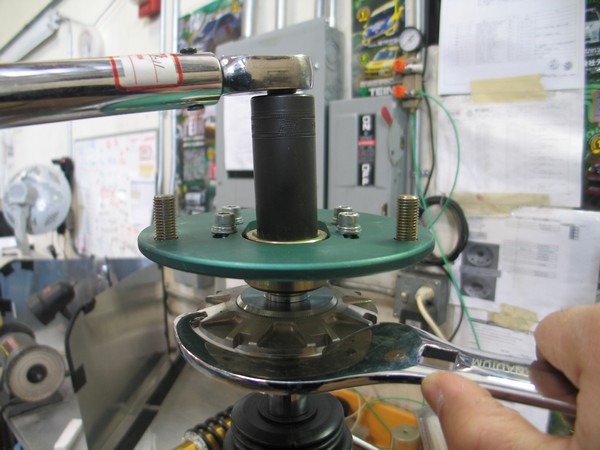
With everything assembled correctly; using the 8mm or 10mm Spanner Wrench to hold the Piston Rod and the Torque Wrench with Spanner Wrench Adapter to turn the Top Lock Nut, turn until you hear the click.
Caution: Over-torquing the Top Lock Nut can cause the Spanner Wrench to slip, damaging the Piston Rod Threads in the process.
If all else fails and an Impact Gun MUST be used, in accordance with our Instruction Manual, set the Impact Gun at the lowest torque possible. A 3/8 Inch Impact Gun is recommended as a 1/2 Inch Impact Gun may be too powerful and can break the Piston Rod. Also, make sure to use short bursts instead of a long continuous burst with the Impact Gun.
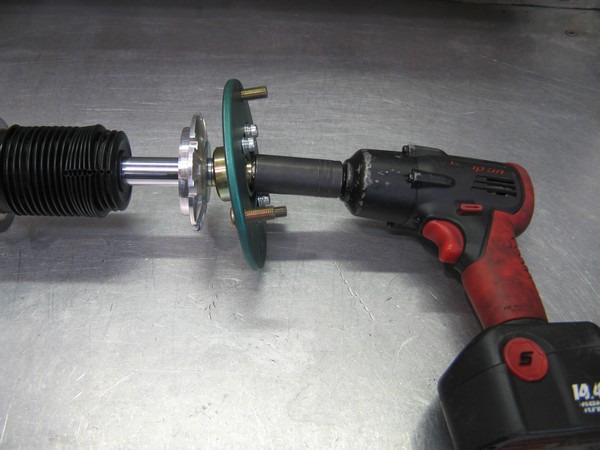
When tightening with an Impact Gun the Piston Rod must not be allowed to spin. The impact and high rate of spinning the Piston Rod can achieve when using an Impact Gun will loosen the internal nut and damage the damper.
For Strut Dampers, use a TEIN ADJ Wrench to hold the Upper Spring Seat while tightening the Top Lock Nut.
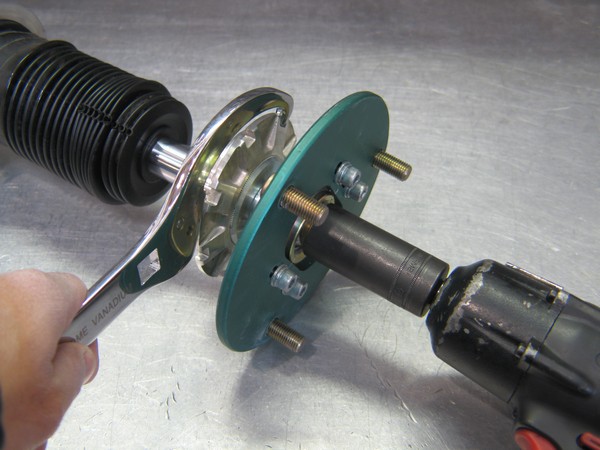
If your Strut Damper does not utilize an Upper Spring Seat that can be grabbed with a TEIN ADJ Wrench then follow the same instructions as the SA Damper below.
For SA Dampers, grab onto the Piston Rod with your fingers as such to prevent the Piston Rod from spinning. Do NOT grab the piston rod with pliers or any other tools as they may scratch the Piston Rod that will damage the Oil Seal and cause an oil leak.
Note: The use of an Impact Gun must be the absolute last resort. TEIN assumes no responsibility for broken or damaged dampers due to incorrect assembly and installation.
How low can you go?
We get a lot questions about what is the lowest a vehicle can go. It has been a tough question to answer since at one time the cops would actually measure from the center of your headlight to the floor. We were unable find out any information to back this up. This last weekend I had a fun 8 hour traffic school class that was able to shed some light on the California State law regarding the legal ride height.
The law states (Cut & pasted from the California DMV website):
V C Section 24008 Modification of Vehicles
It is unlawful to operate any passenger vehicle, or commercial vehicle under 6,000 pounds, which has been modified from the original design so that any portion of the vehicle, other than the wheels, has less clearance from the surface of a level roadway than the clearance between the roadway and the lowermost portion of any rim of any wheel in contact with the roadway.
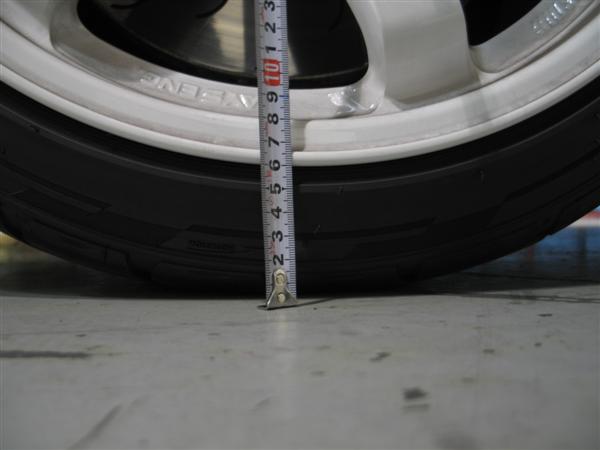
Basically not any part of your vehicle can be lower than the measurement of the lowest part of your rim to the ground. Makes sense right? Just in case if a tire blows out, your not Fred Flintstone-ing with a Fast and Furious floor board on the road.
This law is only confirmed for the State of California. Please check with your state for the current law regarding minimum ride height.
Torque Your Dampers Pt. 1
It seems that lately we have been receiving many questions in regards to how to torque our damper components, and what to torque them to.
This time around we’ll be covering the proper method of torquing the Lower Bracket Lock and Seat Locks.
The use of a table mounted vice and plastic soft jaws is highly recommended.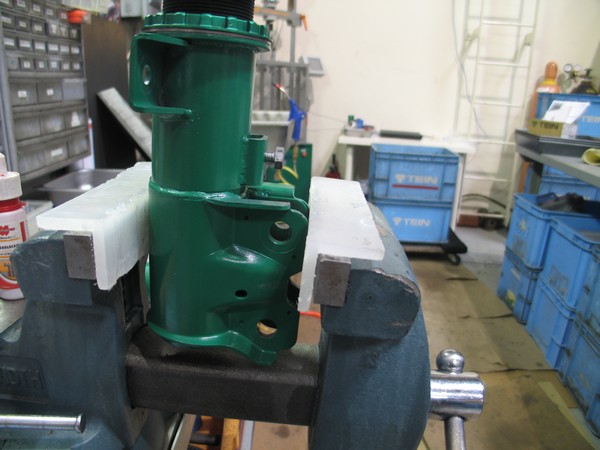
As you can see above, for Eye Ring type bushings, we have special plastic caps with magnets that sit on the inner sleeve of the bushing and protects the outer ring. This allows us to clamp this type of lower bracket to the vise.
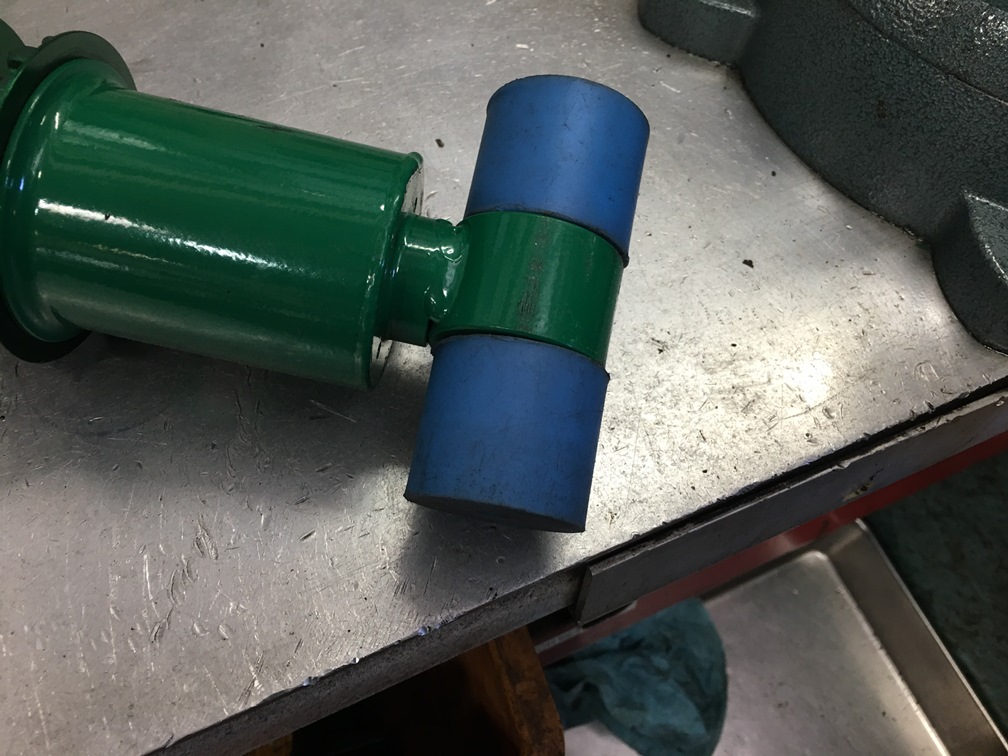
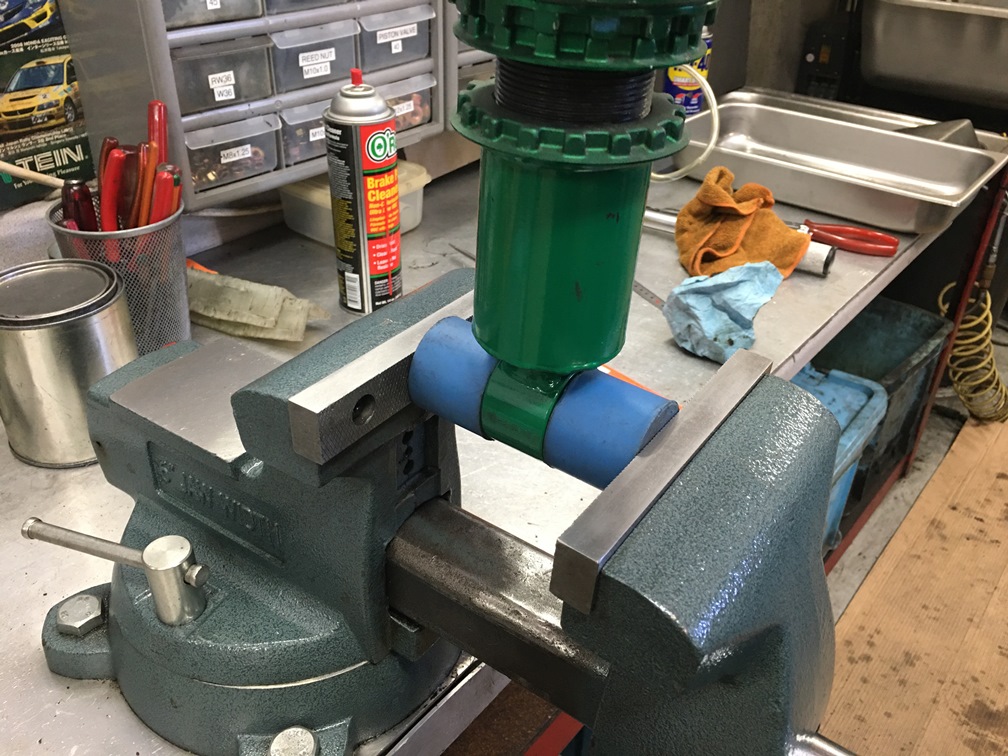
We can also secure Fork type lower brackets onto the vise, like below: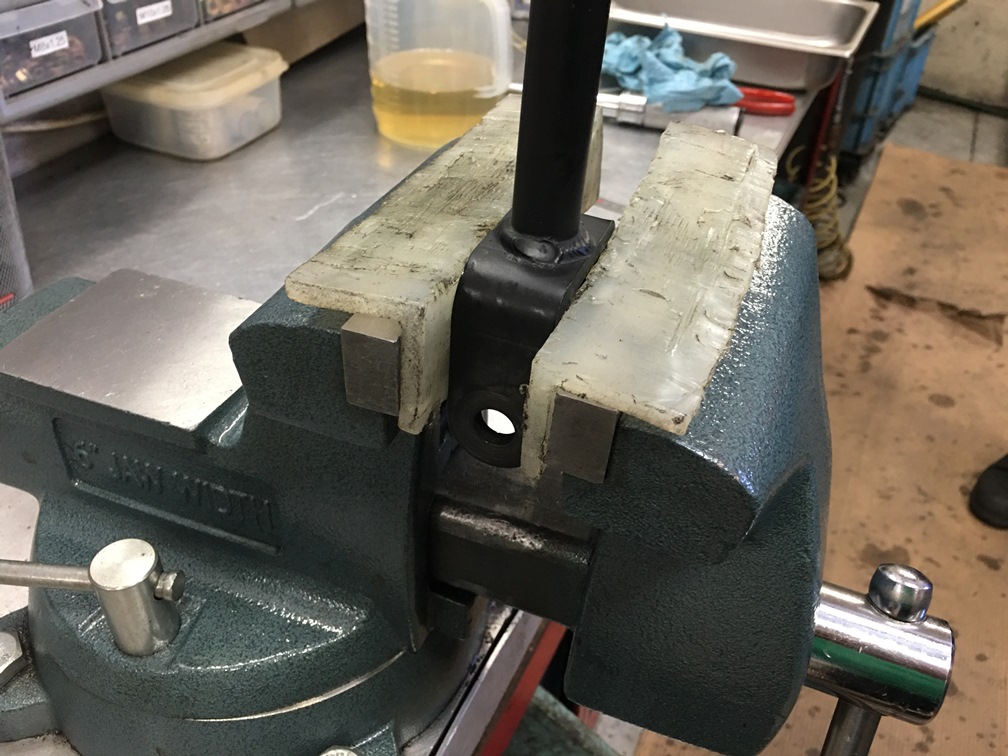 However, DO NOT clamp Fork type lower brackets like below:
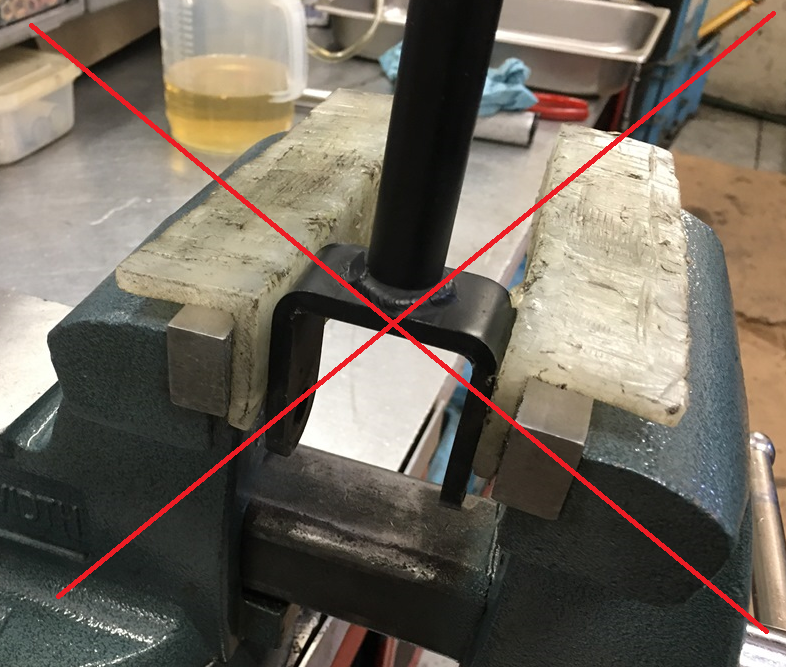 This can cause damage to the Fork, if improperly secured in this way.
Remember not to overtighten the vice, otherwise you will end up with some bent and possibly broken parts. The vice only needs to be tightened to the point that the damper will not move around while torquing the parts down.
We will also need the necessary tools to torque the various locks on the damper.
You will need:
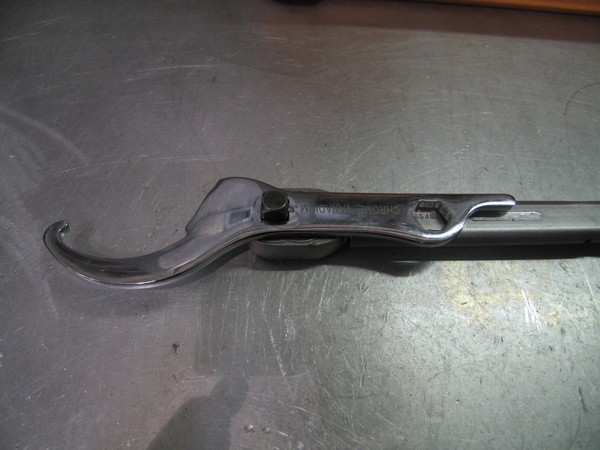
1 Pair of TEIN ADJ Wrenches
&
1 Half-Inch Torque Wrench
As you can see here our ADJ Wrenches come with a square hole that is made to snap into a Half-Inch Torque Wrench:
Now that we have the damper mounted and the tools for the job setup we can move along to the actual torquing.
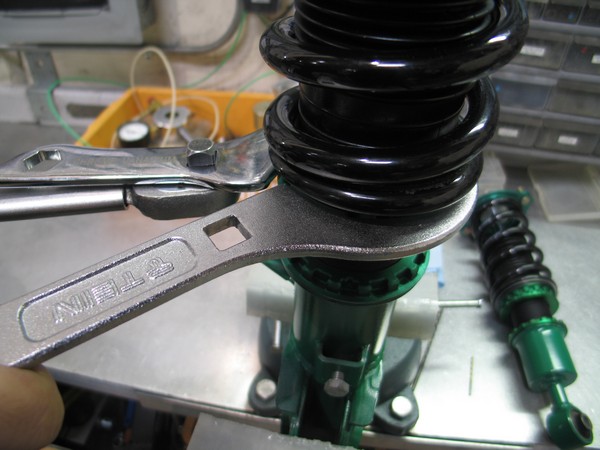
We’ll start off with Seat Locks that do the job of holding the spring up.
The torque for the Seat Locks is roughly the same for any and all TEIN Dampers, ranging from Basic Dampers to the Super Racing Dampers, or even the newer STREET BASIS Z/STREET ADVANCE Z and FLEX Z kits.
The torque spec for the Seat Locks is 41.7 +/- 1.8 ft-lb.
(*Please check your included coilover manual for actual torque specifications for your vehicle application)
After setting the spring height to where you want it to be, take the spare ADJ Wrench that isn’t hooked up to the Torque Wrench and hold the top Seat Lock, then with the Torque Wrench set to the proper torque setting tighten the bottom Seat Lock until you hear/feel the Torque Wrench click.
Simple enough.
Now, for those with full length adjustable dampers (e.g. FLEX/FLEX Z, MONO FLEX/MONO SPORT, SUPER RACING, etc.) you will also need to torque down the Seat Lock that holds the Lower Bracket in place.
The torque for the Lower Bracket Seat Lock differs between Strut and SA (Non-Strut) Dampers.
The torque spec for Strut Types range is from 101.2 to 115.7 (+/- 3.6) ft-lb.
The torque spec for SA Types is 50.7 +/- 1.8 ft-lb.
(*Please check your included coilover manual for actual torque specifications for your vehicle application)
Using only the ADJ Wrench and Torque Wrench combination is necessary for this Seat Lock.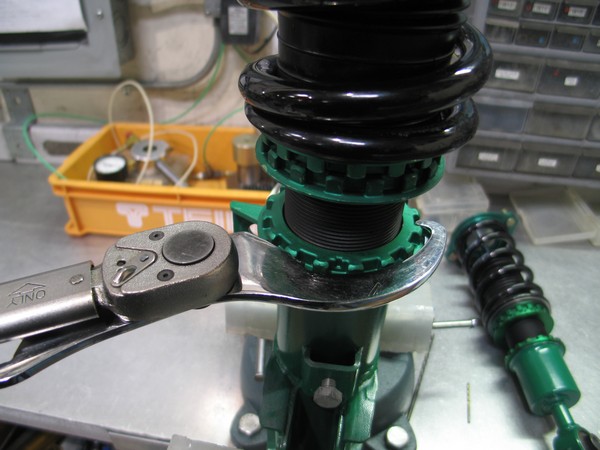
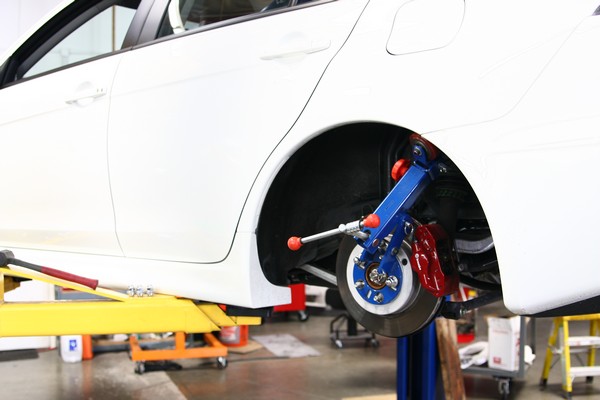
For those that do not have a vice readily available, the next best way to torque down the Lower Bracket Lock is after the Dampers have been installed onto the vehicle.
Make sure all of the other bolts and nuts (e.g. Knuckle Bolts, Sway Bar Links, etc.) are torqued to manufacturer specs.
Turn the wheel so you have clear access to the Bracket Lock and no obstructions for the proper use of a Torque Wrench, then make sure to lock the steering wheel so that the Damper will not turn while being torqued.
Next time we will talk about the proper method and specs for torquing Top Nuts, Camber Plate Hex Bolts, and HAS (Height Adjustment System) Seat Locks.
When life gives you lemons.. be adventurious & build a drift car
I remember back in the day my family would always be amazed when I would build Legos or my R/C cars exactly how it was shown on the box without looking at the instructions. Let me tell you that was skill (brushed a little dirt off my shoulder), but the drift build that I came across and am about to show you just amazes me.
")
(Note the low ride height in this picture. TWO THUMBS UP & Ryan approved!)
The vehicle being built is not your common drift vehicle, its a Toyota UTE (Toyota Tacoma here in the states). It has been stripped to the bare single cab.
")
As you can see the modifications have begun. S15 SR20 transplant, ARC radiator, Cusco Strut Tower Bar, Bride seats and TEIN HA coilovers (discontinued model, similar to currently available Super Street coilovers).
")
The rear end looks to have deleted the shock and leaf spring combination to a solid frame. Now if someone could just teach me to weld this well..
For more updates on this build, visit the following link.
My Evo X and Fujitsubo Legalis R
I bring to you another progress update/product review regarding my personal Evo X.
Previously, I had written about the Mono Flex Dampers that I am using.
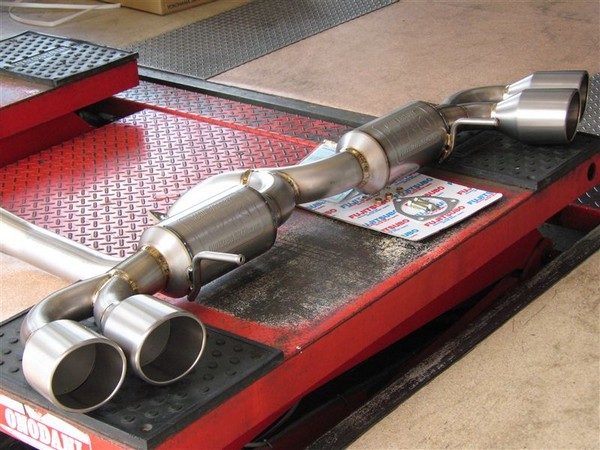
This time I bring to you Fujitsubo’s Legalis R for the CZ4A.

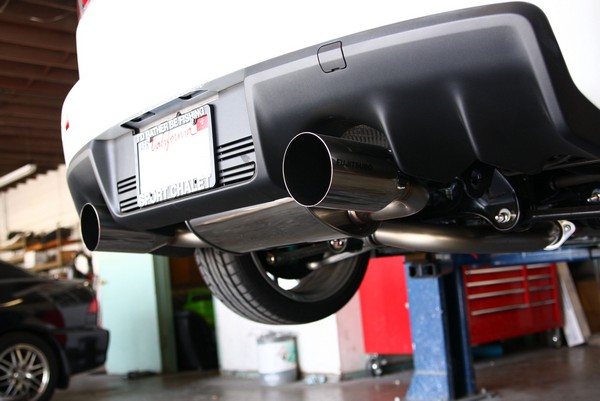
My goal for modifying my car was to obtain as much power as possible while keeping the car completely street legal; and I remember when the Legalis R was first being tested on an Evo X, the sound level and power gains were impressive, unfortunately I didn’t have my car back then.
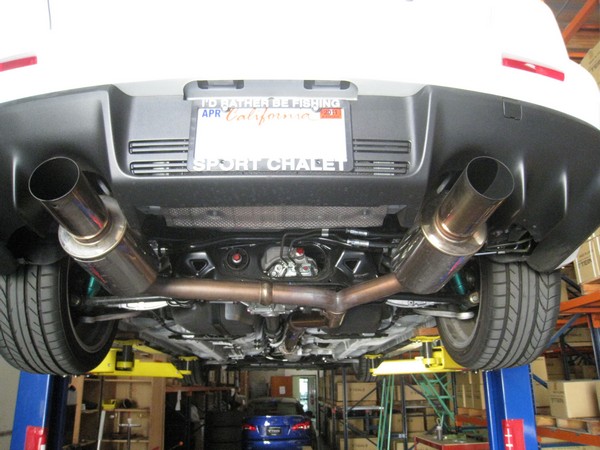
Of course, whenever anyone puts at least a cat-back exhaust on their car they are hoping to gain some power out of it; and I knew, from having seen the before and after dyno runs, that there was power to be made over the stock exhaust with the Legalis R.
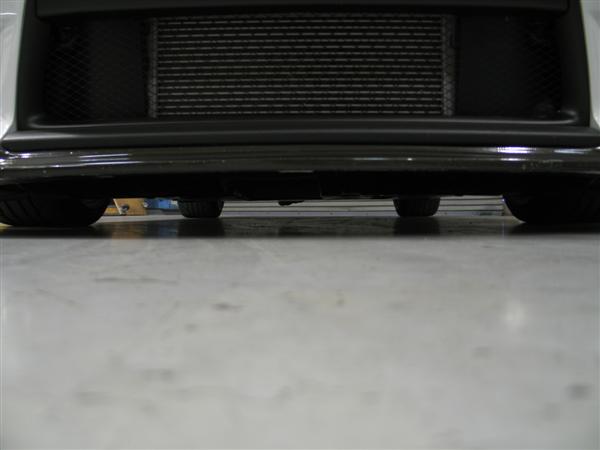
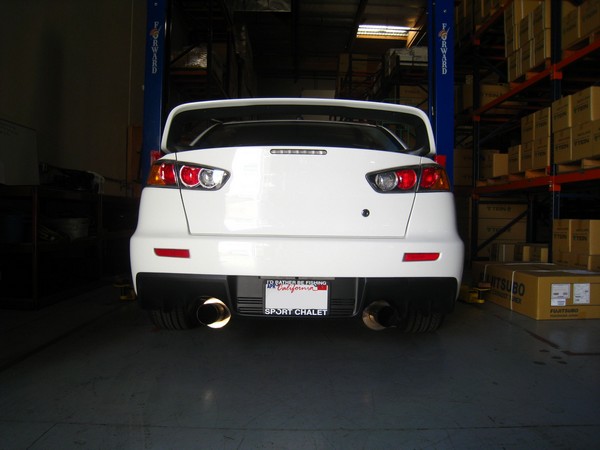
Another thing that was important for me was the aesthetics of the exhaust.
Before deciding on the Legalis R, I actually tried out the RM01A that had been on Elliot’s TEIN Sponsored EVO X.
But after driving around with it for a week or so I decided that I wanted something a little less aggressive looking and flowed better with the rest of the car.
(If you desire the aggressive dual canister look, the RM01A is available for special order.)
And finally the sound level.
According to California Vehicle Code 27151 the decibel level of the exhaust cannot exceed 95dbA.
The Legalis R falls well under 95dbA. It is a very quiet exhaust, no drone when cruising at highway speeds or any speed at that.
A Legalis R Promotional Video was recently filmed using my car, so keep an eye out it’ll be released soon.
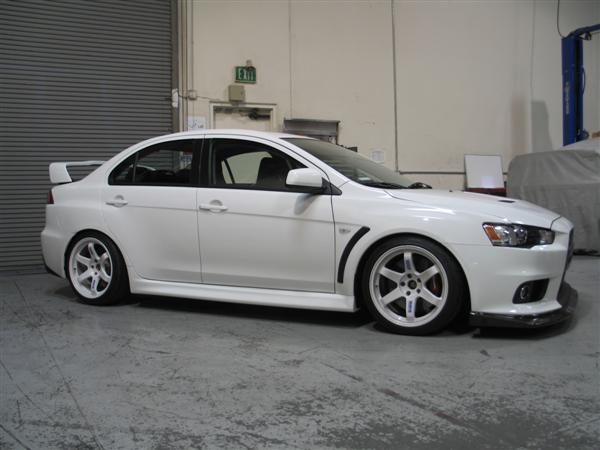
My Evo X as it sits now:
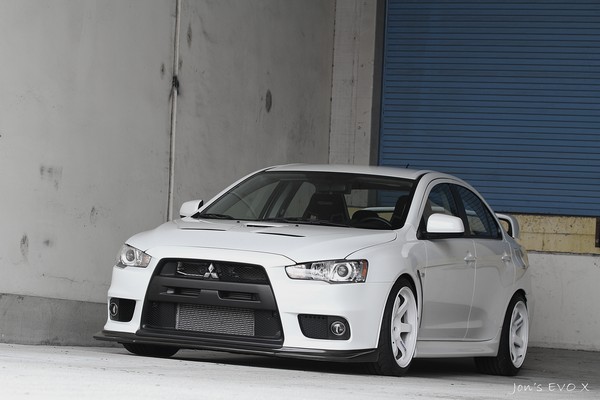
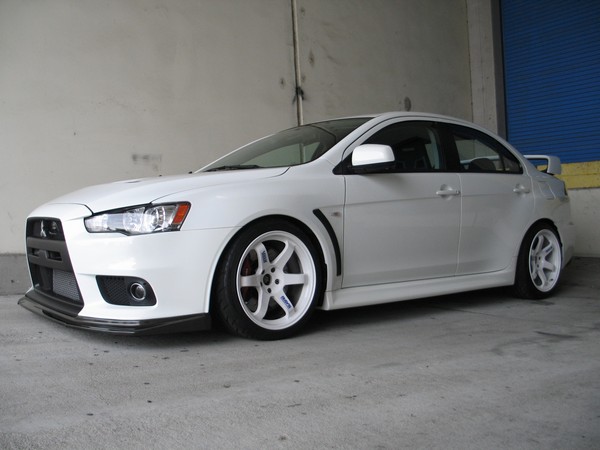
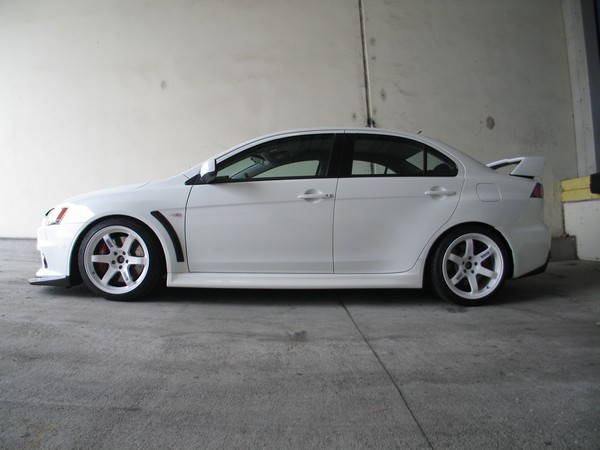
Special thanks to Mackin Industries for helping me obtain a set of TE37’s.
Also, special thanks to Evasive Motorsports for their masterful fender rolling abilities and for carefully mounting tires onto my white wheels without leaving any marks, always true professionals.
(None of that fender rolling with a baseball bat at Evasive)
Do not try this at home!
I came across this rad video over the weekend of a custom built Kawasaki vs. corvette powered RX7 as they drift battle it out around the track.
Now what does this have to do with our company you may ask. Well its rad for one, it has some insane drifting and check out around 1:50. Yep, I spy some TEIN coilovers. This V8 RX7 driven by Jim Guthrie (professional race car driver) is using our Super Racing coilovers. Overall its a dangerous and awesome video. RC car camera=win, The End.
My Evo X and Mono Flex Dampers
Tein Blog Readers,
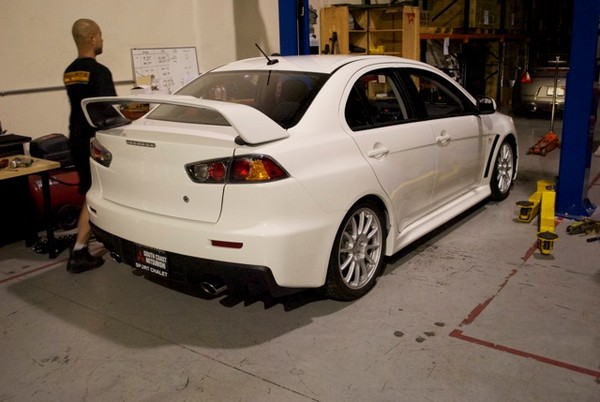
I introduce to you my 2010 Mitsubishi Lancer Evolution X.
I chose the Evo X because I believe it has the perfect balance between daily driver and track car.
For your everyday needs it has 4 doors, it seats 5, and has a decently sized trunk.
When you get to the track it’s 2.0L Turbo Charged S-AWC System makes for a very fun time.
New off of the lot this is what I had to work with: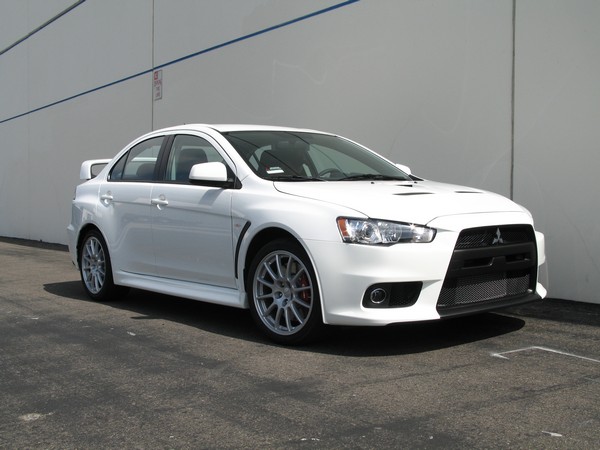
Having switched from a nearly 2 decade old BMW that was still running the suspension that was installed at the factory, the ride quality of the Evo’s stock suspension was a difference of night and day for me. But I still wanted more out of my car. Not to mention the stock ride height, it may be acceptable if the car was going to see any time on gravel; but my car was destined to be a tarmac queen, it needed to be lowered.
When it came time for me to choose one of the many suspension products we offer for the Evo X the decision was quick. Right at the time that I purchased my Evo, Elliot’s TEIN Sponsored EVO X was being returned to stock form, so all I needed to do was remove the suspension from his car and install it onto mine. Having done the majority of the track support for Elliot’s car I knew the suspension and setup well enough to be confident that my car would have no problems with said suspension installed.
Front Dampers installed and EDFC Wiring being taped up:
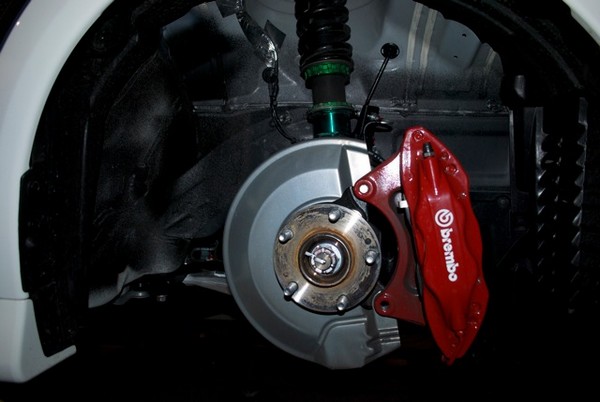
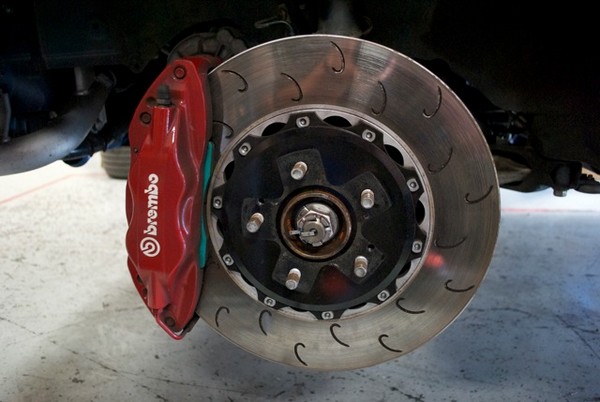
I even switched out my stock brakes for Elliot’s APM Rotors and Project Mu Pads:
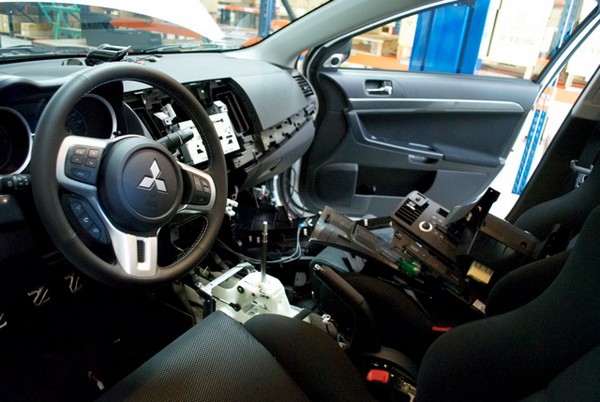
In order to route the EDFC Wiring and mount the Controller I had to tear apart my brand new interior:
After having worked through the night transferring over many more parts I later took my car to Evasive Motorsports for a track ready alignment.
On the streets the Mono Flex Dampers provided just the right amount of comfort and control. The ride height was also right where I wanted it, not too low, not too high:
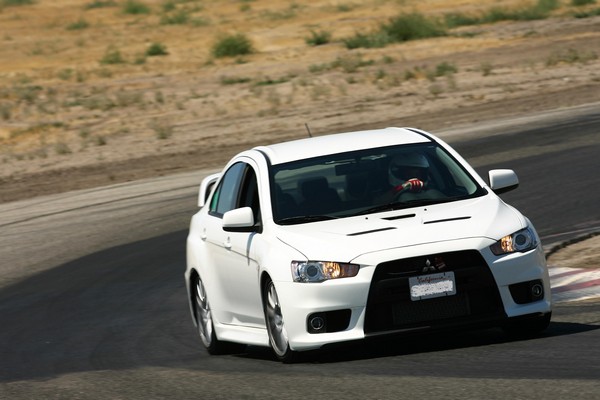
Using Mono Flex Dampers and upgraded brakes I was able to push out a 2:20 on Buttonwillow’s Time Attack configuration:
R35 Godzilla!
As some of you might not know yet.. but the Skyline has returned and is available for sale in the US! Now, I know that you are hearing this for the first time and the price might be a little out of our [your] price range. But if you dream it, it will come because I currently have 3 in my garage! Seriously, I can show you my garage on Gran Turismo 5.
Anyways, I wanted to introduce you to a few products that are available for the GTR. Unfortunately we do not currently stock any of the items here in the US due to low demand but can special order for you.
Super Racing Coilovers (Part Number: DSK00-81LS1) Springs are sold separately.
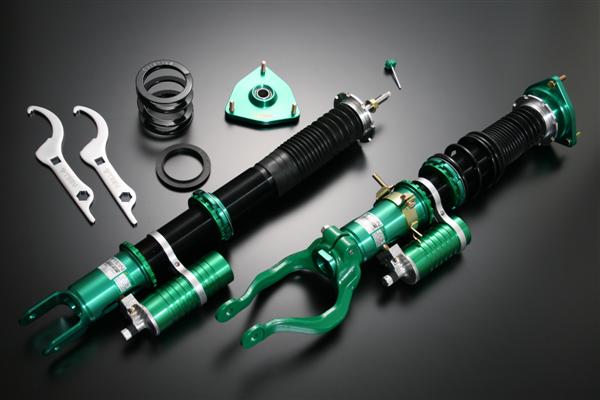
MSRP for these bad boys is $3650.00 (and I do mean bad.. think CyberEvo. Yep the famous record breaking CyberEvo is running our Super Racing Coilovers).
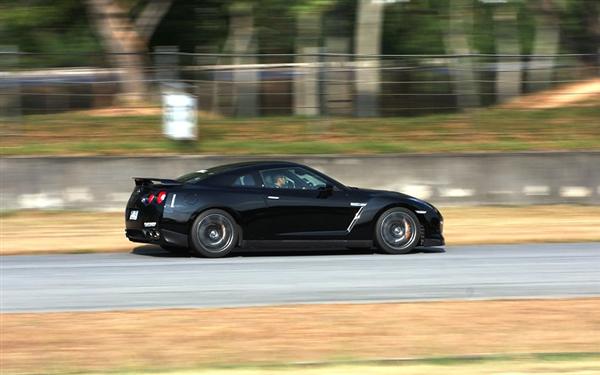
GTR on our coilovers in action around the track
Carbing Aluminium Radiator Reservoir Tank (Part Number: CA 220 148 0)
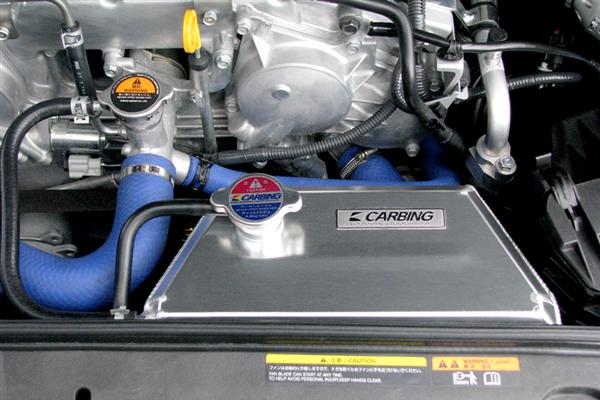
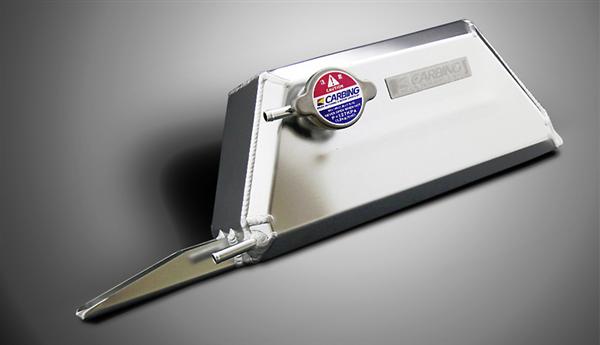
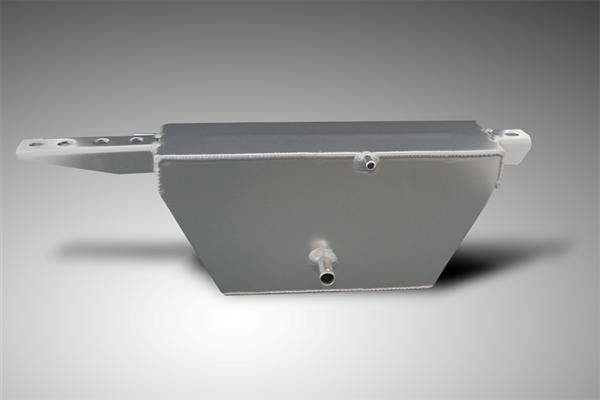
This is serious bling for the engine bay. MSRP $540.00
Fujitsubo Super Ti Exhaust aka the Holy Grail of exhausts and titanium (Part Number: FJ 480-15311)
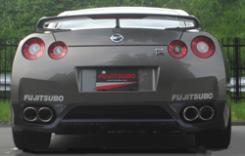
For a sound clip of this exhaust installed on a GTR, please visit the following link: Fujitsubo Website
MSRP $4560.00