My Evo X and Mono Flex Dampers

Tein Blog Readers,

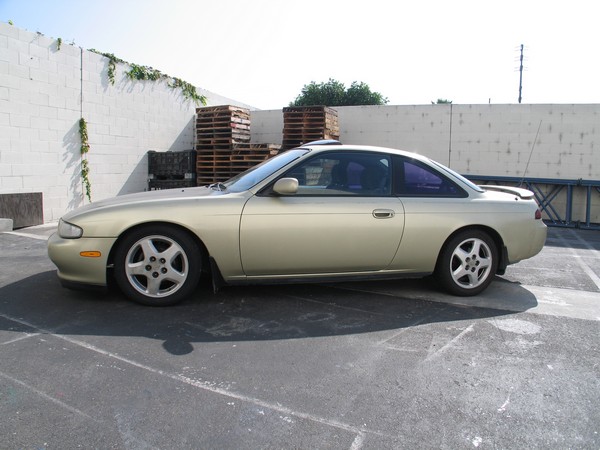
I introduce to you my 2010 Mitsubishi Lancer Evolution X.
I chose the Evo X because I believe it has the perfect balance between daily driver and track car.
For your everyday needs it has 4 doors, it seats 5, and has a decently sized trunk.
When you get to the track it’s 2.0L Turbo Charged S-AWC System makes for a very fun time.

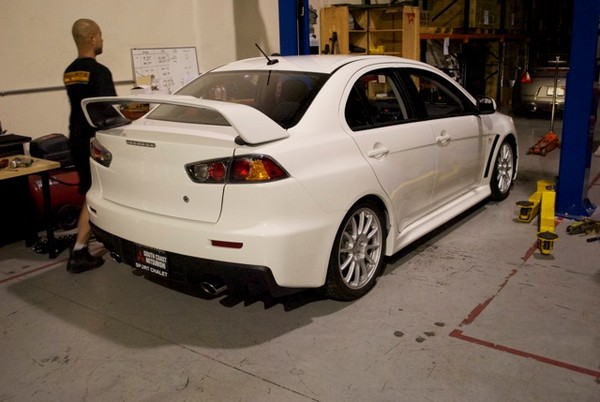
New off of the lot this is what I had to work with:

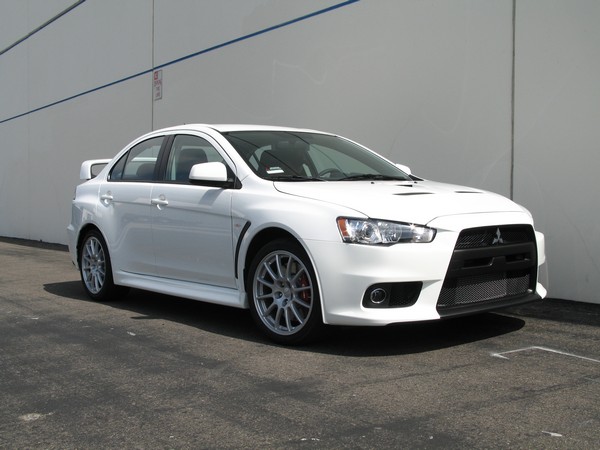
Having switched from a nearly 2 decade old BMW that was still running the suspension that was installed at the factory, the ride quality of the Evo’s stock suspension was a difference of night and day for me. But I still wanted more out of my car. Not to mention the stock ride height, it may be acceptable if the car was going to see any time on gravel; but my car was destined to be a tarmac queen, it needed to be lowered.

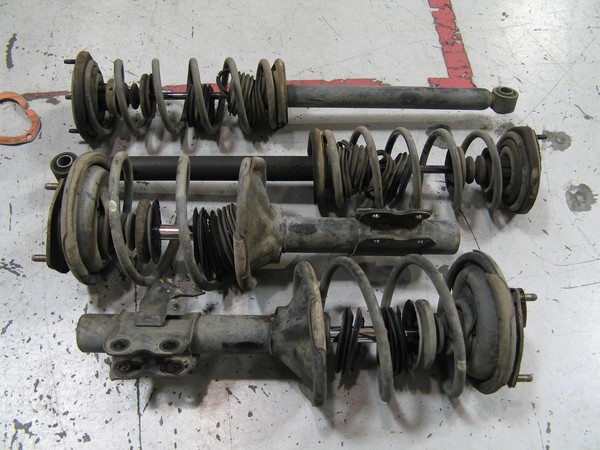
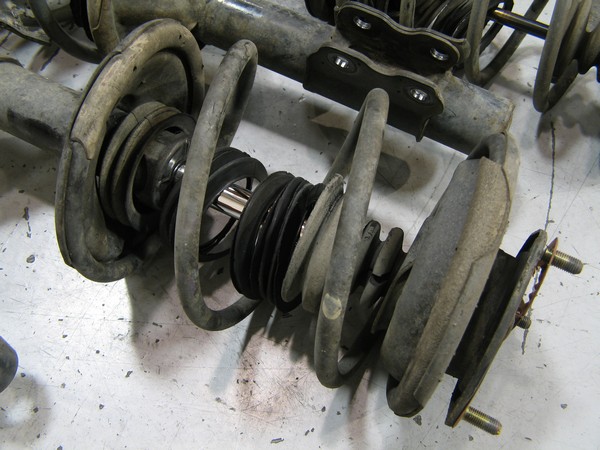
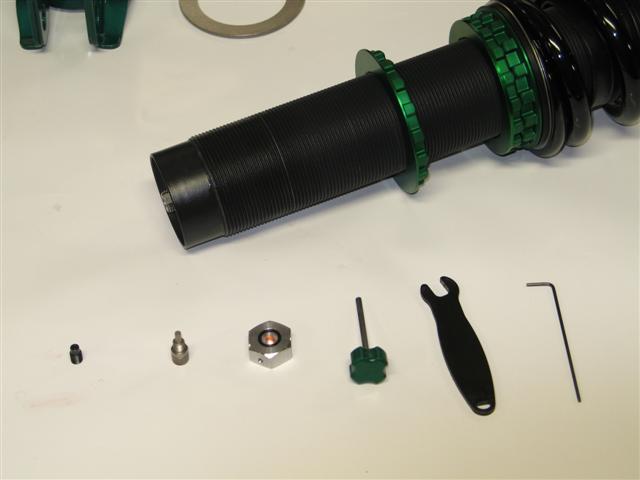
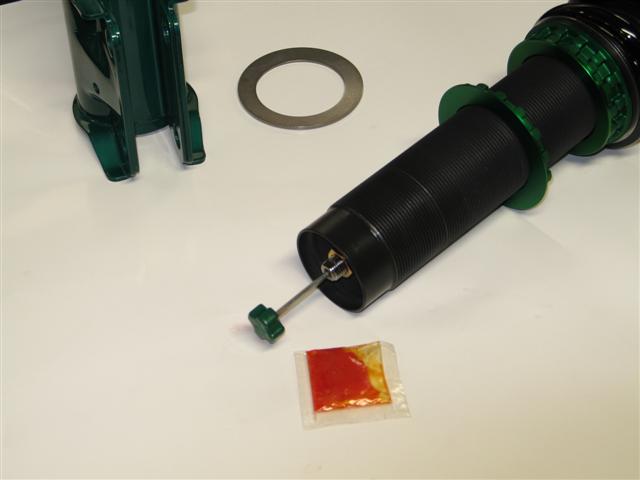
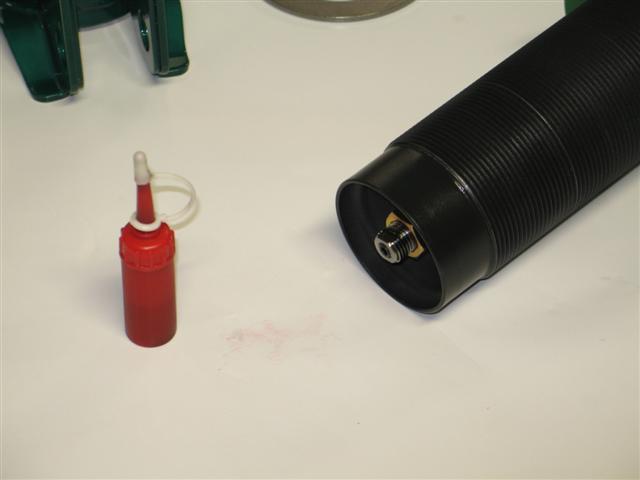
When it came time for me to choose one of the many suspension products we offer for the Evo X the decision was quick. Right at the time that I purchased my Evo, Elliot’s TEIN Sponsored EVO X was being returned to stock form, so all I needed to do was remove the suspension from his car and install it onto mine. Having done the majority of the track support for Elliot’s car I knew the suspension and setup well enough to be confident that my car would have no problems with said suspension installed.

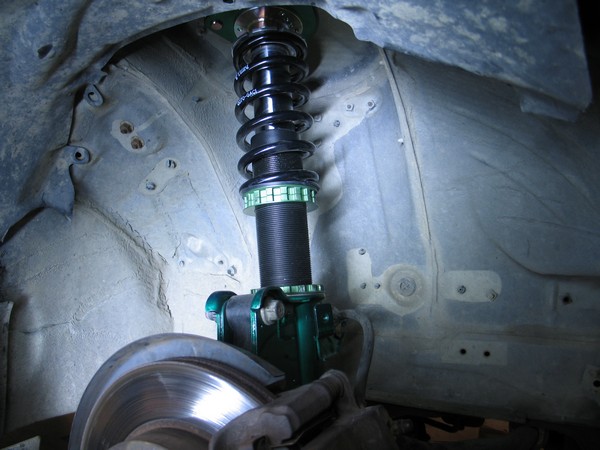
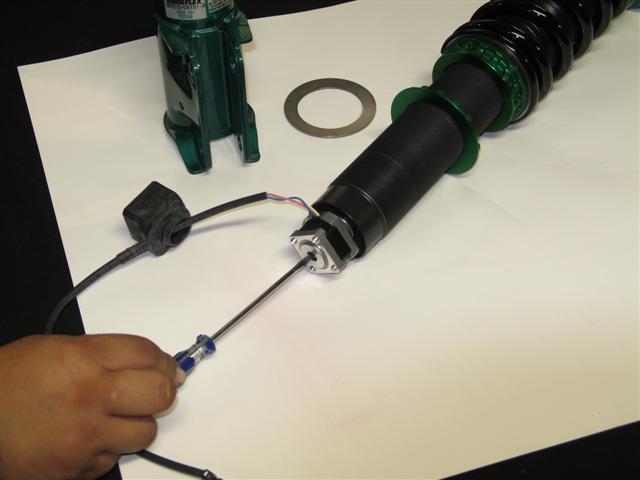
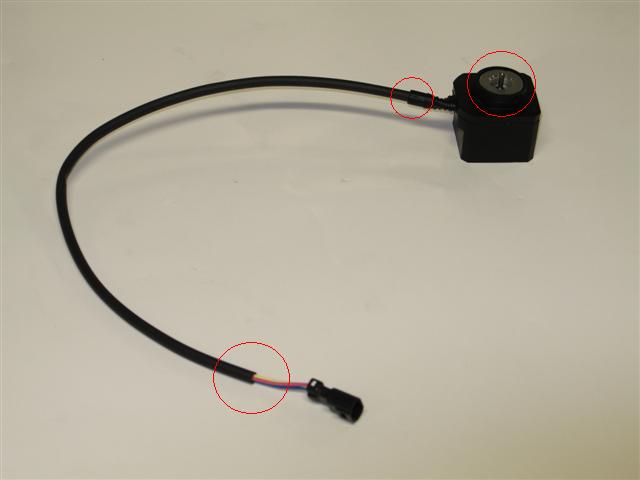
Front Dampers installed and EDFC Wiring being taped up:

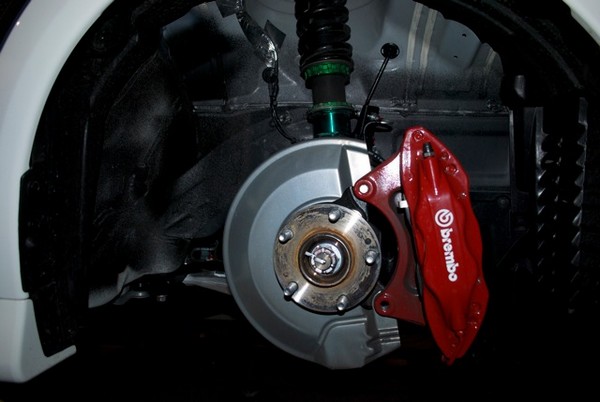
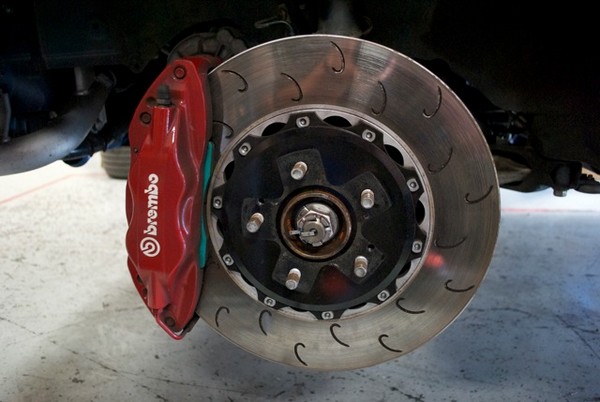
I even switched out my stock brakes for Elliot’s APM Rotors and Project Mu Pads:

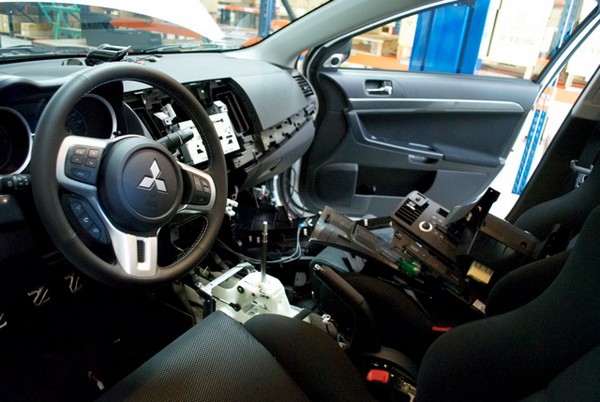
In order to route the EDFC Wiring and mount the Controller I had to tear apart my brand new interior:

After having worked through the night transferring over many more parts I later took my car to Evasive Motorsports for a track ready alignment.

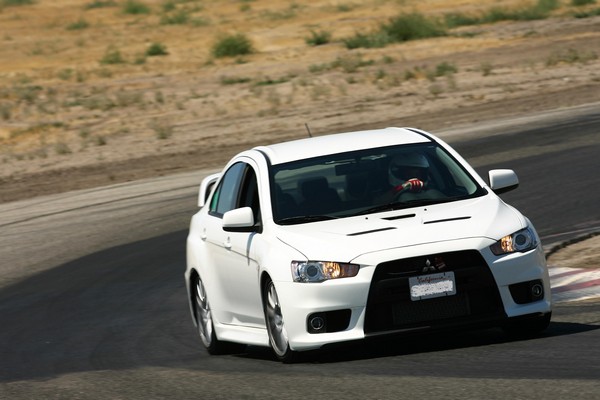
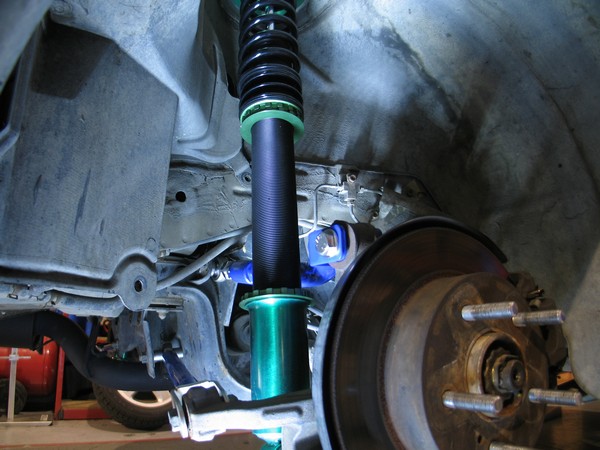
On the streets the Mono Flex Dampers provided just the right amount of comfort and control. The ride height was also right where I wanted it, not too low, not too high:

Using Mono Flex Dampers and upgraded brakes I was able to push out a 2:20 on Buttonwillow’s Time Attack configuration:

S14 Mono Flex Testing

Finally, many years after it’s initial release, the Mono Flex Dampers for the S14 have been tested.

If you own an S14 and happened to have been waiting for us to release a mono tube suspension for your vehicle, chances are your suspension is starting to look like this.

If those parts are a close representation of what your suspension looks like right now, if you’re going to be using your S14 for some serious track events, or if you just want to upgrade your suspension, then you should pick up a set of our Mono Flex to make your S14 handle like the sports car it is.

Not only will our Mono Flex give you that sporty handling and feel, they also look great.

Take the time to contact us or one of our dealers and ask about our S14 Mono Flex.

(Note: S14 Mono Flex are special order items and will require some time to arrive)

Honda CR-Z Mono Flex Coming Soon

We recently got a hold of Honda Tuning magazine’s CR-Z to use for Mono Flex testing.

The JDM Spec Mono Flex will be test fitted and road tested. Following our normal testing procedures we will be revalving and tuning the kit to for Time Attack competition.

Look for complete coverage of the build-up in future issues of Honda Tuning magazine.

Honda Hybrid Power

Getting Started

Checking fitment and taking measurements

EDFC Motor Install Part 2

Here is part two of how to properly install EDFC motors (strut type, inverted shown). For this type of install is not as common as the last, but requires additional steps being that the motor is more exposed outside of the vehicle.

Additional tools you will need for this install is;

Small flat head screwdriver

1.5mm Allen wrench

Silicone sealant

For this install, it is recommended to do it with the damper off the vehicle and to remove the lower bracket for more clearance.

1st step: With a 1.5 mm Allen wrench, remove the click knob. Then you will need to use the 8mm click wrench to remove the click assembly. Once removed use the 3mm hex wrench to remove the original hex bolt from the damper.

Parts removed; original hex bolt, click assembly, click knob. Along with tools used in removal process.

2nd Step: Add a small amount of supplied grease (orange bag) to the EDFC hex bolt threads and install the EDFC hex bolt until flush with the top of the piston rod. Be sure not to add threadlocker (red tube) to this part!

EDFC hex bolt installed with grease and flush with top of piston rod.

3rd Step: Add the supplied threadlocker (red tube) to the outside threads of the top of the piston rod. Please note, not a lot of threadlocker is needed nor does it need to cover all the threads.

Area shown of where to apply the threadlocker to piston rod.

4th Step: Install the EDFC motor to the piston rod. This is the most important part and is sometimes easier with some help. What you need to do is place the EDFC motor shaft into the EDFC hex bolt. Now turn the EDFC motor 3 full rotations. At this point the EDFC motor should have started to thread onto the piston rod. Next, with your small flat head screwdriver, turn the top shaft of the EDFC motor 2 full turns clockwise (shown below). Continue to switch between turning the EDFC motor and top shaft in 3 or 2 specified full turn increments until the EDFC motor cannot turn anymore. The EDFC motor just needs to be hand tightened, not a lot of force is needed. Lastly turn the screw driver in both directions to ensure that the EDFC shaft can rotate freely.

NOTE: the EDFC motor or shaft does NOT need to be set to any particular position. Once the EDFC controller is turned on, it will self adjust.

With your small flat head screwdriver, this is the motor shaft of which you will be turning 2 full turns between 3 full turns of the EDFC motor.

Now go ahead and bring the EDFC rubber dust cap up and cover the EDFC motor. Be careful not to rip the rubber cap. A little lubricant can be used to help install the dust cap. Be sure to confirm that the rubber cover is attached correctly. Otherwise dust or moisture can enter into the cover may shorten the life of the motor or cause trouble.

The last and most important step for this install would be to weatherproof the motors with a type of silicone sealant to areas shown in the picture below.

Be sure to add a silicone sealant to the circled areas to help protect the motors from getting damage from water.

Lastly use zip ties and tape to secure the EDFC wire. You want to avoid driveshafts and make sure there is plenty of slack for suspension movement. If there is limited space and you feel that the wire may come into contact with something, try to add a section of rubber hosing as added protection and periodically inspect the wiring.

Made Specifically for TEIN USA

TEIN products are developed, tested and produced exclusively for the region in which they are sold. Not every region has different specifications but North America does.

Not every model (BASIC, SS, Super Drift, Super Racing, etc…) has a region specific setup. Product models like Comfort Sport or Super Racing serve niche markets and are therefore universal for the world. A competition car using semi-slicks is similar in the US and in Japan., therefore the same product is sold.

Both Cyber EVO and Evasive use Super Racing coilovers.

HOWEVER, models such as BASIC, SS, SS-P, FLEX and Mono FLEX which are more for street use are made specifically for TEIN USA (North America). Meaning a Mono Flex coilover for a 2008+ Subaru STI sold in the US is different than the kit sold in Japan. Features, materials, basic design, assembly, etc… are all the same but mainly spring rate, valving, and ride height range are different.

TEIN USA Kit:  GSS84-FUSS1

Spring Rates Ft: 10kg, Rr: 8kg

Recommended Ride Height Ft: -1.4″, Rr: -1.2″

TEIN Japan Kit:GSS78-F1SS1

Spring Rates Ft: 7kg, Rr: 5kg

Recommended Ride Height Ft: -0.8″, Rr: -0.6″

The specific differences may include spring rate/length, damping force, piston stroke, shell case length and brackets for brake lines, ABS, etc… Products are setup differently because the cars are NOT the same and more importantly the customers are not the same. Admittedly US consumers follow most trends from Japan especially when it comes to performance. However in Japan, the majority of consumers want more compliant suspension systems (softer setups) and do not want the car to be too low. Additional, vehicle ride height laws differ from country to country and in the US state to state.

You can see the difference in ride height between the US Civic Si with JDM body work and real JDM Civic Type R.

In general, TEIN USA setup products with stiffer spring rates and more drop in comparison to TEIN Japan. This is true for both coilovers and lowering springs. For TEIN USA our coilovers setup has changed over the years to keep in tune with the ever changing consumer demand. Our more recent kits have become a little softer than the products which were developed 6-7 years ago but that information is for another blog entry.

On a side note – if any US or Canadian customer wants a TEIN Japan spec. kit we can special order those upon request.

TEIN Japan testing Honda CR-Z

The new Honda CR-Z has been immensely popular in Japan with tuners and consumers alike (there are even rumors about a CR-Z one make race series). All of the big manufacturers have at least one as a demo car including TEIN Japan.

TEIN was one of the first companies to release a coilover for this car and you might think we would release a BASIC or Super Street damper but Japanese consumers wanted Mono FLEX coilovers. So that is what we produced.

Here is a video of TEIN Japan R&D department testing the TEIN CR-Z at Sodegaura Raceway in Japan.

cr

2010 HONDA CR-Z Released in Japan

TEIN Japan recently took delivery on their newest demo car which is the 2010 Honda CR-Z. They have already begun product development and are planning to release the Mono FLEX coilovers as well as High.Tech lowering springs for the Japanese Domestic market.

The CR-Z is “supposed” to be a Sport Hybrid. Comes with a 1.5L Hybrid engine which makes 84KW @ 6,000 (about 113 HP). The weighs in at 1130-1180kg depending on options which is about 2491-2601lbs. Does not sound sporty in comparison to other US vehicles but I guess we’ll have to wait to test drive one.

Front suspension is a MacPherson Strut layout which has the benefit of being lower in cost, having less moving parts and leaves plenty of space for the drive axle.

Rear is a Torsion Beam layout. As you can see the spring and shock is separately mounted. This has become a common rear suspension layout for many manufacturers due to relative low cost and ability to retain more interior space.

This is one of the hottest cars in Japan right now and TEIN is working long hours to finish the development quickly to meet the huge consumer demand. There is already a large back order for the vehicle from Honda.

TEIN Japan is also testing the automatic version.

Once the car is released in the US we will try to locate a test vehicle and begin our own development/ testing processes. TEIN products are developed for the specific region in which they are sold to best match consumer demands. In most cases the US spec products are more aggressive in spring rate and valving as well as drop range.

Past TEIN USA Demo Cars

Was looking through some older pictures on our server and found these. Some of the modifications may be considered out-of-date but at the time these cars were built this was the trend.

2004 Scion xB – built in 2004, debuted at SEMA 2004.  Featured TEIN’s Hybrid Wagon Dampers which allows for ride height adjustment from the cockpit. Greddy turbo kit, custom metal widebody, Bride seats front and rear, custom dash, Racing Hart wheels, and complete Lightning Audio setup. Was sold a couple times, last seen with new a paint job and many of the goodies removed.

1999 Nissan Silvia S15 – initially built in 2005, debuted at SEMA 2005, and went on to continually be modified/ revised/ re-tuned until 2007. 650WHP, RB28DETT (stroked), V-mount, OS Giken 6-speed sequential transmission, TEIN Super Racing coilovers, C-West widebody, stitch welded, crazy roll cage, too much to list. Now owned by a private party in California.

2006 Honda Civic Si Coupe – built in 2005, debuted at SEMA 2005. Custom metal widebody, custom turbo setup, custom red suede interior, TEIN Mono FLEX coilovers, Enkei RPF1 Type RC wheels, etc… Stolen while on the HIN tour and later recovered completely stripped.

2006 Volkswagen Golf GTI mk. V – built in 2006, debuted at SEMA 2006. Featured TEIN Euro Dampers, BRS widebody, host of Seibon Carbon parts, APR Turbo upgrade, JE pistons, Carrillo rods, Bride Gias Carbon Kevlar seats, custom Rothschild Fabrication roll bar, dual composite NX nitrous kit, and custom AutoArt VX wheels. Sold to a used car dealership, not sure where this car ended up.

2007 Toyota Yaris 3-dr – Built in 2006, debuted at SEMA 2006 and competed at Super Lap Battle Finals 2007 (driver Andy Hope pushed this car to a 2:08.091). Burnout bodykit from Japan, custom painted graphics, Super Charger kit, KAAZ LSD, Custom Rothschild Fabrication roll cage, Bride Bucket, Defi Meters, and custom spec TEIN Super Street coilovers. Currently sitting inside one of Toyota’s warehouses.

more past demo cars to be revisited in the future…