Learning the OVERHAUL repair process

When it comes to overhauls I’m usually the person in charge of carrying out all the steps. Except for one which is the most important of them all , the actual repair. The way it works is as followed- We receive the package and check it in then we move it to our R&D department for a repair inspection. Upon the inspection I contact the customer and secure the repair payment and/or  final overhaul decision. Upon completion of repair a recontact the customer to verify shipping information and that’s where it ends.


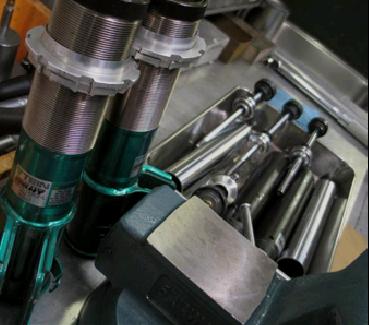
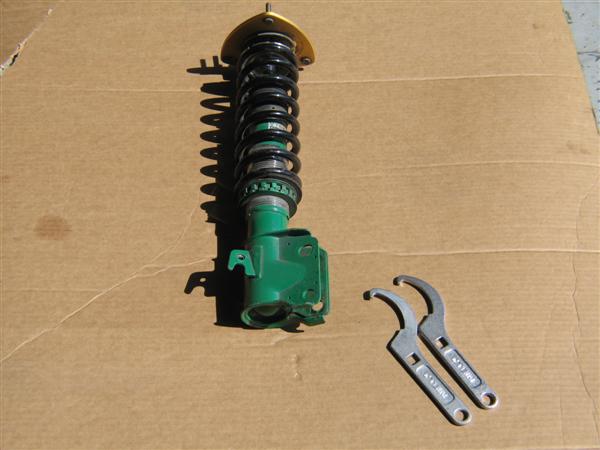
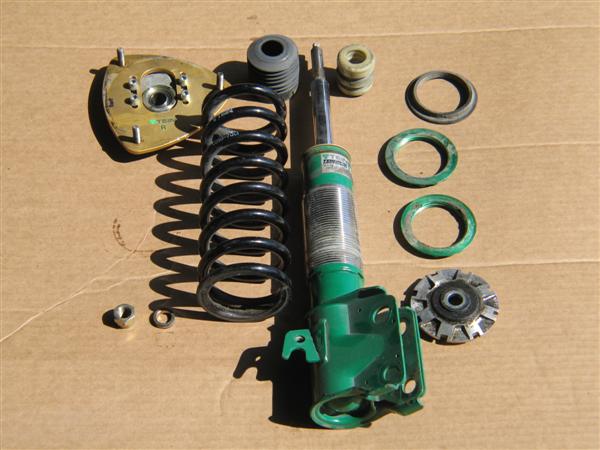
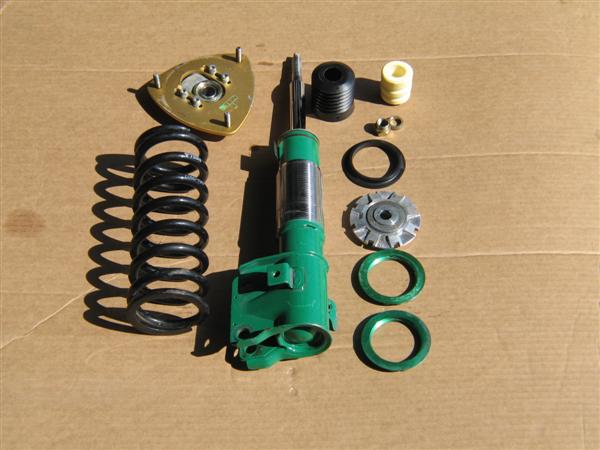
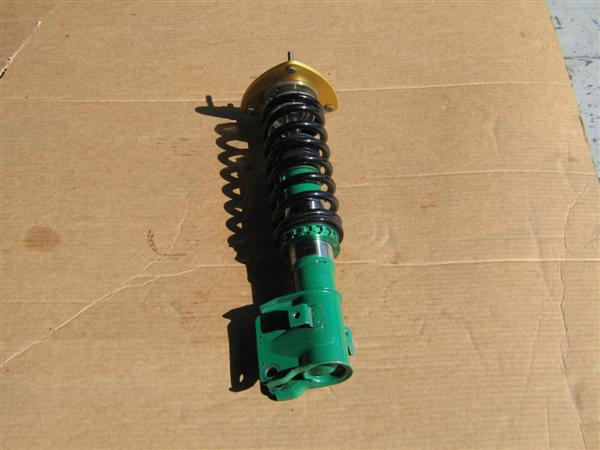
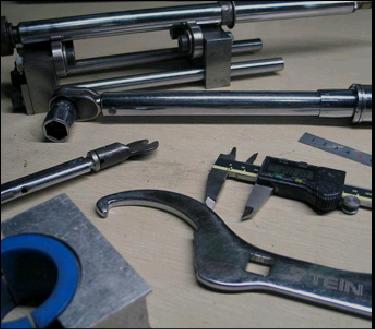
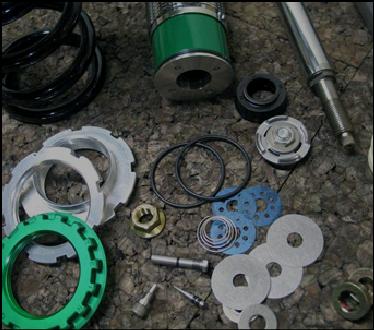
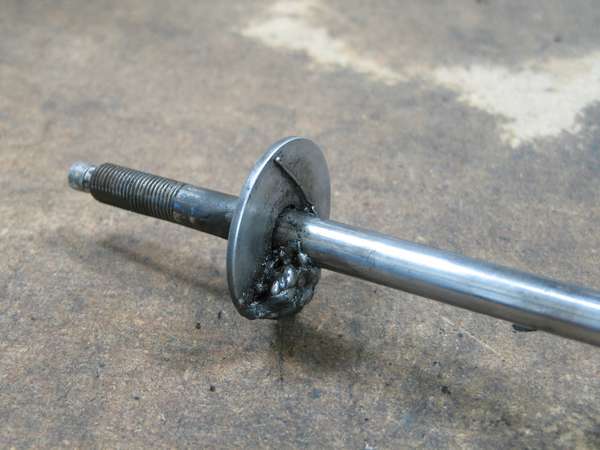
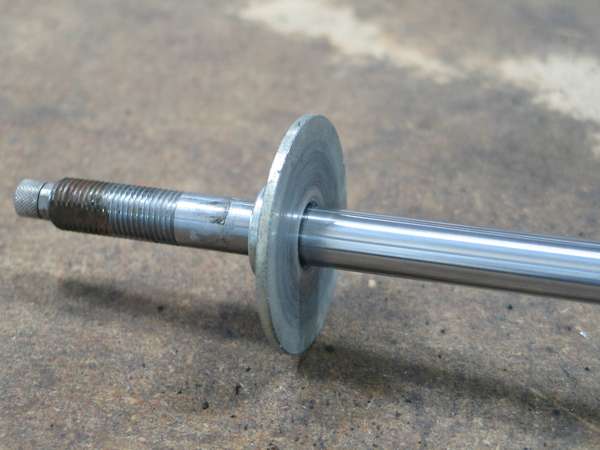
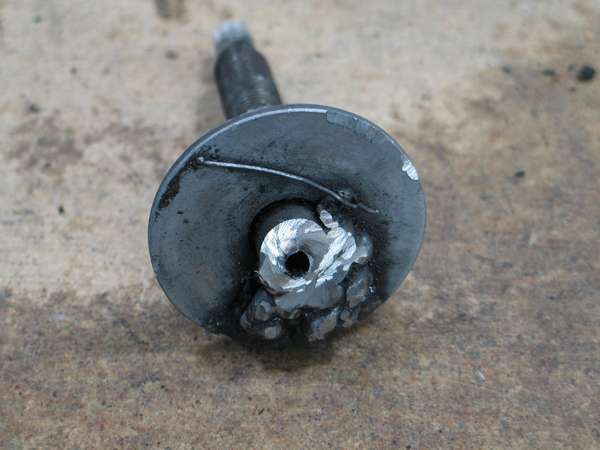
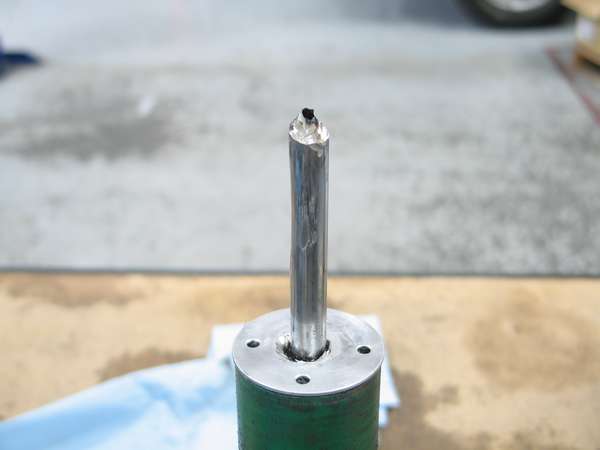
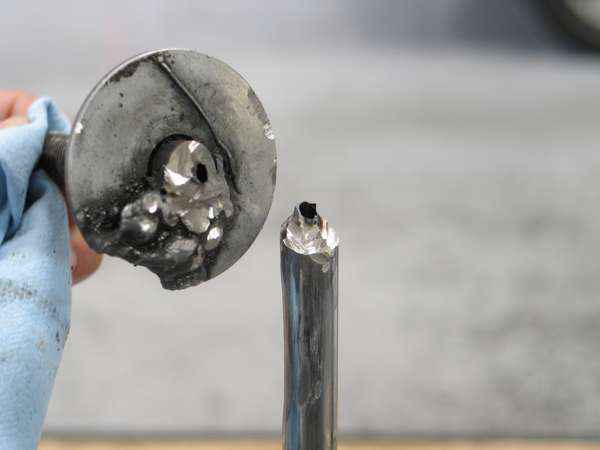
The disassembling of our dampers is not that difficult. Breaking down the piston rod and internal components, then cleaning them from dirt, dust, rust, and debris  is also not that difficult. It does, however, get a little repetitive. Now, where it gets tricky is reassembling the internal components.  As some of the parts (shims) tend to look the same but are nevertheless different in design and thickness. There are many steps that need to be done to successfully overhaul a damper. I will save the details as they are confidential but I must say that re-greasing, and re-torquing all the components is the easiest step of all.


Well, now I have actually learned the repair process. Unfortunately for us here at TEIN one of our R&D staff members has left us to work as a CHP officer. Fortunately for me, I have now learned a new skill and got my hands on repair action. We’ll still leave that work for our trained engineers. As for me, I’m glad I’ve been able to learn more of the details that goes into an overhaul.


Spring Seat and Seat Lock Evolution

Since the beginning, spring seats and seat locks have been a necessity for the systems ranging from our Type NA coilovers systems utilizing a three position adjustable perch on the shock body with locking snap ring to maintain the seat position, similar in design as the Koni and Ground Control set ups, all the way to the Street Advance coilovers which utilize a spring seat lock with a delrin thrust washer and seat lock to maintain the ride height position on a removable threaded sleeve which is ZT coated.

The photos below detail the different changes made to the spring seats and seats locks over the years.

The Image above is of the spring seats for the Type NA damper which, as mentioned, used a c-ring that would be placed in the desired ride height setting.

This style which utilized a spring seat, seat lock, and aluminum thrust washer as shown in the photo above was the second design released for multiple coilover kits ranging from the older style Type H2, Type HA, Basic, and Super Street, all the way up N1 coilvers as shown in the photo.

This third design which is still used with some of our coilovers today utilizes  two seat locks and 1 rubber spring seat.

This photos show the newest type of spring seats and delrin thrust washer in conjunction with the previous style seat lock which are found on the Street Basis, Street Advance, and other coilover kits both currently available and future release.

Although the material and coating has changed over the years, it would still be recommended to periodically clean and lubricate the locks, threads, and locking rings, depending on the model type. This will ensure years of trouble-free height adjustment for your TEIN coilovers.

Don’t DIY

It’s no secret that since the beginning of time consumers of products have been attempting DIY fixes in order to cut down on repair costs. Some succeed while others fail at actually repairing whatever it is they want to fix. More often than not, for those who do fail, the repair costs end up exceeding what they could have been had the product been sent in before it was tinkered with.

Our products are no different. A few times out of the month we will receive a product that has had a “home remedy”, a DIY fix attempt. Well, we’re here to tell you this: “Don’t DIY your own repairs!” The end result might turn into a much more costly mistake.

We will take this customer for instance.

(Depending on your vehicle and model your dampers’ components may or may not look the same.)

For a reason that we were unable to figure out, the customer decided to weld the Bump Stopper to the Piston Rod.

A normal Bump Stopper on a Piston Rod without the welding.

The customer’s original issue may have been fixed. However, that’s where the list of pros to doing it themselves ends.

Here’s what the Ring Nut (top of the shock) will look like under normal conditions.

Here’s how the customer’s Ring Nut ended up looking after the damper parts were welded on and the damper was actually driven on.

Because the Bump Stopper could not be removed in the correct manner to make way for servicing of the damper,  the top of the Piston Rod had to be cut off.

This customer was lucky that the damage was limited to that location on the damper only, and that an overhaul was still possible.
But the labor put into the cutting and the cost of the replacement parts that were needed could have been avoided had the customer sent in their damper without the DIY fix that was attempted.

Your DIY fix may not end up as lucky, you may end up damaging the damper beyond any repair.
If you think you can fix an issue that you’re having with your dampers, take a step back and think if the possible extra cost of repairing your “fix” will be worth it.

By the way- if you aren’t sure you have your suspension set up correctly, or you just need to verify the parts of your kit are correct, we ask that you please contact us beforehand and have us assist you with your inquiry. Give us a call at 562-861-9161 or email us at tus_sales@tein.com for assistance.

FR-S or BRZ?

It has been almost over a month since this years hottest sports car, Scion FR-S and Subaru BRZ came out to the market.

TEIN USA has been developing products for these two cars to deliver our products to the customer as soon as possible.

I have been wondering what is the difference between FR-S and BRZ?

Exterior dimension, interior, engine, transmission, chassis and tire sizes are the same in between these cars.

But, when I drove BRZ that came in for development,  I felt a big difference!

BRZ’s suspension are set as a mild setup, if you push harder it simply understeers and will not take you to oversteer motion.

But, the FR-S has an opposite character than the BRZ. 

The FR-S has stiffer damper with softer spring. And if you know how to push hard, this simple, less electronically controlled device (compare to newer higher performance car) and fun to drive machine, it’s just pure fun to drive!

My conclusion is FR-S and BRZ are totally diffent set-ups

If you want to get pure driving pleasure go with FR-S, and if you want affordable yet nice, well-designed coupe go with BRZ.

And I will leave damper dyno chart (in .pdf format) for FR-S and BRZ for comparison.


OEM BRZ & FRS Front

OEM BRZ & FRS Rear

ONE SLAMMED ELEMENT!!

‘Sup Guys! As you can see, this Element does not look like your ordinary slammed Element. Then again why would it, since this one belongs to one of our staff that is known for slamming his cars!

You can see how much lower it is compared to another staff member’s stock Element here.

This slam didn’t come easy. Gonzo had to look over lots of design drawings and come up with the one that basically lowered the car to his liking! He decided to go with customized Basic dampers from a 2001-2005 Honda Civic re-valved to 10kg and 14 kg springs. After he completed lowering his Element he purchased a nice set of Enkei’s (first gen NT03+M  18″ by 8 1/2″  to make it look even lower (overall diameter of the wheel and tire is smaller than the factory setup).

**The 2001-2005 Civic Basic kit is is not a direct swap into the Element- steering arm location is not the same and requires custom steering tie rod ends to make it work. It should be noted that if anyone decides to do a similar modification to their vehicle, it is at their sole discretion.

Some of his upgrades are a S2000 steering wheel with functioning cruise control, a rear camber kit and a Carbing blue anodized shift knob.


Overhaul Pricing

Now, I know we list an overhaul starting price on our website. However, we do know that some customers are a little confused when we give them a quote higher than what they may find listed. I’m hoping to clarify on this matter a little bit.

On our Service page on www.tein.com, you will find a link to our Overhaul Price List. You can find a list just like the above image which is the starting price for our overhaul service, as well as revalve service (if you plan on having the dampers matched to a specific spring rate). Again, this is just the starting price for the work covering new seals, damper fluid, nitrogen gas fill, and labor.

However when we receive your dampers, we have our in-house engineer inspect the dampers to assess any damage or potential damage from the original parts. As you can imagine, there are a lot of moving components that comprise the complete damper. In some cases, we can reuse many internal parts. But in the event that an engineer finds a part to be under specification, we will suggest to replace those items. If you’ve ever received a quote much higher than the starting price, it is because of these findings.

This picture shows what type of internal parts may need to be replaced for twin-tube type dampers (Basic, Super Street, Flex, Super Drift).

This list above is for mono tube damper-specific parts.

In all cases, our staff will go over the details with the customer to let them know what will possibly need to be replaced on the damper part by part. Again, we know that for some customers a high quote is not what they are expecting. We just take these extra steps before starting any work to make sure that the customer has an overhaul that is worthwhile and that will last just as long as an out-of-the-box kit.

*For the record, we’ve taken a customer’s request to reuse some of his old parts (a damaged piston shaft was one of them) when overhauling to save on some costs. The kit came back to us not too long after because the nitrogen charge ended up leaking out past the new seals.

So we will do whatever the customer requests, within reason. But believe me- we do so hesitantly.

We do, however, leave some new internal parts as only a recommendation to replace. But in many instances, it is probably best to take the engineer’s word when they suggest part replacement.

Of course, if you need some explanation or any assistance with your dampers you’re thinking of having serviced by us, please feel free to give our staff a call at 562-861-9161, and we will take the time to go over the service in detail for you.

March Madness!!

No, this is not your typical NCAA March Madness. But it is March Madness in our
warehouse department! I recently went to deliver to Options Auto Salon, our
local authorized distributor, with the box truck full of pallets, including springs
and dampers in the passenger side of the cab!

The box truck can hold a total of 8 pallets. But since the order was so
massive, I didn’t have enough room in the back. So we just simply filled up
the cab. It has been very busy here at TEIN with other massive orders we had shipped
out this week, not to mention receiving our second container from TEIN Japan this month to help fulfill the rest of the orders we have pending. We hope we get many more of these “March Madness’s” this year (how about an April Madness?!)!

Though the cab was filled with product, safety precautions were of course taken to
avoid any accidents such as mirror visibility and the product
arrangement. Strange that for some reason the product was arranged in such a
manner that it stayed solid and in place even while driving.

As we get busier this year, we will do our best to make sure our dealers and customers have the products they’re looking for readily available and delivered as soon as possible!

Cardomain


To all the car fanatics and Tein supporters out there who keep up with our blogs. I have stumbled upon a website in which you can show off your vehicle like on a summer night parking lot meet with out the authorities making you sweat. Car domain is like a Facebook for your vehicle dedicated to car fanatics of all vehicles all over the world. In the search engine just type in TEIN and a list will automatically populate with all the profiles on the website that have TEIN products listed as a modification to their vehicle. If you do not own any of our products and are considering one of our kits, you can possibly view how your vehicle would look with our kits by searching for your vehicle’s model on this site. You can also send messages, request new friends, add images, and list modification as easy as any other social networking website. Below are some pictures of some nifty vehicles I found with our products installed. Visit the website to check it out for yourself.


So fresh and so clean clean

To some automotive enthusiasts with suspension modifications, many think “install it, set it and forget it”. In many ways, this in incorrect. One thing everyone should consider is that suspension is exposed to the elements of the road. Whether its debris, rain, snow, dirt, mud, sand and possibly road kill, over time these elements could take a toll of the performance and life of any brand suspension. I wanted to go over a few tips for cleaning your suspension that myself and a few other coworkers use.

Cleaners and cleaning tools needed:
Running water, light brush, cleaning solvent in spray bottle (ex. Simple Green), rubbing alcohol, spray lubricant, clean terry cloth and elbow grease.

Damper removed for cleaning

Damper shown fully disassembled for cleaning. The adjustment threads were covered with dirt that made the seat locks hard to remove.

After 10 minutes of cleaning with the brush, simple green and water the damper is looking new again. Once the damper is dry, we clean the piston rod with rubbing alcohol to get rid of any water spots and remaining soap. Before we reassemble, it’s recommended to spray the threads on the damper body and piston rod with a spray lubricant to help from parts becoming seized and rusted.

The damper all assembled again and torque to the recommendations in the installation manual. This damper is ready to rock and roll!