A Hit or Miss Situation

During December 2012 we received a call from Bruce. He is the owner of  DeDona Tint & Sound, Inc. in Greensboro, NC. He had spoken to us during SEMA week and was interested in purchasing our Street Advance coilover kit. Now, the kit he was interested in is manufactured for the 2006-2012 Lexus Gs430. However, he wanted the kit for his 2008 GS460. We told him it may not fit, as there could be discrepancies in the vehicle weight , mounting points, etc. Plus, we have not tested that particular model.  Basically, it would be a hit or miss at his own discretion.  Nevertheless, he was determined and confident the kit would fit.

Flash forward to a month from December and Bruce calls confirming fitment. Now from our standpoint, we still can’t guarantee the fitment to consumers. Again, because our R&D team has not physically done the testing. He detailed to me that minor modifications had been done, and that the mounting points were identical to those of  the GS430.  He loves the drop, and ride quality all around. I was impressed and glad to hear that he was satisfied with our product as a TEIN customer and automotive enthusiast.

If you’re considering a aftermarket suspension for your GS460, I would recommend you give them a call to touch base on what exactly was done to make the kit work. Below is an image of this simple yet stunning 2008 Lexus GS 460.

http://dedona.com/

Hub Swappin Brackets

Hey everyone. Ever purchase a set of TEIN full length adjustable coilovers that can be swapped onto other applications but when installing them you find that the lower bracket mount differs from that of the kit? Well, I’m here to put your mind at ease.

With the release of the Specialized Damper Program allowing the consumer create their own custom coilover kit to their specifications, the option of having just a custom lower bracket manufactured is also be available.

We always get consumers and shops inquiring about lower brackets for a hub conversion on any application ranging from the Subaru STI (from 5×100 pcd to 5×114.3 pcd knuckle) conversion to Nissan 240SX/ 300ZX rear end conversion.


Although we can have the lower bracket manufactured to your specifications, keep in mind that  it would be done at the consumers own discretion, as the coilover was not originally designed for the modifications. Changes to the original design can create different stresses on the damper body or components causing the damper to fail. Be sure to exercise caution.

With that said, the costs for a set of brackets can range anywhere from $100 and up each from current manufactured kits to custom brackets with desired features. For inquiries, please feel free to contact us for a quote. (562)-861-9161/ tus_sales@tein.com


Spring Seat and Seat Lock Evolution

Since the beginning, spring seats and seat locks have been a necessity for the systems ranging from our Type NA coilovers systems utilizing a three position adjustable perch on the shock body with locking snap ring to maintain the seat position, similar in design as the Koni and Ground Control set ups, all the way to the Street Advance coilovers which utilize a spring seat lock with a delrin thrust washer and seat lock to maintain the ride height position on a removable threaded sleeve which is ZT coated.

The photos below detail the different changes made to the spring seats and seats locks over the years.

The Image above is of the spring seats for the Type NA damper which, as mentioned, used a c-ring that would be placed in the desired ride height setting.

This style which utilized a spring seat, seat lock, and aluminum thrust washer as shown in the photo above was the second design released for multiple coilover kits ranging from the older style Type H2, Type HA, Basic, and Super Street, all the way up N1 coilvers as shown in the photo.

This third design which is still used with some of our coilovers today utilizes  two seat locks and 1 rubber spring seat.

This photos show the newest type of spring seats and delrin thrust washer in conjunction with the previous style seat lock which are found on the Street Basis, Street Advance, and other coilover kits both currently available and future release.

Although the material and coating has changed over the years, it would still be recommended to periodically clean and lubricate the locks, threads, and locking rings, depending on the model type. This will ensure years of trouble-free height adjustment for your TEIN coilovers.

Don’t DIY

It’s no secret that since the beginning of time consumers of products have been attempting DIY fixes in order to cut down on repair costs. Some succeed while others fail at actually repairing whatever it is they want to fix. More often than not, for those who do fail, the repair costs end up exceeding what they could have been had the product been sent in before it was tinkered with.

Our products are no different. A few times out of the month we will receive a product that has had a “home remedy”, a DIY fix attempt. Well, we’re here to tell you this: “Don’t DIY your own repairs!” The end result might turn into a much more costly mistake.

We will take this customer for instance.

(Depending on your vehicle and model your dampers’ components may or may not look the same.)

For a reason that we were unable to figure out, the customer decided to weld the Bump Stopper to the Piston Rod.

A normal Bump Stopper on a Piston Rod without the welding.

The customer’s original issue may have been fixed. However, that’s where the list of pros to doing it themselves ends.

Here’s what the Ring Nut (top of the shock) will look like under normal conditions.

Here’s how the customer’s Ring Nut ended up looking after the damper parts were welded on and the damper was actually driven on.

Because the Bump Stopper could not be removed in the correct manner to make way for servicing of the damper,  the top of the Piston Rod had to be cut off.

This customer was lucky that the damage was limited to that location on the damper only, and that an overhaul was still possible.
But the labor put into the cutting and the cost of the replacement parts that were needed could have been avoided had the customer sent in their damper without the DIY fix that was attempted.

Your DIY fix may not end up as lucky, you may end up damaging the damper beyond any repair.
If you think you can fix an issue that you’re having with your dampers, take a step back and think if the possible extra cost of repairing your “fix” will be worth it.

By the way- if you aren’t sure you have your suspension set up correctly, or you just need to verify the parts of your kit are correct, we ask that you please contact us beforehand and have us assist you with your inquiry. Give us a call at 562-861-9161 or email us at tus_sales@tein.com for assistance.

Applying Suspension Preload

What’s up, people? Here I go again with some helpful tips when installing lowering springs and coilover kits.

I have to honestly say that we hear the following questions countless times during the work week.

“Why is one corner of my car higher than the other?” Or, “Why is my ride height uneven?”……………..(AHHH..here we go again)..lol.

The solution is actually quite simple. The first things to check are for worn-out suspension components. We advise to check all components carefully and thoroughly. Anything can contribute to the issue previously mentioned. Worn out bushing, incorrect spring, blown damper, spring perches are not even, missing or mis-installed components, etc. If everything checks out fine, then the only candidate that would contribute to uneven ride height would be suspension pre-load. This issue is commonly encountered when installing lowering springs and/or dampers on vehicles with double wishbone or multi-link suspensions.

In some cases the lowering spring or coilover kit is installed while the suspension is in a full droop.  This means that the bolts on the lower control arm were tightened while the arm was hanging down. In other words, there is no load on the suspension when tightening all components.  When the vehicle is brought back down the bushings twist causing the suspension to not settle correctly thus resulting in a uneven ride height.

The first thing you want to do is lift the car back up. Them loosen the bolts on the control arm and shock absorber. Once in the air use a second jack to apply load on the control arm. This simulates as if the car was on the ground and the control arm is back to its original position. Then re- tighten all the bolts loosen in the previous step. Follow this process with all four corners, then bring the vehicle back down. If you follow these instructions, this should help get the vehicle to the correct ride height. Plus,
you will have learned another method on how to correct uneven ride heights, if you ever run into a similar situation in the future!


Warning: Do NOT use impact tools!

When installing our products, namely coilover kits, onto your car, you will probably end up looking through the Installation/Instruction Manual.
In the Installation/Instruction Manual you will find a few warnings regarding the use of Impact Tools.
The general warning will be along the lines of: Don’t use them, unless it is absolutely necessary.

Here we have a prime example of what can possibly go wrong if an impact tool is used incorrectly.

The Piston Rod has come out of the Damper. Unfortunately it is not as simple as pushing the Piston Rod back into the damper. As you’ll see in this next picture, all of the internals have come apart.

This will require a basic overhaul just to even get the damper back into one piece. If the damper comes apart slowly and eventually decides to give out while you are driving, a lot of internal damage will ensue.

Another thing to look out for when assembling and installing coilover kits is to never hold the Piston Rod with a set of pliers.
This sort of damage is evident in this damper’s Piston Rod by the dark ring and scratches going in a circle around the Rod.

These scratches will cause damage to the oil seal and ultimately the premature failure of the damper.
For proper torquing techniques refer to THIS POST.


FR-S or BRZ?

It has been almost over a month since this years hottest sports car, Scion FR-S and Subaru BRZ came out to the market.

TEIN USA has been developing products for these two cars to deliver our products to the customer as soon as possible.

I have been wondering what is the difference between FR-S and BRZ?

Exterior dimension, interior, engine, transmission, chassis and tire sizes are the same in between these cars.

But, when I drove BRZ that came in for development,  I felt a big difference!

BRZ’s suspension are set as a mild setup, if you push harder it simply understeers and will not take you to oversteer motion.

But, the FR-S has an opposite character than the BRZ. 

The FR-S has stiffer damper with softer spring. And if you know how to push hard, this simple, less electronically controlled device (compare to newer higher performance car) and fun to drive machine, it’s just pure fun to drive!

My conclusion is FR-S and BRZ are totally diffent set-ups

If you want to get pure driving pleasure go with FR-S, and if you want affordable yet nice, well-designed coupe go with BRZ.

And I will leave damper dyno chart (in .pdf format) for FR-S and BRZ for comparison.


OEM BRZ & FRS Front

OEM BRZ & FRS Rear

EDFC Fitment Check

Back again with some more useful tech info this time for EDFC fitment verification.

We are always receiving calls regarding EDFC fitment on older kits or kits which may not have any details of EDFC compatibility. I was able to obtain some info on some specific areas ,clearances, and measurements that should be focused on when checking for compatibility.


Checking piston shaft compatibility

Inspect the top threaded portion of the of the dampers piston shaft making sure that the shaft is threaded all the way to the top of the shaft. Some shafts may have the flat machined edges, but the threads continue on the other rounded sides. Those can still work. The other type as shown below would have an area around the top of the piston shaft with no threads which not allow the EDFC motor to mount up.


Measuring piston shaft thread amount

Taking a measurement of the same area which protrudes out from the mount, measuring from the edge of the nut to the tip of the shaft. If the measurement is more than 7mm in length, then the EDFC would have enough space to bolt on. Any less and there would not be sufficient space for the motor.


Checking compartment space for EDFC motor

 Taking a measurement from the top of the click assembly a vertical measurement of over 24mm as well as a 50mm horizontal measurement using the center of the piston shaft as the center point. Any clearances less than those detailed would interfere with either the hood or other engine compartment components and/or interior.


Caution! When checking these areas please note that the measurements provided above are the minimum required clearances for the EDFC motor installation. Please keep in mind that depending on the mount type used on the damper kit, the motor might move vertically which may require further clearance. Modifications and/or removal of supportive device around piston shaft top, insulator and/or interior might be required to allow for fitment. EDFC, in conjunction with any tower bars/strut bars may not allow enough clearance across the piston shaft for certain applications. Installation of the EDFC on any vehicles/ dampers on which TEIN had not confirmed fitment compatibility should be done at your own discretion. TEIN assumes no responsibility for any damaged and warranty void for such installations.

 Always exercise caution when trying to install the EDFC units on your application whether the kit has been confirmed for fitment or the guide detailed above is being used to determine fitment. Uncertain of the installation? You can always take a look back at an early post for the EDFC installation for help.

http://teinusa-blog.com/edfc-motor-install/

Japanese Spec Vs. US Spec Coil-overs

Recently I have noticed that a lot of consumers and dealers of ours inquire about the differences between a Japanese-spec coilover kit and a U.S.-spec coilover kit. Relax, grab a cup of coffee, and let me do some explaining. It’s actually quite simple.

One of the main differences between these kits is the valving and in some cases spring rates. The U.S.-spec coilover kit comes with a more aggressive valving. The reason behind this is because consumers in the U.S. prefer a slightly more aggressive coilover in comparison to consumers in Japan. U.S. vehicle’s may also have some manufacturing differences opposed to the ones released overseas.

But as mentioned earlier, another factor is the spring rates. Some of the U.S.-spec coilover’s come with a stiffer spring to match the aggressive valving of the dampers. Of course there are other differences between the dampers besides the valving and spring rate. Damper designs may vary from U.S. to Japanese kits such as damper mounting points, damper body and stroke lengths, and required OEM parts.

As a side note- some U.S. applications may be compatible with Japanese dampers with no modifications whatsoever. But we recommended to verify with TEIN prior to purchasing these kits.

In conclusion, regardless if the coilover kit is Japanese or US spec they both come down to one thing- they both cater to different markets which is a matter of consumer preference. However, TEIN is able to assist with customization of your TEIN dampers through our Overhaul and Revalving service available Stateside through our in-house service departments in the East Coast and West Coast facilities. As a performance suspension manufacturer for a global market, we realize it is difficult to appease all customers. But we can definitely assist our customers in dialing in their suspension for their specific needs, all of which is for your driving pleasure!

Using Racing Harnesses

I’d like to approach this topic by first stating that racing harnesses are not suitable for daily driving. When used properly, a good harness system keeps you relatively firm in place, minimizing your body movements critical during quick maneuvers on track. The idea is to keep you planted into the car and reduce any excessive body motions that just add hysteresis to your hand and foot inputs.

With racing harnesses, proper head and neck restraint systems should also be used. Obviously, helmets are for head protection, but you should also use a neck brace (or a HANS device, if you have the money) when using a helmet and racing harness in conjunction. It would be pointless to use a harness that keeps you pretty firm in your seat while your next could pivot around in a nice axis. In a frontal impact, your neck can easily swing forward in an unsafe manner. Add the weight of the helmet you’re wearing, and that just adds to the trauma.

Another important notice- the angle of the racing harness must be set properly. If the shoulder straps use a very low anchoring point (like right behind your seat and towards the ground), that can cause serious bodily damage (paralysis, or even death) due to the compression of your spine in a frontal impact. Mounting or setting the angle of the shoulder straps horizontal to your shoulders (+/- 20 degrees) can help prevent that. One of the safest ways is by using a harness bar. But they aren’t available for every vehicle. So you would have to find a secure, roughly horizontal (again, +/- 20 degrees) anchoring point for the shoulder straps to secure on to.

The picture above shows the suitable angles for mounting the shoulder straps.

The use of the harness bar allows the anchoring point to be placed low behind the front seats since the bar’s angle relative to the shoulder height is horizontal. So in a frontal collision, there wouldn’t be any compressive forces pushing down on your shoulders. Instead, the harness bar would take the vertical load as your body attempts to move forward in an impact.


Harnesses mounted without a bar. Assuming the seat’s backrest can take the vertical load rather than your shoulders, and the anchoring angle set within an acceptable range, this is okay. I’d prefer a harness bar, though.


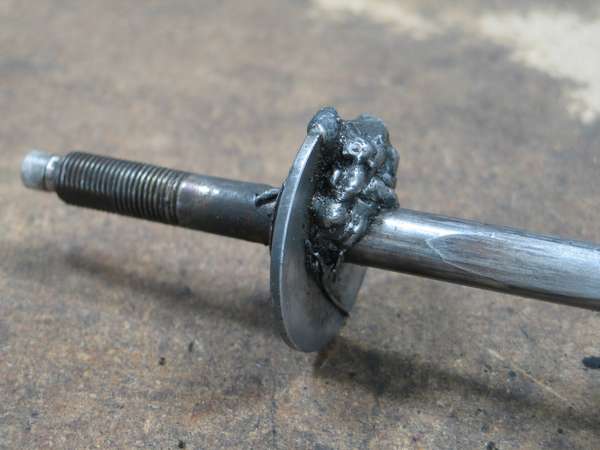
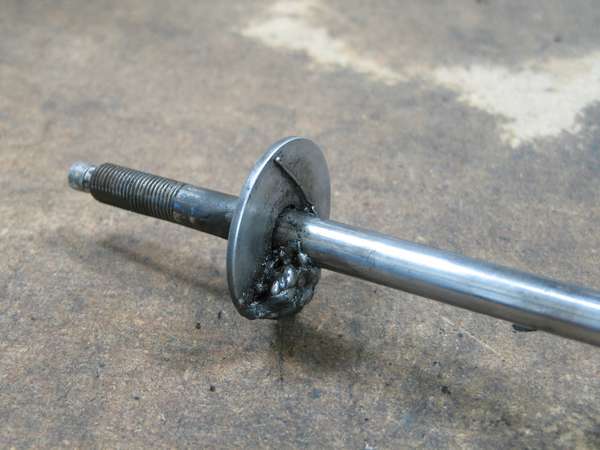
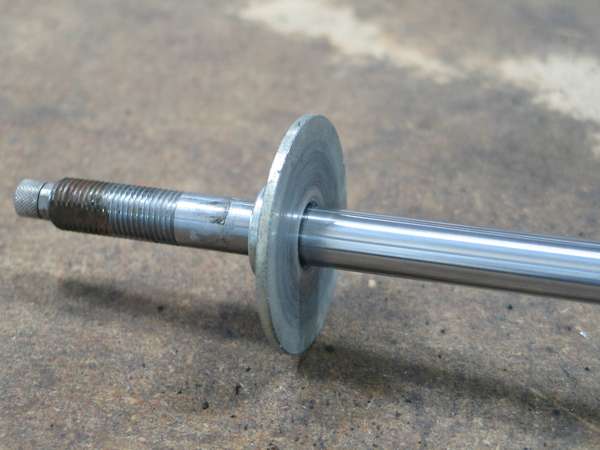
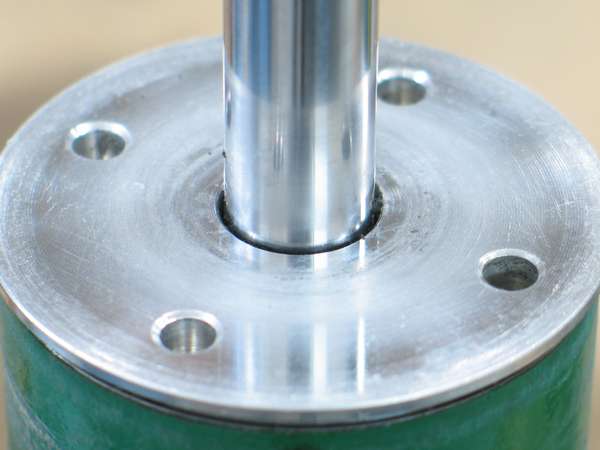
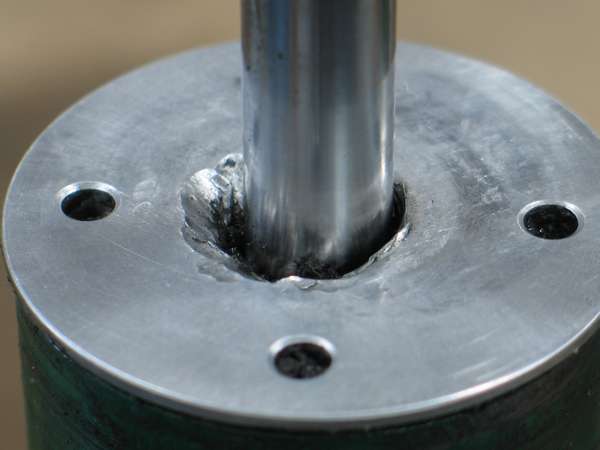
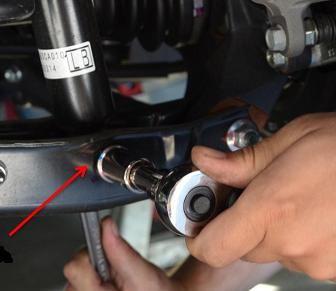
Anchoring the harness using the bolt holes from the OE mounting is more than sufficient and secure for eye ring bolts included with some harness sets like Takata.

Regarding neck support (HANS, specifically), this is just as important as you can see in these photos with & without HANS


Fortunately, I was able to find much of this necessary information on Takata Racing’s website

http://www.takataracingproducts.com/guide.html

but I also looked up some images online and pulled up some interesting information.

By now it must sound like safety equipment is a very expensive proposition. But this shouldn’t be a factor that you decide to skimp on when preparing a vehicle for racing.

The Takata harnesses we sell include most of the necessary hardware to use factory belt mounting points. But optional longer eye bolts and mounting plates are available if you decide to make your own mounting point.

Also, if looping to a harness bar, a 3 bar adjuster will be needed. Pegasus Racing sells such adjusters from their website

https://www.pegasusautoracing.com/productdetails.asp?RecID=627

The Octane Report also did a great write up on how to install harnesses to a harness bar

http://octanereport.com/gallery-how-to-takata-safety-harness-loop

I hope this gives you some great insight on safety equipment, and what is necessary for setting it up correctly. Just remember, your safety is the most important aspect to consider.